Video Tip

I use my DSLRs for video; I also teach a course I developed on shooting video with DSLR cameras (see here).

Today, a tip from that course: Audio. Audio is very important, and I recommend a few simple things:

One: turn off auto level. Set the audio recording level manually, else every time no-one speaks the noise goes up.

Two: use an iPhone in your pocket if you have no lapel microphone. An iPhone gives you great audio quality at an incremental cost of zero, if you already have an iphone.

And three: use a clapper board app such as Digislate (thank you, intern Daniel, for this one). Using a clapperboard allows you to synchronize this iPhone audio with the video from your DSLR.

Done. Professional audio from an iPhone, a simple camera, and free iMovie software. Simple, innit?


___

The special on headshots is still on. Buy this week; take the headshot in my studio by August 14, and get a pro headshiot for much less than the regular price. See http://learning.photography or scroll down to yesterday’s post.


les animaux

Shooting animals, there is one thing you have to take into account. Namely, that they have snouts, where the nose and eyes are far apart in distance when they look at you. Unlike in the case of humans, where our eyes and nose are quite close.

This is important why? Because of focus. Where f/5.6 may be enough for a face to be in focus, in an animal, invariably it isn’t, and you will get either a sharp nose, or sharp eyes. Anyone who has taken pictures of their pet will know this. Especially when using fast lenses indoors.

The solution?

There’s the usual suspects: to get more depth of field, you need any combination of:

  • a wider angle (shorter) lens, i.e. “zooming out”, or
  • you get farther from your subject, or
  • you use a smaller aperture (higher “f-number”).

Or, perhaps the simplest solution: you do not shoot them straight on.

See. we have narrow depth of field, but it is not annoying us here. Both nose and closest eye are in sharp focus.

Bonus question: what about the light?

I am bouncing my flash behind me. You can see that by the catch light: a circle on the ceiling behind me, lit up by my flash.

___

Want to learn video with your DSLR? Come to my 3-hour seminar in Oakville on Sunday, 30 March. This seminar is limited to no more than 6 people. In this three hour lesson, Michael teaches you:

  • Perfect camera settings for each situation
  • The secret to achieving focus
  • Additional equipment to consider
  • Avoiding the 5 common mistakes
  • Audio: The forgotten essential.
  • Three ways to Make It Better.
  • Composition of your images
  • Types of shot and how to use them
  • Storytelling in a video: using B-roll, script, and storyboarPost-production tips

Your DSLR is a great tool for movie-quality videos, but only if you know the secrets to its effective use. Space is limited: sign up now via http://cameratraining.ca/Booking.html.


Jello cam

I a teaching video with DSLR to a high school for a few days. Fun stuff: you can do so much movie stuff with a modern DSLR. As long as you know the limitations, you can do pro work—and then some. Today, a few randomly selected tips to give you a taste. Worked all day, up at 6am, so a very quick post. Don’t worry, I will make it up to you all!

One of the DSLR video limitations is focus. Tip: generally, do not try to focus during a scene; instead, focus before the scene on where the subject will be. Shoot short clips. Re-focus for each clip. If you must focus during a clip, use manual focus only.

Another one is sound. The built-in microphone is not very good (to say the least). Here’s a cool tip: use one or more iPhones to capture sound, and in post-production, mix that with (or use that instead of) the camera’s captured sound.

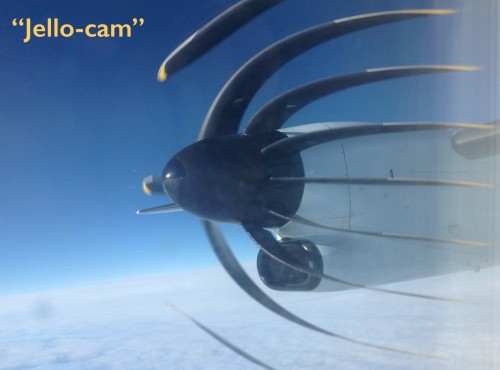
Finally, with a CMOS equipped camera, avoid the jello-cam effect:

This is due to the fact that the sensor is read from top to bottom. While it is being read, the prop moves. Weird effects ensure.

Anyway: get ready, More to come about video. You have a great video tool: let’s use it!


Photo Change, and Video Starter Tips

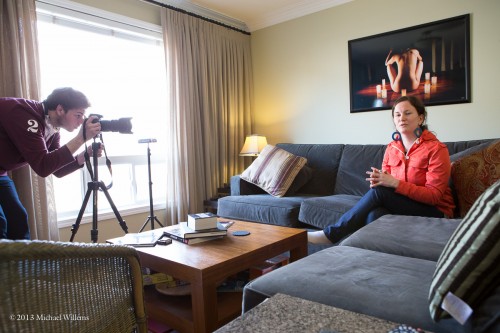
Here’s Brynn and her colleague from Photosensitive, preparing to video-interview me today for the Picture Change Project I will be part of (keep July 15 open, all!):

And this prompts me to talk a little about video today.

Vido on a DSLR is great. Better than with pro hi def video cameras of just a few years ago. As long as you take a few simple things in mind. Here’s my 10 starter tips for video on a DSLR:

  1. Do not focus during shooting. Focus, then leave it alone. Or if you must, then do manual focus, and practice the technique.
  2. Wide lenses make it easier.
  3. Avoid fast shutter speeds: they lead to unnaturally “shocking”, stuttery-looking video.
  4. Unless you are shooting an interview you should shoot short clips, usually. Say, 8-10 seconds.
  5. Shoot 2 seconds before, and 2 seconds after, each clip for fade in/out purposes.
  6. Get close-up, too, not just all-body shots.
  7. Avoid unnecessary zooming in and out or panning.
  8. Shoot “B-roll” frames too – the environment, the “establishing shot”, etc.
  9. Stabilize the camera. See the tripod here?
  10. Use photographic composition rules you already know.
  11. Use separate audio equipment. See it in this shot?

There. Start with that.. and leave lots of time for editing… at least three quarters of your shoot should end up on the metaphorical cutting room floor.


Ten Video Tips

I occasionally shoot video with my DSLRs (7D and 1D Mk4). Not like this, therefore:

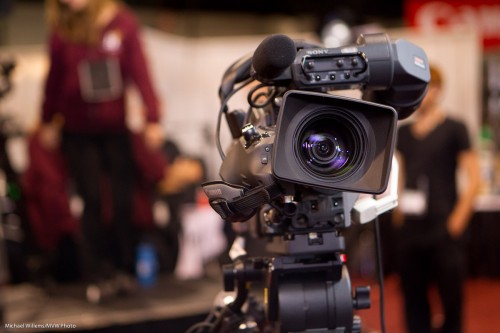
Camera (Photo: Michael Willems)

But simpler. And the secret is simplicity!

My top ten video tips:

  1. Shoot clips of ca 10 seconds.
  2. Add a lead-in and lead-out of a second or two to each clip so you can fade in/out
  3. Do not move the camera unnecessarily. The dog breathing is enough motion.
  4. Avoid focusing while shooting. Focus, shoot the clip, done
  5. Use external audio, or at least an external mike.
  6. Use manual exposure if you can, or at least lock exposure during your clip
  7. Avoid zooming in or out unnecessarily, and never zoom in, then out or vice versa.
  8. Use prime lenses.
  9. Shoot a “B-roll”, i.e. supporting clips that show the environment
  10. Start with an “establishing shot”

Try that and your videos get much better!


Sad day

Today is my friend Andrew “Wedge” James’s funeral. He died the other day, at the age of just 51, of cancer. Poor Wedge. At the bottom here (the long-haired guy in the background is me):

Since I cannot be in the UK for the funeral, I video’d a short (2 minute) tribute to him, to be played there today. You can see it here:

http://www.youtube.com/watch?v=XKFTNtrkwn8

Since most new cameras now do video, I thought you might want to see how I did this. I am not by inclination a video guy, but can put together a video, of course. And here’s how:

  • I used my Canon 7D – set to record video at 24 fps
  • I used a tripod and prefocused manually
  • I set the camera to f/5.6 and 1/30th sec in manual exposure mode.
  • I used the Modeling lights of by Bowens flashes as the lights.
  • I used iMovie on my Mac to put this together including the inserted pictures, background sounds, and transitions. This took most of the time, of course.
  • And to save time at the end, I uploaded straight to Youtube from within iMovie. This worked beautifully.

I think that while this is not as good as being there, it is a fitting way to share my recollection of Wedge. Video has its uses.