Gelling!

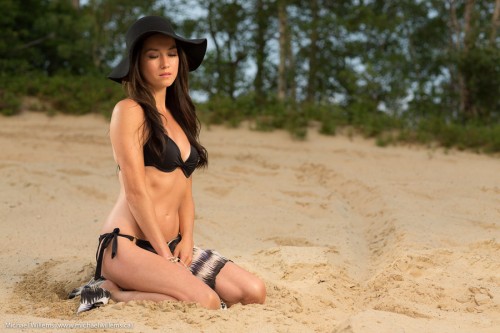
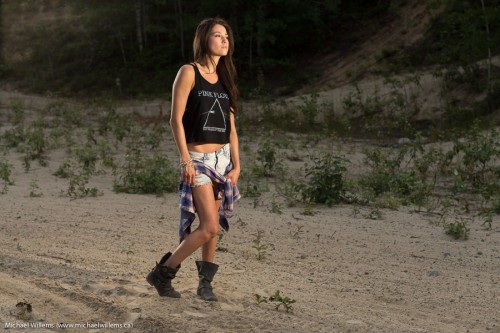
In yesterday’s shoot with Vanessa Scott in Timmins, Ontario, I used gels to recreate the sunlight that was fast fading below the hills. All shot with Canon’s amazing 85mm f/1.2 len.

(1/200th, f/4, ISO100)

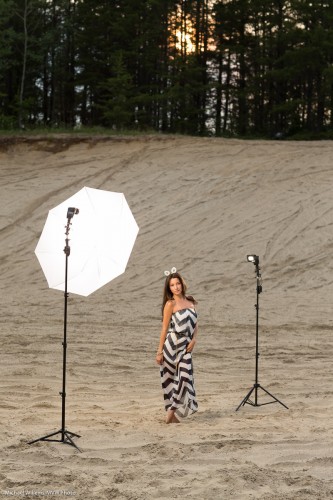
Vanessa looks like she is in that light, because I put a CTO (Colour Temperature Orange) gel by Honlphoto on the main flash, like so:

You will see also that I am using a second flash, fitted with a grid, for the hair light. Two flashes driven by Pocketwizards—that’s all.

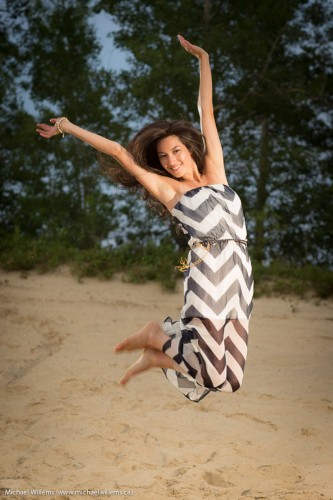
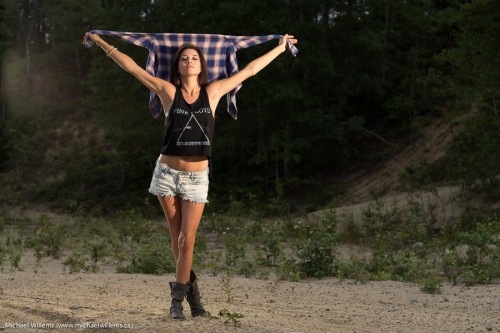
One more from this amazingly versatile young woman:

1/60, f/5, ISO100 — I had to adjust for fading light


Again, the flash allows me to offset the subject against the background, which I keep dark. Without the flash, I would lose the nice colour and I would have to make everything, including that background, very bright.

And that’s how the cookie crumbles.


What makes a shot?

What makes a shot? New photographers think “technique” – and that is understandable, since the weakest points are where you concentrate first.

But in the end, it is much more than technique.

As an illustration of some of the factors, take a shot like this, from that recent “autumn” magazine shoot in Oakville:

Vanessa and melony showing fashion (Photo: Michael Willems)

What had to happen for this shot?

  1. Technique, of course. I described this in my post of 5 September. Two lights, and a gel on the light on our right (that autumn feeling!), and a long lens (70-200).
  2. People. Two models (thanks, Vanessa and Mel), an assistant (thanks Kurt), client for direction, and myself. Five people. And they all have to show up.
  3. The models. Modeling is a profession, and not everyone can do it equally well. Models have to look good, be the right types for the shoot, carry themselves well, and even have a good day. I am sure even supermodels have off-days, so it is something to keep in mind: you are shooting people.
  4. Clothing. The clothing here was from a great Oakville store – instant makeover. Without that, nothing.
  5. Props. The theme was “autumn”. So flowers and fruit personalized that very well – as well as introducing wonderful colour. Props are often forgotten but they can make (or break) a shot.
  6. Weather. Since I am using strobes and speedlights, I can do this in pretty much any light – but I still don’t want too much rain, and I do not want direct sunlight on the models if I can help it, and I sure don’t want sunlight into the models’ eyes-  they would squint.
  7. Location. I chose this location because it had many options, and settled quickly on this particular option – shows a “boulevard” type walk, shows trees, even shows autumn trees even though this was still summer. And those wonderful European-looking street lights.
  8. Moment. In this shoot, half the shots (40 out of 85) shots were unusable due to one or both  of the two models blinking. With two models, on a bright day, that happens! And some were not in sharp focus (6 out of 85) or were awkward moments.

Get all of the above working, and you get nice shots. It’s not just technique: subject and moment are important!


Fashion flashin’

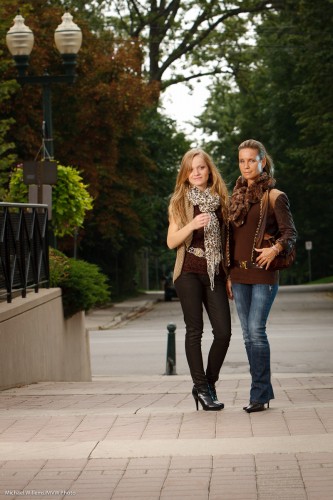
Sunday morning, around mid-day, in downtown Oakville I shot a fashion shot for a magazine front cover.

Outdoors fashion is, as always, a matter of many things coming together at once. One of those is light. Without light, even on a wonderful overcast day (wonderful in photo terms), the image lacks something. The mother and daughter models lack a certain je-ne-sais-quoi.

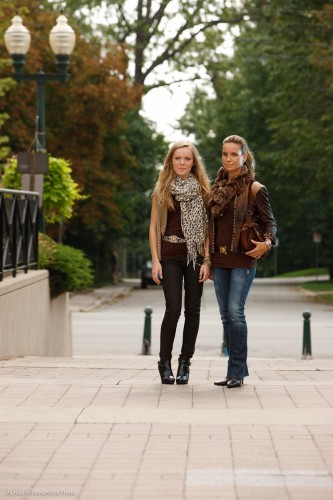
Actually I do know – they lack light:

Models in Oakville (Photo: Michael Willems)

So we add a flash. I used a Bowens 400 Ws strobe, although I could have used speedlights. The sequence is as follows:

  1. I set my camera to manual.
  2. I select 1/200th second and 100 ISO.
  3. That gave me, on this particular day, an aperture of f/5.6 for a nice saturated background. (To arrive at this, I can use my in-camera meter or my light meter set to ambient.)
  4. I now add the strobe, set it to 80% power about 6ft away, and test this with the meter (now set to flash mode). Well have you ever:  the meter immediately indicates f/5.6! (This is just experience. If you are less experienced, no worries – just turn the light up and down until you do read f/5.6).

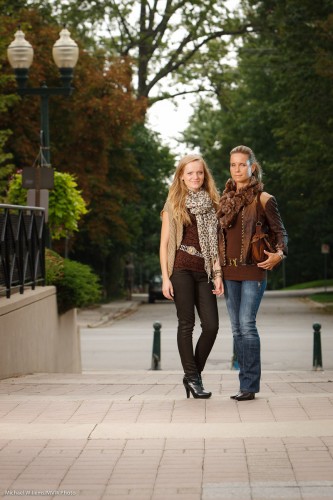
That gives me:

Models in Oakville (Photo: Michael Willems)

If I want the background a little darker I change the speed to 1/250th (still in my flash sync range):

Models in Oakville (Photo: Michael Willems)

Okay, we are set. If the sun comes out a little more,  I go to 1/250th, and if it gets a tad darker I go to 1/160th.

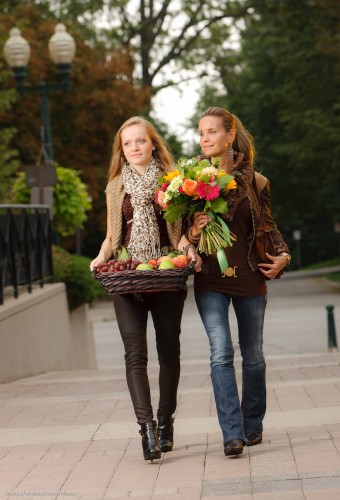
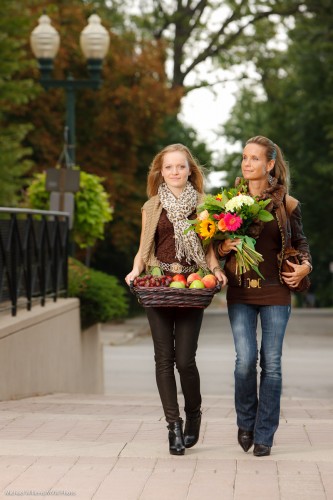
The idea of this shot is autumn – so we now bring out the props. Autumn flowers and fruits and vegetables now gives us this:

Models in Oakville (Photo: Michael Willems)

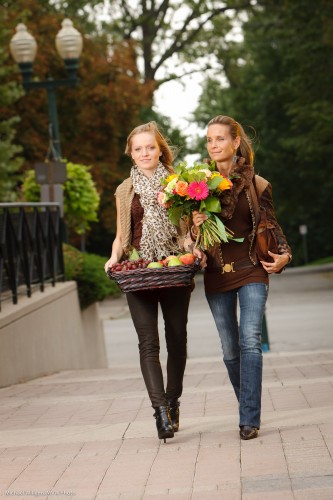
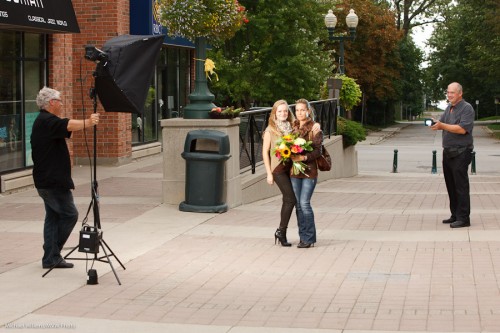
Notice the speedlight with a blue-green gel as accent/hair light on our right? The speedlight was held by Kurt, who assisted on this shoot, and was set to 1/4 power (again – experience tells me that setting will probably work – and it did).

The final step is to make that an egg-yolk yellow gel instead of a blue-green gel – yellow accentuates the late day setting sun feeling that is synonymous with autumn. (I use Honl Photo gels).

Models in Oakville (Photo: Michael Willems)

And there we have the image. (In fact this is not quite the image – that one went to the client, and I do not like to publish images in this open forum before the customer has used them!). Also – note that these are shot a little wide since this is for a magazine front page, so there needs to be space for text.

Notes:

  • Umbrellas and softboxes outdoors will be blown away, so hold on tight.
  • If the models move, use AF-C/AI Servo focus mode.
  • With two models, be very aware of the danger of blinking – one of them will blink in very many images, so check, and take many images.

The setup was as follows:

Fun shoot.

(And perhaps also, a shoot that explains why photography costs money: A car full of equipment, props that get used just once, two sets of clothing, and five people taking several hours. All this costs money!)


But.. but… it’s complicated!

Well, sometimes things need work.

I often have students who ask “do I really need two lenses?”, “do I really need a reflector”, “do I really need a tripod”? “Must I really use manual”, … and so on.

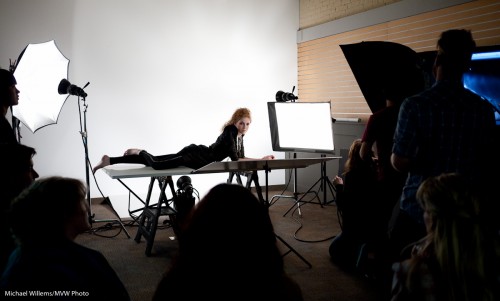
The other day I attended a very entertaining shoot with Ivan Otis, and this shoot was a typical example of “how it’s done”.

Even a simple fashion shoot like this involves cameras, light stands, reflectors, computers, umbrellas, light meters, batteries, cables, softboxes, pocketwizards, props, two assistants, a make-up artist (“MUA”), a hairdresser, lunch, and of course a model and a photographer.

A Fashion Shoot

A Fashion Shoot

A more involved fashion shoot would also have fashion advisors, a creative director, and more.

So the answer to “do I really need all this” is “it depends, but you cannot always do everything with one handheld camera, a 50mm lens, and a pop-up flash”.

The complexity in a shoot like the one above is not done just to make things complicated! As I always say, the Sports Illustrated swimsuit-issue model cavorting happily on the beach looks good only because there is a guy with a big reflector cavorting along right behind her.

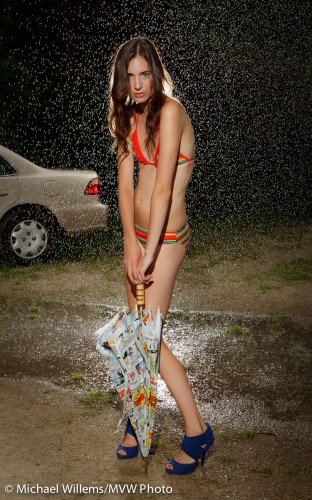
That said: you do not need to over-complicate things. Simple means can often achieve great results. Like this, taken at a recent Mono workshop Joseph Marranca and I taught:

Evanna Mills in the rain

Evanna Mills in the rain

That used just three bare speedlights and a handheld camera.

(On that note: our next “advanced lighting” all-day workshops in Mono, Ontario, will be held on 3 October and 20 November, and as of the time of writing, there is still space).