Reflect on this

I taught a very enjoyable class on “Portrait Photography” last night. I taught six students about studio lighting. Strobes, modifiers, light meters, backdrops, that sort of thing.

And one message was: it can be simple. One student wrote me just now:

I just wanted to tell you that I really enjoyed tonight’s workshop, which was excellent.  I learnt so much about studio lighting in just 3 hours.  I had always wondered how the big lights work prior to tonight’s workshop, and I have to say that you solved the mystery for me tonight.

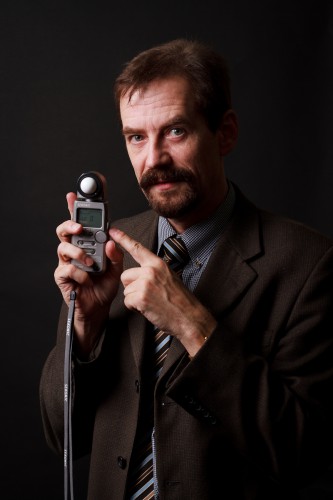
Yes it can be simple. Like in this shot, made with just one light (a Bowens 500 Ws strobe fired using pocketwizards, through an umbrella):

Michael Willems, by Franklin Wang

Michael Willems, by Franklin Wang

Observant readers (no no, not religiously observant – I mean readers who look carefully) will see that I am at 1/160s on the meter, and am using 200 ISO.

(Why 200 ISO? Should I, in a studio setting, not be using 100? Not when some students use Nikon cameras, which cannot easily go down below 100 ISO. That’s why. And why 1/160th? Because being slightly below your maximum flash sync speed, so ambient light does nothing while you avoid cutting off a bit of the image, is sensible in a studio. That’s why.)

So your settings in a studio might be:

  • Camera on manual;
  • 1/200th second at f/8;
  • 100 ISO;
  • Now set the lights to those values, using a flash meter.

I used a black background, away from the lights. That way it remains black.

So if you think that is a bit contrasty – we add a second light, right? And power it 1-2 stops below the first (2:1 or 4:1 ratio)?

Maybe.

Or maybe we just use a reflector. Saves the planet.

Michael Willems, by Franklin Wang

Michael Willems, by Franklin Wang

That way we save the second light which we can then use for the background, or for hair light, or for other funky effects.

The final picture is by another of the students:

Michael Willems, by Richard Smart

Michael Willems, by Richard Smart

Hey! Now that black background is light grey!

That is the point too. Black can be black (it is black when it has little light falling on it) or bright white (it turns white when it has lots of light falling on it). That is why I like black. White is much harder to control – it is easy to make it white, but tough to get it darker than mid grey in a typical studio.

As for the last picture: of course the top needs to be cropped off, but that is the point: these images are straight from the students’ cameras.

Oh – and the purple edge light is a simple 430EX speedlite, with a Honl grid and a Honl gel. Also fired using a Pocketwizard.

And yes, I think I can carry it off, purple.

One Day Special: Advanced Flash

Good news. The One-Day Only Special “Michael Willems’s Advanced Flash”, with special Guest Star David Honl (yes, the David Honl, the inventor and creator of that great range of small flash modifiers!), is now open for booking.

  • When? March 19. From 11AM until 2:30PM
  • Where? Downtown Toronto, Henry’s School of Imaging flagship location at Church and Queen Streets.
  • What? Check the syllabus at www.cameratraining.ca/Flash-Honl.html
  • How Much? $175

Registration is limited, so go to the Henry’s School of Imaging site today to reserve your space – click here:

www.schoolofimaging.ca/Courses/64044-Advanced-Flash.aspx

Registration is open now and space is limited, so I recommend you book soon if you are interested. In this four-hour workshop in downtown Toronto, you’ll learn a lot about advanced use of flash, and Dave will show you some signature shots made with simple, small flashes that you can also afford.

Not to be missed if you would like to be exert at using small flashes to create professional shots, even when the light is tough.

Gridlock

Why do you use a grid on a flash?

A grid softens the light somewhat, an effect I really like. But the main use for a grid is to avoid the light going everywhere.

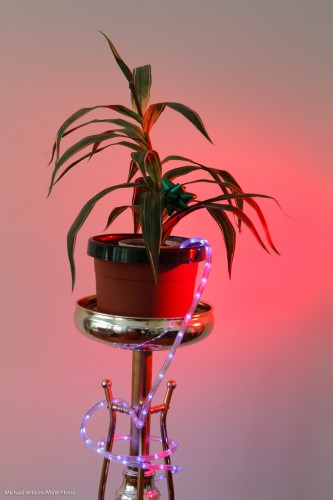
Look at this image: lit from the side with a bare speedlight (a Canon 430EX, which is equivalent to a Nikon SB600) with a red gel.

As you see, light hits the wall.

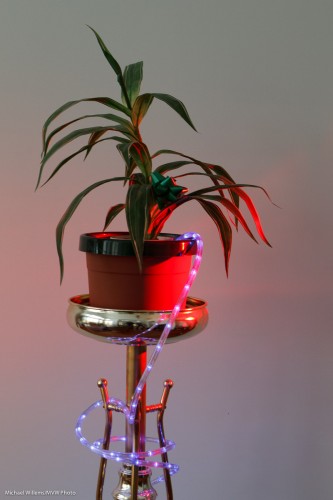
Now look what happens when I put a 1/4″ Honl Photo grid on the flash, with a gel on top of the grid.

Ah. No more light spill onto the wall.

That’s all. As simple as that.

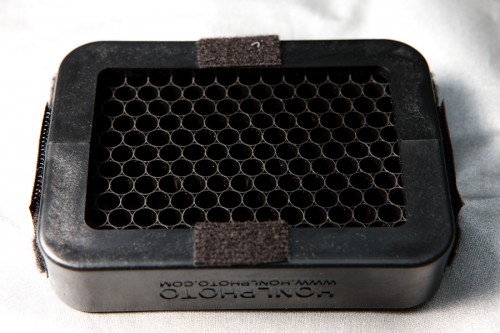
And here’s what a Honl grid looks like:

About colour in photos

In my series of “travel tips”, here’s a thought or two about colour.

Colour is often nice when used very deliberately. And the good news: there are tricks to doing that.

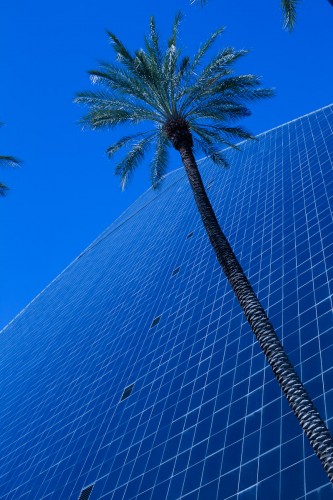
Like using single colours. Whenever you see a strong primary colour dominate, consider whether this might contain a picture:

Blue Vegas

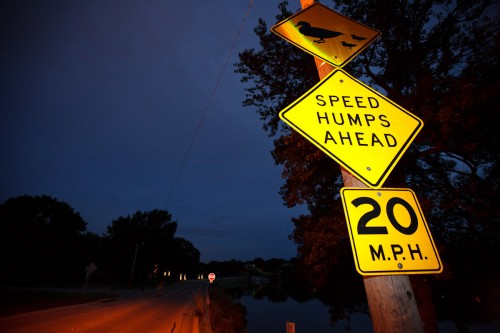
Or when you see opposite colours – like blue and yellow together:

Speed Humps!

(Can you see the use of flash in that image?)

Warm colours are good too – think about a sunset. Think of adding a little CTO filterin front of your flash (a gel – I use the Honl gels, which like the rest of the Honl range of modifiers, has made my life much easier).

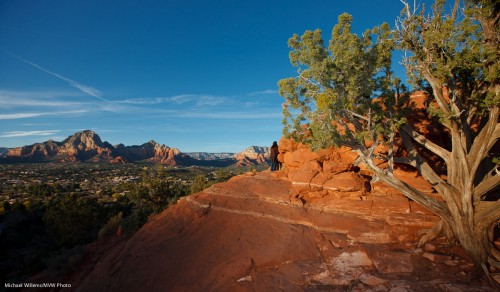
And I especially like the combination of all three main primary colours, red, green and blue, all in the same image:

Sedona Afternoon View

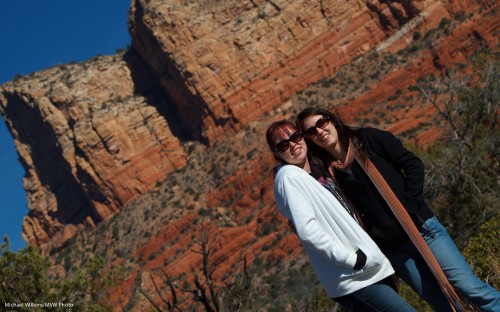
You will see this in many of my images: here’s another one, an on-request snap of a couple of tourists in Sedona, AZ (can you see I used a long lens for this? Why?)

Sedona Tourists

Finally, candy colours can be fun too: we look at them, our eye is drawn to them:

Candy Cane Colours

So my lesson for today is: think about colour: how are you using it? Are you getting the best out of it?

Foot note: I mentioned David Honl above. Dave is coming to Toronto – he is my special guest in a three-hour course on “Event Photography and Creative Light”, on Saturday, 19 March 2011. The location is to be announced but it will be in, or right next to, Toronto. Let me know right now if you want to reserve your space.

I’m Gellin’

A very short article today about gels.

And by the way, I apologize for the recent short posts, but having 100 things to do, and being the proud owner of a to-do list that extends more every day, I must prioritize. Finishing “Event Photography” (stay tuned here, and keep checking the Henry’s School of Imaging as well) and “the art of photographing nudes” (see www.cameratraining.ca – one week to go!) come first. Filing my taxes comes down the list somewhere.

Gels are little coloured pieces of plastic. They used to be made out of gelatine, hence “gel”. You put then in front of the flash to colour the light. As in this shot, where I used a quarter CTO (“colour temperature orange”) Honl Photo gel on my speedlite:

Event, lit with CTO-gelled flash

And as in this one, where I used a full CTO:

Event, lit with CTO-gelled flash

The CTO gel, in these cases,makes the flash-lit subject look like it/he/she is lit by beautiful setting-sun “golden light”. A quick and easy way to lend your images a bit of pizzazz.

Light as a creative tool

A quick tip today. Look at this portrait of a personal trainer which I helped a student take earlier today:

Portrait of Travis

Standard key light (a small strobe), fill light (in an umbrella) against a white background. But instead of onto the head, which is already separated from the background by its colour, I turned the hairlight onto the background.

And because it has a snoot on it (a Honl Photo snoot, attached to a speed strap), I get this nice parabola-shaped beam of light behind the subject’s head. A technique worth using occasionally. Avoid getting stuck in the “same old light” category!

(The parabola reminds me of a satellite, somehow. Probaby because have an engineering degree?)

Colour your season

The drab dark days of December can get to you – except if you take charge. That is why we put up trees, and icicles – and that is also why you can use gels.

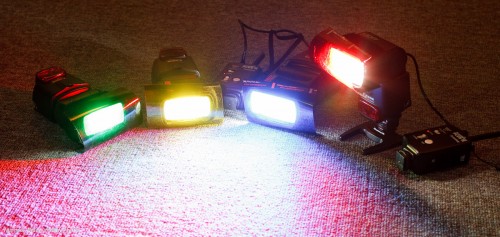
Like these Honl Photo gels, which I use on my speedlights all the time:

Fun with Gels

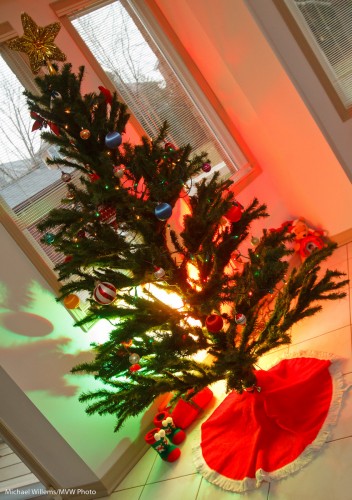
Red and green are the seasonal colours that can make a boring scene into an appropriately brightly coloured one.

Especially with the remote flash technique I metioned a couple of days ago:

Fun with Gels

So your assignment: today, go take a few pictures with a gelled flash – or preferably with two gelled flashes.

A quick flash tip

One of the things you may wish to do this festive season is use off-camera TTL flash.

I.e. holding the camera in your right hand and the flash elsewhere – for instance in your left hand (or your other fight hand if you have two – well spotted, Mike).

In any case: away from the camera – this is key to good pictures.

All brands of camera allow this, and if you have a Nikon, or a Canon 7D or 60D, you do not even need additional hardware: just your flash and your camera, with its popup.

The popup (or on other camera, the on-camera flash) now sends commands to the other flash. So you can light a subject – like the student in Thursday’s Flash class – from one side, in this case with a flash in an umbrella on our right side, with a reflector on our left:

Off-camera flash using TTL

Much better than straight flash!

You can even use several flashes, divided into groups. In the next shot, we have an additional flash on our left, rather than a reflector. That flash has a red gel (one of the Honl Photo gels) on it, to see clearly which light is doing what work:

Off-camera flashes, using TTL

But what you must remember is this:

Disable the on-camera flash.

That is, the pop-up or 580EX/SB900 on your camera still sends its commands to the other flashes, but when the actual photo is beingtaken, it does not flash.

If you forget to disable it, it will fire. And then you get this unfortunate effect:

On-and Off-camera flashes, using TTL

Deer in the headlights. Harshness. Shadows. Brrr: baaad.

So your tip: use off-camera flash, and disable the main flash from firing actual flashes. The camera menu (or the flash on your camera) has functions for this.

If you want to learn this and many other techniques before the holiday, take the advanced flash course in Mono (see http://www.cameratraining.ca) next week. Else, take a course with me or at Henry’s early in the year. It is worth learning flash!

No tie

As reader Robert G pointed out, the other day I posted apicture of me without a tie.

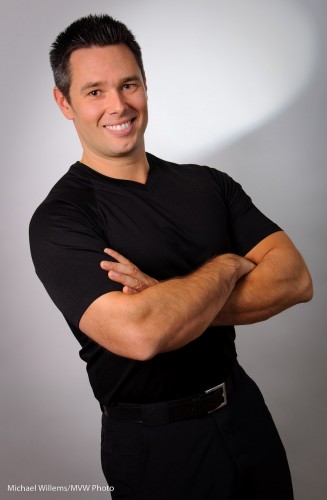
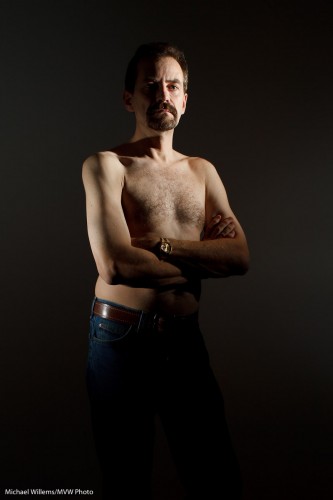
Yes, sometimes I catch myself unawares. I am my own frequent model, and today’s image is myself, again without a tie, to demonstrate an illustration of a different lighting technique from the onein the recent posts.

This time I am using two speedlights from the side. Both speedlights are fitted with a Honl Photo Speed Strap and 1/4″ grid to soften the light and to avoid it spilling onto the white wall. This gives you a dramatic light which can be very good when shooting males:

Michael Willems (by Michael Willems)

Yup. No tie.

See what this edge lighting technique provides?

  • Shape (muscles)
  • Texture (you want this for males, not so much for females)
  • Dark backgrounds
  • The ability to make other areas dark.

This latter ability is often useful. Rememer: lighting is not so much about what you light – it is at least as much about what you do not light.

Add a splash

Further to Thursday’s post, I thought I would brighten your day with some more colour.

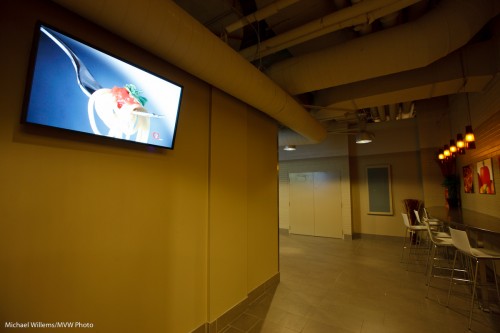
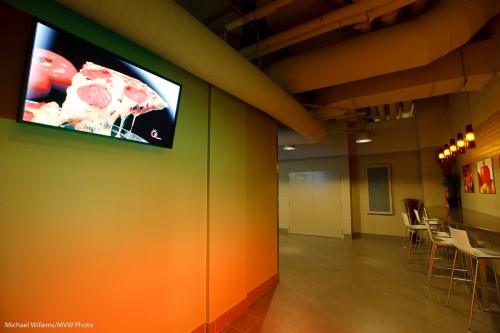
You see, sometimes you need to shoot things that are a bit, well, drab. Like this wall – the screen is great but the wall is a bit dull:

Wall with screen

So then, as you also saw two days ago,  I shot it again, this time with two speedlites:

Wall with screen with gels

How was this rainbow effect achieved?

  • These two 430EX flashes were fired with TTL using a 580EX on my 1D MkIII.
  • They were aimed at the wall, one above the other, aimed in the same direction (good idea from my assistant).
  • They were fitted with Honl speedstraps and with a Honl gel each: red for the bottom flash, green for the top one. No other modifiers: other than the gels, they were bare.
  • The ratio between red and green was set on the back of the 580EX until I was happy.

That was simple, and I think you will agree it’s a better shot.