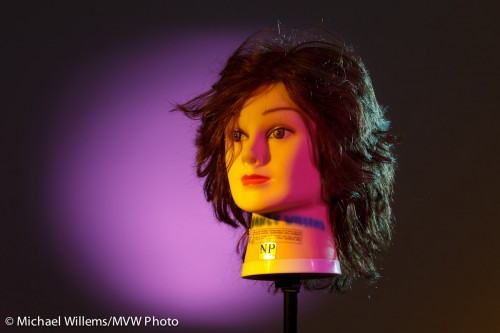
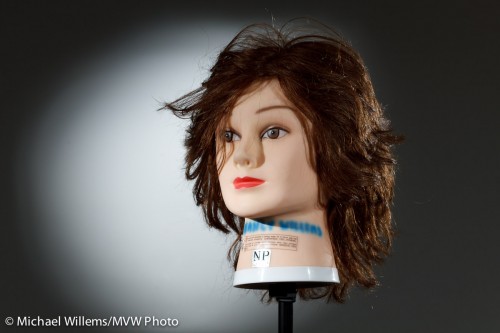
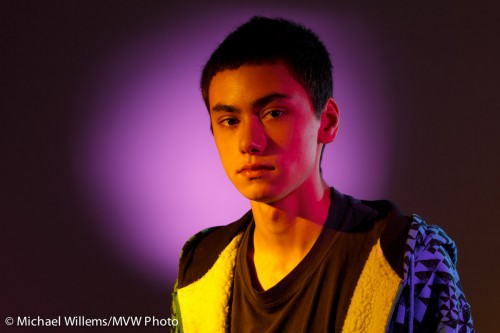
Doing the impossible

Often, as a photographer I have to do the impossible.

That is, of course, an overstatement. But there is a core of truth in it: photography is problem-solving.

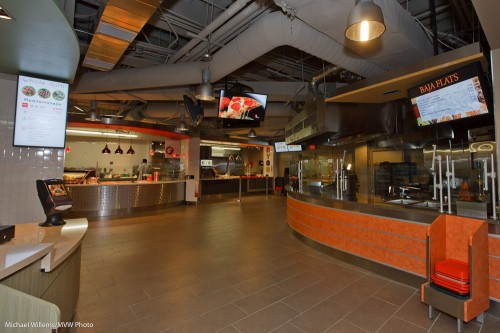
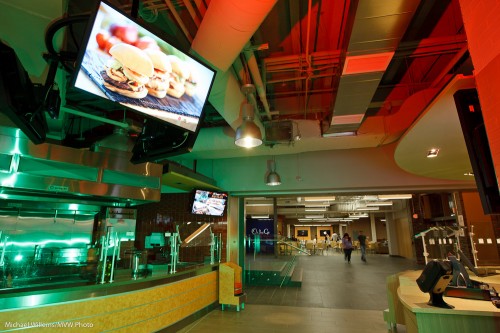
The other night I shot an excellent Digital Signage installation. Innovative screens, powered by EnQii software, in a self-service restaurant.

The problem is: the screens are bright and need to be seen. And the restaurant is dark compared to the screens. Expose for the screens and the restaurant is dark. Expose for the restaurant and the screens overexpose.

There are three potential solutions:

  1. Turn down the screens. Not an option here…
  2. Light the restaurant with flashes. Lot of work, and not practical in a working restaurant.
  3. Shoot RAW and bring bright and dark together in post-processing.

I used a combination of 2 and 3.

More 3 than 2 in this shot:

Digital Signage

Digital Signage

And more 2 than 3 in this shot – with coloured Honl gels on my speedlites:

Digital Signage and gels

Digital Signage and gels

As you see, an impossible-to-shoot scene is possible.

  1. Do a test shot or two, in some automatic mode. Ensure you shoot RAW.
  2. Ensure you use a tripod if necessary (and it will be).
  3. Now first, expose for the screens. Expose to the right, but do not lose detail. Use the histogram and the “blinkies” to gauge this.
  4. Use a tripod if necessary.
  5. Then add light if necessary.
  6. Then in post-production, use “recovery” to decrease brightness in the screens, and “shadows” to increase brightness in the darker areas.

Try it – it is really not all that difficult!

Elements of a picture

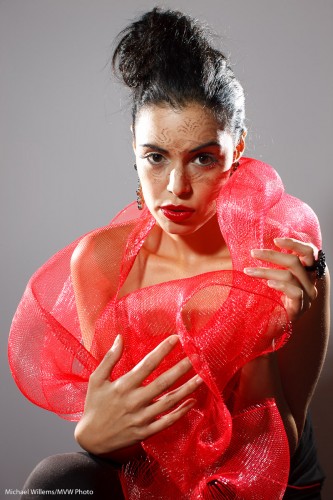
This, another photo from last Saturday’s Mono workshop, prompts me to write today’s post:

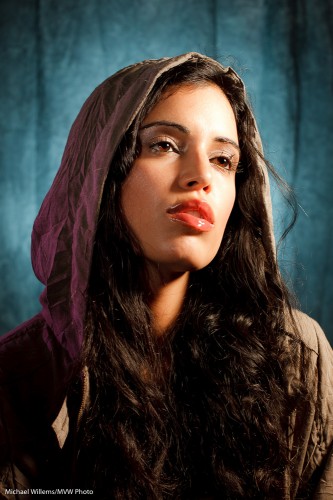
Tara Elizabeth

Tara Elizabeth in Mono, 20 November 2010

It prompts me to talk about how to make a photo like this. You see, a photo is not just one thing. It is a culmination of things all coming together.

First you need a subject. Yes, the subject is important. When all else is equal, your subject makes the image. After all, it is an image of something. Photographers are often enough all technique, to the extent that they forget about the subject. In this image, model Tara is looking great; her clothing is avant garde, her make-up, by Make-Up Artist Tea, is superb. Tara’s expression is just right.

Composition is also important, even in a simple portrait. Uncle Fred puts the subject (Tara’s eyes) in the middle. I use the rule of thirds; off-centre composition. Balance the image.

Next, you need technique and technology. I used a Canon 1Ds with a 50mm prime f/1.2 lens set to f/8 at 100 ISO and 1/125th second – pretty standard “studio” settings.  Pocket wizards were used to fire the flashes. A digital Rebel with a 50mm f/1.8 would have done the same here.

That brings me to the next factor: you need light. We used three speedlights. Two on the sides, with grids: edge lighting is always good. And one behind us, on our left, the fil-from-the-front light, down two stops, and fitted with a Honl Traveller 8 softbox. See that wonderful round catch light in her eyes? (yes, that is important.) The edge light also separates Tara’s arm, on our right, from the background.

Finally you need to simplify. A good photo is a simple photo. We used a simple white wall. I zoomed in enough to have nothing else in the picture. I used no background light or gels. Sometimes simple is better.

And there you have it, a photo worth using!

I encourage you to do the same kind of analysis on your own images. Always good to see what you are doing – it may remind you to think carefully about the image. And that will make it better. Promise.

Outside flash

As a result of yesterday’s shoot, reader Franklin asked:

Michael, I often use my flash for outdoor portraits.  Since I don’t have anywhere to bounce the flash, I often point it straight at my subject.  In many cases, I end up having to deal with the oily, overexposed skin highlights mentioned in your previous post.  Any tips you could offer to create soft, natural looking skin tone would be greatly appreciated.

Great question. Yes, outdoors flash can be challenging, so here are my tips.

  • First, outdoors you can sometimes bounce. A wall, for instance, can provide a wonderful soft ounce area. If possible, try that first. (A Gary Fong Lightsphere may make this easier if there are some small things that light could bounce off. Like people, trees, a car, a fridge, you name it. The Fong Lightsphere throws light everywhere so it sometimes works.)
  • Second: next, try to soften the light. I often use a Honl Photo Traveller 8 softbox for this. Sometimes a Honl bounce card.
  • Third: the direction of the light is important. One reason outdoor flash can look unnatural is that the flash is shooting from where the camera is. If you can take it off the camera, using an off-camera flash cord like the ones of Flashzebra.com, you will get much more natural light. Shoot with the light coming from above (even a foot), and at an angle.
  • Fourth: I often add some colour, like a quarter CTO or half CTO filter, to warm up the flash. This removes much of the objective (see yesterday’s picture).
  • Finally: it is allowed, even a good thing, to shoot with direct flash outside. And Photoshop or Lightroom can help remove the nasty skin highlights. Sometimes this is just the price you pay!

I hope that helps!

Oh daddy…

…I know I shouldn’t have  crashed your plane!

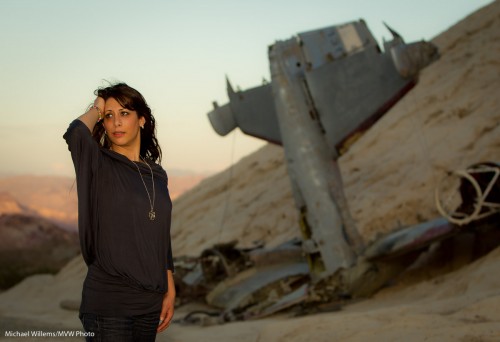
Yasmin Tajik in Nelson, NV

Yasmin Tajik in Nelson, NV

This photo, which I took in Nelson, Nevada of friend and photographer Yasmin Tajik, shows how useful a flash can be when fitted with gels.

I took the picture with a Canon 1D MkIV fitted with a 70-200 2.8 lens and a 580EX II flash. The camera was set to Aperture mode (Av), at f/4 and 100 ISO, which gave 1/320th second when I used -2/3 stop of exposure compensation.

The light was a setting sun.

But the setting sun was not lighting up Yasmin at all. So I used the flash.

But to keep the “golden hour” light quality, I fitted the flash with a Honl Photo Speed Strap and a  1/2 CTO Honl Photo gel.  That made Yasmin look like she was in the setting sun. When in fact she was not.

Flash method

Let me reiterate a simple flash method for camera-aware (i.e. “grip-and-grin”) people pictures at events (like receptions, parties, etc).

  1. Set your camera to “manual”.
  2. Attach your flash.
  3. Bounce your flash off the ceiling or wall just behind you if you can. If you cannot do this, use a reflector (like a Honl reflector) or worst case a Fong sphere. Think about where you bounce in terms of returned light direction.
  4. Use a wider angle lens (say 35mm). I love my 35mm prime on the 1Ds for this type of photo.
  5. Start at these settings: 400 ISO, 1/30th second, f/4
  6. With those settings, aim at an average part of the room (not dark, not light). Watch your light meter. It should read roughly -2 stops. If it reads more, like zero stops, go to a faster speed. If it reads less, go to a wider aperture (and if you cannot then a higher ISO or even a slow speed).

The result will be good.

Grip and grin

Grip and grin

Note that you may, in dark environments, have to go to slow speed and wide open aperture even at high ISO.Watch the light meter and aim for -2 stops ambient light when aimed at an average room area. In a dark night club I may occasionally be shooting at f/1.4, 1/15th second, 1600 ISO!

Portrait note

One more from Sunday’s course.

This time, a portrait of model Tara that I made to help explain multiple flash TTL. Straight out of the camera it is:

Multiple-flash TTL lighting

Multiple-flash TTL lighting

How was this made?

With a small Traveller 8 softbox on the main light, a gridded gelled flash for the background, a snooted flash for the fill light, and a gridded gelled flash for the edge light.

Four speedlights, and all using TTL.

A few things to remember in such portraits:

  • You need a catch light in the eyes.
  • Set your white balance to “flash”.
  • If you have space, longer lenses are good (in this case, though, I use a 50mm prime lens).
  • Avoid the ambient light doing any work: choose 1/125th second at f/5.6 or f/8, say; and be sure to disable “Auto ISO”.
  • Lighting is all about what you do not light: avoid bathing the room in photons. Think about what you light, and how.
  • With Canon’s e-TTL or Nikon’s CLS/iTTL, you only get two or three groups of light. So if you have four lights, some of them will have to be in the same group. My fill and edge light are thus both in group “B”.

Keep those in mind and your portraits will be well lit.

A shot from the course

At the Mono “Creative Light” workshop,  we do different portfolio shots every time.

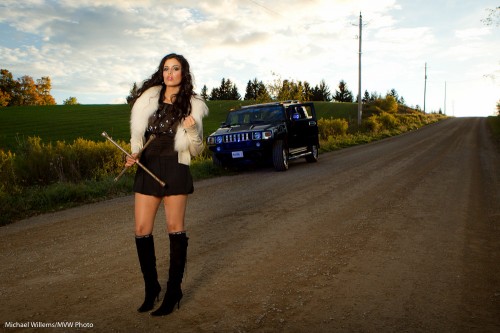
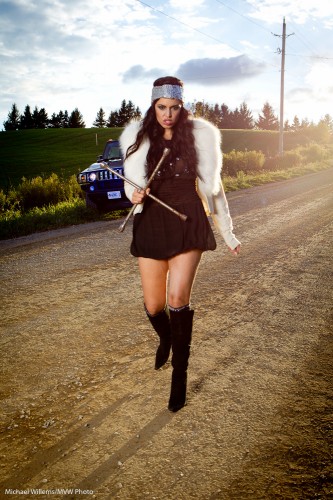
So imagine our delighted on Sunday when a student turned up in a Hummer. This was immediately put to use by model Tara:

Tara Elizabeth and Hummer

Tara Elizabeth and Hummer

That was lit how?

This is how: with a softbox, to our left. And a small speedlight to our left aimed straight at the car – with a blue Honl gel. Both were fired using pocketwizards (the speedlite using a Flashzebra cable). Metered using a light meter, of course.

Here is an alternate take:

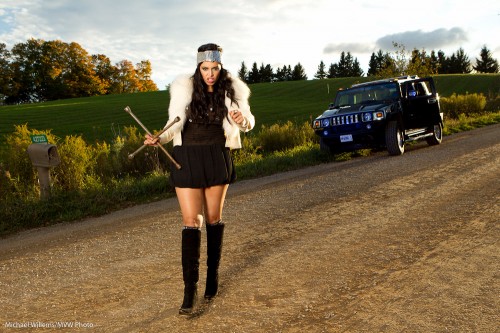
Angry Tara Elizabeth, with Hummer

Angry Tara, with Hummer

That was taken just a few minutes before. Can you see how every minute counts when shooting in beautiful late day light?

Okay, one more. Just to show that lens flare – which should normally be avoided – can sometimes be OK:

Angry with tire iron

Angry with tire iron

You avoid flare by:

  • Using a lens hood
  • Shielding the lens with your hand
  • Avoiding lens filters
  • Pointing slightly away from the light source

Have fun!

What is in my bag?

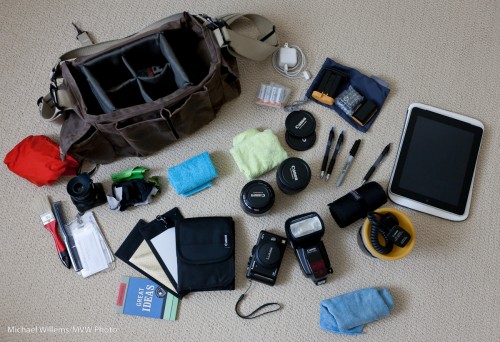
I am often asked “what is in that Domke bag of yours”?

Here. Too much, many would say…:

Photo Bag by Michael Willems

Photo Bag by Michael Willems

The bag is a Domke bag, and it contains:

  • Two lenses (Which ones? That varies per shoot).
  • A speedlight (Canon 580-EX II).
  • My off-camera flash cable.
  • My point-and-shoot camera (a Panasonic Lumix GF-1 Micro Four Thirds camera).
  • The indispensable Hoodman Hood Loupe (Get one. Now.)
  • Memory cards… always carry spares.
  • Fong Lightsphere – for safe shooting when I need safety rather than creativity.
  • Honl Photo reflectors/gobos.
  • A Honl gel set in a Honl roll.
  • My iPad .. plus, just in case, its charger.
  • Spare batteries for every camera and for flash. Never travel without spare batteries.
  • Lens caps for the lenses that are on the camera. I do not use them on the cameras I am using.
  • Cloths, plastic bags, headache and stomach acid pills.
  • Note pad, pens, comb, small brush, business cards.

And an important note: no camera. That is (or more accurately, those are!) over my shoulder.

Think Tank Airport Security

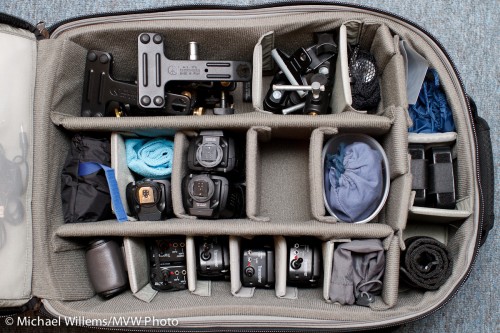
Always short of space to put things, and never one to shy away from adding to my number of bags, I recently bought myself a Think Tank Airport Security™ V 2.0 bag. This huge rolling bag (allowed onto aircraft in the USA, but too big for most of the world) now holds my lighting gear.

Not cameras or camera gear: just my lighting gear, like so:

Airport-security-v2-roller-camera-bag

Airport Security V2 Roller Camera Bag

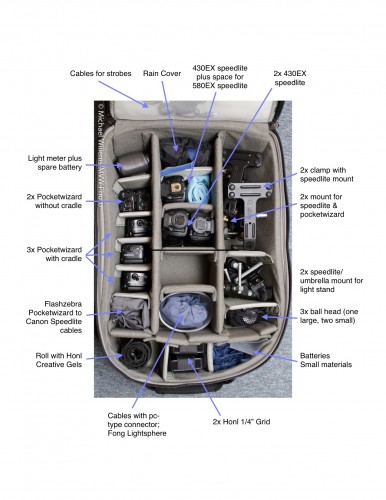
That holds all my  clamps, ball heads, five Pocketwizards, three or four speedlites, cables, grids, gels, my light meter, and more. In addition, the side compartment holds the other Honl Photo modifiers, a gray card, and other small materials.

Michael's Big Lighting Bag

Michael's Big Lighting Bag

This bag is well built and has many cool gadgets. Such as three separate locks (two of which can be opened by the TSA). Emergency backpack straps. Many removable compartment sides. Two lockable cables to attach things to it, or it to things. A rain cover. Many things I will not need, like a tripod mount.

Small areas that could perhaps be improved:

  • The cutouts do not fit large Canon bodies (they are on the wrong side), so you need to remove your lenses if you are to use this as a camera bag. Quite an oversight.
  • Not quite enough internal compartment dividers for my liking: I had to add one or two dividers from another bag.
  • The lid hinges at the bottom, so things may spill out from pockets in the lid when it’s open.
  • The front external compartment is a little too small.
  • The external “laptop compartment” seems a bit of an afterthought and is rather insecure (yes, it has a cable to attach to the laptop – still not quite secure enough for me).
  • The uneven bottom made it a one-hour job to decide how to fit in all my gizmos. But that’s OK.
  • The handle that you use to roll the bag is flimsy and even has a warning, “do not lift by this handle” – that is a design flaw, if you have to warn people how not to use a product.

But those are small gripes. It’s a fantastic bag.

Michael’s Quick Judgment: recommended. This is one huge bag – where I carried two before. Anything that reduces my bag numbers is good. This bag does it in style and with intelligence. And all my lighting gear in one bag, in neatly arranged divisions: utterly fantastic.

Colour has to be real

Right?

Um, no, of course not: colour is a tool for you to use in your artistic endeavors.

And colour can be anything you like.

A few nights ago, I though I would see how long it would take me to recreate a lighting setup that my friend Dave Honl (yes, he of the excellent Honl Photo modifiers) did recently. So I looked at his shot and put it together the same way he shot it, in exactly 20 minutes:

Fun with gels, Photo Michael Willems

Fun with gels

That is including:

  • Setting up four light stands.
  • Connecting four flashes (3x 430EX, 1x 580EX) to Pocketwizards using Flashzebra cables.
  • Mounting these on the light stands using ball heads etc.
  • Equipping the key light with a 1/4″ grid and an Egg Yolk Yellow gel.
  • Equipping the fill light with a 1/4″ grid and a Follies Pink gel.
  • Equipping the hair light with a small snoot and a Steel Green gel.
  • Equipping the background light with a long snoot and a Rose Purple gel.
  • Setting the power levels correctly (by trial and error, combined with histogram: key light = 1/4 power, fill=1/8, hair=1/8, background=1/16).
  • Setting the camera up correctly (I used the 7D and set it to manual, 100ISO, 1/125th, f/6.3).

Huh? Egg Yolk Yellow, a crazy bright colour, to light the face? Are we crazy?

No, just having fun. Yes, of course Dave could have made his shot using no colour. Here’s what the same shot looks like without the gels. (Of course I switched the camera to an aperture one stop tighter, namely f/9, to compensate for the extra light once I removed the gels):

Grids and snoots, photo Michael Willems

Grids and snoots

Yeah, nice, and appropriate for a corporate head shot. But compared to the previous, it is kinda boring, no? So next time you shoot someone, unless they are a law firm executive, you might have fun and try some colour. You don’t need to go crazy and use four colours, but a splash here and there can really help your picture come alive.

By the way, what was the colour of the backdrop?

White.

Remember the following equation:

White – light = black

Similarly, in practice, black + enough light = white.

And finally, a real person: my son Daniel (“sigh, not again, Dad”):

Daniel, photo Michael Willems

Daniel in colour

But here’s the thing. After seeing it, he grinned and said “Rad.”. That‘s a first!