Size matters.

…the size of your umbrella, anyway.

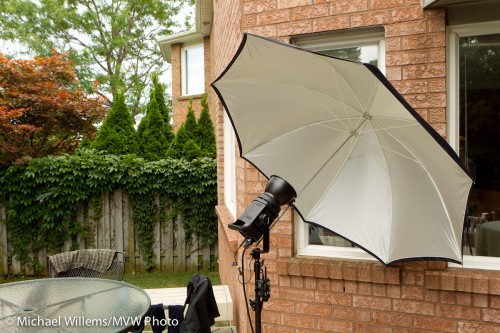
I am using a big Photoflex umbrella today. How big? Here’s how big:

Big Photoflex Umbrella

Big Photoflex Umbrella

This umbrella, which can be used to shoot into, as I am doing here, or to shoot through, is huge. Which makes the light softer.

It is also very reflective, more than most. And that helps: I was able to overpower daylight on an overcast day with the single Bowens 400 Ws light set to 3 (out of 5), somewhat close to the subject. With my regular, smaller and less reflective umbrellas, I would have used a setting of 4 to 5 for that shot.

So, all this amounts to:

  • Softer light (since the source is larger),
  • Greater distance I can bridge,
  • Less spillover behind the umbrella (which in a studio is important)
  • A lot more shots out of my battery pack,
  • Faster recharge time between shots.

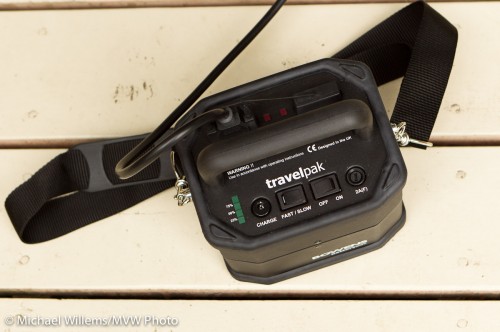
Here is that battery pack:

Bowens battery pack

Bowens battery pack

At full power, I get 150 shots out of a small battery (attached at the bottom); at power level 3, it is closer to 300 shots.

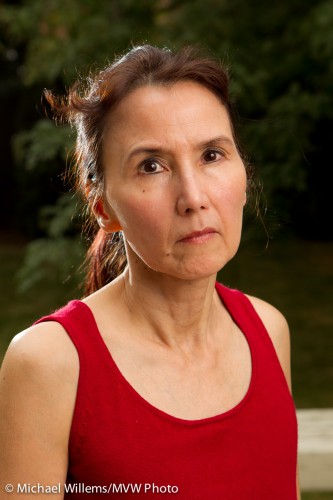
So by using a nice umbrella, metering to minus two stops ambient (minus three if metering off the dark garden), then setting the flash to the aperture thus achieved, which was f/5.6), I get this shot:

Nancy, photo by Michael Willems

In the back yard, lit by flash

As you can probably see, I am also using a speedlite on the camera left, to separate the hair from the background and to give some edge lighting interest. That speedlite is fitted with a Honl Photo 1/4″ grid to avoid the lens flare I would otherwise get.

Time for this snap: couple of minutes.

If all that is confusing, as it will be to beginners, then just take one of the flash courses and learn how to do this. It is fun, and well within reach of amateurs – not just for pros!

Michael’s Quick Judgment:

  • Photoflex large reflective umbrella: recommended.
  • Bowens Travelpak power pack: recommended.

Afternoon = Gel

Another flash tip for you today.

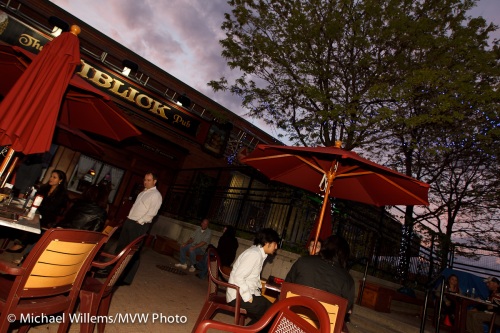
Later afternoon pictures. You can make them look better by adding your own “golden hour” glow. Like this:

Patio at dusk, photo by Michael Willems

Patio at dusk, photo by Michael Willems

To take a picture like this, you might do the following:

  • Use an on-camera flash while there is still light;
  • First set your camera’s exposure (ISO, aperture, shutter) to get a nice background sky. Ignore the foreground for now.
  • Then position yourself such that there is no close subject (remember the inverse square law).
  • Use a half CTO gel on the flash (I used a Honl Photo half CTO gel on the speedstrap on my 580EX);
  • White balance to “Flash”.
  • Take a test shot. If the flash is too bright or too dark, use Flash compensation (+ or 1) to adjust. If the background is not right, adjust ISO, shutter or aperture.
  • A wide angle lens makes it easier.

And Bob’s your uncle: nice colours.

GF1 self portrait

A self portrait I took a few minutes ago:

Michael Willems, photo by Michael Willems

Michael Willems, photo by Michael Willems

I shot this with the Panasonic GF1:

  • Camera on manual, f/4.0, 1/60th second, 200 ISO
  • Using multiple-point autofocus
  • Pocketwizard on the camera
  • Pocketwizard on a 430EX flash, connected with Flashzebra cable
  • Flash set to manual, 1/32nd power
  • Honl Photo Traveller 8 softbox on the (handheld) flash

To lower the noise (“increase the signal to noise ratio”, for engineers) I exposed to the right (i.e. I exposed high, but without actually overexposing anything) and then pulled back a stop in Lightroom.

The 20mm lens (yes you can use 40mm, for that is what it is, for portraits) gives me that wonderful sharpness. Click and view full size to see how sharp it is.

The Honl softbox gives it that nice soft look and the unique round catchlights.

And I have said it before: for creative photography, lighting a subject is as much about what you do not light than about what you do light.

Postscript: And here’s one more: son Jason just now (similarly lit, also shot with the GF1)

Jason Willems, photo Michael Willems

Jason, shot with GF1/430EX

One more quick recipe

Quick recipe for you.

Remember this shot, done in the workshop I taught three days ago in Las Vegas with David Honl?

Yasmin Tajik in Las Vegas, by Michael Willems

Yasmin Tajik in Las Vegas

Shot how, you ask? I mean – at what settings and such?

  • Camera: 1D Mark IV with 35mm f/1.4L prime lens.
  • 100 ISO.
  • Camera on manual, 1/320th second at f/16 (slightly exceeding the 1/300th sec synch speed).
  • Flash is an SB900, also on manual (“M” rather than “TTL”); set to full power (“1/1”).
  • Flash is on a boom, and is fitted with a Honl Photo Traveller 8 softbox (notice the nice round catchlights), and is held a couple of feet from Yasmin’s face.

And you know that at full power, with a softbox, an SB900 will give you those settings.

A 430EX will need to be about twice as close to her face.

Try your own flash at those settings: how close do you need to hold it to ensure proper exposure, using the modifier of your choice. Once you know that, it will always be the same. Simple, really.

Note: the SB900 flash will overheat at these settings, especially in Las Vegas. A dozen shots in you will suddenly get no more flashes. The Nikon flash cannot be used at full power, while the Canon flashes can. With a Nikon SB800/900 flash, I would simply go to half power and live with that. If I needed more light, I would add another flash.

Want to know more? Want to learn all this and go home with a few cool portfolio shots? There is still space on the all-day Advanced Flash workshop Sunday in Mono, Ontario. Book now to get a spot.

Oh, one more thing. Am I cheating? Is this just sunlight lighting up Yasmin?

I think not. Here is the same shot without firing the flash (always a good thing to do to test your settings!):

I rest my case.

Setting sun

Look at this photo I shot of Yasmin Tajik, Sunday in Nelson, outside Las Vegas, NV:

Yasmin in Nelson, NV, photo by Michael Willems

Yasmin in Nelson, NV

Nice late afternoon light, and lit by the late afternoon sun.

Except it wasn’t. Yes, it was late afternoon, but Yasmin was not lit by sunlight. She was lit by my flash.

  • The flash was on camera, since I was traveling without light stands. I would normally take it off camera. But when you can’t, as long as you are mixing light, it is OK to shoot with the flash on camera. Outdoors, therefore, straight into your subject’s face is OK, if you have to.
  • Since both I and the subject were moving constantly, I used TTL rather than manual flash.
  • The nice late afternoon colour on Yasmin? Glad you asked. A 1/2 CTO Honl Photo gel on the flash’s Speed Strap, and the camera’s White Balance set to “Flash”.
  • I ensured that the shutter speed would stay below the camera’s sync speed of 1/300th of a second, in order to give the flash maximum range (“Fast Flash/FP Flash” would decrease available power drastically, which at this distance is not a good thing). Doable late afternoon, when the light is not as bright.

As you see, even very simple means can lead to well-lit pictures.

Flash tip

When your flash is grossly overexposing your pictures…

  • The flash is not seated correctly, or the contacts are dirty
  • The flash is set to MAN (manual), instead of TTL
  • You are using + Flash Exposure Compensation (or on a Nikon, also Exposure Compensation).
  • You are simply too close.

Those are four obvious starting points.

Here is me, pictured by David Honl in Las Vegas the other evening. Using a Leica X1 with off camera flash equipped with CTO gel and Honl Photo Traveller 8 softbox.

Michael Willems, shot by photographer David Honl

Michael Willems, shot by David Honl using a Leica and flash

Quick flash tip

It is July 4 in the US, so my American friends will all be taking pictures today. So here is a quick tip for you flash users out there!

If you want a slightly warmer look – the “late afternoon light” look – to your flash pictures, simply do this:

  • Put a slight warming gel (e.g. a quarter CTO gel, or a half CTO gel) on your flash (i.e. slightly yellow). I use a Honl gel with a Honl speedstrap on my 580EX flash.
  • Set your white balance to “flash”.

Result: your subject (close by, lit by flash) looks slightly warm.. instant late afternoon “golden hour” light even at noon.

Student by Michael Willems

Student, slightly warmed up

That was a student at last week’s “Creative Urban Photography” course. In not very warm light!

Workshops

I have done two workshops in the last two days, and am preparing for the Vegas one with David Honl in a couple of weeks time (read on, below). Workshops are fun for all concerned and add tremendously to your ability to create great shots. Read all the books you like, but doing in an interactive learning environment is how to really learn.

Saturday was “Creative Lighting”, with Joseph Marranca. We taught a group of students some advanced flash techniques using small flashes:

Students at the workshop in Mono, Ont (Photo by Michael Willems)

Students at the workshop in Mono, Ont

This is a great course and we will be doing it again soon. Everyone goes home with knowledge and experience – and with portfolio shots.

Then on Sunday, I led a group of students through Oakville for the School of Imaging, for “Creative Urban Photography”.

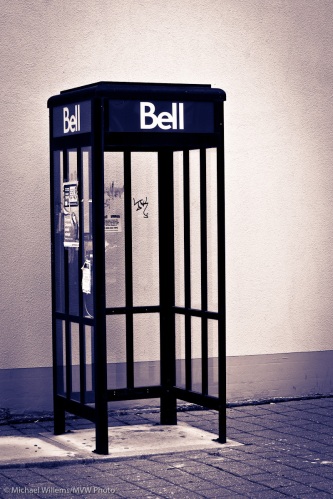
Phone box in Oakville, Ont (Photo by Michael Willems)

Phone box in Oakville, Ont

Now I take a moment to regroup and to prepare for many more.

One exciting pair of workshops coming up in Las Vegas, NV on July 12 and 13.

I am teaching “Advanced Flash” – for amateurs and pros who really want to learn how small flashes work. When to use TTL, and when manual? What are the four technical items you need to know? What are the catches to TTL? How to overcome them? When to use what modifier? Why and when to use gels?

To make it even better, it’s not just theory and technical stuff. I am once again joined in these workshops by David Honl. Yes, the David Honl of the excellent line of modifiers, and the David Honl who shot Saddam Hussein’s trial (with a camera). Yes, that one. Dave will take students through making some great creative shots using small flashes and modifiers, and all participants get to go home with these portfolio shots.

Read up on this workshop here – there’s space, but do book soon to be sure.

Photography is better and easier than ever, once you learn the small flash technique that enable you to do really creative lighting with real ease. Come to Vegas and find out how.

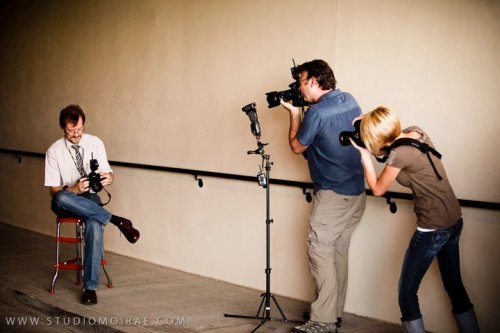
Dave Honl shooting Michael Willems (with a camera)

Dave Honl shooting Michael Willems in Phoenix, March 2010

Now what?

I shot a corporate event the other day, and it taxed me. I shall explain how, and how you can get good (meaning sharp, well lit and well exposed ) shots in bad light.

When I walked in to the venue, I saw the problems:

  1. Extremely bright on one side (direct sun); very dark on the other side (too dark to see the camera)
  2. Virtually no bounce (high black ceilings and walls)

Like this:

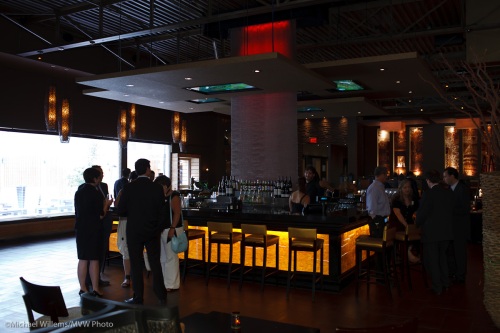
Venue with difficult light, by Michael Willems

Venue with difficult light

Except with 300 lawyers and corporate clients.

So I set to work. And here’s what I did.

Mitigate the problem:

  • Shoot by the window using natural light and high-ish to very high ISO if anyone looks at the window
  • Shoot outdoors, when people move outdoors.
  • Find one or two spots where the light does kinda work and concentrate on those.
  • Move people to a wall where you can bounce a bit.

Handle the problem:

  • Use super high ISO if you must.
  • Use fast lenses.
  • Shoot RAW.
  • Use TTL – and know it.
  • Watch your meters carefully.
  • Avoid moving too much – even when you move half an inch it can put people in totally different light. See the previous point!
  • Be ready quickly. I carried three cameras with three lenses. Ouch. a 1Ds MkIII with a 35mm f/1.4, a 1D MkIV with a 16-35mm f/2.8 lens, and a 7D with a 70-200 f/2.8 lens.
  • I used bounce cards (Honl Photo reflectors, and outdoors,a 1/2 CTO Honl Photo gel) and a Fong thing (I even used a Fong Lightsphere with a Honl bounce card Velcro’d behind it – worked am charm).
  • Work out your best settings for each area and if the area is consistent as an area, set those in manual mode.
  • Shoot a lot.
  • Also shoot things that do not move, like food and furniture.
  • Do more then usual post-production. Yes, some prints will be under-or over-exposed all or part, but if you know your craft and get “close enough” in camera, then you will be able to finish them on the computer.

This way I got prints like:

Indoors, in a good(-ish) area:

Good area in a bad-light location, shot by Michael Willems

Good area in a bad-light location, f/2.0, 800 ISO, 1/50th sec

Outdoors, with a half CTO gel:

A couple shot at an event, by Michael Willems using a half CTO gel

A couple shot at an event, by Michael Willems

Indoors, long and with a 7D at 3200 ISO using available light:

Naural light shot using 7D at 3200 ISO, and a long lens, by Michael Willems

Naural light shot using 7D at 3200 ISO

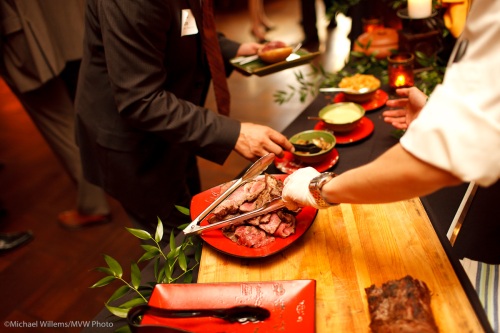
Food:

Food at an event, shot by Michael Willems

Food at an event

At this event I used all the tricks I know, and it was hard work. But I got good pictures, of course.

If you want to learn some of the lighting tricks of the trade, and hone your skills in the flash area, join Joseph Marranca and me in Mono, Ontario tomorrow, Saturday 26 June. There are only two places left!

Where's the light?

In the picture I posted the other day of the female runner, did you notice the light? No, really, did you notice the direction of the light?

Here, let me post another one from the same shoot. Straight out of the camera (i.e. this is not the result of photoshopping):

Female runner running down the hill, shot by Michael Willems

Female runner running down the hill

You can see the sun is behind her: look at her shadow.

Normally that would lead to her front being dark. Bad light!

But instead, she is well lit and even has a bright side light on her face. That shapes her face and makes the picture much more interesting than it would otherwise have been.

You may recall, two flashes were used – two simple speedlites (Canon 430EX speedlites, fired by Pocketwizards). One bare, and one, the fill light, with a Honl Photo Traveller 8 softbox on it.

Light from “unnatural” directions like this leads to a look that is not natural, but rather, hyper real. A sort of otherworldly look. And as you may have noticed in many of my photos, I believe that that is a good thing to strive for in artistic photos.

Exposing the background correctly is also important – it is darker than your camera would have made it if it has had the final say.

Colour is important here too – I am partial to a combination of red, blue and green; and the pink is close enough to red to make it interesting.

Can you see that the background is a bit blurry? That is becasue I was pannign – following th emodel with the camera as I shot.

(Want to learn more? Well, you can: these are just some of the techniques we teach in our workshops: stay tuned or contact me for more information)