Black and Why?

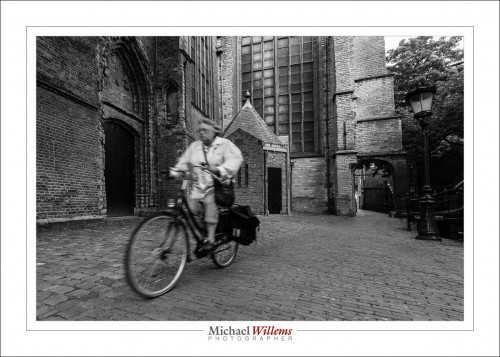
Black and white (or monochrome) is underused nowadays. Yes, colour is great–I love colour, as you see in much of my work–but “mono”, as in the picture below of a cyclist on Gouda, the Netherlands, has something going for it in several ways.

The colours do not distract from the subject. Unless the colours are the subject, avoiding this kind of distraction is a good thing.

Mood can be enhanced: mono can be a storytelling device. Mono can also evoke the past. Mono is thus used in much photojournalism.

But there are also great technical benefits to using mono, and that is what I want to briefly talk about today.

You should shoot RAW and set the camera’s “image type” to monochrome, so you see a preview that at least looks somewhat like what you will get in monochrome, but the RAW file contains all the colours.

First, white balance is unimportant. Whatever you set it to will be fine.

Second, quality of a converted file will be better; or rather, deficiencies will be less noticeable. And third, you can make changes afterward by emphasizing or de-emphasizing individual colours. This is like using coloured filters in film photography (e.g. a yellow filter to make the blue sky darker); with the difference that you can do it afterward, so you can try different “filters”.

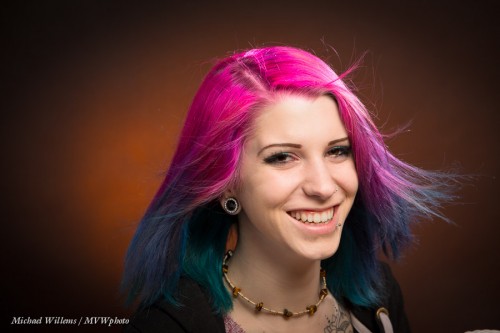
Take model Khoral:

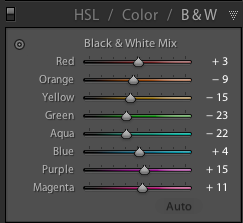
If I do a standard B/W conversion in Lightroom’s DEVELOP module, using its “HSL/Color/B&W” pane, I get this weighting of colours:

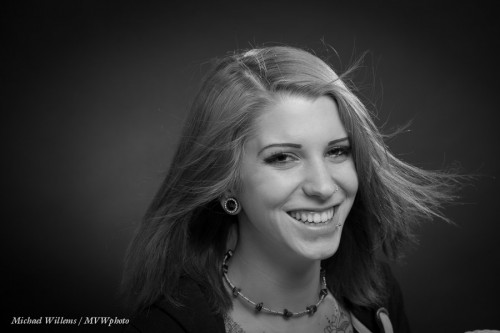
..which gives me:

Which of course looks fine.

But if I turn down Magenta and turn up orange (= skin colour) a little, I get:

Alternately, I could turn up both magenta and orange:

…which gives me:

Can you see how powerful a tool this is? You can try any combination of colour weighting to get the results you want. A distracting colour can be made as bright as the surrounding area so it no longer distracts. Skin can be improved (making orange a little brighter makes skin brighter, which looks clearer).

I hasten to add, of course, that if you are actually doing photojournalism, you should not mess with the original other than a standard conversion, unless your photo editor allows you to use standard colour filters, say – but this would have to be a very explicit agreement, and any edits should not alter the appearance of the scene materially. Why? Because we need to trust that what our media show us is in fact “what there was”. That’s one reason I am not a great fan of “citizen journalism” taking over the news.

But if you shoot art or commercial or family portraits, go wild. OK–maybe no going wild, but you get the idea.

One more thing. Lightroom also allows you to add “film grain”, and that can be very nice in B&W too, to give that old look – and it smooths out skin imperfections. Film grain, unlike digital “noise”, can look good.

OK – lesson over: go shoot some B/W!


Making it seem easy.

A student wrote to me just now, about last Saturday’s workshop, “You and Joseph make it look so easy!”.

He means things like turning this well-conceived but not-very well made available light snapshot…:

…into this creatively lit art photo:

That was from the workshop last Saturday. And yes, we shot this in the camera like that – it’s not Photoshopped.

Our student is underestimating himself, and based on past performance I am sure he did great – but his point is well taken. Experience makes everything seem easy. Brain surgery, too (one day I must ask  brain surgeon).

How do you learn? My teaching uses the following methodology:

  1. You learn by understanding technical basics.
  2. Then you build on those in a step-wise manner – logical progression is key here. Build understanding, one fact at a time. Only when you “get” one fact, move on to the next level, that builds on the previous.
  3. Then you lean how these principles and technologies apply in real life: i.e. what situations they address.
  4. Then you practice. This is when you really learn. During, and after, this practice, of course you continually go back to step 1 and review the fundamentals – and it is at this point that they will all eventually click into place.

That is behind my basic teaching (“learn the camera”), and my advanced teaching, in particular the “Advanced Flash” and “Event Photography” signature courses. And it is also behind the practical workshops Joseph Marranca and I teach to small groups of students.

Sometimes this teaching can seem a bit much. So many facts to learn! But compare this to driving a car, which is also complicated. Or try riding a bicycle.

An image is the confluence of moment, subject, and light. So, the key to the shot above is:

  1. Know the technical aspects of your photography (without that, all else fails);
  2. Come up with the concept;
  3. Ensure you have equipment;
  4. Ensure you have model, setting and props;
  5. Design the right lighting – the key step in this image;
  6. Execute!

On the workshops, we do everything from step 1 to 6. The shots above are made by everything coming together. Without the idea – nothing. Without model and props – nothing. Without technical skills – nothing. Without equipment – nothing.

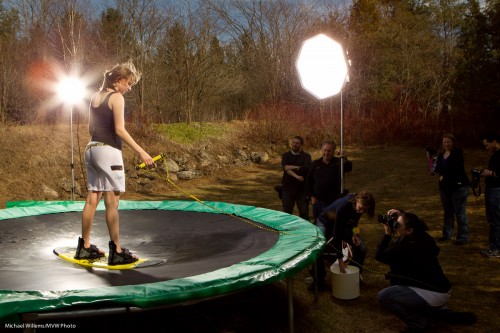
So how did we make that shot?

We rented a boat, and… oh wait. No lake.

So we used the following:

Not something you set up in ten minutes, of course. But when you do it, and it all comes together, the images are great.


Last Tango in Mono

A reminder for those of you who live in the Toronto area and who want to learn all about flash and creative light: the last ever Mono workshop is on Saturday, 23 April, and there are just two spots left.

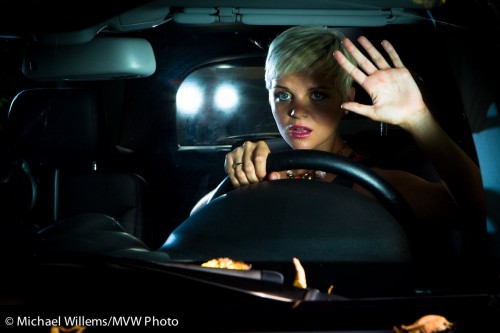
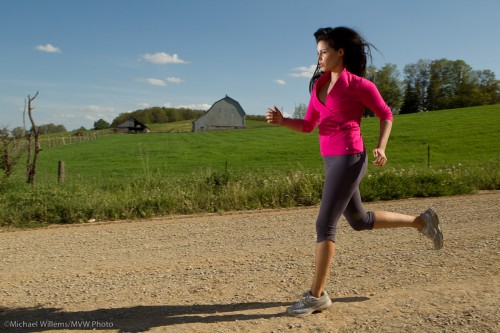
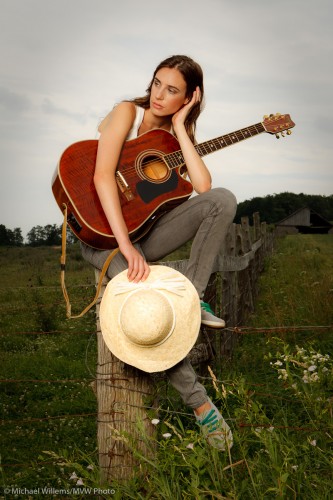
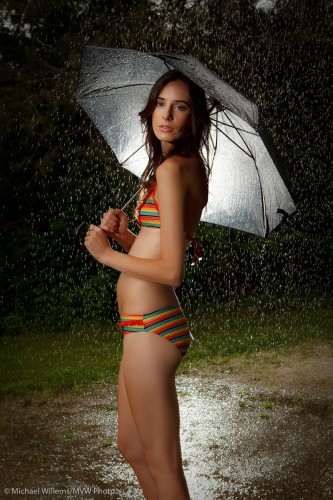
This workshop, in the country home I am leaving at the end of this month, teaches you first the technical points, and then Joseph Marranca and I help you put those into practice. So you will learn – plus you go back with actual portfolio shots that you have made – like these, from previous workshops:

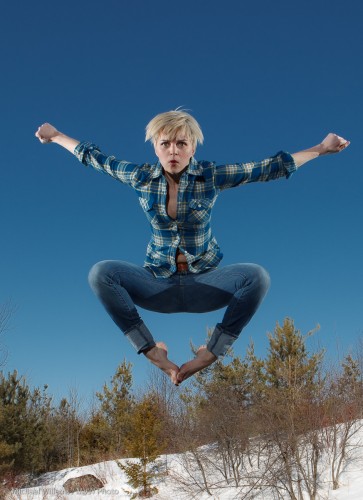
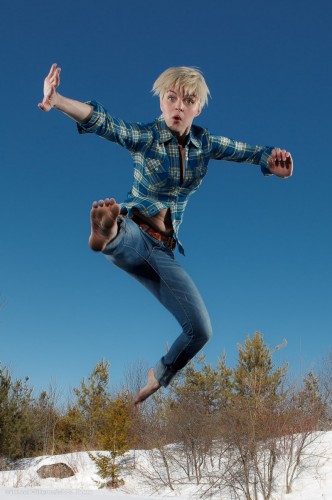
Angry Jump

Angry Jump

All of these were shot “as is”, and minimal processing has been done. The shots were made in the camera, not in post. The one thing they have in common is that they use creative light.

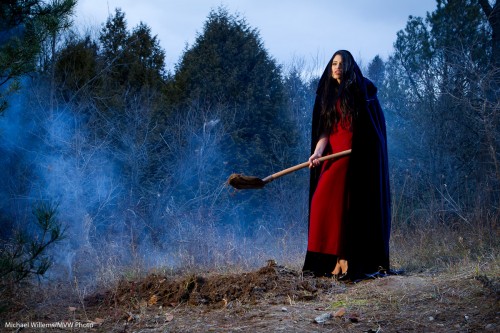
Burying a dead lover

Burying a dead lover

Smoke machine, gels, white balance: all doable once you know how.

Hitchcock! - Shot by Joseph Marranca and Michael Willems, Mono, Ontario, 2010

Hitchcock!

That was a “broad daylight” shot, above.  Shot with just speedlights. Yup, that is what creative light can do.

Lit Runner - Shot by Joseph Marranca and Michael Willems, Mono, Ontario, 2010

Lit Runner

Cross lighting – wonderful, no?

Pensive Girl - Shot by Joseph Marranca and Michael Willems, Mono, Ontario, 2010

Pensive Girl

Looks photoshopped? Nope. Just exposed well and lit well. Simple once you know, and that is what these workshops are all about.

Umbrella Girl - Shot by Joseph Marranca and Michael Willems, Mono, Ontario, 2010

Umbrella Girl

The shot above was another daylight shot, nice day, no rain – but as it happens, we had a garden hose.

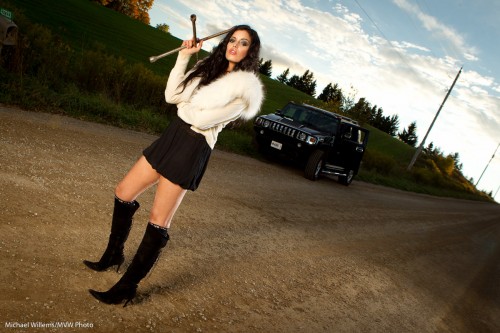
Hummer threat - Shot by Joseph Marranca and Michael Willems, Mono, Ontario, 2010

Hummer threat

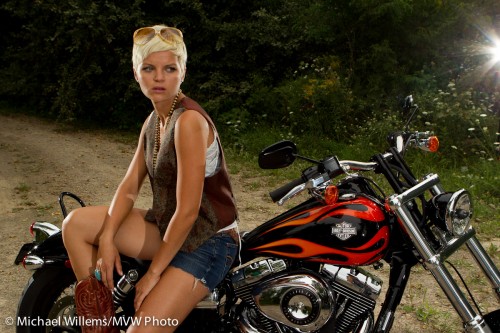
We have shot Hummers, Horses, and indeed also a Harley:

Harley Chick - Shot by Michael Willems and Joseph Marranca, Mono, 2010

Harley Chick

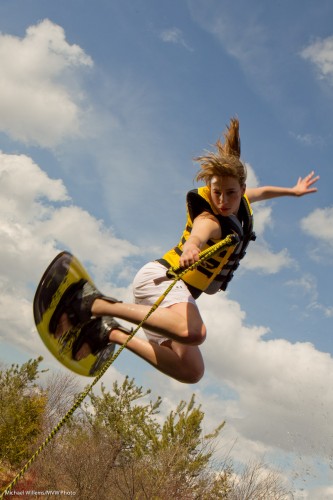
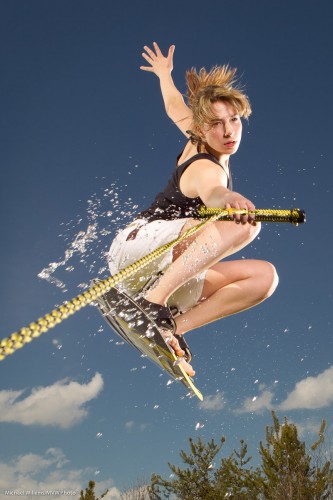
Those are just a few of the shots we did in past workshops – and Saturday’s will be a very special one. Think “wakeboarder” and “green screen”.

If you have always wanted to learn flash and then learn how to apply it both practically and creatively, book now and come to Mono.

Of course we will do more workshops going forward, but they will no longer be in Mono – one of the most amazing settings you will ever shoot in. Two spots left, and we will not allow more in, since the student-teacher ratio is very important to us. This is not a “20 people, one instructor” workshop (rather, it is “no more than 10 students, and two pro instructors”).

See you Saturday – and others, you will see a few shots here later.


Course for past students only

Joseph Marranca and I are planning a number of new workshops. One is an all-day workshop in Mono, Ont. on January 16.

This is a course for past students only. It is about a slightly more advanced subject than the technical courses. About a subject that has kept artists busy for centuries. Namely, “The Art of Nude Photography”.

Throughout history, artists have pictured the human form. Nudes are always timeless when tastefully done, especially in black and white, using natural light or simulated natural light.

It is easy to photograph a nude model but it is difficult to do it with taste and meaning. Using a professional model, Joseph and I will teach you how to light, how to interact with your model, and how to produce art that takes a fresh look at a subject that will always remain interesting.

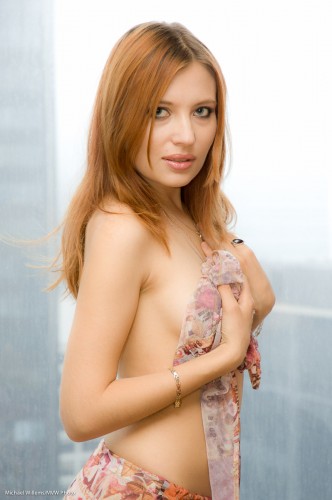
Model Katrina modest

Let me give you a few tips for nudes – a teenie tiny excerpt from the course:

  • You will often want to shoot implied rather than explicit.
  • Use soft light for females – back light is great for round shapes.
  • Hard light is better for males.
  • Keep it simple. Props if appropriate, but as a general rule, nudes are about the nudes, not about the rest!
  • Consider using available light.
  • High-key lighting is more flattering than low-key lighting, especially for females.

A slightly more revealing photo after the click:

Continue reading

Learn light before the holidays!

You can learn now… before the holiday season. Make GREAT portraits and party shots using flash. The festival of lights seems an appropriate time to tell you about light!

So here’s how you can see me in action in December:

  1. There are a few more chances to see me at Henrys this week. After that, a break until the new year.
  2. Big news: Joseph Marranca and I have added an extra “Advanced Lighting” course in Mono, Ontario, on December 19. Indoors as well as outdoors “Winter Wonderland” shooting using small flashes, large strobes, and a combination of all of those. Learn the theory and “do it!” – and go home with great portfolio shots, in a Winter Wonderland setting in Mono, Ontario.

If you want to partake in Mono, be quick: we will limit this all-day course to a maximum of just 8 participants, since with snow we’ll need more individual attention.

If you understand your camera and know what aperture is but have always wanted to learn professional lighting, now is your chance. Read about it, and book, by clicking right here.

Model Lindsay in Mono Snow

…and dust off your camera, gloves, and boots. And use your camera to make some amazing shots during the holidays.

A shot from the course

At the Mono “Creative Light” workshop,  we do different portfolio shots every time.

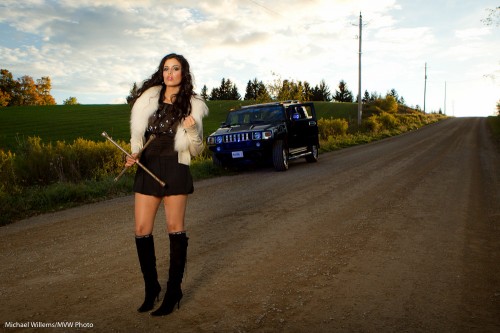
So imagine our delighted on Sunday when a student turned up in a Hummer. This was immediately put to use by model Tara:

Tara Elizabeth and Hummer

Tara Elizabeth and Hummer

That was lit how?

This is how: with a softbox, to our left. And a small speedlight to our left aimed straight at the car – with a blue Honl gel. Both were fired using pocketwizards (the speedlite using a Flashzebra cable). Metered using a light meter, of course.

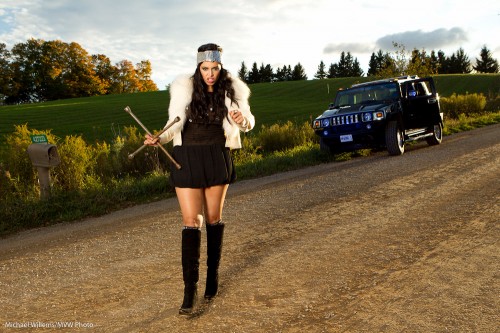
Here is an alternate take:

Angry Tara Elizabeth, with Hummer

Angry Tara, with Hummer

That was taken just a few minutes before. Can you see how every minute counts when shooting in beautiful late day light?

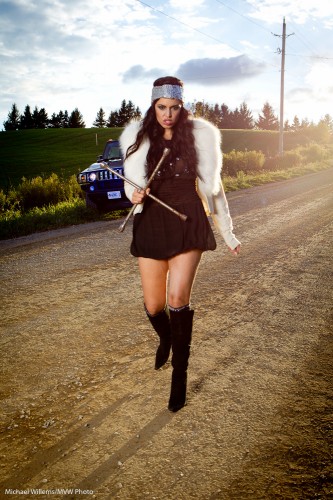
Okay, one more. Just to show that lens flare – which should normally be avoided – can sometimes be OK:

Angry with tire iron

Angry with tire iron

You avoid flare by:

  • Using a lens hood
  • Shielding the lens with your hand
  • Avoiding lens filters
  • Pointing slightly away from the light source

Have fun!

Creative light

There is just one more spot open for the all-day Creative Flash course in Mono, Ontario, an hour north of Toronto, Saturday.

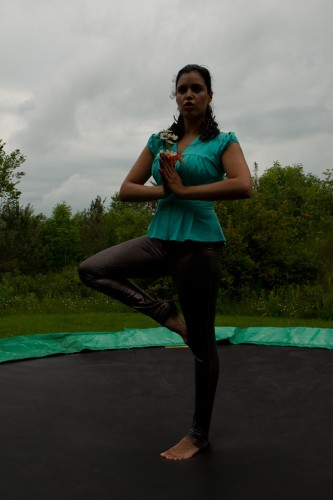
Using a professional model and pro lighting equipment on Canon, Nikon and other camera brands, Joseph Marranca and I will teach our students to take shots not like this:

Tara Elizabeth

Tara Elizabeth

But instead like this:

Tara Elizabeth

Tara Elizabeth

You see how important light is? That’s what these workshops are about, to make users comfortable with the technical and creative aspects of light,

And they are about going home with portfolio shots.

And about having fun with cameras, all day!