
When doing a portrait, you use a main (“key”) light, a fill light, and optionally, a background light and a hair/edge light.
The purpose of that fill light, oddly, is to be darker than the main light. This introduces depth into your picture, and it narrows the subject’s face.
OK, so fill is darker than key, But perhaps not completely dark, like here:
Nice and atmospheric, but perhaps a little too much drama.
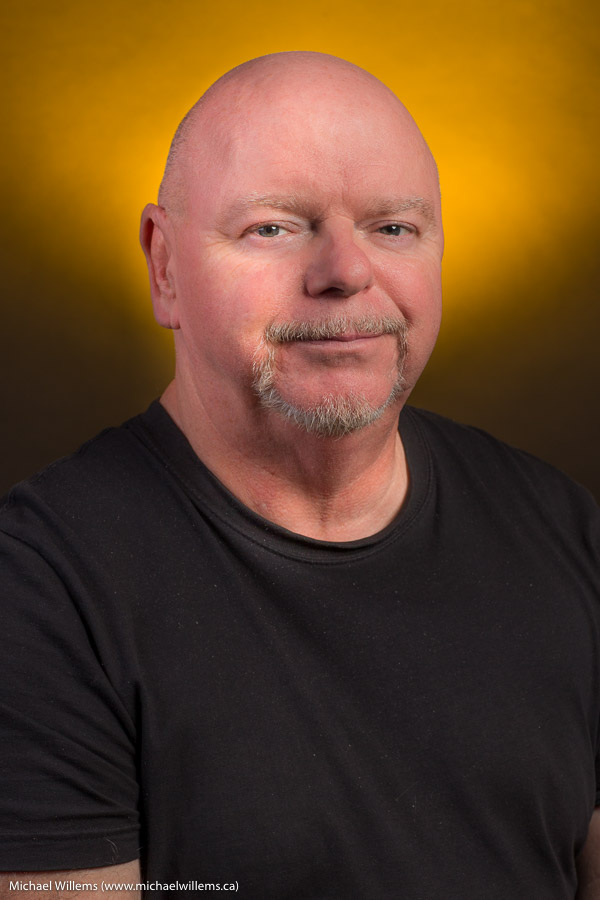
So we add that fill light, but set it, say, two stops below the main light (so if your meter reads an aperture of f/8 for the main light, it should read f/4 for the fill light). Now we get what we wanted:

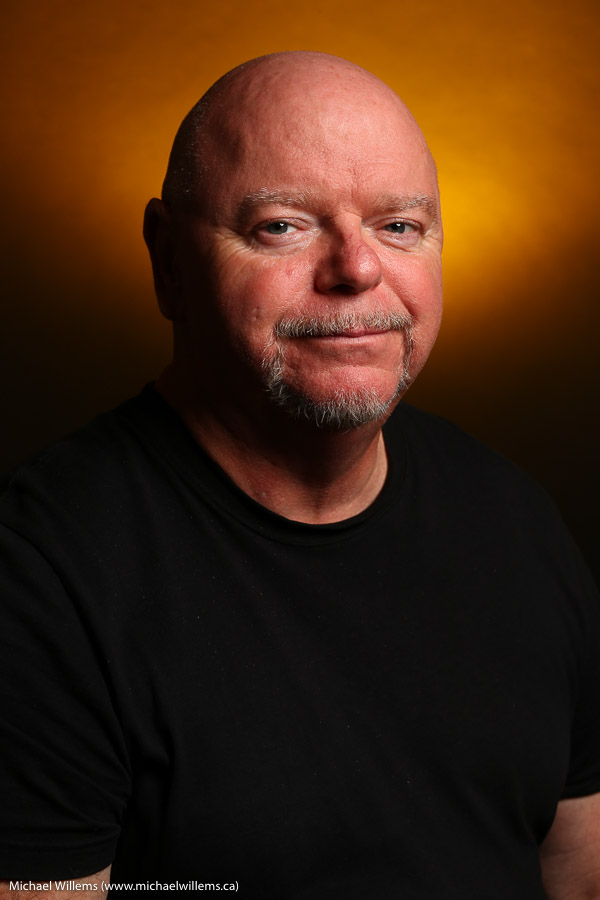
If you make it too bright, i.e. you do not set it two stops below the key light but you set it at the same brightness, you might get something like this:
As you see, the face looks wider now, and it loses that “real”, three-dimensional look.
So you should probably start at –2 stops for the fill light, and then adjust to taste: you are the artist, after all!
–––
Learn to do it yourself! Michael teaches portrait lighting and many, many other photography subjects at Sheridan College in Oakville, and to small groups or individual students all over the world, in person or via Google Hangouts. See http://learning.photography for details.