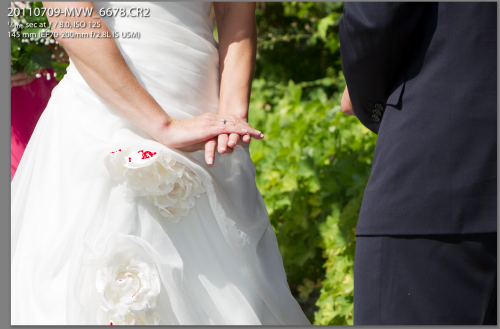
Yesterday I shot a wedding in broad hard daylight. That prompts me to write about a convenient Adobe Lightroom control you will need: recovery. Here’s how you use it.
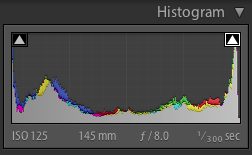
Look at the image. Then, in Lightroom’s DEVELOP module, turn on the highlights warning (on the histogram, click the right little arrow):
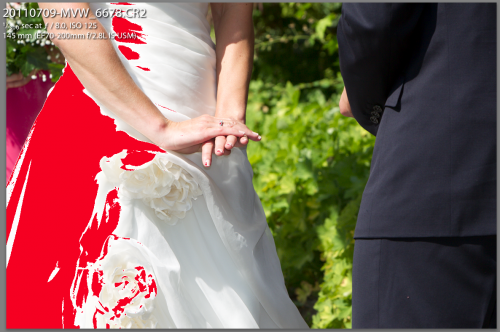
You now see the overexposed areas where there will be total loss of detail:
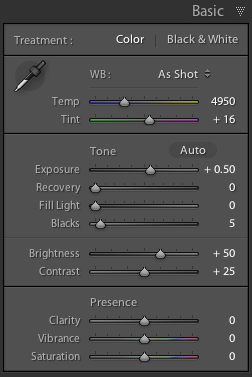
This is how the “basic” edit area looks:
Assuming you were sensibly shooting RAW, you can fix this.
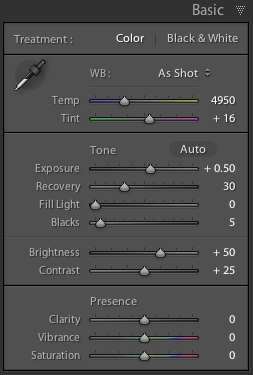
In that “basic” area, drag the “recovery” slider to the right until the red almost disappears:
Now you see this:
And that means there is now detail in the dress. In the immortal words of George W. Bush: “Mission accomplished”.
Discussion:
Q: Why all the way to the right? A: Since the dress is pure white, we want its brightest bits to show extremely, totally, white. Hence the adjustment until the dress is only just showing some highlights.
Q: Could we have done this in camera? A: Yes, by decreasing exposure, but then we would have lost all detail in the dark areas. By slightly overexposing the very brightest areas and then fixing this, we are using the full dynamic range available to use – with the camera in RAW mode.
Q: Could we have done this by just dragging down exposure and increasing fill? A: Yes, perhaps – but in pictures where a small area is blown out totally – sunny day pics – the “recovery” slider is often the quickest, most convenient way to solve these issues. And speed matters when you have 300 images to finish!
Q: Doesn’t a high-end camera provide for this? Some kind of a highlights mode? A: Some do – but only if you shoot JPG, which kind of defeats the purpose of it all.

