Have you ever thought that a nice black and white photo was very worth looking at?
That is because in B&W we do not get distracted by colour: we see the pure image. A photo is composition + moment + light, and in some cases colour just distracts from that.
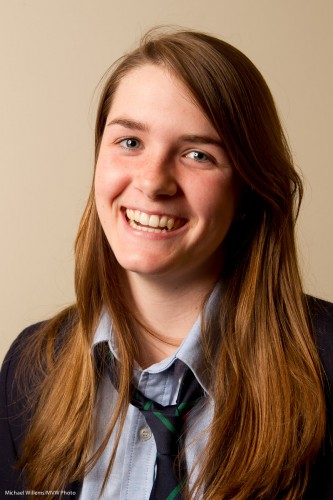
So this one-light image, from the other day, is fine:
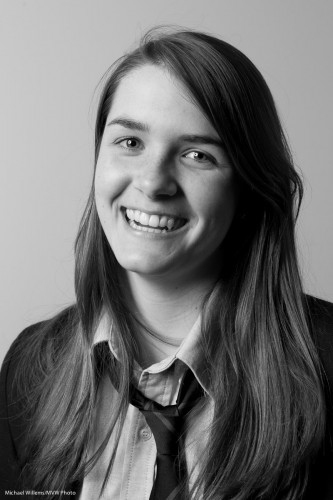
But this image is simpler, and, I think, more powerful:
Plus… there are fringe benefits. Doing a B&W conversion I can selectively increase or decrease colour channels. And by slightly, every so slightly increasing red, orange and yellow, I can:
- Fill in shadows;
- Make skin even smoother;
- Increase the brightness of teeth.
Now of course a teenager needs none of these, but you can nevertheless see this is a better image:
And this only took a few seconds in Lightroom, which has en excellent B&W conversion tool.
And we do this in Lightroom, not in the camera, because that way:
- It saves time;
- We can change our minds;
- We can do a selective per-channel conversion as described above;
When you shoot B&W, do feel free to set the image style to B&W on your camera if you shoot RAW (because in that case you are still saving all colours; it is only the preview that is shown in B&W), but see that preview just as a rough idea and convert properly in Lightroom on the computer.
TIP: if you want to see where someone may develop skin issues decades from today, convert to B&W and then pull red up and pull orange down in Lightroom. You wil now see someone with any skin imperfections magnified hundreds of times. I wil not do it to this lovely young lady, but to see the effect, do it to a picture of yourself.


