We often like vignettes in our pictures – meaning, the outside is darker so that the subject, closer to the centre, stands out more. Gives your pictures that professional “wow” feeling.
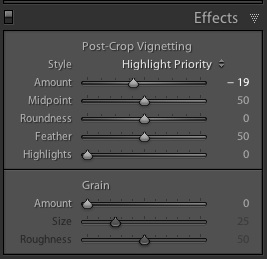
You can do that in post-production, of course, by using Lightroom’s “Post-Crop Vignetting” function:
Your best strategy is to decrease the “amount” setting by a small amount, say minus 15-20. Any more and it often becomes obvious.
There are of course ways to actually shoot with vignettes. I prefer to do that when possible.
One is to use a fast lens, normal to wide angle, and to shoot with it wide open. Like my 16-35 lens:
That often introduces a bit of a vignette: stopped down, lenses behave “better”. So if you want a vignette, “wide open” gives you that not as a problem but as a benefit. And you still get depth of field when wide open with an ultra-wide lens.
Another way is to light selectively. I did that in the above picture also. You can use an off-camera flash (and I often do!), but in this case I used on-camera flash. My lens zoom angle was wide, but instead of letting my flash automatically also zoom to “wide”, I manually set the flash zoom to 135mm. That means the flash’s light only lights up the centre (or where you point the flash head).
Another benefit of this technique: the flash has much more power now, going forward. And you are often going to be fighting at the limit of what power you have, so this is not a bad idea.
Last note: Some flashes (like the 600EX) also have a mode to always send the flash light to a slightly wider or narrower area than the lens covers. I use narrower, to give me some natural vignetting. Check out this function on your high-end flash!


