The Art of the Dramatic Portrait, Continued

At the risk of being repetitive, let me deepen your understanding of dramatic portraits a little.

A dramatic portrait, in my world, is one where:

  1. I emphasize the subject.
  2. I darken the background.
  3. I make the subject the “bright pixels”.
  4. I carefully shape the light.
  5. I carefully direct the light.

You have heard me say this many times, but as said, let me deepen your understanding.

To show you want I mean, look at a few samples from a recent shoot the other day. These are outtakes, but they serve well to see what I mean (for actual shots, come see the Never Not Naked: Natural Nudes exhibit – an exhibit with a twist, June 22-July 8).

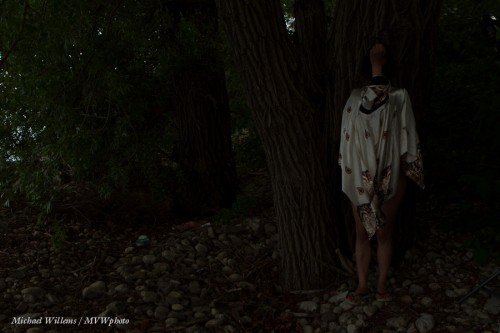
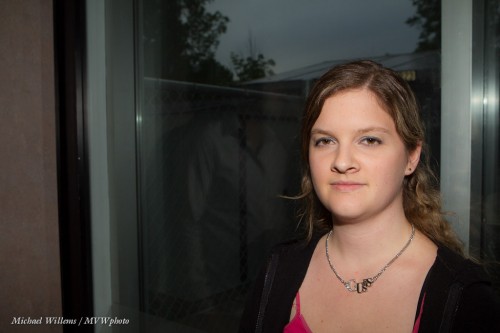
Let us start with a typical snapshot. 100 ISO, f/5.6, and this would be around 1/30th second. This is what available light and “Auto” or “Program mode” would give you:

Fine, but there are several things that can be improved.

  • The subject’s face is lit uneventfully and insufficiently.
  • The subject is “dark pixels”, not sharp “bright pixels”.
  • The subject competes for attention with pretty much everything else.
  • The tree bark’s texture does not really come out very well.

So now let’s do it properly. When I say properly, I mean “Michael Dramatic”. And “Michael Dramatic” for me means three stops below ambient. So I move the shutter to 1/250th second. Three stops darker than a “normal” exposure, in other words. (1/30 to 1/60 is one stop; 1/60 to 1/125 another; 1/125 to 1/250 the third stop).

Three stops is my dramatic portrait. Often, of course, you use less than three stops darkening. Like when you want less drama. Or when your flash is not powerful enough to provide three stops above ambient light.

Anyway, three stops below gives us this:

That’s dark. Um yeah, that is what I had in mind.

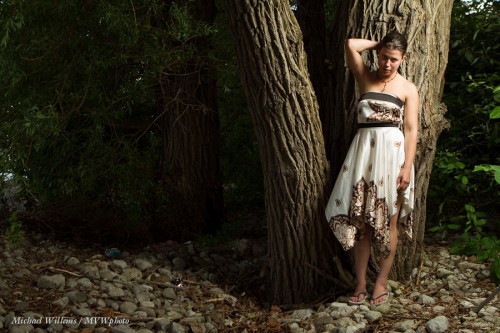
Because now, finally, we add a flash. And we get what we came here for:

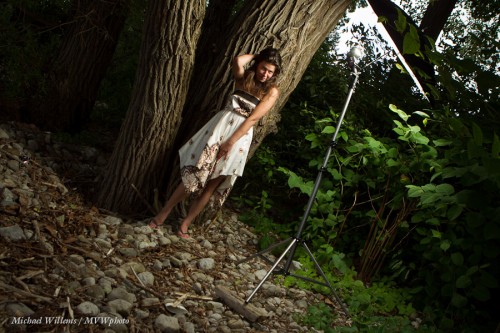
That was done with a single off-camera 430EX speedlight close by, fired into an umbrella. Like this:

You see there are several aspects to this, right?

  • The darkening of the non-flash lit part of the image (the “background”).
  • Properly lighting the subject.
  • Softening the light for the human.
  • But also the shaping and directing of the light. When I see a tree, I think “texture”, and side lighting brings out that texture.
  • Good composition.
  • The Inverse Square Law: light drops off away from teh flash.

Yes, all this needs to come together for a good shot. Go try a photo like this, and tell me how you did!

___

Note: You really can learn this, and in not many hours. My June Special is stil on: $75 per hour plus tax for private coaching, for June only (normal price is $95 per hour).



What to start with?

So you are outside and want to darken the background for a mixed light picture. You’ve heard me talk about this repeatedly.

What can you do? Yes, the triangle, of course. Aperture smaller, shutter faster, ISO lower. But which do I prefer?

Outside in bright conditions your flash is competing with the sun. So you do not want to reduce effective flash power. Yet both aperture and ISO do not just reduce the background: they also affect the effective flash power.

So in those conditions:

  1. You start with the shutter, always. As fast as you can, which is the shutter sync speed: 1/200th sec on cheaper cameras, 1/250th on most, and 1/300th on some (like my 1D  Mk IV). Go to that speed.
  2. Then, and only then, if you still need to darken more, start messing with higher “f-numbers ” or lower ISOs.
  3. If you now end up with insufficient flash power? Add flashes. Bring the flash closer. Use more powerful flashes. Zoom in with your flash heads. Or as a last resort, wait until the light is less intense.

Simple rules make the technical aspects of photography simple and that is what we want.

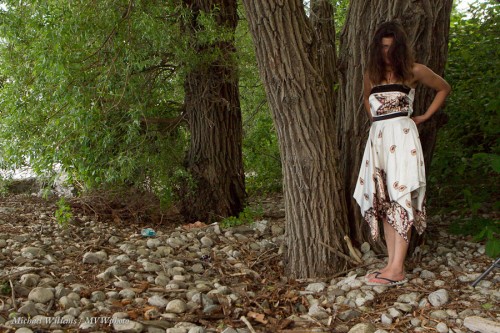
After the click, an image taken thus at 100 ISO at 1/300th at f/6.3. (It’s a slightly NSFW image so it is after the click. For those of you uncomfortable with the unclothed human body, like those of you in Anglo-Saxon or Muslim countries, or who buy at large photo retailers in Ontario: you may not want to click. Everyone else: click away, it’s entirely harmless!):

Continue reading

The Beer-Quay?

At the risk of sounding defensive, let me emphasize to all my students:

Your photography is valuable – do not give it away.

Photography is at least as valuable as, say, dental hygiene, or plumbing, or sewers, or garbage collection. Yet people will pay for the latter, and pay well, and often not for the former.

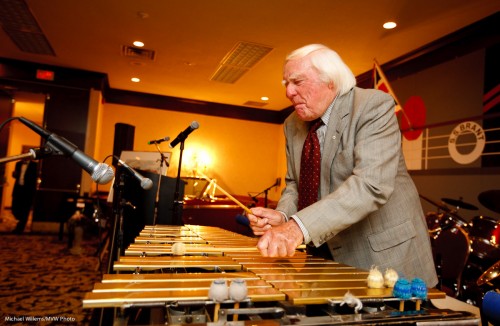
Case in point. An art festival contacted me a few days ago: they wanted to use my photo of Jazz great Peter Appleyard, which they described as a “stunning photo”:

Peter Appleyard. Photo © Michael Willems, All Rights Reserved

Note that this is a significant art festival, which:

  • Charges up to $50 for admission per guest, for each event. Plus HST.
  • Is sponsored by the Ontario Arts Council, the Ontario Arts Foundation, the Canada Council for the Arts, and  the Canadian Heritage ministry.
  • Is sponsored by The Cooperators and various other commercial organizations.
  • Undoubtedly pays for its venues, food, drink, permits,
  • Undoubtedly pays its performers.
  • Undoubtedly pays its taxes, office costs, hydro, water, sewerage.
  • Most certainly pays its printer for the brochure I was going to be used in.

And yet for the photo there was no remaining budget.

I would have let it go for a very small fee (my way of subsidizing the arts), but “”free” is a no-go. You see, I too am expected to pay the bills.

Why is this happening? I see a few reasons.

  • “Uncle Fred has a Digital Rebel”. This makes the perceived value of photography zero, even though there’s no way Uncle Fred can produce a photo like the above.
  • New photographers fall into the trap of “doing it for credit”. Don’t do this, new photographers, if you ever want to do it for a living! Instead, calculate the hours you really spend on a shoot (including talking about it, getting there, shooting, waiting, and post-editing), and multiply that by the wage you want to make (hint: you are worth at least what a dental hygienist or a plumber are worth!).

It is what it is – the Dutch have an expression that translates as “you can’t fight the beer quay” – i.e. if people want beer delivered, it WILL happen. Calligraphy went away, and if quality photography is no longer wanted by society, so be it. We’ll all just shoot weddings. Although – even those: I have recently been asked to shoot several weddings for “a few hundred dollars each”. Which is at least 20 times below my normal fee.

There will of course always be quality photography, Ads in magazines, art shows (like mine coming up: Never Not Naked – Natural Nudes) and more will always need competent artists. But it will be a market where 1% of photographers get paid, and the rest do it “for credit”.

So – a parting thought: be part of the 1% and come to me to learn how to really do it!


Silhouette How-To

I have talked about silhouettes recently – let me share another one.

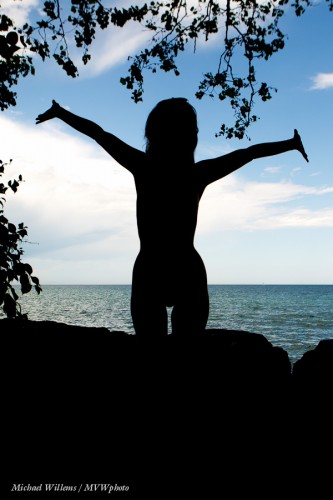
This was an accident: my flash had not charged yet so did not fire. It shows how to make an accident into a nice shot.

  1. Make sure your subject is in the shade, and the background is bright.
  2. Expose for the sky: aim your camera at the sky and set exposure to “0” for that on the meter if shooting in manual mode, or if in an automatic mode, press the Exposure Lock button (AE Lock, or on Canon, “*”).
  3. Recompose.
  4. Shoot.
  5. If you have to, in Lightroom drag “Blacks” to the left (if  you have LR4).

That is all – simple, and something you should sometimes do.

Flash Ethics

I bumped into another pro yesterday at The Distillery. She was about to teach a workshop and thought I had come to attend. Which I had not.

Turns out this photographer does photojournalistic weddings and family shoots, and never uses flash, and, astonishingly to me, for the following reason: because she has “ethical problems shooting flash”. I think was unable to convince her to even take a look at speedlighter: flash was a no-go area for her.

Ethical? Artistic I can understand, but in my experience, pros who do not use flash have several reasons:

  1. They do not really know how to, especially TTL flash with all its limitations and complexities. This is the vast majority of non-flash users.
  2. They have genuine (and in my view, misguided) ethical problems.
  3. They have reason (1) but say it’s (2).

Category 2 is a minority, and in my opinion, a misguided one!

As a newspaper shooter, I could never alter a picture: cropping, white balance and exposure is all, and any other alteration would ensure I would never work in press photography again. You need to trust the photos you see in the paper. So I get ethics! But adding light has been allowed for many, many years. What are you supposed to do when there’s not enough light?

I shoot, and teach shooting, with flash. Either:

  1. On its own (in a studio); or in a mixed environment, namely:
  2. Mixed with bright outside light, when you need to kill that light
  3. Or with dim indoors light where you have to boost that light.

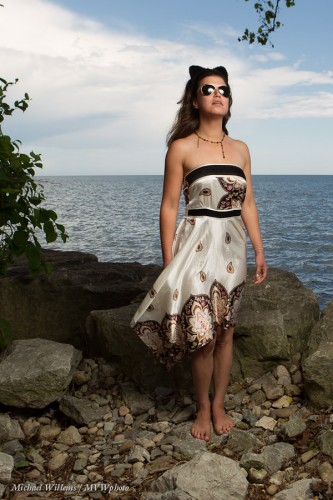
The main point is not not the adding light – the main point is the creative options that this opens. By saying “I only shoot with flash” you are denying yourself a great number of opportunities. Like this, taken a few hours ago at Lake Ontario in Oakville:

I used an off-camera flash. Am I ethically sinning by adding light and making this a nice picture? No way. As for events: bounce behind you and use the flash as additional light. You are not committing ethical breaches by doing this!

So go ahead, learn flash, and use it for both technical (adding light) and artistic purposes. Have fun!


Another example

…of outdoor flash here.

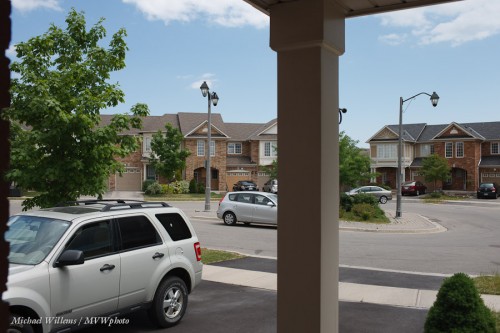
Take a typical back yard on a sunny day. Set your camera to “P”, or the green AUTO mode, or A/Av mode, and click.

Mmm. Why do we avoid just snapping? Because it can be a little boring and it gives you no control. Let’s take control, instead, and

  1. Darken the background (I do it in manual mode, or you can do it by using “-” exposure compensation). Set shutter, aperture and ISO to give you a dark background (dark colour is saturated colour)
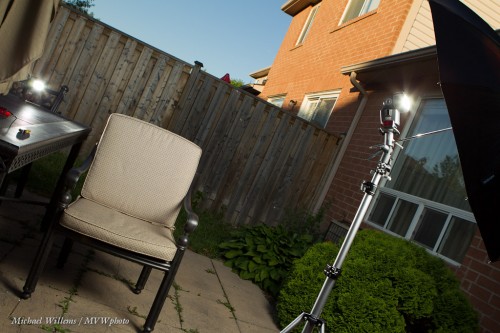
  2. Add a flash or two, using wireless TTL (wireless with manual flash power setting is better if you have the time and things don’t move position while you are shooting, but TTL is faster – I used TTL here):

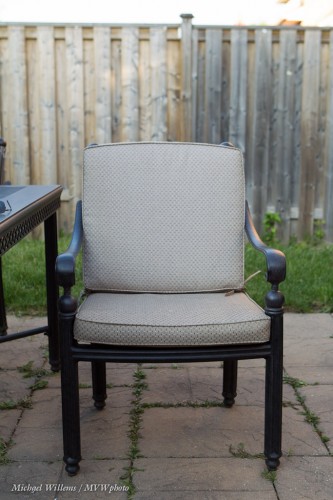
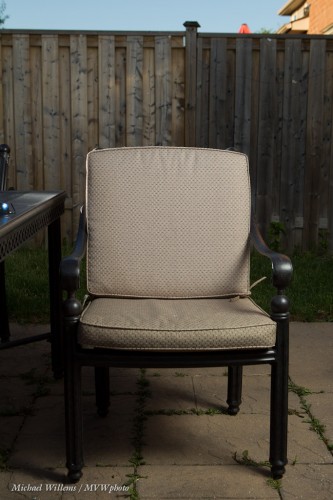
…which gives us a chair like this:

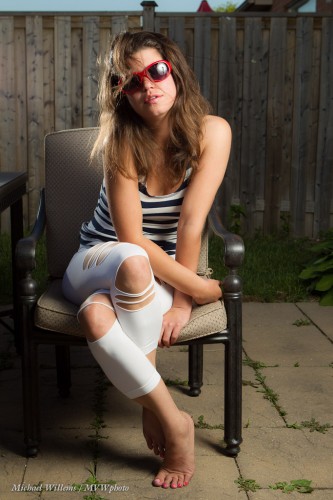
And a pic like this:

See how rich and blue the sky is (in the first picture it was featureless white)?

That’s a stock quality image and the point is, you can shoot it in seconds. Learn flash (from me in a private session, or wherever I teach) and your pictures will become immeasurably better.


Student Help

This blog is for general readers who want to learn professional photography skills (hi, everyone) and pros who wants flash knowledge (hi, guys). But it is also for my students – previously at the School of Imaging; now for my Sheridan College and private students (and stand by for more news). So here I repeat things I have talked about in classes, to support the class.

Such as this: The difference between background and foreground in a mixed flash/ambient image.

Easy to learn with some practice!

You need to remember the basics:

  • The flash power determines the brightness of the foreground.
  • Your “Triangle” settings (Aperture-Shutter-ISO) determine the brightness of the background.

You also need to learn the main restrictions:

  • Flash power may not be enough. Aperture affects flash too, so for darker backgrounds, try to keep aperture low and shutter fast. Or get closer.
  • Note, shutter speed cannot exceed 1/250th second (roughly)

Look at these examples, of a student at Sheridan College yesterday:

I changed the background by setting my shutter to 1/15th second, 1/50th second., and 1/250th second, respectively. The flash part is roughly the same, since the flash power remains the same – but the background is najorly affected by this.

So remember, in any flash picture, you always start by asking “what will the background without flash need to look like”? That could be totally dark (studio); middle (dramatic outdoors), or bright (a party). But it’s always your first question.

Clear? (Pun intended).

___

PS: I have a special on for private or small-group training June – just $75 plus HST an hour instead of the usual $95. Email me!


People techniques

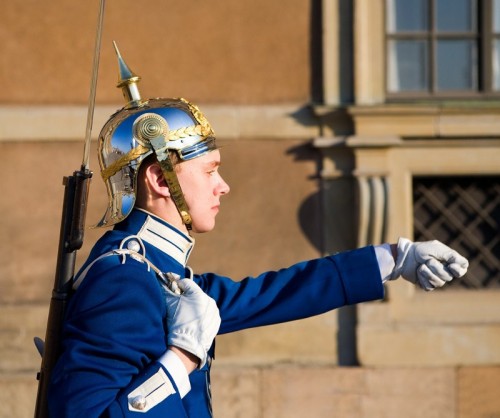
As I have been saying for years in my Travel Photography workshop: when you shoot travel, you are in the business of “building-prevention”. Meaning – do not just shoot buildings, but shoot people.

You can do this in various ways. One is to shoot events. Like the Stockholm Palace guard:

You can also use a wide lens (no-one notices what you dover) or a long lens (sneak a shot from afar). But those are last resorts.

The main way is: be a people person. Talk first, shoot later.  Talk. Laugh, Interact. Buy something. Admire. Then ask.

That’s how you get interesting travel photos!


No Show?

I was asked the other day while shooting: why do I not like to show clients my shots on the camera while I am shooting?

  • The display is not very good, on some of my pro cameras. That leads to bad previews.
  • Showing distracts me from shooting and uses up my battery.
  • The images may need cropping or adjusting, especially when shooting TTL flash.
  • I may want to have time to choose the one out of three identical portrats that I shoot – the one without the double chins.
  • Some images should never be seen (eg images of people eating).
  • No image looks great when one inch in size.

That is why I prefer to look at my images myself before showing – that way you get to see only excellence. Cool?


Polarize It.. Don’t Criticize It…

Or, “more about those sunny days of summer”.

Why do you need a Polarizer (“Polarizing filter”, “Circular Polarizer”, “C-Pol”)?

Most lens filters bought nowadays  (“UV”, “Daylight”, “Protection”) do nothing but protect against sand, snow, and rain. And sticky fingers. But one filter, the Polarizer, does something.

Put it on your lens and you see the normal scene (but you need more ISO, lower “F-number”, or slower shutter to compensate for the loss of light):

Now turn the polarizer, and suddenly, the reflections on the non-metallic part of the car, the windows, disappear!

Bit more importantly, look at the sky. Here’s the scene outside my home yesterday at 2pm:

And now I turn the front of the filter until this happens: look at the sky, and observe the green colour of the tree:

And that is why, especially on those blue-skies-with-some-cloud days, you should carry a polarizer!

(Can we do this is Lightroom? Yes – but then you get funny edges around the shapes. There’s no real substitute for a Polarizer in this case.)