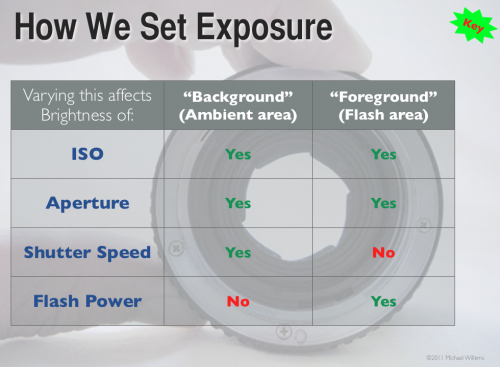
Table of Truth

In case you, like many photographers, wonder how aperture and shutter, as well as ISO and flash power, affect your flash pictures – here’s how!

Study that graph – a good photographer knows this graph off by heart – in fact, a good photographer has made this chart part of his or her DNA.

Note that if you set your camera to an automatic mode (like P), or if you set your flash to an automatic mode (i.e. TTL), you’ll get confused, since the camera varies things! So when learning, keep everything on manual.


Dark arts

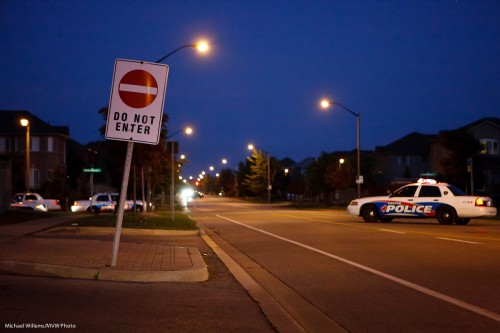
Darkness techniques, I mean. In other words: what do do when you have to shoot in the dark. Like in an image such as this, from the other night (as a photojournalist I take quite a few of these):

The simple answer: there’s no simple answer. In other words, there isn’t one single technique.

What I do is a combination of the following techniques:

  • Try to shoot when there is some light- not usually an option, since the criminal element does not wait until
  • Use a tripod or monopod, if possible.
  • Use a fast lens (one with a low “F-number”).
  • Use a wide lens, if possible – wider lenses are of course more tolerant of motion; while longer lenses show every little tremble.
  • Use a higher ISO – 3200 in this image, which is as high as my a-little-long-in-the-tooth 1Ds Mark 3 can go.
  • Crouch and make myself into a tripod.
  • Take the image many times – in the hope that one will be “accidentally sharp”.
  • Underexpose, and then later “push” the image (at the expense of more grain).
  • Use what you get – in this case, cars turning around right beside me lit of the police cars on the left, so I waited for more cars to do that (otherwise, those police cars would be dark).

By using some or all of the above techniques, you can get sharp pictures even when it is difficult, and when others fail.


Unpredictable?

Another tip re flash (un-)predictability:

Sometimes it’s not the flash that is unpredictable; it is the review on your camera.

If your camera has a LCD brightness adjustment, set it to a constant value.

I was reminded of this the oterh day when I shot some shots with my 7D instead of the 1Ds. The 7D defaults to setting LCD brightness by itself. In these cases, when you take a shot and view it, you never know whether you are seeing a dark shot, say, or just a dark preview of a good shot.

In fact I found myself looking at shots twice, and once I’d see a dark shot, apparently underexposed; once, a bright shot, that looked fine.

I immediately realized what I was seeing, and I set the LCD brightness to “manual”, not “auto”. That problem was solved. I suggest you all do the same.

(And you really ought to use the histogram to judge your images, not the LCD, but you knew that already. Right?)


Back to basics

You know that as an event shooter, I use TTL (through-the-lens flash metering, using a preflash) very widely. Much as it is sometimes hard to predict, it is the only thing you can use when things are moving quickly. Like at an event.

But sometimes, things go wrong. I had flash maslfunctions for part of Saturday’s shoots. You see, TTL is not really unpredictable -once you know how it works (metering bias to the focus point, for instance, and an assumption of 18% grey where it meters) it is predictable. So a malfunction is when it becomes actually unpredictable.

As it did Saturday with my dying 580EX II flash. Here’s three consecutive shots – I do everything the same, and yet I got, in rapid succession in the same setup, one dark shot, one light shot, and one OK shot:

Too dark. And the next one, way overexposed:

And the third one, almost OK:

I cannot live with this craziness. So then what do I do? I go back to basics. Actual basics. The basics we used in 1980. Namely, I set my flash to manual power setting (my camera, of course, is already on manual exposure settings).

One quarter flash power ought to do it, I thought, looking at where I was bouncing and what my settings were – and that worked great:

So then for the next dozen or two shots I stayed in the same place, shot people at the same distance, and kept the flash and camera set to the same. Bingo, predictable shots.

So when life hands you unpredictability, force predictability on it If you use the same settings and it’s all manual and your distance to the subject stays constant, the pictures will all be the same.

Sometimes, 1980-style basics work just great. Actually, they quite often do. My camera is very often on the “manual” exposure setting, for instance.


Flash assist

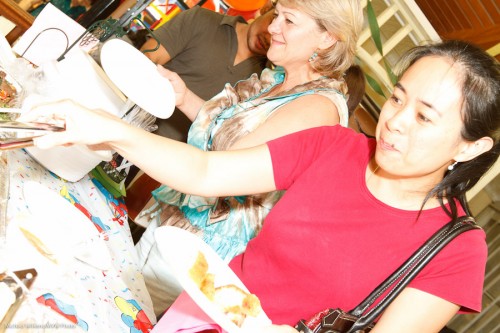
Sometimes when shooting an event, I cannot easily bounce my flash. In that case, I will first try to use mainly available light –  meaning, turn up the ISO. That gets me shots that are borderline acceptable, like this from Saturday’s event shoot:

So here’s the message: even when I am not using the flash as the main, overpowering, major light, I still use it in these cases.

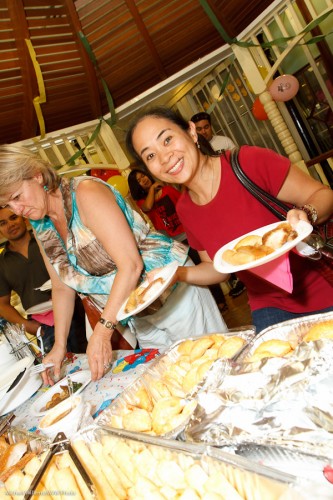
Turning the flash on and bouncing it behind me, while I lose most of that light in this room, still gives me a better picture:

This gives me what I would call a “flash assist” image:

  • Better light, brighter whites
  • More control over direction of the light
  • Fewer shadows where I do not want them, and softer shadows overall
  • Better control over colour balance
  • “Bright pixels are sharp pixels”.

So why did I take the first picture above?

Simply because my 580EX II flash failed. It fired intermittently Saturday, This is why pros always carry spares: I grabbed my other, second, 580 EX II and put that on my camera instead. The first 580 will have to be retired – a blow, because it’ll cost me more than I earned in the shoot to replace it – but them’s the breaks.


Tell the story

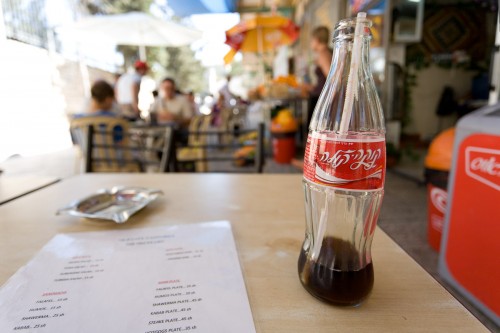
Here’s an image from a 2007 trip to Jerusalem:

Jerusalem 2007 (Photo: Michael Willems)

A typical “B-roll” picture – a picture that helps…

  1. …set the scene – where we are;
  2. Tell something about the environment;
  3. Make the viewer “work it out”;
  4. Provide a visually interesting image.

In this case, elements are: the blurred scene in the background (people eating and drinking, the waiter, the umbrellas); the Hebrew on the coke bottle; the menu including shoarma; the sunny background; and the three-dimensional feeling created by the “close-far” technique.

When you next travel, try to take lots of images like this. You’ll be amazed how much easier it is to tell the story.


Tip of the day

Thinking a little more about yesterday’s post: here’s a suggestion for you.

When you find a setup thart works, or when you pack your bag just the way you like – anything like that, make a one-page cheat sheet for yourself.

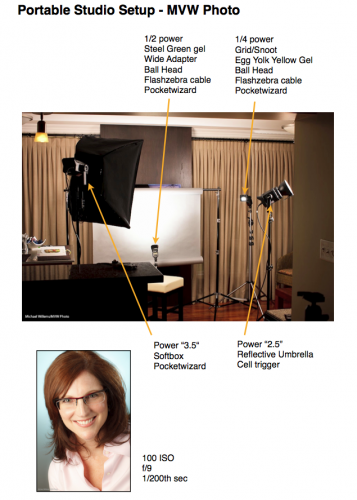
Like mine for the portable studio I showed you yesterday:

Click through to see it as a PDF:

HomeStudio-Small

And of course I have that cheat sheet PDF on my iPad also.

These “recipe” sheets help me or my assistant quickly set up a starting situation, in case I am in a hurry. (OK, I am always in a hurry.) This way, I ensure I do not forget something. I have one for my lighting bag (what goes where), for common lighting situations, and for common shoots.


A simple lighting setup?

What one person finds complicated, another finds simple.

And vice versa. A friend who visited the other night reminded me of this, when I talked about the simple four-flash light setup I was using for a headshot:
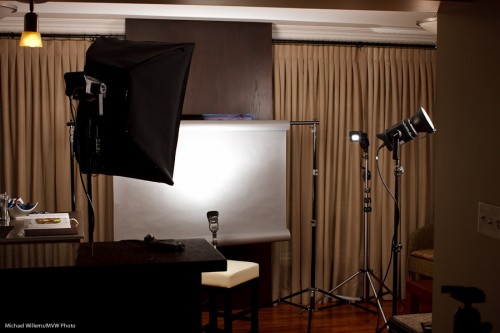
And as he said that, I realized that perhaps it’s not simple.

But if you want to take portraits, then it should be. In other words, without knowing how to do a “traditional” portrait setup, it is hard to do creative portraits. No, that does not mean you need to make all portraits traditional – you can do great stuff with one off-camera speedlight and a grid.

But you need to know how a traditional portrait is made. Which is with:

  1. A backdrop (paper roll, here).
  2. A main, or “key” light, in this case a Bowens strobe with a softbox.
  3. A fill light (Bowens strobe with umbrella, in this case).
  4. A hair light (speedlight with Honl Photo grid and egg yolk yellow gel).
  5. A background light (speedlight with Honl Photo blue-green gel).
  6. A way to drive them: Here, I used one strobe and two speedlights fired by pocketwizards; one strobe by the light-sensitive cell.
  7. Metering: I used light meter to arrive at f/9.0 at 100 ISO and 1/200th second.
  8. Ratios: I set the fill two stops darker than the key. And the hair and background light by trial and error (I got them right first time – done it before).

A note about those gels: colour makes a difference. I love the blue-green gel on the background, to contrast with the red hair – contrast is good. That’s why the butcher uses green plastic between the red meat – to make it look redder. (Oh wait – butcher? We buy meat at the supermarket now, in neat little packages. Dumb me.)

Anyhow – parsing makes things simpler. If you are faced with a complex situation, parse it, i.e. take it apart, one thing at a time. Analyse each layer until you understand it, then go on to the next layer. And before you know it, you will be saying “that’s simple”.

That’s what you learn when I teach you: how to make complex situations simple by understanding the elements, then building on those. Deductive learning, if you will.

And what does the setup above produce? Portraits like this:
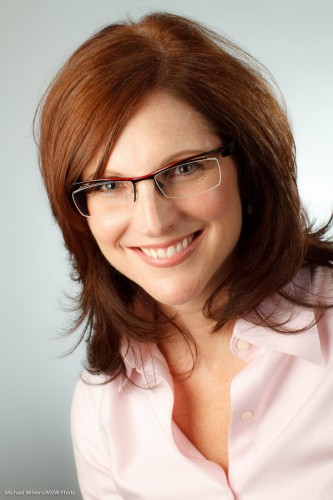
Headshot (Photo: Michael Willems)

(Canon 7D at f/9.0, 1/200th sec, 100 ISO)

A plug, if I may: if you, too, need an updated headshot, and live in the Greater Toronto Area, do call me. For Facebook, your resume, LinkedIn, or your web site: a good headshot helps, and Headshots Specials are on during the month of September!


Golden

I don’t have to tell any of you the best time to take photos, right? Mid-day on a sunny day.

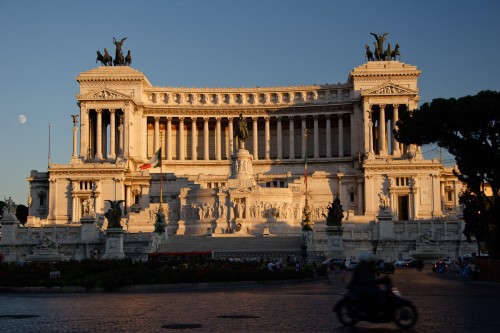
Kidding. Of course what I meant is “the hour before sunset” – or the hour after sunrise, but then I tend to be asleep. The Golden Hour, as we call it.

Piazza Venezia (Photo: Michael Willems)

Around sunset:

  • Light becomes more red since it passes through more atmosphere;
  • The sky gets darker, meaning more saturated (blue rather than blown out white);
  • Light becomes less harsh;
  • Shadows get longer and softer.

To benefit from this, ensure that your camera is set as follows:

  1. White balance – daylight (the sun symbol);
  2. Exposure – not too bright (maybe exposure compensation around -1 stop);
  3. If the shutter speed gets low, ensure you increase ISO or use a tripod.

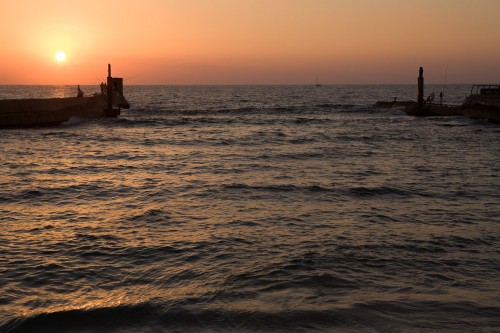
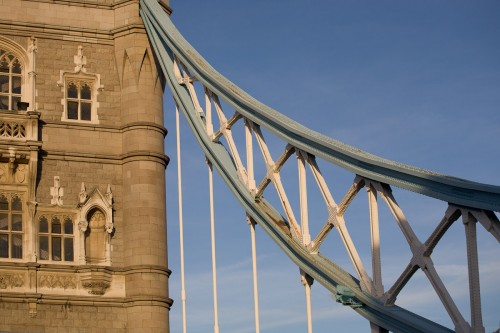
Simple. In Rome, as above, and in Tel Aviv, London and anywhere else you care to shoot. Sometimes it is just as simple as “be there at the right time” rather than “use lots of technique”.

Tel Aviv (Photo: Michael Willems)

Tower Bridge (Photo: Michael Willems)

Of course as you all know, you can also shoot at mid-day – that’s when flash comes in. More about this in many future posts, I can assure you.


Of blinkies, histograms and the dress

In your camera menu, you can enable a view called something like “highlight alerts”. Either by enabling it, or by pressing “DISP” or “INFO” until you see it.

This means that when reviewing, you get to see black and white blinking areas where the image is overexposed. Where it blinks is where it’s over-exposed.

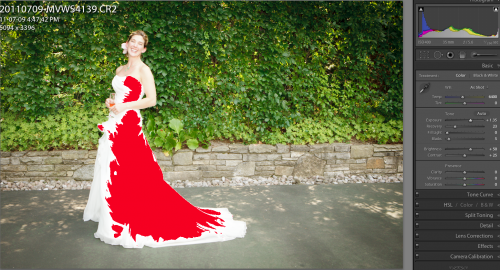
You can also see this in software like Adobe Lightroom (By clicking on the arrow on the right of the histogram, in Lightroom’s case):

Dress (Photo: Michael Willems)

This means the dress is overexposed. All detail is lost on the red area. Bride not happy.

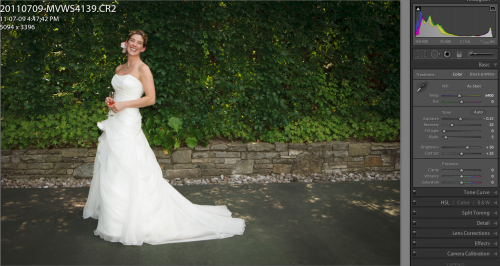
If you had left the camera to itself, it would have perhaps underexposed the dress, especially if it is large in the image:

Dress (Michael Willems)

Not bad, but bride still not happy, because a white dress should be pure, 100% white. Meaning it should edge against overexposing, but only just.

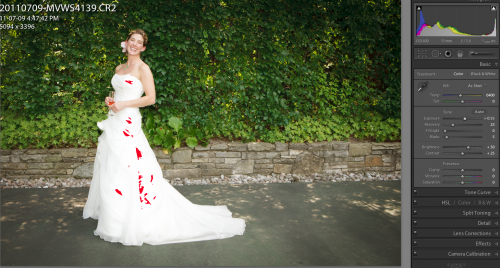
And that is where the blinkies come in. Enable the blinkies, and expose so that the dress is only blinking a little bit, and only just. In Lightroom, that looks like this:

Dress (Photo: Michael Willems)

And that is how you use the blinkies: expose so you see a tiny bit of blinking in the white areas – but only just.

The blinkies and the histogram represent a major contribution to photography – use them, and ace your exposures.