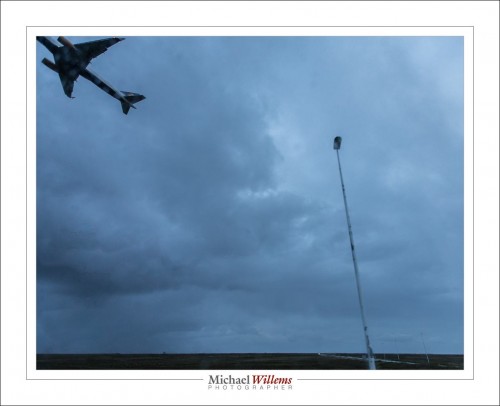
Shadow avoidance

One reason we bounce our flash off the ceiling (behind us) is to avoid those nasty drop shadows, especially the side shadows.

But what if we can’t? If there is no ceiling, perhaps. Or that ceiling is bright red. Or it does not reflect enough light, because it is pitch black. or it is a very high ceiling. What then?

Then we can use many other means, like reflectors. Or off camera flash, with modifiers. Or a ring flash. Or we simply ask the subject to move to where it is possible (d’oh!).

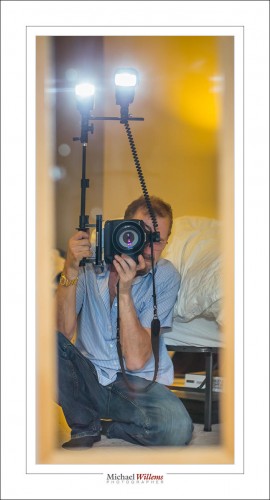
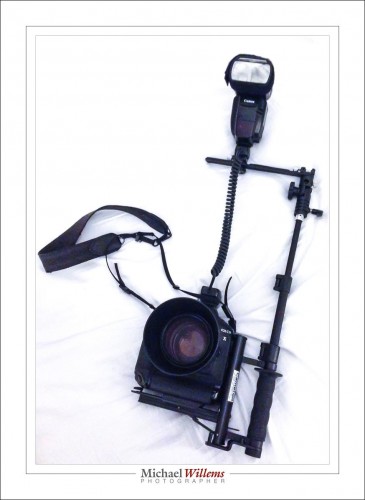
There is one more option, one I have not discussed before: we use a bracket to move the flash away from the camera and keep it above. Like this Cameron V-H Flip bracket (marketed under various names):

It has some pretty good features:

  • It moves the flashes away from the camera, see the extending pole. Up to 28″ above, and this means that there will be less shadow and no red-eye.
  • It keeps the flash(es) directly above the lens, so any remaining shadows will not be side shadows.
  • It can fit two or even three flashes.
  • It swivels, to keep the flash where it is while the camera turns 90 degrees (but note, it turns the wrong way, which is awkward. I would not want to use this bracket for a lot of vertical shots).
  • And unexpectedly, this bracket can use a small umbrella. You’ll look funny, but oh boy, the light you will get!

While bouncing, or off-camera flash with modifiers, is generally still better, this solution can work well:

Best of all, it can hold two (or even three) flashes:

Now we get extra light, plus the light from one flash can almost eliminate the shadow from the other.

That doesn’t look like a “direct flash:” photo, does it? And beauty pictures, with a small modifier, seem another obvious candidate (“butterfly lighting”).

The moral of today’s post: There are many ways to use flash, and there are many ways to use it well. A bracket is one of those ways. Not the be-all and end-all of flash; just one more cool tool that can sometimes lead to fabulous pictures.


___

Footnote: Have you considered really learning flash? Worth every hour—and dollar—that you invest in it. See learning.photography for a good option. And don’t forget to order the flash manual now. You’ll know the secrets the great pros know; and more importantly, you’ll be able to use them.

 

Deep.

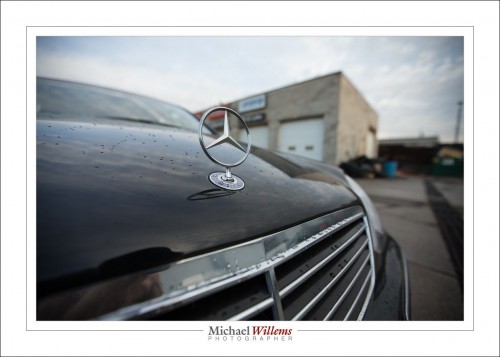
Deep. As in, “this photo has depth”:

One of my cars, outside the mechanic’s yesterday.

So how do you get depth? You know!

  1. Have a close-by object (we call this: “Close-Far”);
  2. Have diagonal lines in the image (the foreground needs lines or texture, preferably)
  3. Use a wide angle lens.

The wide angle lens facilitates 1 and 2, and also has two other advantages: it is easy to get everything sharp if you wish (here, I did not wish); and it is easy to shoot at show shutter speeds.

So pack your 16-35 lens if you have a full frame camera, or your 10-20 or similar if you have a crop body, and go shoot some depth pictures.


REMINDER: Have you thought of a training gift certificate for a private custom lesson with me as a gift for this coming season? A gift which is not only fun, but leads to your loved one making better family photos. And you’re done with shopping immediately. So everyone’s a winner. Go to http://learning.photography to order your gift certificate now.


Tapetum lucidum

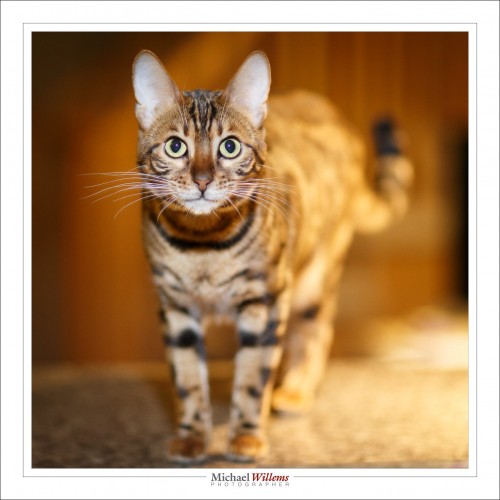
Cats do not usually have that annoying “red-eye” effect…

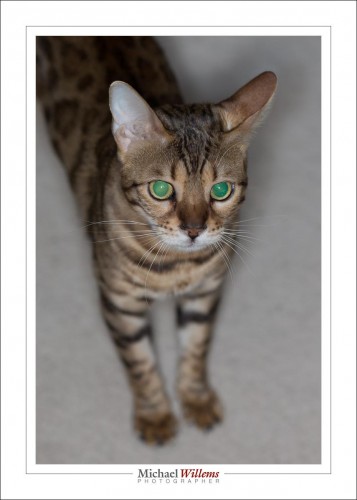
…but they do have green-eye (or white-eye, blue-eye: anything but red.) Why?

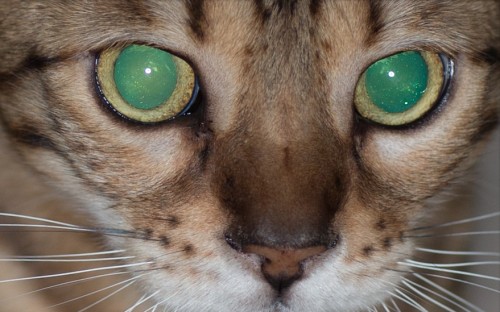
Because they have a layer of reflective cells, right behind the retina. The “tapetum lucidum” (bright carpet) helps them make the most of whatever little amount of light there may be, as they hunt for mice in the pitch dark desert. It is because of the tapetum lucidum that cats can see more than humans in the dark.

Here’s a close up:

So that’s why cats have “green-eye” instead of red-eye, when you shine a light (like a flash) into their eyes. And it is especially in the dark, when their eyes are open to the fullest extent (when, as you see, they have huge pupils), that this shows.

Note that Lightroom’s “red eye removal” tool does not work on green-eye. Best to avoid it in the first place, then; and the way to avoid it is to avoid shooting with the flash near the lens, especially in the dark. No pop-up flashes for kitty!


A small, important detail

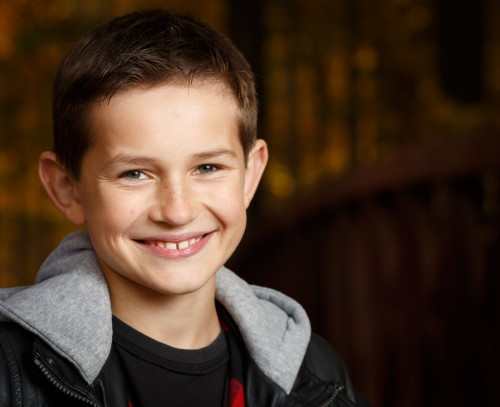
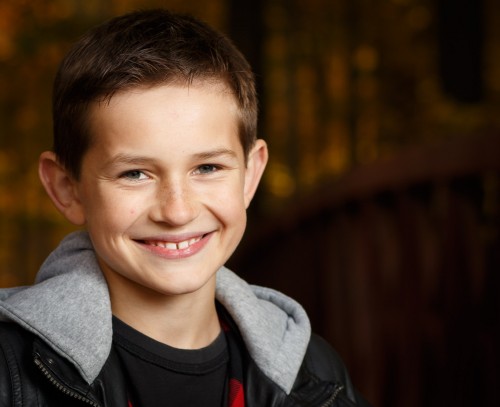
The catch light in someone’s eyes are essential: no catch lights, no portrait. And that catch light needs to be not in the centre, as when you use a pop-up flash (can you spell “deer in the headlights”?), but in the upper left corner, or the upper right corner, of the eye (in the “10 o’clock position” or in the “2 o’clock position”). Like here:

If you do not have a catch light showing in at least one eye, the subject lacks that little “sparkle of life”, and looks strangely lifeless.

Your catch light usually comes from your main light source, whatever it is. And “whatever it is” is important, because it affects the picture.

Take, for instance, a beauty dish, which like an umbrella gives you a circular catch light (albeit with a slight dot in the middle):

A reflected umbrella would be a white circle with a big black blob in the centre (the flash). That looks odd, which is why I prefer to shoot through an umbrella.Whatevery you do, make sure

Or take a softbox, which, like a window when you use available light, results in a square catch light:

The moral is: in portraits, ensure that there is a catch light, that it looks good, and that it is somewhere in the upper half of the eye. Preferably, if you can., in both eyes.

Portraits are fun, and yes, there is a lot to be learned.


TIP: Have you thought of a training gift certificate for a private custom lesson with me as a gift for this coming season? A gift which is not only fun, but leads to your loved one making better family photos. And you’re done with shopping immediately. So everyone’s a winner. Go to http://learning.photography to order your gift certificate now.


Manual or TTL?

When making flash pictures, your camera will be on manual mode—I hope so, anyway. It’s the way to go. This means you set ISO, aperture and shutter yourself.

But your flash does not need to be on manual. That is to say, flash power can still be metered and be adjusted by the camera, automatically. We call this “TTL” (Through The Lens metering). And TTL can work even when the camera itself is on manual.

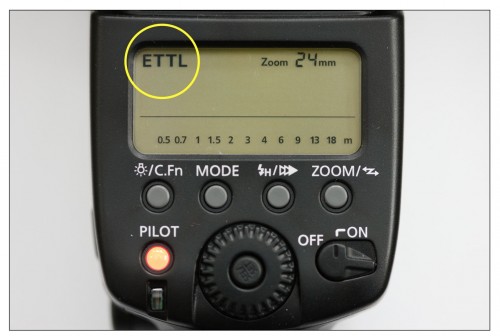
When your flash is in TTL mode, the back looks something like this:

You see TTL, ETTL, TTL-BL, i.e. something containing the letters TTL. This means the flash power is adjusted automatically by the camera. If you are close to something, the flash will fire at low power; if you are far away, a high power flash will be emitted. Magic!

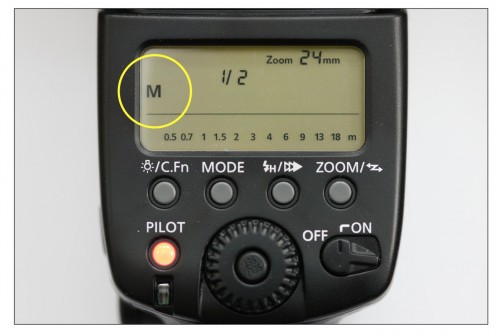
The alternative is that you set the flash power. Manual flash, in other words. Press the MODE button on the back of the flash and set it to Manual:

In the photo above, the flash is set to half power (1/2). It could also be set to full power (100%, or 1/1), or to quarter power (1/4), or one eight power (1/8), one sixteenth (1/16), and so on; or to some level in between.

Try this now. Set your camera to manual mode, 1/40 second, 400 ISO, f/4. Now turn on your flash and set it to manual, and set it to 1/64 power. Using the viewfinder, take a photo. Check the photo: You will probably be hard pressed to see the flash, especially if your subject is far away.

Now set it to full power (1/1, or 100%). Do the same again. Whew, probably a grossly overexposed picture!

But you probably noticed something else. You did not see the flash through the viewfinder. “Did it work?”, you may well have asked. That is because when the flash is on manual, it fires just once, at the power level you set. You do not get the metering pre-flash that it uses when set to TTL mode (a flash at 1/32 power that is used to determine the needed power level). And that preflash is the one you can see through the viewfinder. The actual flash you cannot see!

Now, an exercise.

  1. Find an object to photograph. With the camera set as before, and the flash on MANUAL, find the correct power level for a good picture. Aim the flash straight ahead for this exercise.
  2. Now move 40% farther from the object. E.g. if your original distance was one metre, make it 1.4 metres. Or if you were 4 feet away, make it 5 feet 7 inches (that is 40% farther than 4 feet).
  3. Now find the correct power level for this picture. How much more power did you need? And (an advanced question for mathematicians): why? (Hint: it’s actually 41.4% farther).

Have fun.


Easy way out?

The Easy Way Out Is Not The Right Way.

I just read a post on a Facebook group from a photographer who is about to shoot portraits at a wedding, in a photo booth. She has two softboxes, two flashes, and a camera and a few triggers, and her question was basically “I have no idea what to set the camera and all these other things to, and it is so confusing”.

This is a good example of trying to take the easy way out, and it is seldom a good way. Things do not come that easy. Her question sounds to me like “I bought an airplane and I need to fly it to Sydney but I have no idea what all these meters and levers and dials do, but I don’t want to read a book”. This sounds almost insulting to those of us who did take the trouble to actually learn stuff.

Guess what: you will have to read a book, and take some lessons.  Trying to shoot professionally while not knowing even the basic facts gives photographers a bad name.

I see this in students sometimes: the “but but but syndrome”, I like to call it. “I can’t learn this”. “Yes you can”. “But but but…”, and every further argument or fact or attempt to help is answered by a “but but but”. This is someone who “just wants it to be easy”.

Well, guess what. Yes, you can learn this. Everyone can. But yes, you will need to learn things, like the workings of aperture, shutter, and ISO; the inverse square law; flash power settings; shutter limitations when using flash; balancing ambient and flash; how modifiers work; and a whole lot more. Just like to fly an airplane, you do need to know how all the levers and handles and switches work.

B737 flight deck

The good news: flash is simpler than a B737 flight deck.

The bad news: you do have to learn it, and some of the theory behind it. Here are the easy ways:

  • Go to http://learning.photography/collections/books and buy the Pro Flash Manual, and if necessary, the “Mastering Your Camera” manual. These are non-DRM PDF files, i.e. you can read them on any computer, pad, phone or similar, and you can carry them with you for convenience. They will teach you everything, There is no excuse for “not knowing things”.
  • Then take a course (email me on michael@mvwphoto.com to arrange a date/subject).
  • Read this daily blog, here on www.speedlighter.ca
  • Then do all the exercises mentioned in the above resources.

“But I don’t learn that way; I don’t learn from reading. I need to be hands on.”

Yeah, sure, and the books are full of practice. But just like Pythagoras’s Theorem, Shakespeare, Brain Surgery, or Quantum Electrodynamics, it does start with reading. Sorry. The cold, hard, realities of life. trust me on this: I know how people learn. You will learn this.

“But I don’t do math.”

Some minimal math is needed, just like when you go to your local supermarket. When you hand the cashier a $100 note for a quart of milk and she hands you back 23 cents, you do not say “that’s OK, because I don’t do math”, do you? No—you smile at her, hold out your hand insistently, and say “and the rest?”

“But my friend just presses buttons.”

Sure, I can come set up your camera and flashes and you can just press buttons, Sears “minimum wage” style. But what will you do when something goes wrong? Or the batteries run out? Or you need to change cameras? Or you need to shoot in a different room? You need to know what you are doing.

And by the way, it is not confusing. Here, then, since you asked:

  • Camera on manual exposure mode (“M”).
  • Set it to 200 ISO, 1/125 sec, f/8. (no auto ISO!)
  • Flashes on manual mode, 1/4 power.
  • Picture too dark? increase flash power or bring flashes closer to subject. Picture too bright? decrease flash power or move flashes away from subject.
  • If you have these settings, then trigger on camera is on TRANSMIT/REMOTE; triggers on flashes are on RECEIVE/LOCAL.

That’s all. Not complicated at all. But to see that it is not complicated, and to see why I recommend those particular settings, you do need to know the background. Otherwise flashes will always seem like that B737 flight deck.

PS: the photographer who asked the question did, I am sure, do lots of re4search. I am arguing not against her, but against other who do not do the research. All too common.

Basics.

I notice that sometimes, students do not want to ask basic questions. Well, my message is clear: do not worry. Ask.

A student recently had half completed a course and still did not know how to change the “f-number”. (Hint: on small cameras you may need to press and hold the diaphragm button while you turn the wheel).

So today, a basic basic point: aperture.

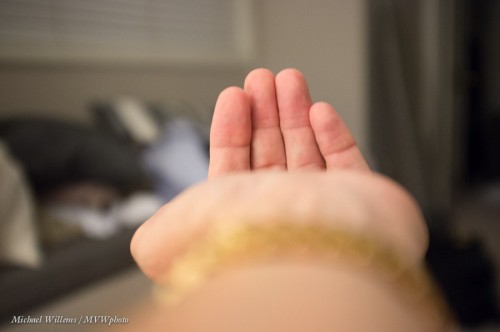
Here’s a photo taken at f/2. I focused on the hand:

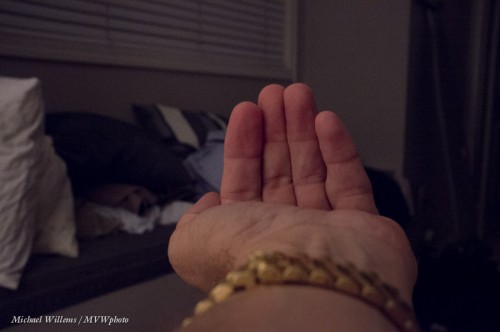
And now I do it again, this time at f/8 (all other settings are the same). Again, I focused on the hand. The image now looks like this:

We see the following:

  1. I focused on the hand, so the hand is sharp in both cases.
  2. In photo 2. f/8 is a higher f–number, but the photo is darker; hence a higher f-number means a smaller opening (“aperture”) in the lens.
  3. In photo 2, the background and foreground are sharper. In photo 1, it is blurry. So, all other things being equal, a lower f–number means a blurrier background.

You need to understand these basics and be fully familiar with them.

So, a low number like f/2.2 at close distance gives you this: a great blurred background.

To make things easy, the camera was in manual mode for all these shots.

Q: The second shot has a sharper background, which conceivably is what I wanted; but it is darker, which is not what I wanted. How could I have fixed this latter problem?

Experiment with aspect ratios

Your camera produces an image in the aspect ratio 3:2 (or 4:3, if you use a four-thirds camera). But why not let go of that, and use your own ratios?

Like square.

Or like wide.

Or odd-shaped.

I am a firm believer in “make the picture whatever shape you think fits the picture best”. Not “whatever the frame-makers in China or the paper-makers in Switzerland have decided for you”. Make the picture the way you like, and then cut white edges off paper, and have custom frames made.

On that note: no, you cannot print a 4:3, say, on 3:2 paper without either cropping the picture or cutting off white edges. It’s the reality of life.

I have found that often, people do not understand this: “yes but I want my 4:3 picture to fit on this 8:10 paper and no, I won;t accept cropping or white edges”. Well, here’s news: you have to. To understand why, imagine you have a square picture. Try fitting that on an 8×10 piece of paper, and now you will see why it cannot be done. So you either crop to the paper aspect ratio prior to printing (Lightroom is very good at that), or you print with white edges, which you then cut off. It’s one of those “it is what it is” things.