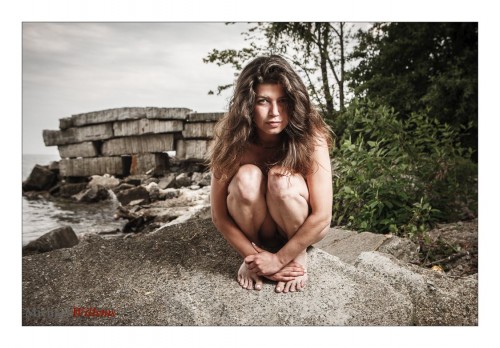
150 for 5

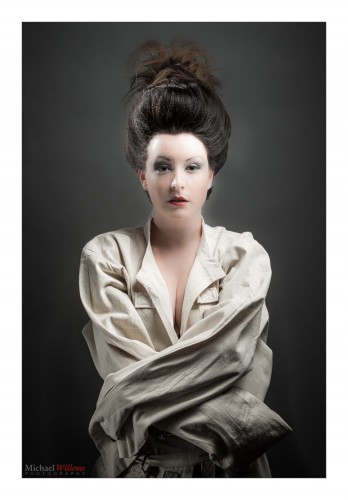
When I shoot a shoot like this – special hairdos – how many images do I shoot?

As so often.. it depends. I wanted various expressions to choose from, so I shot 150 images to get these 5 hairdos down. Then I selected just 10 (2 for each hairdo) to show the client, including the above and this:

After that, I usually await a final choice to do the final edit on those final choices only.

But do note that all 1590 images were technically good (except 3 blinkers) – that’s the beauty of studio-style shooting (100 ISO, f/5.6, 1/125th sec).


Decisions and cats.

Every image you make involves decisions – you decide how to expose. Aperture, shutter, and ISO.

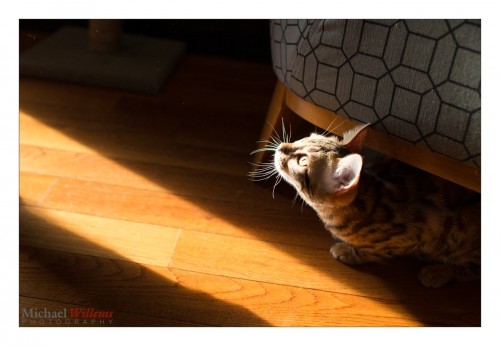
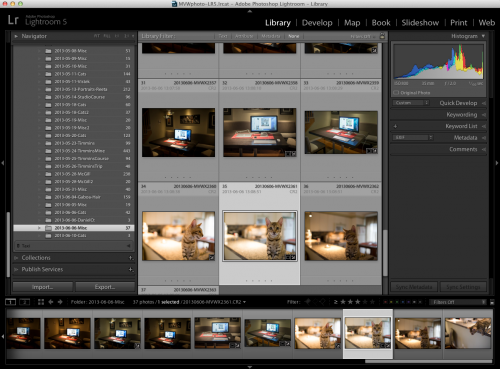
Cats – f/2.8, 1/125th sec, 1600 ISO (45mm)

The first decision here was f/2.8, to allow in enough light and to get selective depth of field. Then I needed a fast enough shutter speed, and that led to the 1600 ISO.

Cats – f/4, 1/200th sec, 1600 ISO (45mm)

The first decision here was f/4, to get a little more depth of field. Then I needed a fast enough shutter speed, and that led to the 1600 ISO.

And finally, one more cat:

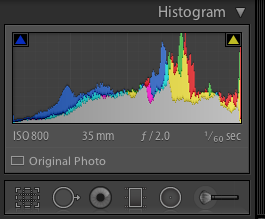
Cats – f/2.8, 1/60th sec, 1600 ISO (45mm)

This time, I lowered the shutter speed, because I did not want to go beyond 1600 ISO.

So as you see, every snap involves decisions; deliberate decisions about aperture, shutter and ISO, that make your picture into what it is.

___

The Father’s Day Special is still on: book training by tomorrow evening and pay a deposit, and get 35% off regular cost. Email or call me if you want to take advantage of this offer!


Back to basics

One thing I notice is that often, even working photographers get focus wrong. So let me go back to basics with you today. Focus basics.

There are two focus “settings”: where to focus and how to focus. Today, where to focus.

In the basic “auto” modes, you let the camera choose. You see all focus areas (all three, or all 9, or all 11, or all 42 – depends on your camera) and when you press the shutter halfway, the camera indicates which ones it uses.

These are the ones that have a close object. So you would get this:

But is that clever? Surely you should choose? Perhaps you want this, instead?

That can only be done if you:

  1. Select one focus point (read your camera manual if you need help doing that)
  2. Aim that focus point at the subject you want to have sharp
  3. Press half way down (you will hear a beep, if you haven’t disabled the beep)
  4. While holding the button half way down, recompose, if you like
  5. Press the shutter all the way down to take the image.

This is how you shoot most of the time. Letting the camera choose where to focus is not a great idea. It does not have a brain, and even if it did, it wouldn’t be your brain.  And no, “more focus points” does not mean “greater depth of field, i.e. more focus”! It merely means “camera gets to choose”.

So go set your camera to one focus point pronto!


Lens Choices Matter

Look at this Lake Ontario Shot from last year:

Not bad eh. You can see, I trust, that I used a wide-angle lens. 16mm on a full frame camera – you get that “wrap around” feeling.

Now look closely at the boat in the bottom right corner. See it?

Then let’s replace the wide angle lens with a 200mm telephoto lens on a crop camera (meaning, 320mm effectively). And aim at that boat.

Now I get a very different shot:

That difference should alert you to the fact that a different lens gives you a different world.


Lightroom 5

Lightroom 5 (formally known as “Adobe Photoshop Lightroom 5”) has been released. I downloaded the $79 upgrade and converted my catalogs, and here’s my feedback so far.


A reminder: Lightroom is a tool that does asset management, photo editing, book and slideshow creating, printing, and much more: It is the tool for pros and serious amateurs alike.

First, the conversion takes time – much time. The computer seems to be doing nothing but in fact it is working. Just wait – it took me three hours, and might take you many hours more. It’ll get there. Just wait.

New features: lots of little ones; purportedly also many inside (‘better math”).  And some you see.

See a new tool there?

The ones that stand out for me are:

  • The healing tool can now be any shape you like. But note, pressing down COMMAND (or Control or a PC) .
  • The lens correction tool now does auto perspective correction.
  • There is a new “Radial Filter” tool that allows me to apply changes inside (or outside) any oval shape anywhere.
  • Lightroom supports “Smart Previews”, which allow you to edit even while your original images are not connected (e.g. they are on a disconnected hard drive). This is a new option in the IMPORT screen, too. Neat.

There’s no doubt a lot more, but these are enough to justify the upgrade if you rely on Lightroom, as I do, and as many, many amateur and pro photographers do. If you have not yet used Lightroom, please do give it a try.

And use the shortcuts to be really productive!

Like these:

  • Q for healing tool
  • H for hide/ for move sample point
  • Shift after click to hold and view fix
  • F for full screen (and shift-F to getthe “old” behaviour)
  • E loop view toggle
  • S softproof toggle
  • Y before/after toggle
  • R see crop toolo see overlays (from a choice)
  • Z zoom view toggle

…there’s so many more, and the menus tellyou what those are. I recommend you learn these – Lightroom is all about productivity. After all, we all want to be shooting, not editing!

Tomorrow, I feel like some more shooting: we are expecting nice weather here, which means tough but very rewarding shooting.  And that’s what we do, right?

___

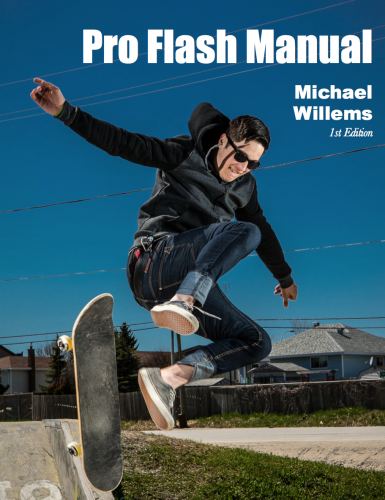
The “Pro Flash Manual” is out: have you had a look yet? Flash photography rocks – once you know how it works!


BOOKS

Today, a note or two about books. In particular, how useful are they for learning?

The right books are very useful, especially when combined with three essential elements:

  1. Time
  2. Practice
  3. Personal instruction

You need time to grasp and absorb concepts. The “aha-erlebnis” moment does not come immediately. So read, and re-read, and come back to the same spot again, and things will click into place. Especially when you practice, which in digital photography is easy and affordable. And finally, when you combine with personal instruction, which is essential in complex fields. That’s why at university we do all three: read, repeat, practice, and attend lectures, tutorials, and labs.  Just one won’t do it.

Hence my combining all of these, too. My two books:

http://www.michaelwillems.ca/Buy_Book.html

If you have not yet obtained them, I suggest that if the subjects interest you, you purchase and download the books now. But then combine with lots of practice, and if possible, with interaction. See http://cameratraining.ca/Schedule.html – all these are now open (the links will be provided shortly, or you can call or email me).

My books have ISBN numbers. For me as a Canadian, obtaining one is easier than for most. In most countries, getting an ISBN is complicated and needs you to pay. In Canada, it is done online, and is free. And an ISBN is important in books, I think.

But selling books? That’s complicated. The large sellers (Amazon, Apple, Google) need you to jump though hoops. Apple needs you to get an IRS ID and hence, presumably file US taxes for the rest of your life. Amazon imposes a format that is not suitable for most readers. And so on. Plus, all these take a large part of the revenue.

So I have decided to sell my own. It means my market is smaller (people who know of me). But it also means your price is lower (competing authors sell for two, three times more) and I can provide more service. For example, my books are DRM-free – meaning:

  • They have no Digital Rights Management to restrict what you can do. You can copy to any device, no registration needed.  I happen to trust my readers.
  • If after reading, anything is not clear, email me and I shall respond! How many authors can promise this?

Question for you. What subjects would you like me to cover next in book form? Camera basics? Macro? Travel? Portraits? Any number of subjects occur – I am interested in hearing your viewpoint!

In the mean time, I recommend you go buy a photography book now (mine, or anyone’s). And read, re-read, absorb, practice, integrate!

Now off to upgrade Lightroom to version 5, which was just released.


Mail List

Those of you who did NOT receive my mailing yesterday about the new e-book: I send occasional information emails. No more than a couple per month, and they contain info about new products, new courses, special deals, tips and tricks. If you did not get the mail yesterday, and you would like to, sign up here!

(Note: you can always unsign, and I will never sell or share my list with others.)

It’s not for me to say!

Some of you are amateurs, and some are pros, and some would like to be pros. And when I say “pros”, I mean not “people who know how to make photos” (many hobbyists are good shooters), but “people who engage in photography for a living”.
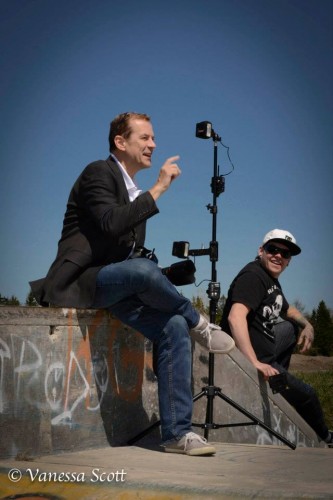
Teaching in Timmins

Michael Willems Teaching in Timmins

“Should I go into business?”, people ask me.

That is becoming very difficult. There are many reasons for this: everyone has a camera now. iPhones make acceptable pictures. The perception is that if you have a big camera, you know how to make pictures. And that cameras “do it all, automatically” now. And Uncle Fred will work 48 hours for credit, for no pay. As a result, photographers who shoot for a living are having trouble getting paying clients. Or are getting laid off.

But there is another reason, too. Many of us are afraid to ask for proper money.

Take an on-location family portrait. It will take me at least five hours to do one – counting the hours spent packing, driving, setting up, shooting, taking down, driving, loading, editing, exporting, making USB keys, billing, and so on. Five hours at my hourly rate of $125 is $625, plus tax. Now perhaps I can cut corners, do it more quickly, and include less, but it’ll still be hundreds of dollars.

When I recently had a client query, the lady thought it was “disgusting” that this would cost a few hundred dollars. I have been told “ripoff” to my face more than once. A certain PR company last year asked me to do food shots in a restaurant: budget: $50 (my price was around $2,000).  The sad thing is that they got someone to do it for that $50. Not well, I am sure, and undoubtedly he will have had to spend the same hours I did, or more, but he was perhaps a hobbyist delighted to be “given credit”. I have been asked for family pictures four times this month; each time, after cost is discussed, the potential client has gone away never to return. The perception seems to be that a family shoot should cost $100, and prints $1 each. Instead, it’s more like here, and those prices certainly don’t make a photographer rich.

Now let’s compare. A car service costs me hundreds or thousands of dollars for a few hours work. I went to a vet yesterday with my cats: time taken by vet and staff perhaps half an hour, of which perhaps half was vet time; cost: $183.06. See a plumber or a psychologist or a dental hygienist, and it will cost you hundreds of dollars. No-one argues or complains or shouts “ripoff”.

Much of the problem is with photographers themselves. New photographers, who will “do it for credit”, and photographers who are unable to explain the value of their work. I have as much value as the vet. Value is simply a measure of expressing scarcity, of course, and what I provide is scarce:

  • Extensive knowledge.
  • Years of experience.
  • Creative insight and ability.
  • Extensive problem solving ability.
  • $30,000 of equipment.
  • Fast lenses, not consumer lenses.
  • Fast, water-sealed cameras.
  • Six speedlights and four studio strobes, not “a flash”.
  • A car full of accessories.
  • Business ability (contracts, invoices, and so on).
  • Reliability.
  • Computer equipment, software and skills.
  • Printing ability and skills.
  • Speedy delivery.
  • People skills.
  • Spares for everything.

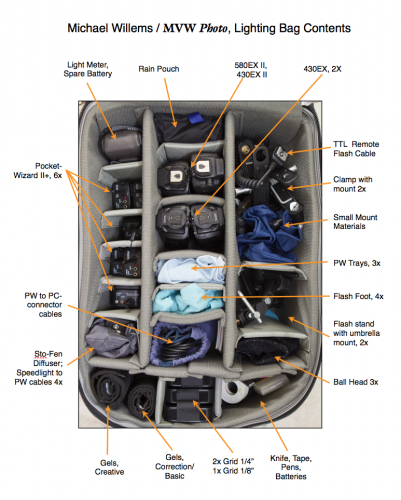
…the list goes on. Here, this is just my flash accessories bag:
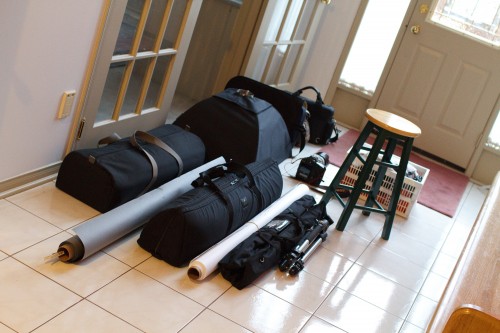
And here’s part of the location shoot equipment to be packed before a shoot:
So what I provide is scarce, and hence I will not do work for less than a reasonable hourly fee, and I expect there is still a market of people who will pay that reasonable fee.
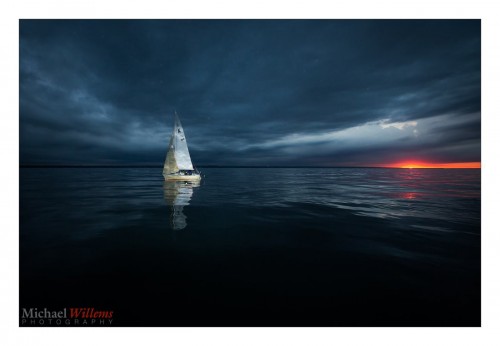
But if we are not good at explaining the value we provide, I fear professional photography will die.  The picture above was taken at a yacht club, where I spent many weeks making great pictures: I figured people who can afford hundreds of thousands for a boat can afford a few hundred dollar for a large, handmade, permanent artistic print to look at during our long Canadian winters. Alas, only one yacht owner bought a print, and at a discount. Many of you will have said “amazing picture” when seeing the shot above. Liking a picture is fine, but if that liking does not translate into paying, the liking means very little.

The result is simple: as a society, we will no longer have artistic pictures of our boats or our families. Instead, we will have many iPhone snapshots. That is a huge artistic loss, but it is not for me to say whether overall this is good or bad. Many photographers complain; blame society; blame Uncle Fred; blame new photographers for ‘spoiling the market’. But I think these blame games are not productive.

Instead, new photographers, you need to find your niche. For me, I will simply use my skills for those who do see the value, and I will teach, and write (that way, at least society keeps some skills alive).  Making quality shots for people who know quality, and teaching and writing, are very rewarding. As are family shoots and weddings, including destination weddings.

So, Oakville and world: I am open for business! You will not get $2 prints or $100 half-day shoots; but you will get efficiency, enthusiasm. artistic work, inspired teaching, and above all: world-class quality in all I do.

Learn Pro Flash – Buy The All-New e-Book!


An interesting day!

Today marked the release of my second book – this one on Flash Photography.

In many ways this is an opus magnum: it is my main area of special expertise, and I spent years thinking about how to teach this most effectively. And how to compress a world of knowledge into 123 pages. I think I succeeded. Sales have been good, which I am delighted about, because so many more people will learn how to use their flash.

Here’s the link. And there’s a discount if you get both books. Let me know what you think.

Why flash? Because it is a way to control light. There is no such thing as “flash photography”, really: there is just “photography including flash”.

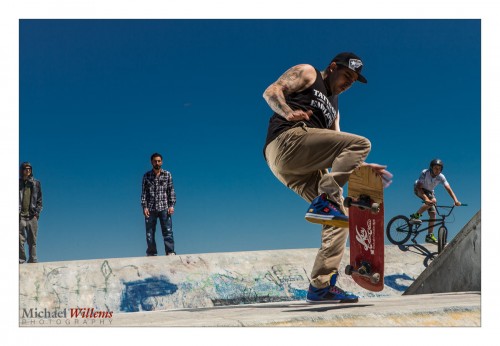
A picture like the one below looks like it is all Photoshop. In fact, the post editing was minimal: desaturation, and a little clarity. The rest is simply this: the use of an off-camera flash on our right into an umbrella. That allowed me to make the background darker and hence, saturated, so the model looks three-dimensional and “real”.

The technique is really rather simple, once you know it. Here’s your checklist:

  • Camera set to Manual mode.
  • 100 ISO.
  • 1/250th second.
  • Aperture as needed to get an exposure of “minus 1 – minus 2 stops” on the meter (f/8-f/13 depending on how bright it is outside).
  • Use an off-camera flash – your on-camera flash, if present, should do nothing except tell the off-camera flash what to do.

That’s all, and now you get wonderful light, and plenty of modeling – meaning, objects take on a three-dimensional shape. Without flash, this would simply not be possible.

And that is just one lesson from the book. Learning flash, however you do it, makes sense: if you prefer available light, I suggest you try techniques like this, and then you tell me which light you prefer. Saying “I don’t use flash” is like saying “I like to a priori restrict my light opportunities”.