Myths

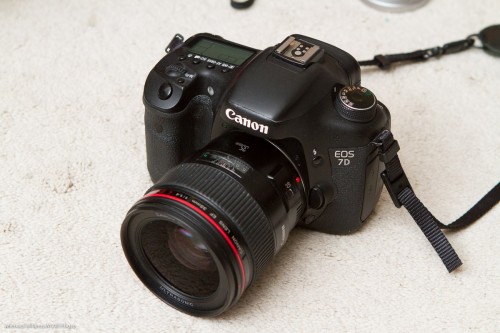
Canon myth: The Canon 7D (the original one) has the name of being not great at high ISO values. High is 800 or above.

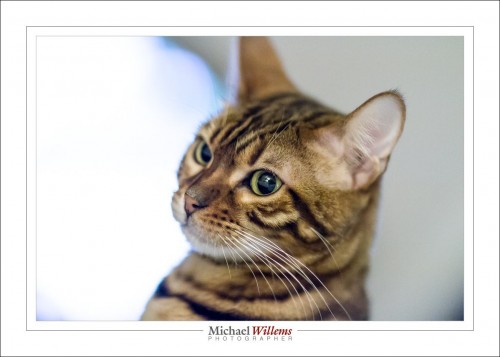
Well… depends. This is pretty good, at 2,000 ISO:

Isn’t it? That’s what an f/1.2 lens will do. That is 1/125 sec, 2000 ISO, f/1.2. Handheld. And a little noise cancellation. Taken just now in available dark bedroom light.
Lightroom Myth: Lightroom has the name of not being very able. You can’t do this on it, for instance:

Except I just did. Not that I know why I would want to.

Anyway, my point is: when you look a little deeper, often these “truths” are just not true.

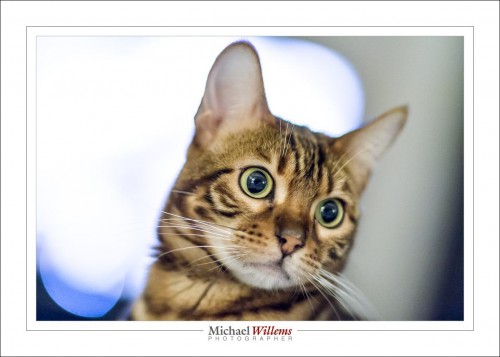
And I leave you with another cat picture. Because.


Shopping Recommendations

A few Shopping Recommendations here for you today. Read on, because some of them can be advantageous to you.

First: someone asked me for a good framer in the region. I forget who it was who asked, but here you go: Don Corby, of Corby Framing in Freelton (www.corbyframing.ca, 905-689-1976). Tell him I sent you. He does a great job with custom frames and affordably. Please print and frame your photos. Please!

Then, printing. As I have said many times here: please, please, please print your work. You will avoid losing it. It will look better, and you will feel much better about your skills and your art. Made into wall art your work will be much more valuable. For prints up to 13×19″ use a Canon Picma Pro or 9500 Mark II. For larger prints, use Fotobox in Etobicoke. These guys and what they do are amazing. Al my large metallic prints are theirs. Top work for a very affordable price. Again, tell them I sent you.

Then, shopping! I recommend you buy here: Henry’s in Oakville (ask for Rob, manager) or Vistek, in Mississauga or Toronto. Go to these guys every time over the big box stores, and tell them I sent you. They will take care of you with great selections, the latest stuff, and excellent product and market knowledge. They will sell you only what you need, not what gives them most commission. They’re like me: they want customers, not sales.

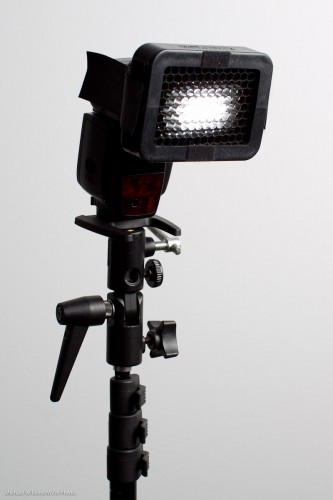
Finally, flash modifiers. Honl, honl, and Honl again. I have waxed lyrical over these small flash modifiers forever: not because David Honl is a friend of mine, but because his modifiers are small, light, sturdy and affordable, and that is an unbeatable combination for a photojournalist and for anyone else except masochists who like to carry more and pay more. Dave has joined me in teaching flash in Phoenix, Las Vegas, and Toronto, and he has agreed to put together special kits and to give you a 10% discount on any order if you, as a reader of speedlighter.ca and/or one of my students, order direct from him by using this link (click here) (or simply click on the Honl Photo ad on this page), and use discount code willems. 10% off on gear that is already affordable and that is the key to unlocking small flash success: what’s not to like? I strongly recommend this. There’s the grid, pictured here; the gels; the unique gell rollups; the speed snoot, the reflectors, the small softboxes: with these tools, small flashes effortlessly and quickly become flexible creative tools. I have a carrying case full of them, and you’ve seen my work: need I say more? Even in my studio I often use small flashes now, rather than strobes. The hair light is always a small flash with a speed snoot, for instance.
End note: I only make recommendations I strongly believe in; “for these, I would put my hand into the fire”, as the Dutch would say. The vendors and tools I recommend will help you become a better photographer, or will help you get more out of your work. Promise.

 

Lenses, Lenses everywhere, and nary a shot to take.

OK, weak joke, I know. But it is true that I feel like that: I sit here tonight surrounded by lenses instead of being out shooting. And not just me: lenses tend to take up a lot of a photographer’s time. What lens? Prime or zoom? Wide range or narrow range, more specialized?

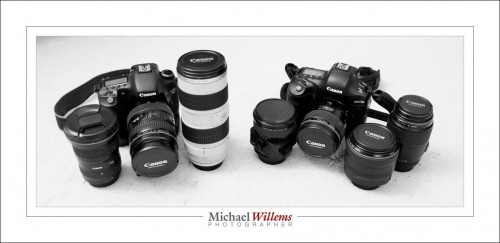
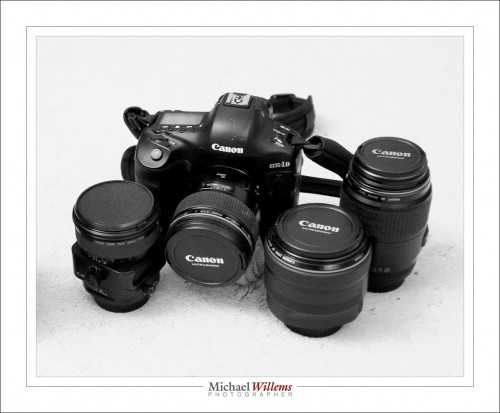
Most photojournalists would like roughly the same list of lenses in order to be able to handle everything. I think I am pretty close. Here are my lenses as they sit here in front of me:

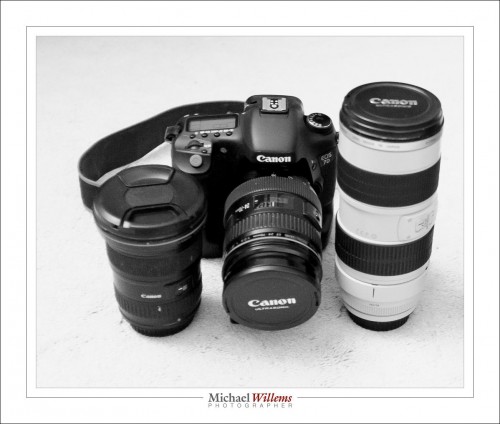
On the left, my zoom lenses. You use a zoom when you need convenience, when you have little time for lens changes, when you need various focal lengths, when you aren’t sure what you will be needing: in short, zooms are for flexibility. Professional zooms are f/2.8 lenses, for the most, meaning they will go down to an f-number of 2.8 whether you zoom in or out (ass opposed to consumer lenses, which generally go down to f/3.5 when zoomed out, and f/5.6 when zoomed in).

My zooms are:

You will see:

  • 16-35 f/2.8
  • 24-70 f/2.8
  • 70-200 f/2.8

A nice wide range: because of my two cameras, one of which is a crop, the range is effectively from 16 to 320mm (200mm on the crop camera works like 320mm). None of these are “one lens does it all” lenses: these are a compromise. For quality, choose whether your lens is a wide angle or a telephoto. It cannot be both, if it is to be good.

Then my prime lenses:

I have four primes:

  • 35mm f/1.4 (on the camera)
  • 45mm f/2.8 Tilt-Shift (left)
  • 85mm f/1.2 (second from right)
  • 100mm f/2.8 macro (right).

You use primes when you do not need the flexibility of a zoom, or when you need specialist lenses like a tilt-shift or a macro. In return for that, you get other benefits. A major one for many prime lenses is larger apertures: f/1.4 gives you both blurry backgrounds and faster shutter speeds. Another benefit is quality: fewer lens elements means sharper pictures. And, last but not least: consistency. The look and feel and composition of each shoot is the same.

Do we all need all of those lenses? Of course not. But now you know where you start saving. And especially: you learn to use the tools you have to what they were designed for. An f/5.6 lens is just fine-€”but don’t try to use it to shoot a dark event without flash, or to get a super blurry background. As long as you stay within the range of situations a particular lens was designed for, you’re just fine. After all, remember this: an SLR with a cheap kit lens is approximately a godzillion times better than an iPhone.

And the photos above? I took those with my Fujicolor x100 small camera. A point-and-shoot with a fixed 24mm lens (equivalent to 35mm). Just goes to show.


News About Small Modifiers

If, like me, you like David Honl’s range of small flash modifiers, including the Traveller 8 softbox, gels, the speedsnoot, the grids, and many more, you will be happy to read the following: you can order directly from David Honl. Simply follow the link here (or click on the ad on the right, below), and order the special kits and modifiers.

Better still, if you are one of my students, you get 10% off. To hear the code that gets you this discount, just email or call, and ask me. To qualify, all you need is to have been one of my students. Enjoy!


Aha me a riddle

OK, so I set the Nikon camera to the recommended studio setting of 1/125 sec, f/8, 100 ISO, and, using Pocketwizards, set off an off camera flash fitted with an umbrella.

Ouch. So what happened here?

The shutter curtain happened; that’s what. It got in the way; the shutter was not fully open when the photo was taken.

But surely 1/125 is slower than the 1/200 that is possible with this Nikon camera?

Well: in this case once the signal traversed the combination Camera—Pocketwizards—Flash, it was clearly not enough. There is a delay in that path, a delay that is significantly great compared to the flash time. I.e. the camera said “Flash: Fire Now!”; and the flash took its time so that by the time it fired, the shutter was already half closed again.

The solution? Use a slower shutter speed. 1/60 gives us this:

We could also have used a faster path. Perhaps different Pocketwizards, or a cable, or a different flash, or even a different camera would have helped.

Tip: check what your critical shutter speed is, if you use off-camera flash (and you should). make a note of it, and always stay well below it.

___

Notes: Honl Photo special modifier deal coming for readers of www.speedlighter.ca. Also, a Vistek special Speedlighter Kit is in the making. And on March 30, I am a guest presenter on TWIP, Frederick Van Johnson’s excellent This Week in Photo podcast. Things happen fast: Stay tuned!


Mixing is fun.

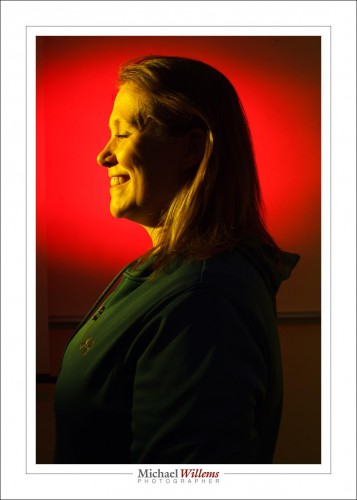
Provided you start with no light, and also that you do not overexpose, you can light up things (subjects, backgrounds, etc) by using gels.

Like here: a red gel for the background, and a yellow gel for the face/front of subject.

But here’s the funny thing. She was wearing a blue top. Blue! And here it shows as green!

That is because blue paint + yellow light = green. Try it. And similarly, try mixing other colours. Try to look up additive and subtractive mixing. Google “colour mixing red green blue” and see whether you can recreate the combinations. And since it’s science, of course you can. But also try to mix other, non primary, colours and see what happens. gels can be a lot of fun!


Back up

Time out for an unusual post!

You know I am always on at you all to back up your data? I also recommend you back up your cameras. Which is why I have more than a few. Cameras break. Memory cards go south. People drop things, including cameras. There is only one way to prevent issues, and that is by having spares for everything.

But there is such a thing as “too much”, and I have too many SLR cameras: one of them, my 7D, is therefore for sale.

If you are interested, let me know. Body only; plus an aftermarket battery grip. Camera has minor normal wear and tear and is in full working order and in great shape. $650.

Tomorrow, back to regular programming.


Launch

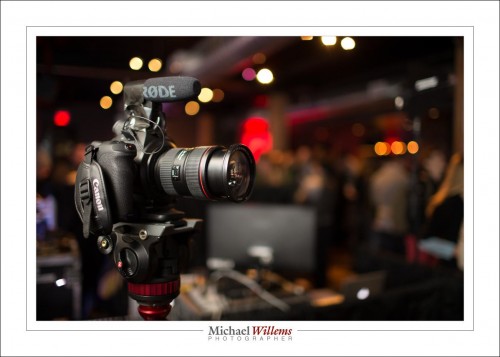
I attended a Canon Canada industry event today: launch of the C100 MkII video camera. Here it is:

(1600 ISO, 1/60 sec, f/1.4, bounced flash).

Hey. Wait. Let’s talk about this shot. Why those particular settings?

  1. It was dark, and bouncing was tough, so the lens will need to be open at f/1.4 to let in enough light. Also, this creates round bokeh background lights, not hexagons. So, aperture done.
  2. I wanted a handheld sharpness guaranteed shutter speed. Say twice the lens focal length. And with a 35mm lens, that means 1/60 second. So, shutter done.
  3. So now I wanted the background to read around -3 stops, or something thereabouts: dark, but not pitch dark; a nice warm glow. My first guess was that 1600 ISO would get me there. If it had not been, I would gave tried other ISO values until done.
  4. White balance to zero. Flash compensation to minus one (the camera is black and the flash is metering off the camera).

That wasn’t so difficult now, was it? And note, I am not saying that my way is the only way. If you have another way of getting to good settings, good for you. But this works for me and you should think about what works for you. And then, and you are probably starting to recognize a theme: practice. practice. practice.


Know your stuff.

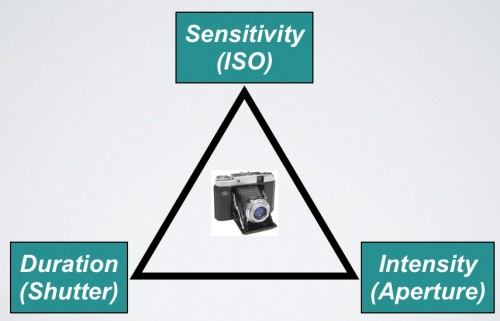
You know the exposure triangle, yes?

They work together. All three of these variable affect exposure (“how bright it is”).

  • For a brighter picture, you go to a higher ISO, or a lower “f-number”, or a slower shutter speed.
  • For a darker picture, the opposite.

And to make things easy, we have “main numbers” for each of the three variables.

  • Each of these main numbers doubles, or halves, the light.
  • We call a doubling, or halving, of the light “one stop”.
  • So the main numbers are one stop apart.

Main numbers are like this:

  • Shutter: …1/8 sec, 1/15, 1/30, 1/60, 1/125, 1/250, 1/500, 1/1000, 1/2000 …
  • ISO: …ISO100, 200, 400, 800, 1600, 3200…
  • Aperture: … f/1.4,  2.0,  2.8,  4.0,  5.6,  8,  11,  16,  22 …

Moving ISO “to the right” in the table above makes things brighter; that’s the definition of ISO sensitivity. Moving aperture and shutter “to the right”, on the other hand, makes things darker. (Why? A faster speed means a quicker click, which means less light gets in. A larger f-number gives us a smaller opening in the lens; that too results in less light).

And these can cancel each other out! So if you make one change that would darken the image by a stop, and at the same time make another change that would brighten the image by a stop, you will end up with the same brightness in the resulting picture.

E.g. moving from 400 ISO to 800 ISO (“brighter”) and at the same time going from 1/60 to 1/125 second (“darker”) would result in the same brightness.

Your camera probably adjusts things in steps of one third of a stop, which means it takes three “clicks” top go from one main number to the next (200 to 400 ISO, or 1/125 to 1/250 sec, of f/5.6 to f/8). But the main numbers are the important ones.

You need to know these numbers off by heart.

That way, you can quickly do mental arithmetic like “Hey, I moved the aperture from f/4 to f/8. My shutter was at 1/1000 of a second. How do I need to set the shutter to get back to the same exposure?”. (The answer is 1/250. But you should be able to do that in your head. Which is very easy once you have the series above, the main numbers, memorised.)

So before you go any further:

  1. Do you understand the above? If now, why not?
  2. Have you actually practiced the above (in manual mode)? Not once or twice, but dozens, hundreds of times?
  3. Have you memorized the main numbers?

If you are a beginner, do the three steps above before you go any further. OK, go ahead. I’ll wait. Because if you think you can really learn photography without knowing and understanding this, you are wrong. And if you think you can understand this without trying this many times, you are also wrong. We call this “wishful thinking”.

___

Michael (www.michaelwillems.ca) does custom private training as well as group-based training and classroom training; see http://learning.photography. Contact him now (416-875-8770 or michael@mvwphoto.com) to set up a date.