Scarlett Jane

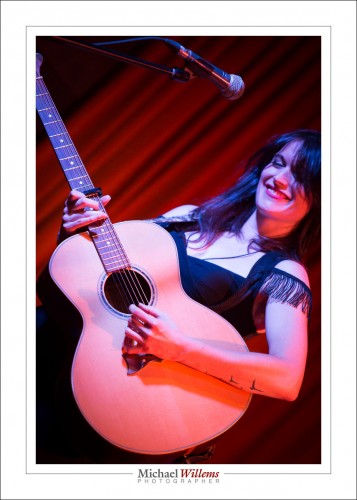
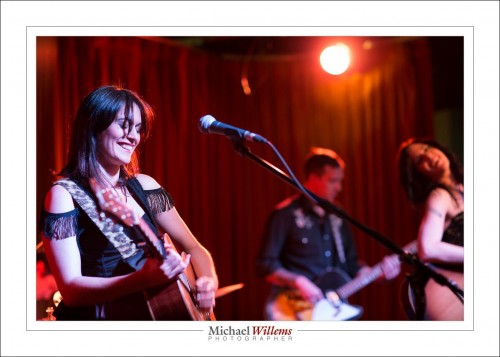
Last week I shot Scarlett Jane at a gig they did in Toronto:

That shot prompts me to say a few things.

First, the moment. “If it smiles, shoot it”: the mood is captured well by this moment. Moments are important. Look for them, wait for them, grab them!

Then the light. It was pretty light at the venue, but that is relative. Light is not really light: I used an 85mm f/1.2 lens set to 1/80 sec at f/2.0, ISO 3200. Fortunately, my camera, a 1Dx, allows that.

But I found the primes almost impossible to focus. Most shots were way out., whether I focused using one AF point, or manually. My experience is that focus on digital cameras is tough in the dark. So I shot most of the rest with f/2.8 zoom lenses like the 70-200.

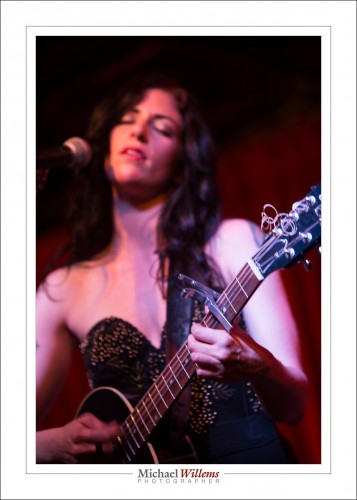
Here, a couple more:

..and again, as you see, the quality is good (here it’s 1/60th at f/2.8, ISO3200), but the moment, the mood, is most important. And these ladies had fun!

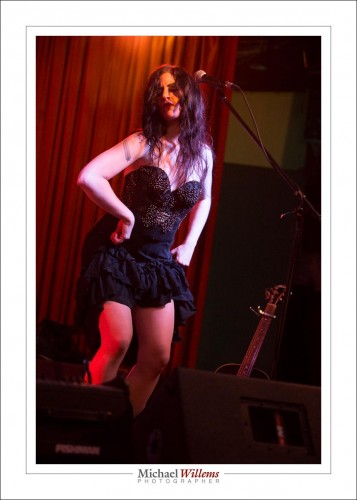
OK… one more to prove the point.


Quiet times. But…

….but things will speed up again, no worries, fans. I have been preoccupied with things, busy shooting, busy teaching, working on the e-store at http://learning.photography, and dealing with all manner of issues. But things, as said, will get back.

Meanwhile, there’s a father’s day special! Go check it out: http://learning.photography

There are three Father’s Day options, open ONLY until Sunday: All five books for $49, a portrait for $100, and a one-on-one lesson for $149! Go check them out!


Math!

Reader Michel, referring to a previous post, asks:

Hi Michael, I am struggling with the math of this statement…. “two lights that both say f/5.6 will give you a total of f/8″… Can you clarify?

Sure.

The “main f-numbers” (1.4, 2, 2.8, 4, 5.6, 8, 11, 16, 22, etc) are the square root of 2 apart (each is 1.41.. times the previous number). This is so that they they are all one stop apart (pi x r squared is the area of a circle). Anyway, math notwithstanding, one stop means double, or half, the amount of light.

So if I were to shoot a photo at f/5.6, and then I repeat it at f/8, I would get half the light in that second picture.

But if at the same time I add a second flash, which doubles the light, I would get net the same amount of light. Two flashes doubles it; one stop higher f-number halves that.

So if you need to set your camera to f/5.6 if you have one flash, you would set it to f/8 if you have two flashes.


Colour

How do you make colours pop, I was asked today?

(Fuji X100, 1/50 sec, f/2.0, ISO 1600, Velvia film simulation)

This  picture shows one of the ways: in the past it would have been “choose the right film”; today it is “choose the right film simulation”. You can do this in post-processing, or even in the camera if you shoot JPGs. The shot above simulates Velvia film. Velvia was famous for being beautiful and saturated.

Then, be lucky, patient, or clever, and choose the right light. Like this beautiful late, late afternoon Golden Hour light on a “mainly overcast” day:

If it has been fully overcast that would have been OK too: overcast is generally better than “sunny” for saturated colours, by the way. Direct sunlight kills colours.

Next, make sure you get your white balance right. Like here, where I used custom white balance:

Cat Chilling

And, essentially, do not overexpose. Expose less and colours will pop. If necessary, use a flash to light up the foreground as you saturate the ambient light by slightly underexposing it.

And finally, you can do some more saturation in Lightroom… but that is a last step, that you should use judiciously, and if you do, do not go overboard.


RAW or JPG fine?

A friend just asked:

Hey Michael, How would you rate JPEG FINE vs RAW or TIFF? I am getting 8 meg JPG FINE file sizes and they are also OK to upload onto face book, go figure… I like the idea of RAW larger file sizes, even though they do require extra processing to use in Photo Shop. Is it worth it in the end?

Good question.

JPG fine and RAW are about the same quality, sure.

A JPG of Shiva the Bengal

But JPG is the end result, while RAW is like a negative. RAW is better because:

  1. It has more colour bits (11 or 14 per colour, not 8 like the JPG). Meaning, more ability to fix, if you under- or over-expose or if the picture contains a high dynamic range.
  2. Settings are not yet applied, they are suggestions only. Setting like colour space, white balance, contrast, sharpening. In a JPG, what you see is what you get; in a RAW, you can roll back the settings.

Both reasons are showstoppers in some images.

So you can shoot JPG if you never make a mistake, and if you never need to change your mind on a setting like colour space or white balance. (Get the idea?)

But extra work? In Lightroom, select all, then “save as JPG”. Two clicks of extra work–but you get the chance to edit before you do that, if you like.


And more on film

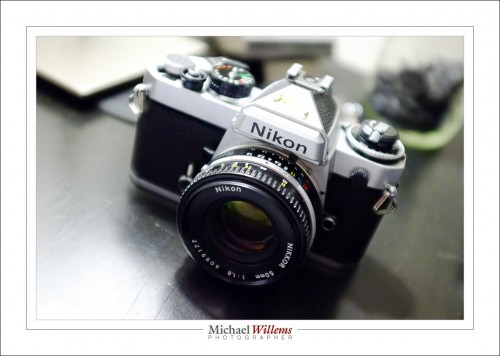
I am still playing with the Nikon FE with film. Not taking a lot of pictures, mind: the moment I touch a film camera, my old film skills come back. Including:

  • “Don’t shoot unless you mean to, because every click costs a dollar”.
  • Manual focus, where you want.
  • Meter carefully: no second chances.
  • Frame carefully: no post work.

Those are skills that are still very valuable; in fact they are skills you should have even when shooting digital. So perhaps your next self-assignment should be: shoot with manual focus for a day or two, and do not allow yourself the luxury of cropping in “post”. Pretend to shoot film!


Another note on filters

A friend pointed out something that you should know, and that I did not point out again in my recent point about ND filters. Namely this: OK, so you need them for waterfalls. What else do you need them for?

The other reason you need them is to get blurry backgrounds outdoors, particularly if you are using flash.

Let me explain. Take a shot like this:
That was 1/4000 sec at 400 ISO at f/2.8.

  • It has the blurry background I wanted.
  • Which I achieved with the large aperture (low f-number).
  • That large aperture necessitates a fast shutter speed.

But – uh oh. When I use a flash (which I might well want, in a picture like this), I cannot go faster than my flash sync speed, namely 1/250 second (if you want to know why, buy the Mastering Flash e-book). So then I’d have to slow the shutter to 1/250th, and the picture would be overexposed.

To prevent that, we can use not f/2.8 but f/11:
(400 ISIO, 1/250 sec, f/11).

Fine. But—uh oh—now the background is not blurry enough. See:

So here comes the ND filter to the rescue:

  • If the ND filter cuts one stop of light, you need f/8 instead fo 11.
  • If it cuts two stops, you need f/5.6.
  • Three stops, f/4.
  • And finally, if it cuts four stops, you need f/2.8. And my filter cuts four stops of light.

So that gives us:
(400 ISO, 1/250th sec, f/2.8)

And  that is exactly what we want. Identical picture to the first one, but with a slower shutter speed, 1/250 sec instead of 1/4000 sec.

In simple words: an ND filter allows you to use a lower f-number without having to increase the shutter speed to a faster value (which you do not want to do because of flash).

(Do note this, however: the flash now also has to punch through that ND filter’s darkness. I.e. my aperture may be f/2.8, but as far as my flash’s amount of light is concerned, it looks like f/11. Meaning I may not have enough power to bounce, etc.)

___

Go get all five of my e-books now: Special deal. Go to http://learning.photography and before the last click, enter discount code “Speedlighter” for another 10% discount on top.

 

Upgrade

Yoo hoo! I upgraded today.

To this:

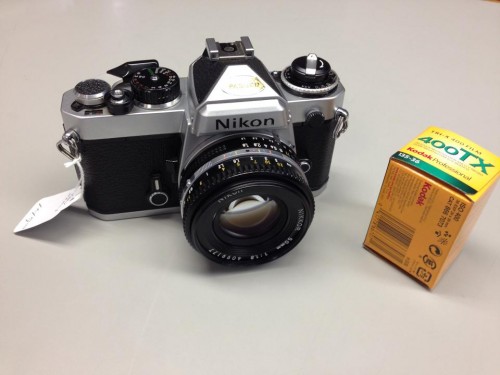
A Nikon FE SLR with a 50mm f/1.8 lens. Great condition, $150.

OK, so maybe a Nikon FE from, I am guessing, 1981 or 1982, is not an upgrade. But in some ways it is, and that is what I want to briefly talk about.

First, though, what is missing on a film camera like this Nikon:

  • “Each click costs $1”.
  • No instant feedback so I do not know if the picture worked.
  • After pictures, I need to wait a week to see my images.
  • A lack of virtually all technical functions.
  • No autofocus, no matrix metering.
  • No program mode, no shutter priority mode, no scene modes.
  • On-off switch is the wind lever, and for a left-eyed person like me, that is inconvenient
  • Just 36 clicks and you have to mess about changing films!

And some of those are huge drawbacks, the first two in particular; and that is why we shoot digital now.

But now we come to the benefits, and why in many ways this is an upgrade.

  • The camera is small and light. No ten pound brick, and yet it has full SLR functions and a full frame sensor… well, negative.
  • It is incredibly well made, Workmanship, engineering, materials: solid.
  • It has a “split screen” viewfinder with manual focus. That kind of manual focus is so accurate, and is such a pleasure to use, that I totally miss it today.
  • It has an analog meter, not a display consisting of little LEDs. That means fast response and great precision.
  • Its battery lasts for years. Not “a day”. Talk about retrograde steps in technology.
  • It is beautiful.
  • Above all: it is simple. It allows me to adjust ASA to match the film, and to set aperture and shutter speed in one stop increments. Shutter can also be automatic, so that is Aperture priority mode. (I.e. “M” and “A” are the only two modes). Those are the basic controls; that is exposure!
  • In addition, I can set exposure compensation; it has AE lock; a self timer; a mechanical backup of 1/90th second only, Bulb mode, a sliding battery check button, and an aperture preview. And that is it!

With a film camera, you have to get it right, So, just to show I can still do it, I bought a roll of Tri-X and I’ll take some photos in Toronto tomorrow. And then I’ll hunt down someone who can develop and “digitize or print”.

Fun fun fun~!


Anatomy of a flash

I often add a flash here, a flash there to my shoots. Easy peasy.

But if you have never set up a flash, that might not be so simple. Hence today’s lesson: how to set up a flash for some extra light.

From the bottom up, we have:

  1. A cheap light stand.
  2. A pocketwizard radio trigger. This just tells the flash “fire”. No intelligence.
  3. A cable, from flashzebra.com, to connect that pocketwizard’s “flash” output to any flash, via a hotshoe. That hotshoe is screwed onto the top of the stand. (Optionally, I would usually use a ball head between the light stand and the hotshoe).
  4. A flash (a.k.a. a speedlight). This can be any brand flash, as long as its power can be set manually.
  5. On the flash, a Honl Photo speedstrap (help on with friction).
  6. Attached to that Speed Strap, a 1/4″ Honl Photo grid, to be able to direct the light only where I want it.
  7. On that grid, a yellow gel: this turns the light into yellow light.

Now all I need is an other Pocketwizard on the camera (the transmitter, whereas this one is the receiver); then I figure out the power level needed; and I am done.

Save this picture if you want to learn studio stuff!


Flare as a good thing

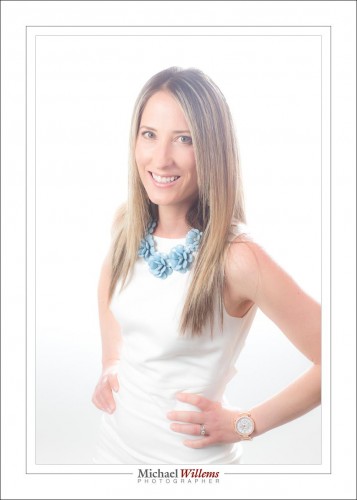
I did a portrait session yesterday, of another photographer, the talented and beautiful Tanya Cimera Brown.

Tanya wanted a high key portrait with blown out background and flare. A portrait that looks like it was taken in front of a bright window.

Flare, eh? Like this?

Yes, like that.

So how did I get that?

Flare is basically “lens imperfections with strong incoming light”. Like bright back light. It gets worse with some lenses (like the 70-200) and conditions (like filters). But instead, I used my 85mm lens. Not much flare there.

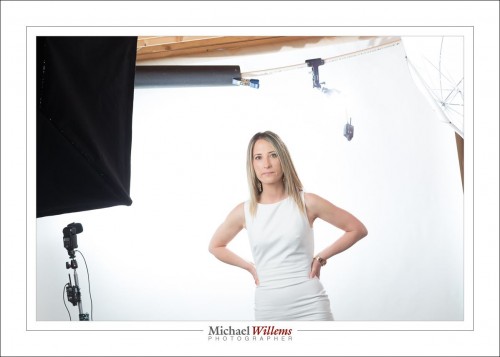
So I did it like this:

Five flashes: Softbox, umbrella, hair (strobes); then background, flare (speedlights). Flare? Yes, see that speedlight hanging down? Hardly visible? That is because it is shining toward me. And that with the bright background (speedlight left) gives me what I want, if my lens is in its light.

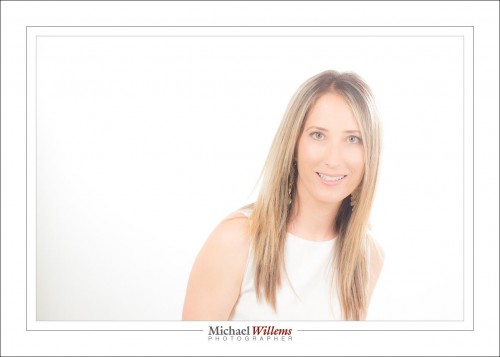
Done. A bit of logic always works. Logic rocks! Here’s one more.