Histogram Hints

What is the graph you see on the back of your camera when you press the “DISP”, “INFO”, or “up” or “down” buttons on the back of your camera?

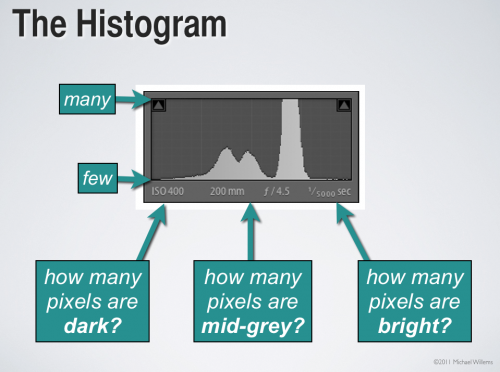
It is called the Histogram. It should really be called the “Exposure Histogram”.

It tells you about your exposure in much more detail than a light meter does. In a way, it is like 256 little light meters in one.

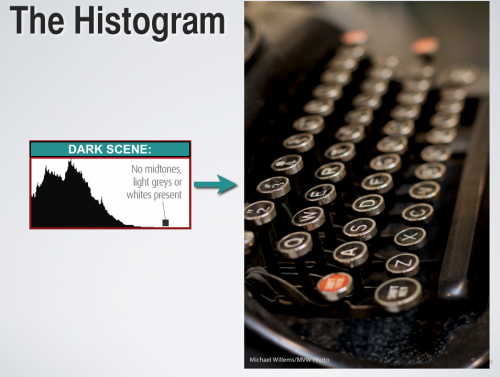
A histogram of a correctly exposed dark image would look like this (unless you are shooting RAW and “exposing to the right”, which is a good technique – but more about that again some other day):

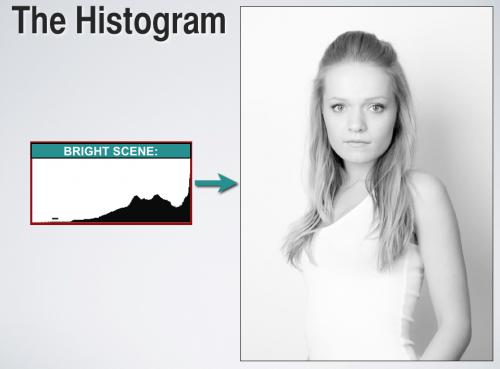
And a histogram of a correctly exposed overwhelmingly bright image might look like this instead:

The words “correctly exposed” are key. If you expose either of the images above incorrectly, you would see a different histogram than the ones above. And that is the power of the histogram: it helps you expose correctly.

Try it now: go shoot a black bag or coat or wall. Fill the entire viewfinder with that bag or coat. Now check the image – and the histogram. Then do it again, using exposure compensation to get a correct histogram.

 

Exposure lock

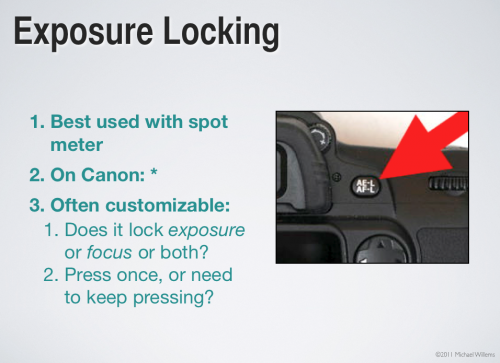
Beginners may wonder what the AE-L/AF-L or the “*” button on their camera is for.

Here’s what. It’s called “exposure lock”.

It allows you to do the following:

  1. Aim at something you want to expose well (a mid0greay object, ideally);
  2. Press the lock button;
  3. While still holding it down, now recompose (i.e. aim the camera at another area);
  4. The focus and click.

That way you get a picture that is focused on what you set as the final composition, but its exposure is based on where you were aiming earlier, when you pressed the lock button.

You might use this if shooting a person against a very white or dark wll. Aim at the person, lock, now aim back at the rest of the scene, now takethe image The exposure will be based on the person, not on the wall.

Two things you need to be sure to do for this to work:

  1. Set your meter to spot metering.
  2. While locking, be sure to aim at an object that is not very dark nor very light – an “18% grey” object, like a Grey Card or like Uncle Fred’s grey suit.

Do this and all your images will be exposed great.

So why do we not use this all the time? Simply because it takes time.


Close and fuzzy

A repeat post(*) about a beginners tip we all forget sometimes: there are several things that all contribute to the blurred backgrounds we all love (“narrow depth of field”). And they are….

  1. Selecting a larger aperture (a lower f-number)
  2. Zooming in (using a telephoto lens, not a wide angle lens)
  3. Getting closer

ALL those work. So why forget numbers 2 and 3? If you do not have an f/1.4 lens use an f/5.6 lens but get close!

Here’s me demonstrating this point to two students the other night:

Some blurring of the lady in the background – but not a lot (that was f/2.8 on a point-and-shoot Fuji X100 camera- which gives a depth of field equivalent to around f/4.0 on a full frame camera).

Now, same settings exactly, but let’s get close:

Hey presto – dramatic blurring of the lady in the background. It can be as simple as that.


(*) a repeat post on this subject – why? Simple: you learn by repetition. Also, of course not everyone has read all prior posts. Finally, you’ll see a slight difference in how I explain things, when I explain them several times, and that is a useful difference, designed to help you learn.


Sunny Sixteen

Why do you need to be able to operate a camera manually? Because it gives you an idea of what values might fit a situation. The same way you need to know arithmetic even if we have calculators.

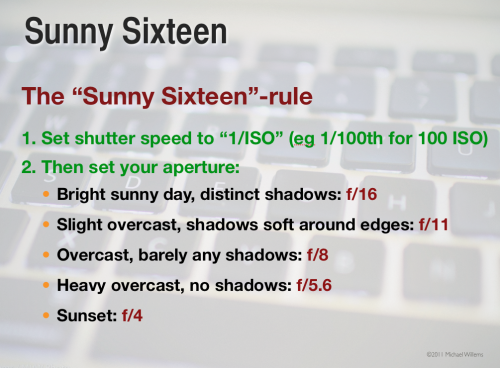
So here’s a rule all photographers need to know. A rule of thumb – that’s all it is of course – but a useful one. Namely, the “sunny sixteen rule” for exposures at mid-day:

Selecting these values will give you a “good standard exposure”. Of course you adjust when it is not mid-day, or you are a very high latitudes, and so on.

If you do not yet know it, learn this “rule” today. It’s great to be able to shoot without a light meter sometimes.


Nifty.

The 50mm lens continues to be a favourite, but not always for the same reason.

There are in fact four reasons people often say they like a 50mm lens:

  1. On a full frame camera, it has the width of view that our eyes see sharply. This gives it a natural look: no compressed perspective (telephoto lens), and no expanded perspective (wide angle lens).
  2. Or – on a crop camera, it is a 75/80mm lens, which makes it a great portrait lens.
  3. And most 50mm lenses are fast. Meaning a low “f-number”, meaning a wide aperture, meaning selective depth of field.
  4. And finally, that also gives you a nice fast shutter speed in low light without having to go to very high ISO values.

Those last two points are illustrated by this picture, 50mm at f/1.2:

Reem, by Michael Willems

Pay here!


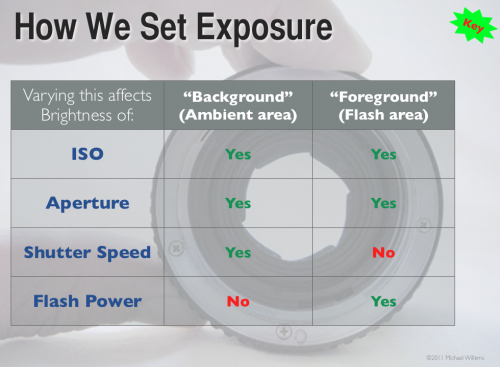
Table of Truth

In case you, like many photographers, wonder how aperture and shutter, as well as ISO and flash power, affect your flash pictures – here’s how!

Study that graph – a good photographer knows this graph off by heart – in fact, a good photographer has made this chart part of his or her DNA.

Note that if you set your camera to an automatic mode (like P), or if you set your flash to an automatic mode (i.e. TTL), you’ll get confused, since the camera varies things! So when learning, keep everything on manual.


Dark arts

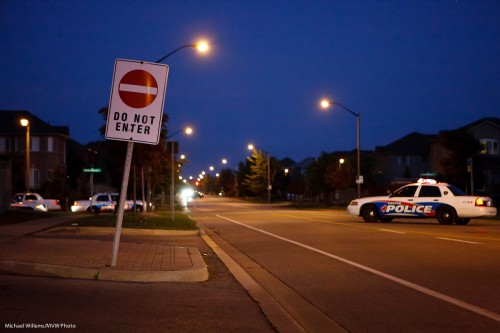
Darkness techniques, I mean. In other words: what do do when you have to shoot in the dark. Like in an image such as this, from the other night (as a photojournalist I take quite a few of these):

The simple answer: there’s no simple answer. In other words, there isn’t one single technique.

What I do is a combination of the following techniques:

  • Try to shoot when there is some light- not usually an option, since the criminal element does not wait until
  • Use a tripod or monopod, if possible.
  • Use a fast lens (one with a low “F-number”).
  • Use a wide lens, if possible – wider lenses are of course more tolerant of motion; while longer lenses show every little tremble.
  • Use a higher ISO – 3200 in this image, which is as high as my a-little-long-in-the-tooth 1Ds Mark 3 can go.
  • Crouch and make myself into a tripod.
  • Take the image many times – in the hope that one will be “accidentally sharp”.
  • Underexpose, and then later “push” the image (at the expense of more grain).
  • Use what you get – in this case, cars turning around right beside me lit of the police cars on the left, so I waited for more cars to do that (otherwise, those police cars would be dark).

By using some or all of the above techniques, you can get sharp pictures even when it is difficult, and when others fail.


Unpredictable?

Another tip re flash (un-)predictability:

Sometimes it’s not the flash that is unpredictable; it is the review on your camera.

If your camera has a LCD brightness adjustment, set it to a constant value.

I was reminded of this the oterh day when I shot some shots with my 7D instead of the 1Ds. The 7D defaults to setting LCD brightness by itself. In these cases, when you take a shot and view it, you never know whether you are seeing a dark shot, say, or just a dark preview of a good shot.

In fact I found myself looking at shots twice, and once I’d see a dark shot, apparently underexposed; once, a bright shot, that looked fine.

I immediately realized what I was seeing, and I set the LCD brightness to “manual”, not “auto”. That problem was solved. I suggest you all do the same.

(And you really ought to use the histogram to judge your images, not the LCD, but you knew that already. Right?)


Back to basics

You know that as an event shooter, I use TTL (through-the-lens flash metering, using a preflash) very widely. Much as it is sometimes hard to predict, it is the only thing you can use when things are moving quickly. Like at an event.

But sometimes, things go wrong. I had flash maslfunctions for part of Saturday’s shoots. You see, TTL is not really unpredictable -once you know how it works (metering bias to the focus point, for instance, and an assumption of 18% grey where it meters) it is predictable. So a malfunction is when it becomes actually unpredictable.

As it did Saturday with my dying 580EX II flash. Here’s three consecutive shots – I do everything the same, and yet I got, in rapid succession in the same setup, one dark shot, one light shot, and one OK shot:

Too dark. And the next one, way overexposed:

And the third one, almost OK:

I cannot live with this craziness. So then what do I do? I go back to basics. Actual basics. The basics we used in 1980. Namely, I set my flash to manual power setting (my camera, of course, is already on manual exposure settings).

One quarter flash power ought to do it, I thought, looking at where I was bouncing and what my settings were – and that worked great:

So then for the next dozen or two shots I stayed in the same place, shot people at the same distance, and kept the flash and camera set to the same. Bingo, predictable shots.

So when life hands you unpredictability, force predictability on it If you use the same settings and it’s all manual and your distance to the subject stays constant, the pictures will all be the same.

Sometimes, 1980-style basics work just great. Actually, they quite often do. My camera is very often on the “manual” exposure setting, for instance.


Flash assist

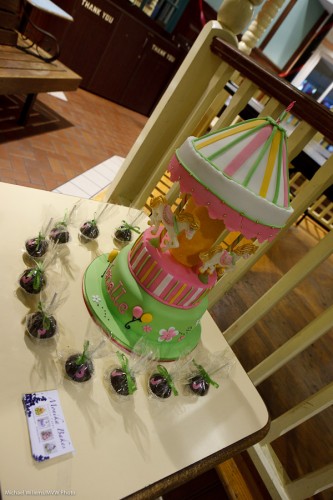
Sometimes when shooting an event, I cannot easily bounce my flash. In that case, I will first try to use mainly available light –  meaning, turn up the ISO. That gets me shots that are borderline acceptable, like this from Saturday’s event shoot:

So here’s the message: even when I am not using the flash as the main, overpowering, major light, I still use it in these cases.

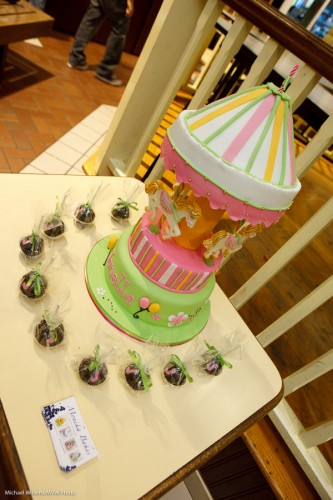
Turning the flash on and bouncing it behind me, while I lose most of that light in this room, still gives me a better picture:

This gives me what I would call a “flash assist” image:

  • Better light, brighter whites
  • More control over direction of the light
  • Fewer shadows where I do not want them, and softer shadows overall
  • Better control over colour balance
  • “Bright pixels are sharp pixels”.

So why did I take the first picture above?

Simply because my 580EX II flash failed. It fired intermittently Saturday, This is why pros always carry spares: I grabbed my other, second, 580 EX II and put that on my camera instead. The first 580 will have to be retired – a blow, because it’ll cost me more than I earned in the shoot to replace it – but them’s the breaks.