This weekend I shoot (with a camera, I assure you) music school students.

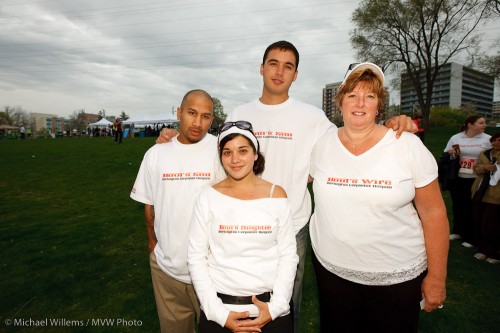
Like this, from last year:

Music School Shoot

Music School Shoot

With two other photographers, I will make parents happy with great images. To do that, I use (as I thought you would appreciate hearing):

  • Manual camera settings (1/125th, f/8).
  • Manual flash settings; with lights in umbrellas or softboxes.
  • White balance set to Flash (though I shoot RAW).
  • Simple backgrounds if I can.
  • A good zoom lens – 16-35 “L” or 24-70 “L”. Good lenses are costly but they do help in terms of sharpness, among others.
  • A light meter
  • Pocketwizards
  • Standard to slightly wide or sometimes slightly telephoto lenses
  • Personality.

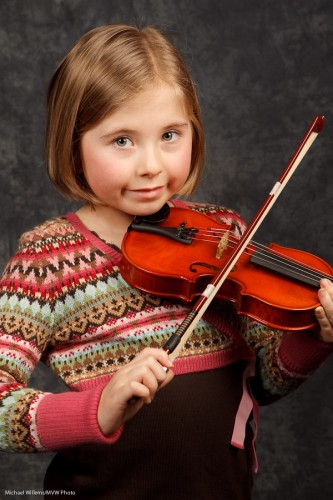
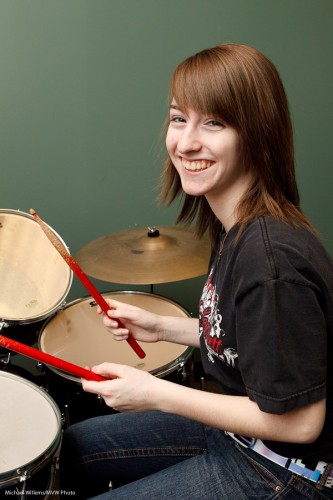
Most images were like this, with a backdrop:

Music School Violinist

Music School Violinist

A grey background gives you some separation whether the subject is light-haired or dark-haired, and separation is very important.

As are catchlights: I am sure you can see them.

And you noticed the rule of thirds being applied. Right?

But do you need all that stuff? No (but “personality”probably helps). The first photo was taken with a simple SLR, zoom lens, and one on-camera flash bounced off the ceiling.

You can make these things complicated, or sometimes you can keep them simple.

Next blog posts will be longer: tonight, however, I need to sleep before packing 500 lbs worth of gear into the car.

Shooting events

A corporate shoot the other evening, with an assistant/second shooter. A music school shoot all weekend. Many more shoots coming up: lots to do, and lots of fun.

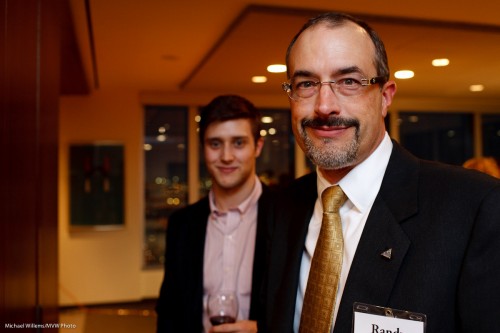
I like shooting indoors events, because with training, it is simple to get consistent results. And as you know, my favourite party lens is the 35mm f/1.4 prime (fixed) lens. It consistently gets you images like this, from the other night:

Event shot, photo Michael Willems

Event shot, photo Michael Willems (35mm prime lens)

I like this style of shooting and it is worth talking for a moment about how this is done.

  • The lens is a 35mm on a full frame camera. On a crop camera, you would use a 24mm lens. Prime lenses are nice and consistent and sharp.
  • The flash is a single 580EX II speedlight, on camera but bounced 45 degrees behind me, slightly to my right to get light onto the subject’s face.
  • The camera mode is manual. It is set to 400 ISO, 1/30th second, f/4. This gives me an ambient exposure of about -2 stops (the meter says “-2” when I look at an average part of the room).
  • The white balance is set to “flash”. That ensures that the subject is natural, but the background, which is lit by tungsten light, is warm.
  • The flash is on TTL.
  • I ensure the subject is close – but not too close. And not right next to the edge.
  • I compose using the rule of thirds – I avoid totally centered subjects here.
  • I look for a background that tells the story (i.e. a corporate cocktail party; people meeting and talking).

Here’s one more:

Event shot, photo Michael Willems

Event shot, photo Michael Willems

That person blurred in the background helps tell the story.

And one more, to inspire you all:

Event shot, photo Michael Willems

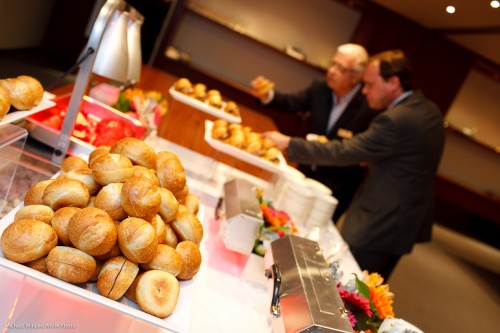
Food - always shoot this.

Do not hesitate: you can tilt. You can shoot the food. As an event photographer you probably should not be eating it, but shooting it is OK.

(These, and many other tips and tricks, are part of my special “Michael Willems’s Events Photography” course – soon as a special at Henry’s School of Imaging, as well as here as a one day special: April 3 in Mono, Ontario. Let me know if you are interested. )

Focus!

The other day I said “focus using one focus point”. A reader asked why. So let me explain why I said that.

On a modern SLR camera you have many focus points: 9, 11, 22, or even 40. The camera has various modes, which may include:

  1. The camera chooses from all available points.
  2. The camera chooses from a smaller area of available points.
  3. You choose a point, but the camera will look immediately next to that point if it cannot find focus.
  4. You choose a focus point, period.
  5. You choose a very small focus point.

Method 1 is the “snapshot” mode. Methods 2, 3 and 5 may only be available on high end or very modern cameras (2 and 5 are only available on my 7D, for example). I like 3, but it too is for high-end cameras only. So usually the choice is “1 or 4?”

In method 1, the camera chooses one or more focus point; in other words, it decides where to focus.

What does it base its choice on?

A lot of people think “on the subject”. No, it does not have a brain, It does not know what the subject is. The camera basically bases its choice on “I’ll focus on whatever is closest”.

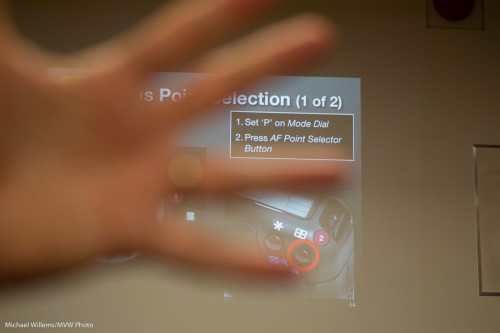
And that, as in the image below, is not always what you want. In this image I wanted the wall to be sharp – so I aimed the single focus spot between my fingers.

Which is why you choose method 4: YOU choose a focus point, and aim that at the subject where it should be sharpest.

There are a few things to remember:

  • You need to allow enough distance.
  • The subject needs to be well lit.
  • The subject needs to be contrasty (focusing on a blank white wall is impossible).
  • You can recompose after focusing, as long as you keep your finger half way on the shutter.
  • On high end cameras, exposure is also biased to the focus point, making it even more important to focus accurately.

Photographers who let the camera decide where to focus are playing roulette – Russian roulette. after all, in a portrait, do I want the closest object (the nose) to be sharp, or the eyes?

So take charge and usually, use one focus point. Focus, wait, recompose if needed, and shoot. Presto – sharp where you want it to be.

Warm up the colour

When the light is very dull and you want to add some quality, you can add a bit of flash outdoors, I am sure you all do this.

But do you also think about colour?

I often add a gel for a little colour. Like in this image:

A family celebrating their late father, Burlington, 2010

Burlington, 2010: A family celebrating their late father and husband

A half CTO gel (CTO means “colour temperature orange”) allowed me to warm up the light on the family here. I use the Honl Photo speed strap and gels: incredibly easy system that has revolutionized small flash use.

Make sure that if you want the effect in the image above, your white balance is set to “flash”.

TIP: If you use a CTO gel and set the white balance to Tungsten (light bulb), the family would look normal – but now the background would turn blue.

(I probably don’t have to mention it again – David Honl himself is joining me as Guest Star in Toronto on March 19, at the School of Imaging, for a special four-hour “advanced flash” course! Book now – there is still some space).

User Registration

I know many hundreds of you have registered here as users.

Alas, so have the spammers. I am currently under user registration spam attack: today and last night, a new fake user registers every few seconds,  I no have thousands of new fake users.

Alas, I have to, unfortunately, disable user registration.

That may or may not disable comments. A thousand apologies if it does, but I seem to have no other option. Either I sit here while I receive thousands of fake user registrations a day or I disable registering.

These spam users have domains advertising things and often, addresses ending in .pl, .ro and .ru (Poland, Romania and Russia, I fear your real users will be the losers here). No idea why they register because they then cannot do anything.

Also, I may also have to disable the emails that are being sent out. Right now for every legitimate user, ten emails are sent by my blog to these fake spammers. I do not have two hours a day to weed through the registrations: it is easy enough but takes time.

Anyone with any ideas, let me know. Yes I have tried various plugins but these do not work and are dangerous: one bad command, one wrong line of code  in a plugin will kill your entire WordPress.com blog.

Another tip

One more beginners’ tip today for my readers. (The term “my readers”, it occurs to me, makes me sound a little like col. Qaddafi. whose Green Book I read when I worked in Libya for around a year, a few decades ago).

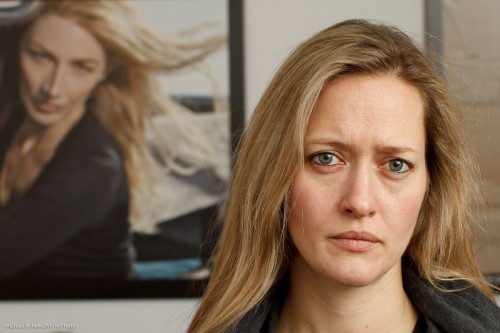
Anyway. I often see that my images are really, really sharp where others’ are often not quite as sharp. So how do you make your images sharp? I have written about this before, see here, among others. Operation, light, settings, and good (prime, or quality) lenses all come into this.

A student, photographed by Michael Willems.

Student Volunteer, photo Michael Willems. Canon 7D, f/5.6, 400 ISO, 1/125th sec.

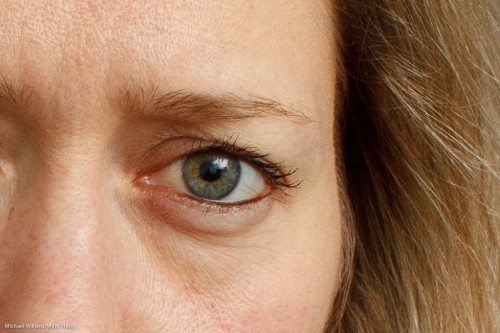
When you show that image large (original size), you see it’s sharp.

A student, photographed by Michael Willems. Detail.

Student Volunteer, photo Michael Willems. (Detail).

But today a quick tip about errors I see people make frequently.

Whenever I see people whose images, in spite of good lenses and the right settings, are not as sharp as mine, and when I then watch their technique, I often see these mistakes:

  1. People jam down on the shutter. I hear a beep, and a millisecond later, the click. This means the shooter is not giving himself or herself enough time to verify that focus was achieved on the right object. Instead, you should aim, press half way down, wait for the beep, then wait, and only once you have ensured the focus point activated properly where you wanted it, push down.
  2. The shooter leaves the beep off. This means no confirmation of focus unless you look away from the subject… bad.
  3. The shooter beeps and waits correctly – but then moves forward or backward before pushing down. Even a slight backward or forward movement shifts focus!

Watch yourself carefully when you shoot. If you discover that you are making any of the above mistakes, this will affect your sharp focus.

And that would be a shame. My people deserve sharp focus!