Simply simple.

I had lunch with a student today – this student is bright, and is doing a private one-week full time crash course with me, something I recommend for anyone wanting to do real photography (tomorrow, we do a studio shoot).

Over lunch, we brought our cameras. Of course.

And I made this shot of my Miso soup:

A few questions. Like: “what was I using”? And “What makes this shot effective”?

I was using a full frae camer with a 50mm prime lens. My student, a crop camera with a 35mm lens. Equivalent, therefore. The prime lens allows those nice blurry background, and it allows fast shutter speeds at low-ish ISO values: I shot this at 1/80th second at f/2.8, at 400 ISO. With a non-prime lens I would have had to use slower shutter speed (motion blur) or higher ISO (grain), and I would not have obtained the nice blur.

What makes this image work, though?

  • The simplicity. The original shot was just a little wider but had some “stuff” in it. A pro shot is good is if has no “stuff” in it that should not be there – and generally, “stuff” should not be there!
  • The blur. Only part (around the chopsticks) is sharp.
  • The contrast – the dark table really helps.
  • The 45 degree angle.
  • And finally that wonderful sunlight reflection in the soup. Yes, that was deliberate: I angled the shot until I got the reflection.

My student did well, too: here’s his shot:

Well done, Jeff. Here, again selective sharpness, combined with the backlight, makes this an effective shot. In this shot, too, we cropped to get rid of distractions.

So the lesson today?

Keep. It. Simple.

That is so often the secret to one of those “wow, that one worked!” shots. Everything that is in a photo should be in that photo because it should be in that photo, or else it should not be in that photo.


Square roots? …Really??

Why, I am sometimes asked, do the engineers who design cameras make it all so darn difficult? Like using square roots, and stuff.

And I agree, sometimes they do make it complicated. Like by calling “Continuous Focus” (which you might just understand) by a name like “AI Servo” instead, which relies on you knowing that “AI” means “Artificial Intelligence” and that a servo motor is a closely controlled electrical motor with built-in negative feedback loop. Right. And like by making the zoom-in/zoom-out function on my new Canon 1Dx as unintuitive as the one on the old Nikons. Why make it simple, eh?

But sometimes, the engineers are right.

Like in using fractions. f/16 is smaller than f/4 because it is a fraction. Instead of saying “f 16” we should really say “Focal length F divided by 16″, and we certainly would say that way if it weren’t so many syllables. Clearly, 1/16th of a pizza is less than 1/4 of a pizza, and the same is true of aperture.

Anyway – fractions are very useful when a magnitude (like shutter speed or aperture) tends to double or halve all the time. (In contract, ISO is not expressed as a fraction, and hence it can be confusing… 12800 ISO is only a little faster than 800 ISO, but because we do not use fractions here, it looks much faster.)

So get that out of the way. Fractions can be useful.

But why those silly numbers? f/2, f/2.8, f/4, f/5.6, f/8, f/11, f/16: why not just f/1, f/2, f/3, and so on?

Ah. There is a reason.

  • You see, those numbers mean something. The “f-number” indicates the size of the lens opening as a fraction of the lens length (so a 200mm lens set to f/4 would have an opening, or aperture, of 200/4 = 50mm).
  • And if you want to, say, halve the light that enters your lens (i.e. reduce it by a stop; a stop means double or half), you would have to halve the area of the aperture (the opening).
  • And to halve the area, you would have to reduce the diameter by… the square root of two. (area is Pi x radius squared, you may recall from high school). And indeed, the square root of two (roughly, 1.4) just happens to be the ratio between those funny numbers.

In other words: hose funny numbers mean that every next number up gives you a stop less light (or when you go to lower numbers, a stop more light). And that, you will agree, is a very convenient thing!

So before you dismiss the engineers and their silly complexities: sometimes it is actually quite useful to see why they do what they do. Confession: I am an engineer (electrical), but unlike other engineers, I do not assume that everyone knows engineering language. I do, however, know when the techie bits are needed. And I will teach you all of then if ytou hang around!

___

NOTE: In case you missed it: my “Photography Cookbook” eBook is now out! Click here to read about it, or click here to order.


Book!

As I mentioned, my long promised eBook is ready and is available now!

Here’s the link:

www.michaelwillems.ca/Buy_Book.html

The book, a 108-page PDF (without DRM) costs $19.95.

(“Without DRM” means you are not addled with complexities in downloading or cumbersome technical restrictions on how you use the book you buy!)

This book is pretty unique in that it gives you recipes you can apply immediately, not just basics where you have to work out how to apply them.

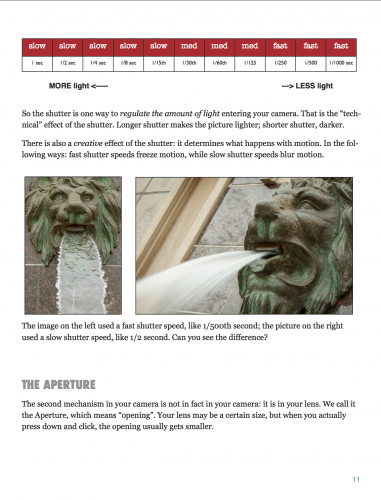
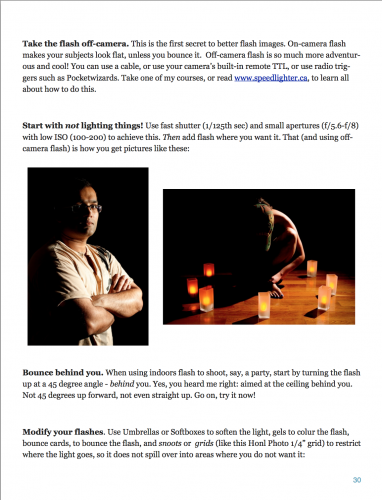
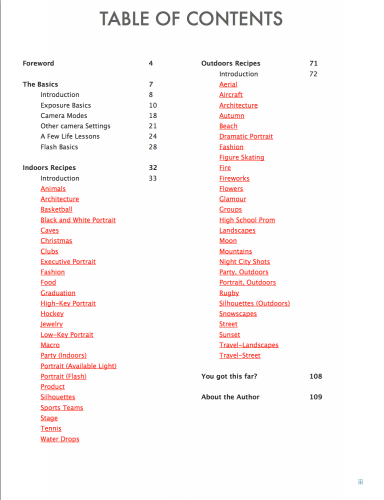
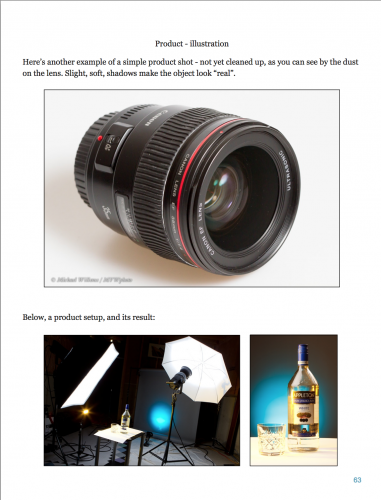
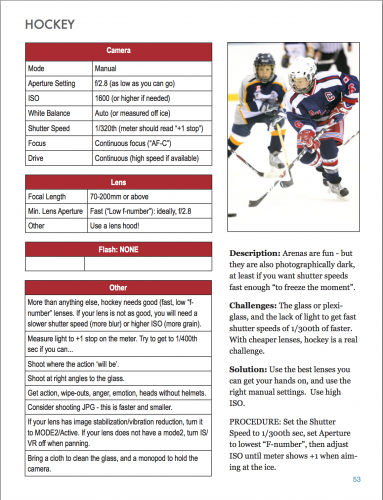
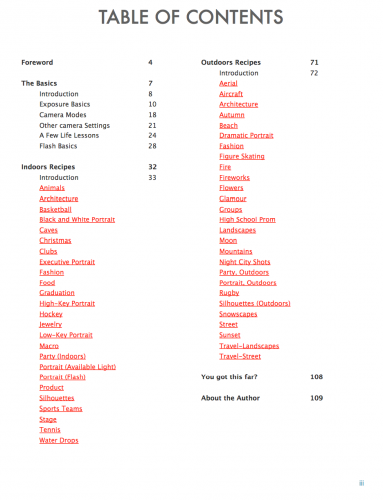
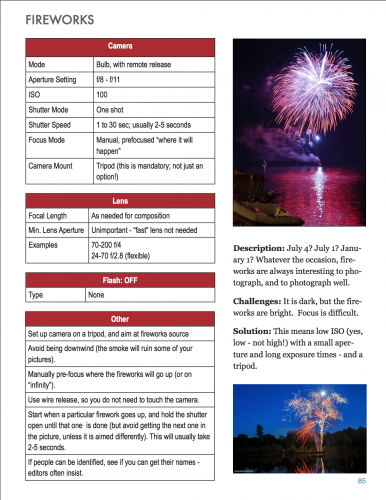
A few sample pages:

I look forward to hearing what you all think. And remember: questions and requests are always welcome.

Michael

(PS Why not free, or $5? Well, I do give away the free speedlighter.ca as you know. But as for eBooks: There are many free ones, but they tend not to be the best. Many eBooks like mine sell for $30-$50. Look at Kelby, Grecco and McNally, all of whose books sell for around those prices.  I myself recently bought a photography eBook for $79US. Also – most eBooks are DRM protected; mine is not. An important distinction. And finally, the Photography Cookbook is 108 pages, not the 30 pages you so often see in eBook PDFs. Enjoy!)


Good News!

First, the bad news: my eBook will not be available as an Apple iBook. I just found out that Apple requires all sellers of iBooks (even, say, Germans selling to Danes, or Canadians selling to Canadians) to file for a US tax ID:

This would mean a lot of work (forms running pages and pages; “certifying” my Canadian passport and having it approved by US authorities; and so on) and a long delay (months), as well as, wait for it, me then filing US tax returns. No way, José.

So… now the good news:

The book is finished, and is available now as a PDF file!

“Photography Cookbook”, an all-new 109-page photography manual, is available direct from me, the author, now.

This PDF e-book is unique in that it gives you 52 actual “recipes” to use as good starting points for various situations. Outdoors and indoors; from Aerial Photography to Hockey to Travel scenes: how do quickly you set up your camera for these situations?

In addition, the book contains:

  • The photography basics you need to know to be a competent photographer.
  • All about exposure and how it works
  • Camera settings
  • Flash Basics

Much of my photo expertise and experience is captured in this one manual, optimized for viewing on iPad and similar platforms:

Unique about this book is that it gives you many common situations in a quick, one-page-per-recipe format:

Refer to these any time, shoot the situations here or find situations similar to the one you are shooting, and you are good to go. This helps you actually achieve.

Combined with the basics section, this PDF provides the best photo start you could have! And it is available right now. Your personal copy is waiting for $19.95!

Click here to order your book. You can also send an e-mail bank transfer.

Your personalized copy will be shipped as soon as possible; usually within hours.

Enjoy!


Design, and a few misses

It is ever surprising to me how often large companies have obvious design misses. Here’s a few examples of just the last days:

My new TomTom remote cannot say “metres”. Instead, it says “meep” – it cuts off the word. A bug, and a very obvious one: evidently no-one tried this device set to English but metric (there’s only just enough time to say “feet” or “yards”).

That same TomTom no longer turns off when the 12V power disappears (i.e. when you switch off the car). Drained battery every time, then.

Apple left the IR sensor off the new Retina MacBook. Meaning I cannot use it for the presentations I do (a remote control advances the Keynote presentation to the next page) – hence I need to keep the old MacBook around just for presentations. Since Keynote is a key app for Apple, this oversight seems odd, and it is very disappointing to me. The lack of a $1 sensor makes the laptop non-usable for my work!

Talking about Apple apps; iBooks Author is not bad, but it has some pretty atrocious issues. That’s why my Camera Recipe Book is not out yet – it’s 99% there but the remaining 1% will take me a couple of days yet. The good news: the book’s better than ever. Stay tuned here!

And I haven’t even started talking about Japanese cameras, whose User Interfaces are evidently designed by committee.

In the past few weeks I have encountered many other such issues: it is surprising that corporations fail in such obvious ways. It seems to me that every company needs a Steve Jobs around to kick some sense into people.

Back to my book design.

Simple Does It

Quite often, you can keep sthings simpler than you might think.

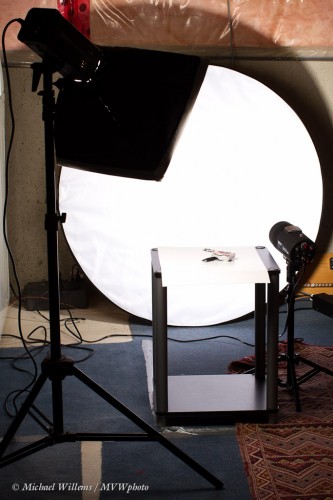
Like this demo of a product setup. All I used is a couple of cheap old strobes; an old table; a reflector; and a piece of paper. Like so:

And that gives me images: like this:

This is just one way of shooting products. The points is that you can often use simple means to shoot professional looking shots.


Driving it home…

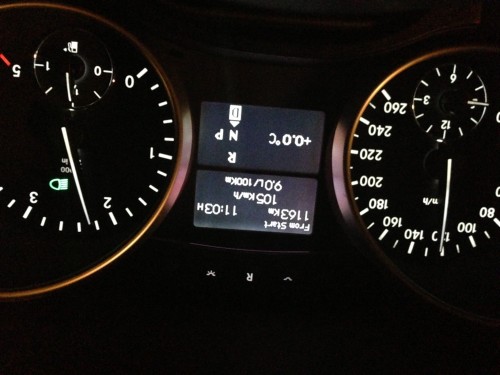
Today, I drove from Toronto to Montreal and back (that’s 12 hours driving the car – good that I took the 3 litre Bluetec turbo diesel).

Here: for once I’ll make it easy for my Australian and New Zealand readers:

What I want to talk about is this: I brought my secondary photo disk with me, in the car.

Why?

Well… what if in my absence my home had been burgled, or had burned down?

Did I mention backups?

Yes I did: search for “backup” here and read all the posts. And you may really want to do that. Hands up everyone, who has a good backup right now? And who will make one tomorrow?

Thought so.

You know, every hard disk dies, and I keep telling everyone that. Case in point: my own Macbook Pro’s hard disk died in the middle of December’s Santa shoot. I had to go out the same morning to buy a new MacBook Pro with Retina Display.

Fortunately, I had backups of all important files. I make several levels of backups:

  • I use a backup strategy for photos as outlined in posts here (search: two external hard disks).
  • I use DropBox as an additional layer
  • I also use Time Machine as an additional layer.

I know I am preaching, but it’s for your own good. Your hard disk could also die – right now, or in fifteen minutes. Are your files safe?

This is worth stressing especially for photographers.  Once your disk dies, it is dead – and all your images are gone. So please – I don’t want to hear any more readers ask me what to do after their disk dies! Make tonight your backup day.


Delays, delays… but for a reason

Ah, I hear you ask, where are your blog posts?

Coming! I am in the process of finally finishing my long-awaited “Photography Cookbook”. This is taking all my time.. also precipitated by a few new things I acquired:

New 15″ Retina Screen Macbook Pro – the old one had a harddisk failure during  Santa shooting, so I had no option but to buy a new one. First impression: I can never go back to an old screen.. all I see there is pixels. Use a retina screen computer, and never look back. Also, the solid state drive is nice – no disk warm up and slow things down (and make noise).  Quick judgment: recommended wholeheartedly.

iBooks Author – my iBook will be available as a PDF and as an Apple iBook. The latter choice means I am using Apple’s iBook Author. Not a bad app, but with a steep learning curve and with several annoying bugs. I am hoping for a version 3 soon. Quick judgment: recommended with some reservations.

Rest assured I will catch up and answer the outstanding questions (and: keep them coming).

And now.. my quick beginners’ lesson for the day:

If you are still having trouble understanding exposure, try this analogy:

Exposing correctly is like filling a bucket (=the sensor) of a given size (=its ISO) from a faucet (=the aperture), by holding it under the stream of water for a given time (=the shutter speed).

Think this through and try to understand how the three variables, duration, faucet size and bucket size, contribute to filling a bucket to the top, no more and no less. Just like shutter speed, aperture, and ISO.

Too little water and the bucket is too empty (“underexposed”); too much water and it spills over the top (“overexposed”). That should help you understand how these variables interact.

___

Today is dedicate to my late father, Eddy Willems, who would have been 83 today.


Point of view: yours for the choosing.

New photographers often ask me “but how do you compose?”.

I give them the simple rules (and they are simple – like the Rule of Thirds), but I also point out one very important thing: where you are, and where and how you are looking, is everything in defining what your photo will be.

Take this scene I shot on Lake Ontario a few months ago:

Impressive, no? All you have to do is be there!

(Oh, and know how to expose. oh, and know when to – I had about thirty seconds of this sunset. Oh, and see the possibilities. Oh, and have the right lens.)

Can you see what kind of lens I used? Yes, a very wide angle lens (16mm on a full frame camera, corresponding to a 10mm lens on a crop camera).

Now look at this shot:

Ah, a different scene altogether. But guess what? Same time, all within those thirty seconds. This time I used a 200mm lens on a crop camera, and aimed at the ship in the bottom right.

Yes, one moment can result in two entirely different shots. It’s all in how you look at the world. And that’s what photographers do: show their vision. A photograph is more about you than about the subject!

With that in mind, a very successful 2013. Take some training (you know where to find me!), have your work reviewed, and especially, practice. Have fun – this blog will continue to help you in many ways. All I ask is: share (the little clicky thingies above each post) and tell your friends!


Happy New Year!

Happy New Year to all my readers!

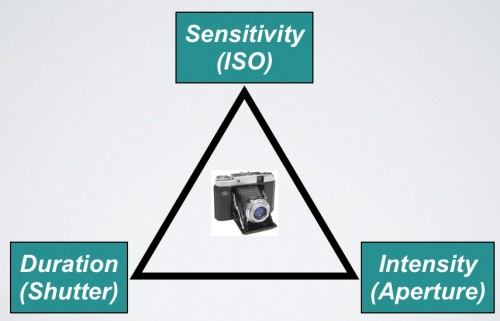
Let me start the new year with a very simple diagram; one that is at the basis of all exposure:

There are three, and only three, variables that define how light or dark your image is. ISO, shutter speed, and aperture. Get that straight and you can start using the camera, knowing what it is doing and why. Want brighter? Increase ISO, use slower shutter, or use larger aperture (lower “f-number”). Darker? The opposite.

In the  next year I will continue to mix basics like this with advanced techniques, often centered around flash and creative light. Keep reading and keep learning – and keep having fun!