Lenses distort?

A wide lens, if you aim it upward, will give you converging verticals at the top:

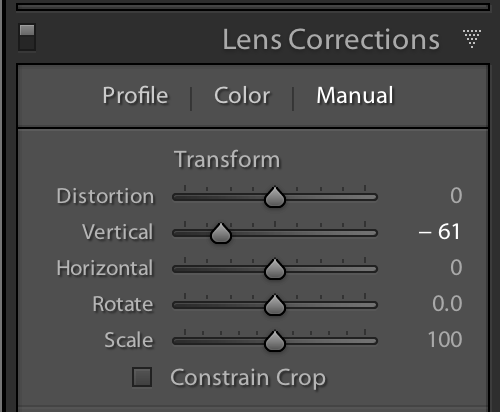
If you do not want this, go into Lightroom’s “Lens Corrections”:

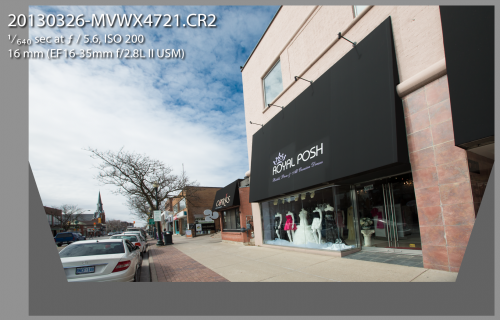
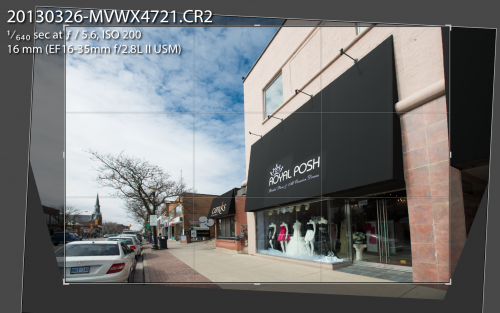
This gives you a corrected view, from which you then crop the excess:

Leaving you with:

The venue above is the venue where tolivetolove.com (my venture with Kristof Borkowski) is joining Jane Dayus-Hinch’s “Wedding Café”, which opens next month.

___

See me next weekend in Toronto:

Explore, network and discover an inspiring array of new photographic products, services and techniques. You will experience the latest photography and video gear and creative solutions at our Photo Network EXPO. Admission not only includes the trade show but also access to hours of free professional imaging presentations each day. To register or for more information visit www.photonetworkexpo.com/.

  • Saturday April 6th, 2013 9am to 6:30pm
  • Sunday April 7th, 2013 9am to 5:00pm

Location: Ryerson University’s Mattamy Athletic Centre (Formerly Maple Leaf Gardens), 50  Carlton St. Toronto, ON


The Outer Limits of Flash

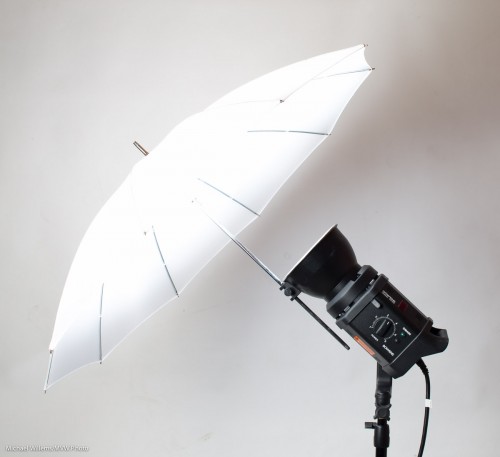
When using flash, as you know, I very often use just one off-camera speedlight in an umbrella, like this:
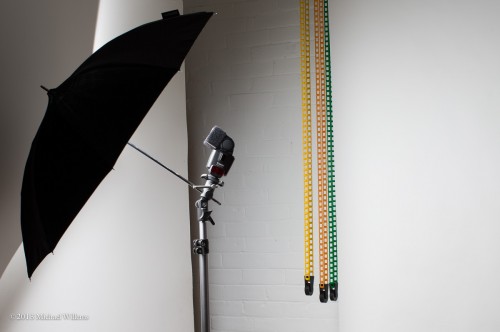
But as you have read here before, there will often be limits to what you can do in practice. These limits and how we handle them are “what separates the men from the boys”. Usually, they are not coincidence: flash makers have made their flashes to be just the right power, for instance, to meet normal earth sunlight conditions. To help you, here are a few limits and solutions:

SHUTTER SPEED: You will run into limits w.r.t. shutter speed: when using flash, normally 1/200th to 1/250th sec will be the fastest shutter speed you can use. Solutions: be aware of this limit, and use low ISO/small aperture to control light.

POWER: Most of all, you will run into power limits. At 1/200th, in bright sunlight you will have to go to f/16-f/24 for a proper exposure, and this means the flash will have to be very powerful to equal or overpower the ambient light (we call this “nuking the sun”). Solutions: use no modifier but fire direct (a direct flash has much more power than a modified one!); or move the flash closer to the subject; or use multiple flashes.

LINE OF SIGHT: Outdoors, your off-camera flash must be able to see the “morse code” light pulses emitted from your on-camera flash. Make sure that the little round light sensor on the side of your flash (Nikon) or the red area on the front of your flash (Canon) can see your camera!

HEAT: Nikon flashes like the SB-800, SB-900, SB-910 and so on, and to a lesser extent Canon flashes, will overheat (and depending on model either break, or shut down, or slow down) when you use the flash repeatedly at full power or anything close to it. Solutions: fire the speedlights at lower power.

CONDITIONS: If the ceiling you are trying to bounce your flash off is 50 feet high, you will have to go to a very high ISO setting. Solutions: do use that high ISO, or use very fast prime lenses, or ask people to move to a better location.

FOCUS: In the dark, focusing your camera is very difficult. Solutions: use a flashlight, or a laser pointer; or focus manually.

TTL INCONSISTENCY: In fact, TTL systems like E-TTL or CLS work very consistently. Solutions, therefore: learn exactly how the TTL technology works; learn exposure and metering; adjust by using Flash Exposure Compensation; avoid reflections; use Flash Lock (FEL/FVL).

There are many more challenges, and the good news is that for each such challenge there is a set of solutions. Learn the tech, and then you will be able to concentrate on what really matters: composition, light, moment!

Enjoy Passover / Easter / the start of spring; and let me leave you with the Thursday News Roundup:

  • LEARN… Join me to learn studio shooting on April 10, and join me in many other courses: see www.cameratraining.ca/Schedule.html
  • WEDDINGS… Watch for news on The Wedding Café: Celebrity planner Jane Dayus-Hinch’s new initiative, which colleague Kristof and I are part of!
  • DESTINATIONS… I am off April 14-21 to shoot a wedding in Jamaica.
  • And finally GEAR: Nikon Canada is lending me a D4 and a few lenses and a flash for two weeks. I shall report on them in detail here.. excited!

If you have any time, then use this long weekend to learn and practice some new photography skills. I vote for “Flash”. Here’finally, a sample snap taken with one flash in an umbrella:
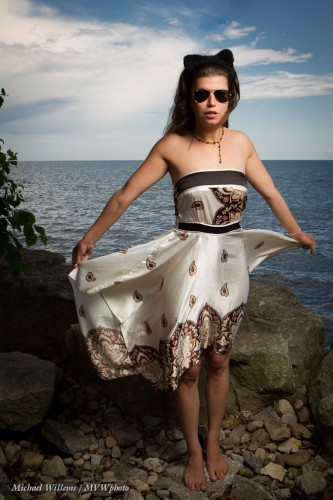
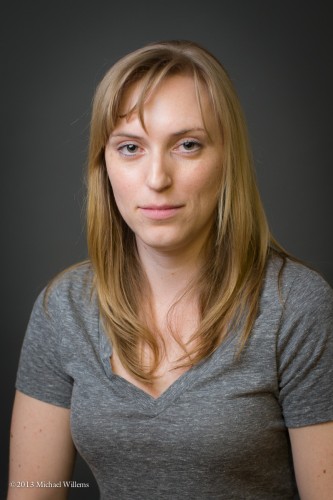
What is wrong here?

Look at this picture – a demo shot I made during a recent course, to show what not to do.

Can you see what is wrong here?

Yes, her eyes and face are all shadowy. Becuase I aimed my on-camera flash straight up. I see many people do this; it is seldom a great idea. Instead, of course, aim it behind you:

Note you need to have some kind of ceiling or wall behind you above that will reflect light. You may need to go to a higher ISO; in a large room, much higher, which is fine nowadays.

You can drive this “the umbrella is where you aim your flash” thing to extremes. Aim at the floor for eerie light – simply rotate your camera upside down, and you get:

Nice warm floor reflection!

Now, to see how fine modern cameras are with regard to ISO: a camera like my 1Dx goes to ridiculously high ISO values. 51,200 ISO with some noise reduction in Lightroom:

Yours will probably not be quite as good, but no problem if you want to go to a higher-than-usual ISO. Do it, and live with the grain – better than bad light or motion blur!

Light

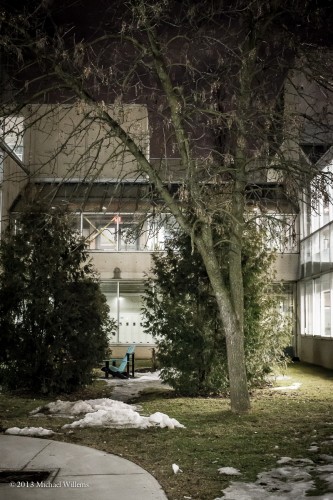
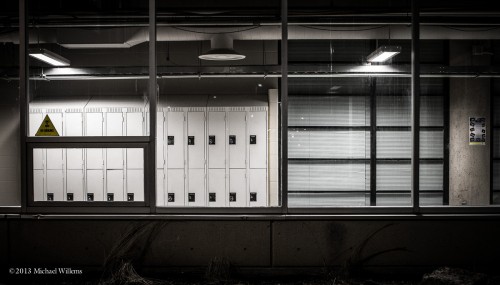
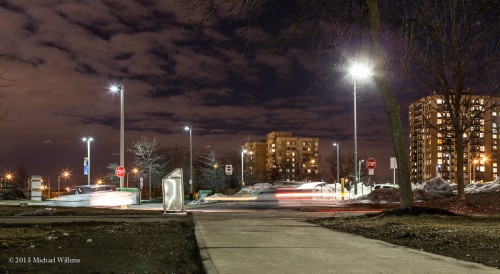
I shot a few pictures featuring light, Monday night.

Light can be depressing.

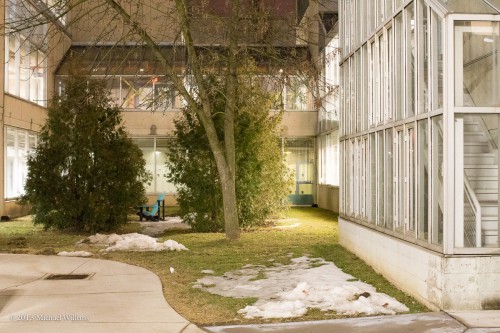
Light can show as bright, in courtyards that to us look pitch black. Just turn up the ISO, lower the f-number, and slow down the shutter speed:

Light can leave trails:

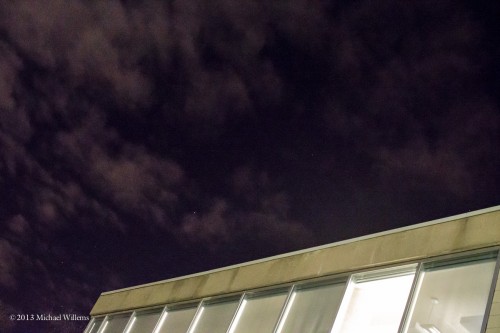
Light can show you things we cannot see… to my eyes, this sky was pitch black:

In other words, light can help make your image in more ways than you might at first imagine.

Tip: when shooting and looking for “creative light”, look for:

  • Shadows.
  • Ways to make “what we see as dark” light, or vice versa.

That way, you get intriguing images. Give it a go. The images above took about, what, three minutes. Given half an hour, what could I have come up with? With eyes wide open, a lot.


Rhonda

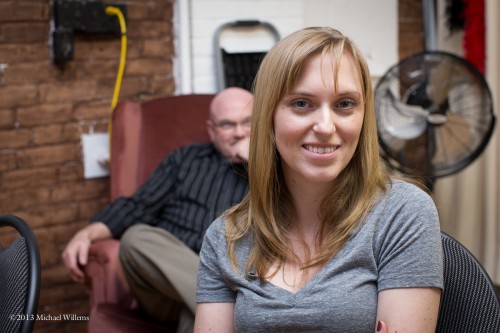
Here, from Friday’s workshop, is a photo of Rhonda:

Wonderful smile, truly! So that photo is good before we even start – how can you fail with a subject like that?

And yet, we have to get the focus and exposure right. Especially exposure is worth mentioning. hence this post.

Yesterday’s shots (scroll to yesterday to see them) had a pale-skinned subject in light clothing. Today, a darker-skinned person with dark clothing. So after the first person, do I need to, like, adjust anything?

If you are using manual flash settings (a typical studio shoot, with flash power set manually, perhaps using Pocketwizards): no. It’s set right, then it’s set right, never mind the subject.

If you are using TTL flash (automatic flash), then yes. You need to adjust flash exposure compensation – down. Down, somewhere between, say, -1 to -2 stops perhaps. Else the metering circuit will try to expose this shot just as light as the last one, and Rhonda will look light grey.

So remember: TTL (automatically metered) flash is convenient, but you have to know how it works and realize that depending on the subject, it potentially works differently each time you click.

Shampooey Goodness™

You have heard the term “hair light”? It’s the Shampooey Goodness™ look that makes hair look alive and wonderful. That is why we use it in portraits.

In yesterday’s flash course, I shot a few images of one of the wonderful students, especially to show you in today’s post. Here’s Becky lit with a single TTL flash (a 580EX shot through an umbrella) without the Shampooey Goodness™ secret ingredient added:

Pretty – but now let’s add a second flash, behind her, fitted with a Honl Photo Speed Snoot (a rolled up tube, that concentrates light). That gives us the desired Shampooey Goodness™, and now, in this scientifically objective and neutral comparison, we get:

See what I mean? That’s why we so often in portraits like to add a “hair light”.

Of course there’s something else missing from this image. Can you see what?

Yes – that background is a little dull. So we add a third flash, fitted with a blue-green gel:

Bingo. A great subject, soft light, Shampooey Goodness™, and a lit background. That’s how you do a portrait. Three TTL flashes with simple, small modifiers.

___

NEW: Learn this from me personally in Hamilton, Ontario on April 10 or May 14: www.cameratraining.ca/Studio-Ham.htmlsee the full schedule on www.cameratraining.ca/Schedule.html and sign up today.


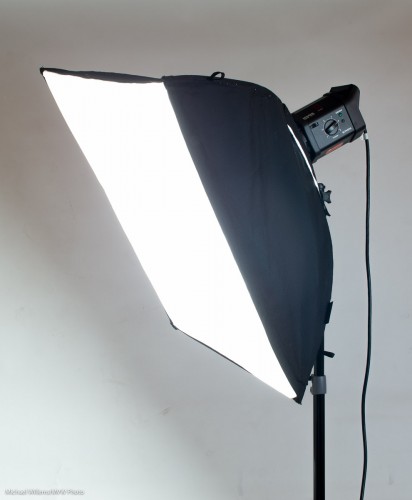
Umbrella or softbox?

Umbrella or softbox? That’s the question. Whether t’is nobler in the mind to… never mind. But the question is valid: when you want to diffuse light, like in a portrait, which one do you use?

An umbrella:
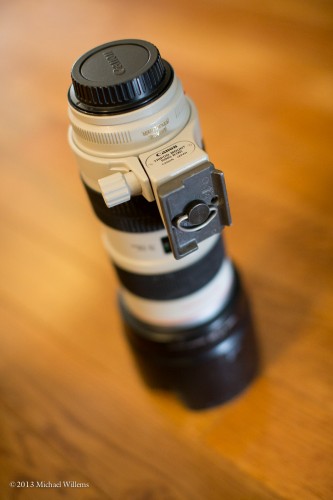
  • Is light and small and affordable.
  • Can be used shoot-through (eg to get a nice round catchlight without “black blob”) or “into”.
  • Loses relatively little light.
  • Throws light everywhere.

A softbox:

  • Is not as small, light, or affordable. Does not fold into “nothing”.
  • Takes more time to set up.
  • Eats up a little more light than an umbrella.
  • Gives you wonderful light – but the catchlight is square.
  • Is more directional than the umbrella – it soes not light up the entire studio.
  • Is not necessarily square: can be long and thin, too (a “lightstrip”)

I prefer softboxes for their light quality and for their ability to selectively light; but I prefer umbrellas for their simplicity and portability.

So as so often: “it depends”. Get one of each!

And get to know them.

___

Special opportunity: I am teaching my “Canon/Nikon TTL Flash” in Hamilton, Ontario, tomorrow night, Friday 22 March, 7-10pm, in a wonderful studio (hamiltonstudio.ca). The class is small, and I have a special opportunity for you: if you attend, you will get a free copy of my eBook, “Photography Cookbook”. You will learn TTL flash on camera, off-camera, remote TTL using the built-in wireless control system, and much more. See http://www.cameratraining.ca/Flash-TTL.html and forego hanging around in bars tomorrow: sign up now, and make your Friday night into a special one that you will remember!


To Alter, Or not To Alter…

Sorry, Bard:

Whether ’tis Nobler in the mind to suffer / The Slings and Arrows of outrageous underexposure and other errors / Or to take Arms against a Sea of photographic problems, And by using Lightroom, to end them…

I often wonder, and I am often asked, how much manipulation is too much. Should you do “stuff” in Lightroom (say), or not? Like the “desaturate” or “desat” effect in this depressing building-under-construction half a mile from my home:

And that is a good question. To answer it, here’s my take why not to do post-production (“post”), followed by my opposing take on why to do it. The last word will never be said on this – things evolve. But today, I think this is a fair summary of how things are:

Why not to manipulate in post:

  1. You are faking it – you are not a photographer, but an illustrator!
  2. You are going to be a lazy and incompetent photographer if you always rely on post work to save your work.
  3. If you work in journalism, altering is lethal: you will never work in the press again. This, I think, is valid: we need to be able to trust our news.
  4. Many effects are “fashionable” – meaning they go out of fashion. Careful.
  5. You can easily end up looking “like everyone else”.
  6. It can be manipulative, i.e. it is sometimes done to manipulate your audience (e.g. poor children in a charity ad are often in contrasty, depressing grainy black and white).

However… the “you may not alter” approach is way too black-and-white (pun intended). The real world is far more nuanced. Here why you should feel free to do post-processing:

  1. It is, I think, best to shoot in the camera, not on the computer. That said, many famous photographers of the past did a lot of darkroom work!
  2. Cropping, exposure adjustments, minor sharpening to compensate for camera limitations and for reduced-size output, white balance, colour space choice: these are surely fine in all cases!
  3. As for fixing mistakes: what, you are always perfect? As long as it not a substitute for learning, Fix in post what you get wrong in camera, by all means.
  4. Sometimes it is better to shoot wide, say, and crop later.
  5. Surely converting to black and white is OK, just as “choosing a colour or B/W film” was in the past?
  6. And anything else you can do with a filter is surely all right?
  7. Ah.. but in that case, surely it’s also OK to do any manipulation that mimics a particular film type?
  8. Quoting Frederick Van Johnson: “pixels were born to be punished”. If you are creating art, who cares how?

On balance, I say do what you like in post, as long as you:

  • Keep in mind the “not” reasons above (photojournalists may only adjust exposure, crop, white balance, colour space: and I think that is right).
  • Do not use to unduly manipulate.
  • Promise to learn to do “what you could have done in camera” in camera.
  • Remember that your effect may go out of fashion and that you may look like everyone else.

I love the desaturated effect in the above photo, but the hospital-under-construction looked like this in real ife:

And I could surely make it a little happier, even on grey day like this:

So I think you are allowed to do what you like if it is art. That said, do learn how to do everying possible in camera, in camera!

POSTSCRIPT note: the “desaturate” effect is my favourite this month. But it can make people look more rugged. Like this wonderful gentleman at yesterday’s Photography course I taught at the Toronto Digital Photo Club:


(Shot with available light, 1Dx at 12,800 ISO at f/2. Yes, 12,800 ISO!)

Now, use a “desat” setting, and you get art, but also exaggerated and less flattering facial features:


Tip: If you do want to manipulate women this way, take the following steps:

  1. Expose well – expose “to the right”.
  2. Carefully apply the “desat” effect.
  3. Show your subject the altered image.
  4. Prepare to meet your maker.

Have a great day/evening, everyone! I am preparing for tomorrow’s course.


Question Of The Day

A reader asks:

“A lot of the bars/venues I’ve been to have been showered in red spot light and it has horrible effect on my photos. Is there anything I can do, maybe in lightroom to lessen the effect, or maybe while shooting?”

My advice: Expose well. Use the histogram, color histogram if possible, to expose well: bright, but avoid blowing out reds. Use high ISO. You’ll want a modern high ISO camera, or/and a prime men’s. That will allow a fast enough shutter speed to freeze motion.

Focus – A Baker’s Dozen Tips

Following up from the last two posts, I shall share few more tips – a baker’s dozen, i.e. thirteen more tips – on obtaining sharp focus exactly where you want it.

Of course you know the basics, right?

  1. Select the appropriate aperture for the required depth of field (DOF).
  2. Select one focus point.
  3. Focus, with that point, on something contrasty.
  4. Holding the camera steady, now Focus-Recompose-Shoot (if using One Shot AF/AF-S).
  5. But if shooting moving subjects, AI Servo/AF-C can give better results. (Then, no recomposing!).

OK, sure. But is there more?

Well, yes. Little things, but important. Including the following:

  1. If you have time, it is better to move the focus point than to recompose. This gives you more accuracy – recomposing means shifting the focal plane a little.
  2. Set your joystick to be able to quickly move focus point (on the Canon 7D, for instance, by default you need to first press the focus point button, and then you can move it. Why that extra button?
  3. Low light is bad! The lower the light, the less accurate your autofocus will be.
  4. In my experience, low-level red (tungsten/incandescent) light is also not as good for autofocus as low-level white/blue light.
  5. If you have a flash and you have time, you can use your flash’s AF assist mode (the “red lines/grids”) to focus. Else, a flashlight can help, too.
  6. Not all focus points are equally accurate. Some, like the one in the centre, are sensitive to both horizontal and vertical lines; others are sensitive only to horizontal or vertical lines!
  7. The AF assist red lines from your flash will show you this – if you select a point that is sensitive to horizontal lines only, for instance, then the flash emits horizontal lines.
  8. Not all focus points are equally accurate with all lenses. On high end cameras, some focus points are horizontal or vertical only unless you use a lens that is f/2.8 or faster.
  9. If in doubt, use the centre focus point, since it detects both horizontal and vertical at all times.
  10. Focus points are in fact usually a little larger than the squares in your viewfinder.  This can easily confuse. If your camera has the option (like a Canon 7D or 1Dx), you can set a smaller focus area, meaning the focus spot is the size indicated.
  11. Lenses are sharpest when stopped down a little. In the shot above, I used my f/1.2 lens at f/2.0 – it’s sharper that way.
  12. But beyond a certain point, the wavelength of light becomes significant related to the small opening, so you get unsharp pictures. Most lenses will start to show this unsharpness beyond about f/11.
  13. You can also choose to allow the camera to use multiple focus spots to figure out where to focus. This can be helpful with moving subjects.

Even armed with this knowledge, you will find that often, especially when the subjects move or the light is low, it’s luck that gives you great images. My advice in those cases is simple: shoot a lot.


___

NOTE! Want to learn how to creatively use off-camera flash using “Master-Slave”/”Commander-Remote” TTL flash control for your Nikon or Canon system?  When to use modifiers? Flash secrets? Do not miss my evening course in Hamilton on Friday: http://cameratraining.ca/Flash-TTL.html. This and other upcoming workshops on http://cameratraining.ca/Schedule.html. Book now to guarantee your place.