Come Learn Lightroom—once and for all!

One of the most spectacular changes in photography over the past decade has been the emergence of Adobe Lightroom (officially called “Adobe Photoshop Lightroom”) as the tool for photo asset management, editing and production for everyone from beginners to pros.

Lightroom was conceived as an additional utility that would make “managing your photos” easier.  But it has become much more: rather than just a utility, it is now the centre of a professional workflow that can save 80% of the time you used to take before for the same job. A wedding that took me 8 days to finish in Photoshop now takes a day.

So what does Lightroom do more, or better, than Photoshop?

The question is a little misleading. They are different beasts, aimed at different tasks. Photoshop is for illustrators that need to spend an hour on one photo; Lightroom is for photographers who need to do 100 photos an hour. Nevertheless, they both overlap to some extent: both offer some asset management (using Bridge, in Photoshop’s case), editing, and some production.

Where Lightroom shines is in its practicality. Lightroom offers:

  • Non destructive editing. Your original photo is never touched.
  • The RAW conversion does not happen until the very end, when you export or print an image, so you can change your mind about any setting at all times.
  • Lightroom offers really, really solid asset management. Even if like me you manage a quarter of a million images, you can rank, rate, search, organize, sort, rename, and a gazillion other things to your hearts content.
  • Practicality. A typical shortcut in Lightroom is, let’s say, “D” for “Develop”. Not, as in most apps, “Ctrl-Alt-Shift-D”, or some such hard to remember combination.
  • Great editing tools for photographers. True, you cannot move a head from one torso to the next, but I consider those functions “illustrator functions”. For what photographers do it is excellent. Especially if you know “the tricks”.
  • It works your way – unlike most apps, where you have to work the app’s way.
  • Everything you do can be undone, or redone differently, so you never have to be afraid that you are setting things up incorrectly, for instance. You can always re-do it a different way.
  • Lightroom is an excellent production tool. Exporting, printing (straight from Lightroom to your paper profile; not via some intermediate file), making web sites: it’s all included, and it has the functions you need.

By now, with Lightroom 6, it is mature and works the way it should.

But you do need to learn it. And like with so much software, it’s the little “A-ha” things; the tips and tricks; the “I had no idea this worked that way” things that makes you a star.

Well, good news. I am teaching Lightroom on 26 February and March 4. In Brantford, Ontario (just 20 minutes west of Hamilton). Morning on both days is “File organization”; afternoon is “Editing”.  So you can take one or two, on either day. Limited to four students each time (plus myself =5).

You can book on meetup.com at https://www.meetup.com/Brantford-Photography-School/ (get a free account, join the group, and book); or you can contact me separately and book in person. But do it soon: as said, space is limited.

Also, stay tuned for other courses in Brantford and in Toronto in the next few months. Unshackle yourself and unleash your creativity!

 

Yesterday’s Seminar…

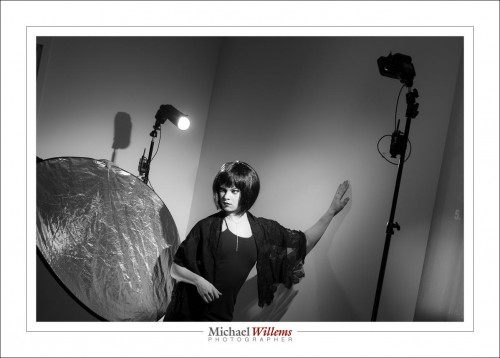
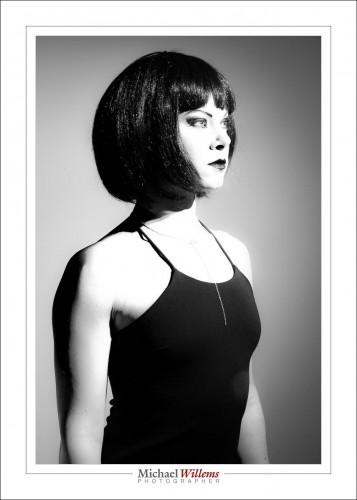
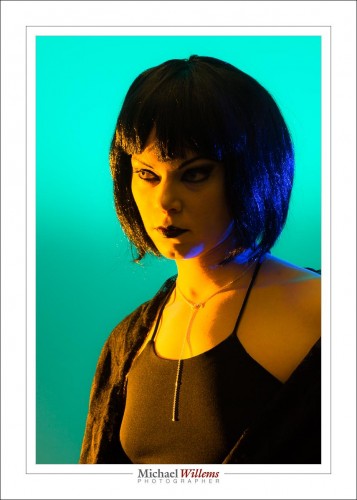
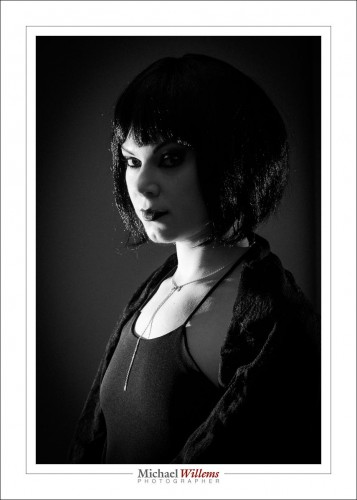
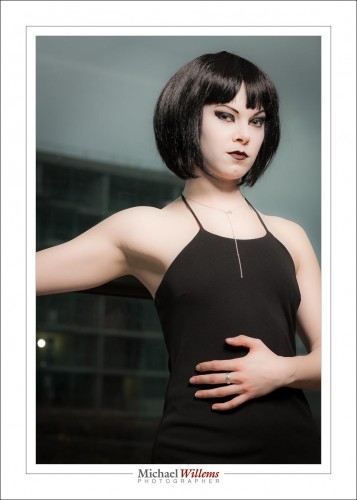
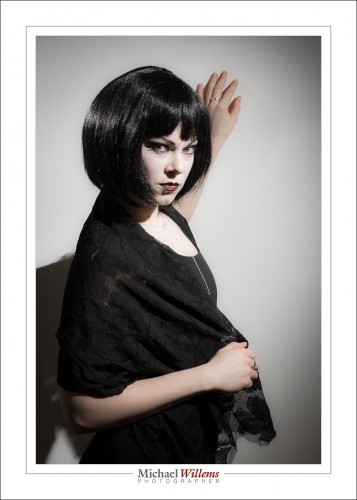
…was in Toronto. Students and I and assistants, model and make-up artist made for a nice crowd and a relaxed atmosphere, which after some training in the basics and in “photo recipes” resulted in shots like these, of the “made up in Goth” model:

20170128-MW5D2880-1024

200 ISO, 1/125 sec, f/8. Flash manual also, 1/4 power. Flash fitted with a Honl Photo 1/4″ grid. A second flash was used  as the hair-light; this was fitted with a Honl Photo Speed Snoot.

20170128-MW5D2884-1024

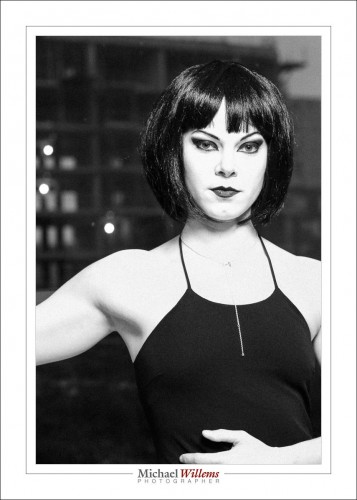
And the same here, now in B/W. Note how the flash is aimed at her face, not at the back of her head:

20170128-MW5D2886-1024

And now for some colour, using gels (Egg Yolk Yellow, Mikkel Blue and a green colour I cannot recall).)

20170128-MW5D2898-1024

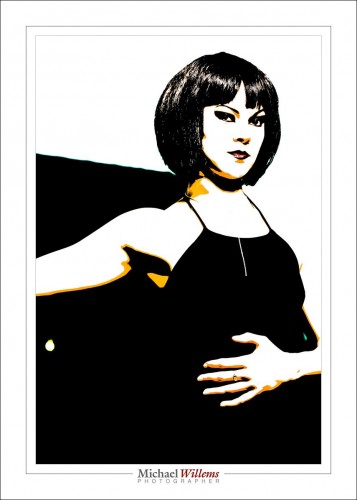
And sometimes I like to have fun, using a preset I have created…

20170128-MW5D2901-1024-2

All this still in Lightroom.

More drama:

20170128-MW5D2895-1024

And here’s the “treated” picture’s original:

20170128-MW5D2901-1024

And another B/W (black and white, or monochrome) image:

20170128-MW5D2900-1024-2

The point is that with a couple of flashes and some simple modifiers you can have hours of fun. As long as you know the theory, the magic “starting points”, and techniques. And that is what today was all about.

Congrats to students!

Congratulations to my students who won in the recent Capture Oakville photo competition!

  • Overall First place went to my student Kevin Workman
  • Hillary Currer won first prize in the “Unaltered/Out of Camera” category
  • Roger Passmore won first prize in the “Capture the Human Spirit” category… see his entry below.
  • David Hook won first prize in the “Capture Oakville” category.

Ha! That means that two thirds of the winners in this prestigious contest have been my students. Well, I am certainly proud to have contributed to their success, and this makes me extra happy to be a teacher of photography.

Congratulations: excellent work.

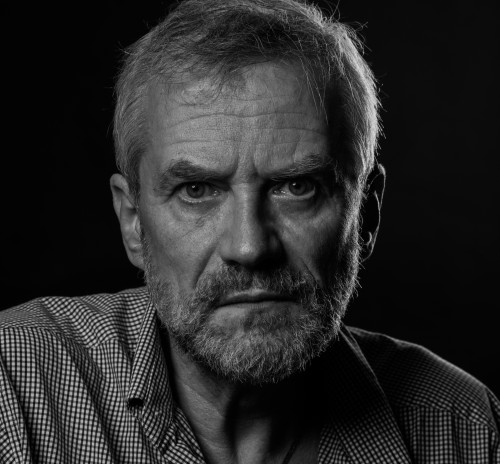
As for contributions: I think perhaps I contributed a little more than average to Roger Passmore’s winning entry “Michael”. Here it is:

Michael Roger Passmore

See what I mean? He captured my spirit wonderfully: serious, perhaps even grumpy, and depressed at many of the things I see in the world. Yup, that’s me!    🙂


Blurrrr.

“How do I get a blurry background?”, asks a student.

20161219-1dx_2654-1024

OK… so if you want a blurred background, as in a portrait:

  • Focus accurately (using one focus point?) on what should be sharp. The eye of your subject, for example.

Then, use some combination of:

  • Get close to your subject.
  • Zoom in on your subject.
  • Use a longer rather than wider lens.
  • Use a lens with a large maximum aperture, i.e. a low minimum “f-number”. (Most prime lenses and most pro lenses are like this).
  • Use a low f-number
  • Use “portrait mode” (which uses… a low f-number!).
  • Have a distant background

And that’s how you do that. As my students at Sheridan College are learning this semester.


Don’t.

When it comes to finishing pictures (call it “finishing”, not “editing”) I adhere to a few rules.

  • If it is news, only changes in colour, exposure and crop are allowed.
  • If it is art, anything is allowed, but that said, I do the minimum.
  • If it is portrait work, I am happy to lessen shadows, to lessen contrast in skin tones, and to lessen permanent blemishes, and I am OK with removing temporary blemishes such as pimples. But I do not remove permanent blemishes.

That last one is important. Read it carefully, and you see that I do not want to change people into what they are not. Not like this (and I have nothing against this particular software, I do not doubt that it is wonderful, but I really, really dislike this kind of advert):

screen-shot-2017-01-03-at-22-06-08

“It does wonders to my pictures”? That means that either the photographer does not know how to light them properly, or she makes everyone into some kind of plastic thing that they are not.

And I think that this shows a lack of respect for the person. Like saying “you are too ugly to display as you are; we have to fix you first”. It also gives young women and men the idea that they do not meet society’s beauty requirements.


Review: Alpine Labs Pulse Camera Controller

“Late December” is a great season, with Christmas, Hanukah, and various other gift-giving opportunities. Especially when Santa brings presents. And Santa brought me presents this year—did he ever!

For starters, my son Daniel bought me this:

20161226-mw5d2449-1024

Superb.

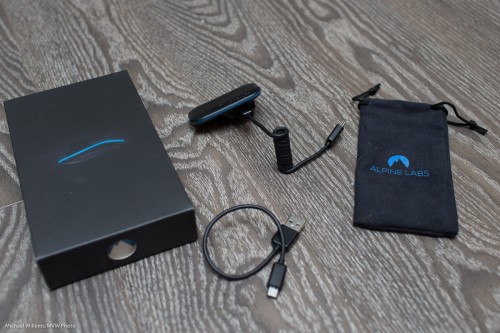
But hardly as interesting to my readers as one of the gifts Jason, my other son, brought me from California—namely, the device I am reviewing here. Here it is:

20161228-1dx_2974-1200

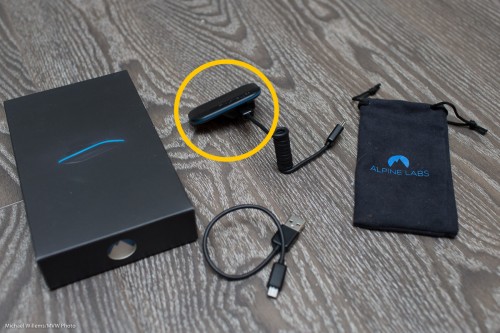
This $99 (US) device is the extremely cool Alpine Labs Pulse camera controller:

20161228-1dx_2974-1200-2

What does a camera controller do? Um… It controls your camera. Duh.

Let me explain. First, here’s how you operate it:

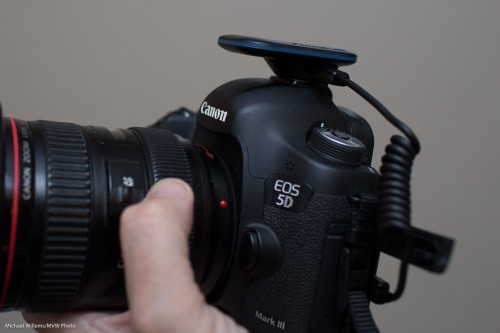
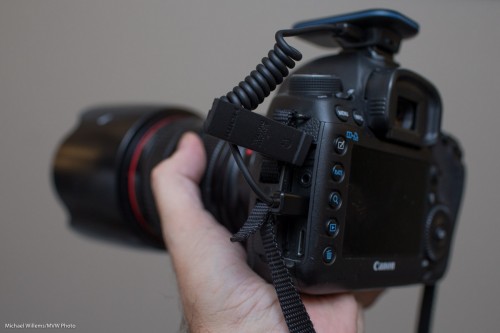
  1. Mount this controller on the flash hotshoe on your Canon or Nikon (but not Sony) camera.
  2. Connect the cable to the mini USB/micro USB input on the camera. Unlike traditional remote triggers, this one uses Bluetooth, and it connects to your camera using the USB port, not the trigger port.
  3. Install the “Pulse Camera Control” app on your phone/tablet (search for it under that name). Both iOS and Android are supported.

20161228-1dx_2970-1200

20161228-1dx_2971-1200

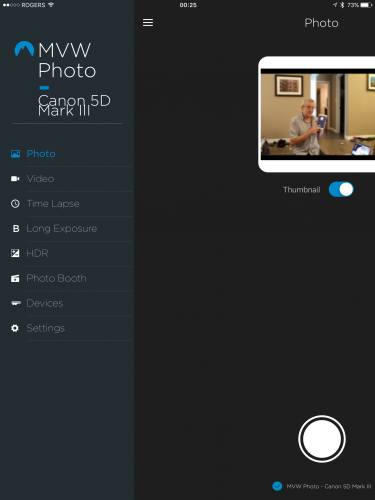
You can now pair the device and use the app:

img_8660

(That pairing, incidentally, could be handled more elegantly. Rename your device and yet it often returns to the default name. But that is a minor issue, and even during my testing I received at least one firmware update, v.1.21. The iPhone app I tested with is v1.3.0.506e570. More about bugs later.)

The device had no trouble recognizing my Canon 5D Mk3 or 1Dx. The Alpine Lab web site has a list of cameras that will work: most current Nikon and Canon cameras are supported.

You can now use the app to control your camera in the following way. First, set the camera to manual focus and preferably to manual exposure mode.

Now use the app to:

  • Set exposure: i.e. set Aperture, Shutter and ISO (your camera should ideally be in Manual mode, and it should be set to manual or back-button focus).
  • Take pictures by pressing the “shutter button” on the app. After you take a picture, you get a preview, which although it is small, low-resolution, an blurry, is very useful. You can also get a histogram, which is also very useful.
  • Take Video, the same way.
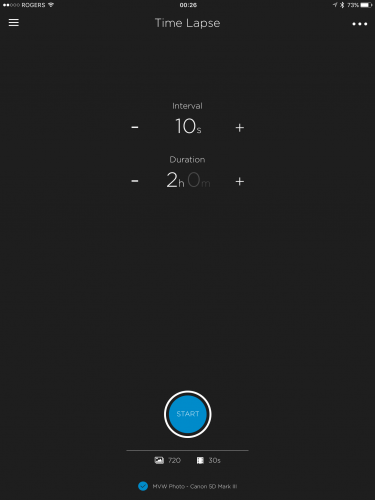
  • Make Time Lapse sequences. This is an extremely cool and easy-to-use feature; see the screen capture below. Easy and flexible: It allows exposure ramping, and you can even pause the exposures. Don’t forget to turn off picture review on the back of the camera when using this mode, or you will drain your battery unnecessarily quickly.

img_8662

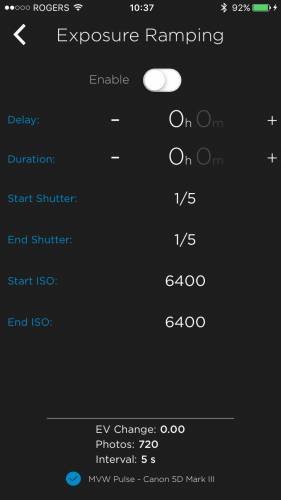
Exposure Ramping is a very cool feature:

img_0058


  • Take Long Exposure pictures. Without this, all you can do is up to 30 seconds, or use the “Bulb” mode, where you yourself have to hold down the camera’s shutter for the required shutter time. Now, you can easily take 35 second exposures, or 55 second exposures, or any exposures up to an hour and a minute. (You can still use “Bulb” mode also, if you wish, and you can start with a delay).
  • Take HDR combinations. Take 3-9 images, up to 7 stops (!) apart from each other. Pulse allows you to take the pictures; it does not combine them for you. You can do that in Lightroom or whatever app you use.
  • Photo Booth: a very simple photo booth mode where the app takes 1-10 pictures when you hit the shutter; 5-10-15-20-etc seconds apart.

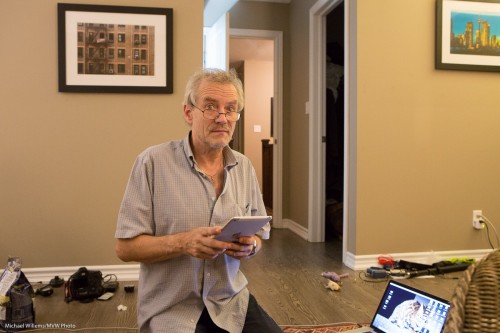
Here’s the selfie, taken with the Pulse, whose preview you saw in the earlier screen shot:

20161228-mw5d2480-1200

This great app does have a few little bugs, but seeing the frequency of updates I am sure they will be fixed soon. Bugs I observed included:

  • The “LED brightness” setting did not work reliably (or at all? Hard to tell).
  • The LED stays on sometimes. Just constant, i.e. non-flashing, blue. At other times, it is completely off. Perhaps these states mean something, but if so: I have no idea what.
  • Several times, the “OK” button on the app screen was obscured by the iPhone’s keyboard. Resetting was the only fix, since there was no down arrow “remove keyboard” key.
  • The “select an accessory (this may take a few seconds)” screen takes up to 20s to appear sometimes.
  • Cosmetic bug: see the camera name in the first screen shot above?
  • The app (or device?) went to sleep sometimes. At these times, a complete reset of camera, device, and app were sometimes necessary to get everything working properly again.
  • When I connect the Pulse to the computer, every few minutes I get this warning:

screen-shot-2016-12-28-at-10-05-18

These are relatively minor issues, most of which will no doubt be fixed soon. None of these stop me from using the camera, and some may well have been the result of me trying out all the modes. Still, robustness could be improved.

Overall

Many devices do some of what Pulse does; few or none do all; and none do it in such a simple and, I dare say elegant, way. This device will have a permanent place in my bag, and you can expect to see time lapse photos etc in my future.

EDIT: Jan 15, 2017: a firmware update fixed at least some of the issues I mention. Stand by for more updated information soon.

Doggone it

I have dogs on my mind, it seems.

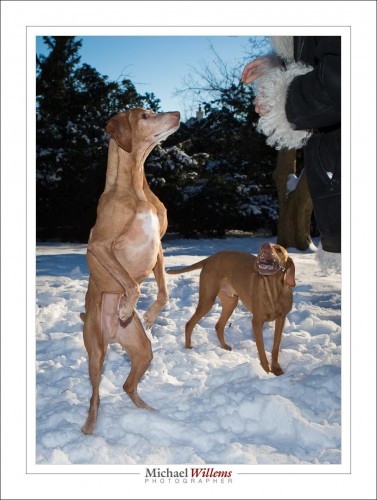
Why? Because I did an outdoors portrait session of two dogs today. A little challenging, because it was cold (-9ºC), and it was bright, and the dogs would not sit still.

I started with flash held by an assistant (in casu, the dogs’ owner) and the standard outdoors settings. That gave me:

20161219-1dx_2758-1024

But TTL is not easy here, because of the dark subject offset against the reflective snow, and “manual” means “keep the distance of the flash from the subject constant”, which is near impossible. So on to additional ways to shoot:

20161219-1dx_2654-1024

Additional advantage: fast shutter speeds are now possible. When you use flash, 1/250 or 1/200 sec is all you can do. Without flash, this limitation is removed. Note that I use back button focus, and this means I need to keep pressing the button as I point at the subject. Having first, of course, selected AI Servo (Nikon calls this AF-C).

After this, I did some with simple on-camera flash, which can be perfectly OK if, as in this case, you mix with lots of ambient light:

20161219-1dx_2756-1024

And finally, I did some standard bounced indoors shots:

20161219-1dx_2829-1024

The lesson here is threefold, namely that you must know a multitude of techniques; that you must be prepared, willing and able to switch between them; and that you must be able to do so quickly.

This, incidentally, is what I teach in my workshops; including the January 28 one in Toronto, for which there is still space. See http://learning.photography for details and to book. If you know the starting points, the magic formulas that match the situation at hand, you can easily and quickly vary from them: your starting point will already be close enough to get acceptable results. Also, you will feel more confident.

After the shoot, I sat in traffic for a few hours, then downloaded and finished the images in a few more hours, and finally I uploaded a preview web site for the client to look at.

If you have every considered hiring a photographer, you now know why this costs some money. Knowledge, experience, expensive equipment, spares, and time all combine.  “My nephew has a camera too, so he can shoot this to save money” simply does not work except in the simplest cases. And as today showed once again, the world rarely consists of simple cases.

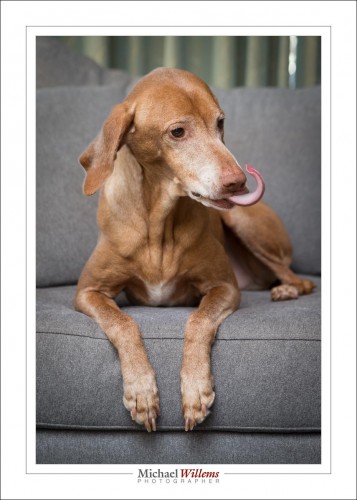
And yes, I do pet pictures too.

Are you in, or near, Toronto?

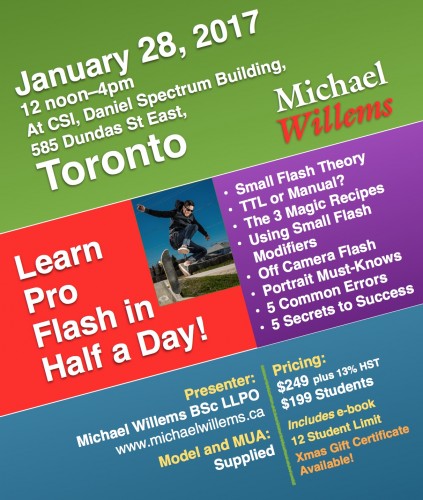
In that case, you may be interested to hear that I am going to teach a workshop on 28 January 2017, right in downtown Toronto. This will be a good one: half a day, model and make-up artist included, and as a special present you get the Pro Flash Manual e-book included, too. 

And you can buy the course as a gift certificate: a great gift for the holiday season.

Student discount and couple discount available, so bring a friend.

To read more and to book, go to http://learning.photography now.

The PDF is here: csi-course

screen-shot-2016-12-14-at-15-53-06

Another Holiday Season Gift Idea: SAVE and GIVE THE LASTING GIFT OF KNOWLEDGE: http://learning.photography/collections/training-misc/products/gift-voucher-private-course