Not enough? Then add.

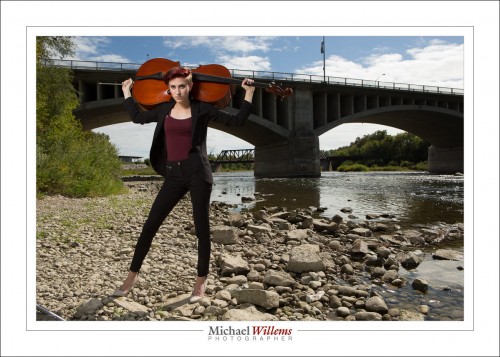
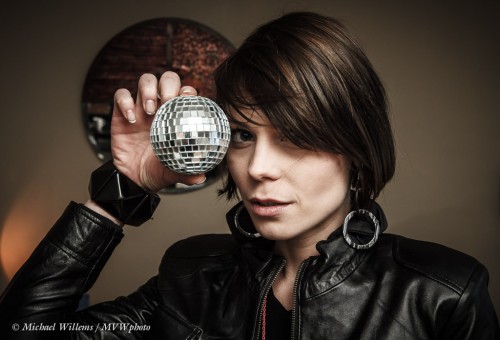
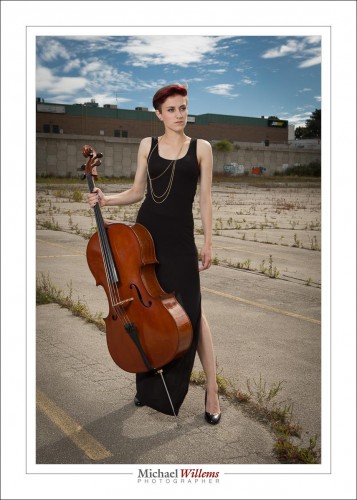
To do a photo like this, just now of talented cellist Kendra Grittani, you need a lot of flash light:

So if one speedlight into an umbrella does not give you quite enough light, you can:

– move the umbrella closer to the subject
– turn up the power
– add more flashes

I did the latter. One more flash at full power on a separate light stand, but aimed at the very same umbrella. It worked. One stop more light.

Magic

There’s several magic formulas I will teach you if you buy one of my books or come to a course here or at Sheridan College. Or if you, like today’s student, arrange a private training session with me. Well worth it: individual teaching of exactly what YOU need to know.

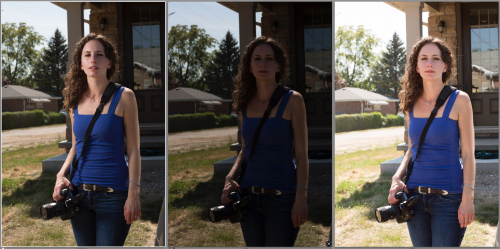
So here’s an example from today’s training session. Here is today’s student, three times (you may want to click to enlarge):

  • Photo 1: The magic. Flash. Flash into an umbrella on our left, set to “full power minus 1/3 stop”. Camera uses the magic starting point of: 100 ISO, 1/250 sec, f/8, in order to expose for the background.
  • Photo 2: Same exposure settings, but no flash.
  • Photo 3: Also no flash, but now exposed for the person.

In all three photos I got one essential need right: the sun is behind the person and thus becomes the shampooey goodness light (a.k.a. the hairlight).

But then, the differences.

As you will agree, the flash photo shows a real person. The face is not dimensionless and flat. I can get creative: I can position the umbrella to create split lighting, as I did here, or I could move it more towards me, to get first Rembrandt lighting, then loop lighting, and eventually butterfly lighting.

In the non-flash photos, the face is flat. So is the entire person, her clothing, etc: it’s all flash and featureless.

Also, in non-flash photo 1 the sky and the saturation of the background is fine, but the person is a shadow.  In the second non-flash photo, I exposed for the person—but now the background is overexposed, causing it to lose definition and saturation.

What do you need?

  1. Light stand
  2. Bracket to mount the flash and umbrella onto the light stand
  3. Umbrella
  4. Two radio triggers (I use Pocketwizards, the simple, non-TTL type)
  5. A cable to go from Pocketwizard to flash (see www.flashzebra.com)

And that’s it. Except for the camera, of course. So get the gear mentioned above and use the magic formula for outdoors/bright day (100 ISO, 1/250 sec, f/8; now vary just the aperture), and you can do great creative work.

___

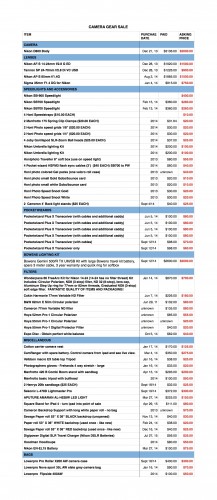
Footnote: A friend in Burlington, Ontario is selling all her camera gear. Look at the list below and if there is anything you like, email me with “GEARSALE” in the subject line, and I will forward your email immediately.

Here’s her list:


Mission: impossible

Sometimes you are faced with a situation that would be easy to solve with a flash.

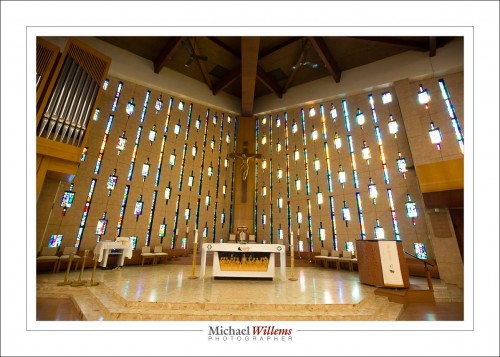
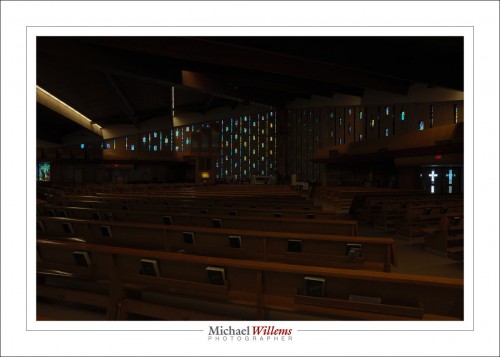
Like this church, in which I co-shot a wedding on Saturday:

You can see why the situation needs flash. Without it, I am stuck: I expose for the church, and the stained glass pretty much disappears, as you see above.

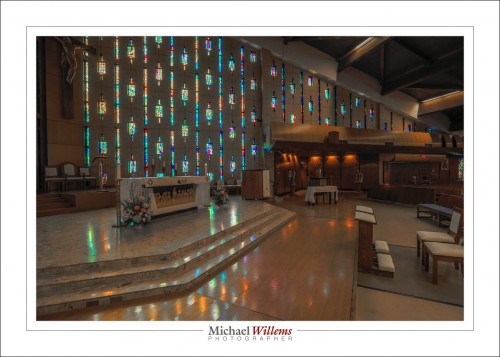
Or I expose for the glass:

Yeah, the glass is back. But now I lose the church.

OK, flash then. Simple! (If you have done my courses and bought my books.)

But Wait.

It is a Roman Catholic church, and that church is used to an authoritarian top-down command structure, and in this particular case that works against us. Because the photography rules (and there’s a full page of them) say:

“No Flash”.

Now I am stuck. As my colleague George quite rightly says: “we are here for the people” (and you can imagine him shrug). Right he is.

But hang on. There are still tricks we can use.

One: use the built-in HDR mode in your camera, if it has is. Some high-end cameras do, and my 5D Mk3 is one of those.

Select it and press. The camera now takes three pictures (my choice), two stops apart from each other (my choice), and crunches a few seconds, while it combines them into a JPG file:

Now, the bright and dark areas are no longer 12 stops apart.

And that was the problem: the difference between bright and dark was simply too great for a camera to handle in one image.  Select HDR (which you all know stands for “High Dynamic Range”—right?) and hold the shutter down until it has done three shots (or more, if you prefer).

And then you can work the image a little more in Lightroom, if you like. Problem solved. There’s always a solution.

___

I have moved to Brantford, Ontario. The new studio and classroom welcome you: call 416-875-8770 or5 email michael@mvwphoto.com.


About to re-start.

The teaching blog is about to restart. My office is being installed.

My first note: a quick tip.

Make backups. Make backups. Make backups.

  • I like to make backups at a time of MY liking – not automatically. That way I only back up good files, not errors.
  • You need multiple backups. At least 2. Disks are failuires waiting to happen. All of them.
  • Of your backups, at least one should be off site.
  • Print your photos, too. Good pigment prints on natural fibre paper last.

If I had not moved the disks myself, what could have happened makes me shudder. Do not become part of the “I lost everything” crowd.


You’ve done this yet?

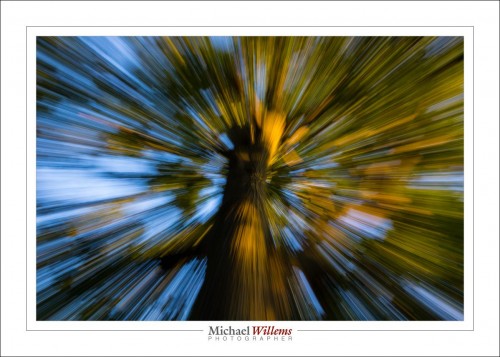
Zoom in or out (as said before, it does not matter which) while shooting. Slow shutter speed, 1/15 sec.

The centre will be relatively clear; the outside more and more blurred. Wide angle lens works best, of course.

And in general, learn what slow shutter speeds do. If you want to be a good photographer, that’s how you learn: by doing, trying, experimenting.

What are you doing reading this? You should be shooting!

Exceed Your Limits!

That sounds like something on an inspirational poster in your company’s HR office, doesn’t it? But I mean it. You can exceed your limits. Your shutter’s limits, that is.

One of my cameras has a flash sync speed of 1/200 sec. That means, see the post from two days ago, that I cannot go faster than that without this happening:

See that black bar? That’s what happens. Flash does not reach that part of the photo; the shutter curtain is too slow and gets in the way.

But sometimes, especially in bright sunlight, I want to shoot at 1/250 second, or even at 1/300 second.

And you know what? Sometimes I do.

In that picture, taken at 1/250th second on a camera that only goes up to 1/200, is the black area at the bottom really annoying? No. It is not obvious (there is also ambient light) and in any case, I want to vignette a little anyway.

Remember, it is only the bottom (or if I turn the camera to portrait orientation, the right) that will lack flash. So I can use a faster-than-allowed shutter speed while using a flash, IF any of the following four apply:

  • the subject of my photo is just in the centre; or
  • there is a lot of ambient light; or
  • I can crop off the black area; or
  • I want a strong vignette anyway.

There. Another trick on your flash bag of tricks!


Come hither?

A few opportunities to meet, if you are nmear Toronto:

On July 19, I am doing a small workshop in Oakville. You, your computer, workflow and backup Best Practices, and Lightroom. Click here to learn more.  And be quick: 5 students max, and gone is gone.

And earlier still, this coming Sunday July 12, you can meet me during the official opening/”meet the artist” of my exhibit in Bronte, Oakville:

Sign up here (click) and come and see me, and buy one of the works for sale. There’ll be unframed work too, in a tray which I will bring. See you Sunday!

A new toy

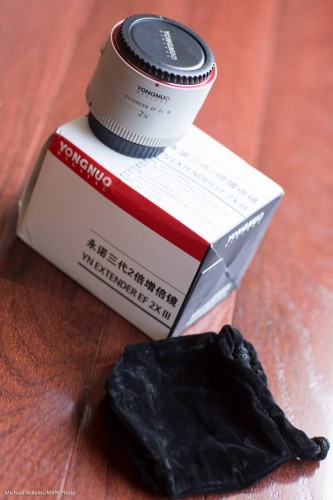
You have probably all heard the name Yongnuo: a Chinese maker of photo equipment that is not only very affordable, but also good. Flashes that compete with those made by Nikon and Canon, but also other equipment, like lenses.

And like the Yongnuo Extender EF 2x III (i.e. the Canon version of a 2x lens extender) that I just bought for around US$190—compared with the Canon version, which today costs $525 at B&H. A huge price delta, so is there a quality difference too? Read on to find out.
A lens extender is a device that is mounted in between the camera and the lens, and by being there, makes telephoto lenses longer. So with this 2x extender, my 70-200 mm f/2.8 lens becomes a 140-400mm lens. When I use this lens/extender combination on my crop camera, the Canon 7D, I get an effective (and astonishing) 640mm!
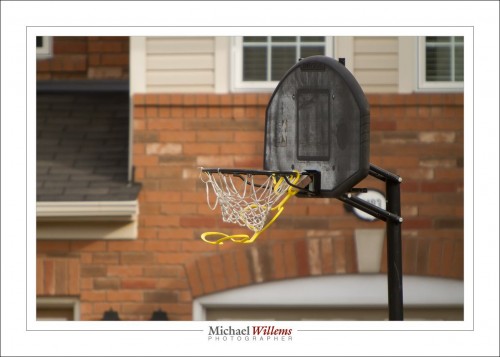
Effective 640mm

An extender is an active device: unlike extension rings, which simply make the distance between lens and camera greater in order to achieve macro functionality, an extender has lenses inside (9 lenses in this case, in 5 groups), so quality is important: cheap glass will cause quality to deteriorate quickly.

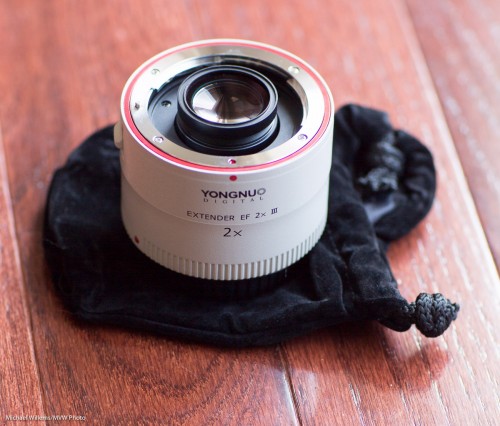
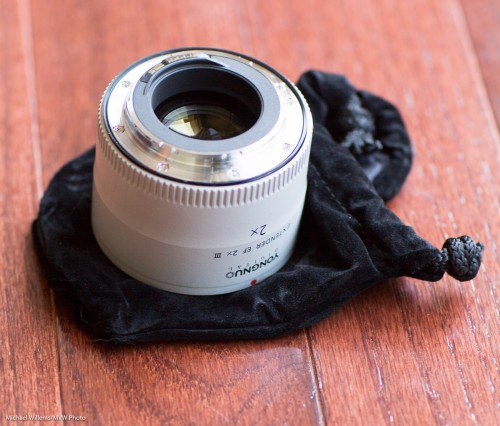
Upon visual inspection, this extender comes across as a quality device. A carrying pouch is provided, and the extender itself is good: the mounts are metal, lenses are coated, and workmanship is excellent.

Here’s the lens side. As you see, an element sticks out, which is why you can only use this extender on certain, mainly long, lenses:
And here’s the camera side:
So by using this extender between my camera and my telephoto lens, I get a longer telephoto lens. Great stuff! But is it a free lunch?

Of course not: free lunches do not exist. When considering an extender, keep in mind the three possible drawback areas:

  1. First, there are the theoretical drawbacks. There is no way of overcoming these. The main price you pay for the extra focal length is a decrease in maximum aperture. A 2x extender will cost you 2 stops of aperture. My f/2.8 lens now becomes an f/5.6 lens.
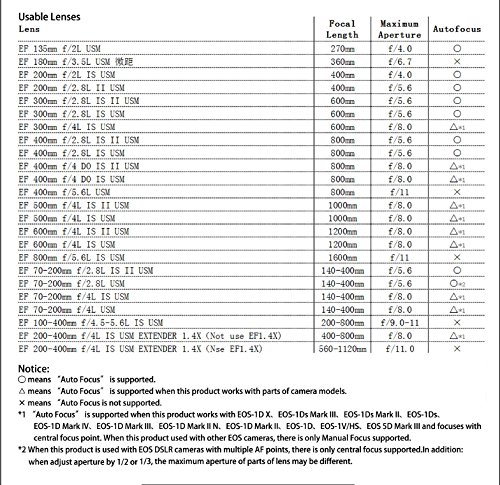
  2. Then, there could be functionality drawbacks. An extender will only work on certain lenses, namely the longer lenses. You need to check the list of lenses that will work with the extender: see below. Also, some lenses will lose functionality, such as metering or autofocus functionality. I am fortunate: the 70-200 f/2.8 IS lens works great with this extender: autofocus works, as does metering (but more about this later). This extender works with my 45mm T/S lens as well, but I am doubtful as to whether that is actually useful in real life.
  3. Finally, there may be quality drawbacks. Cheap glass, for instance, will destroy the quality of your picture. The Yongnuo scores very well here.

Lenses you can use with this extender:
I used the Yongnuo 2x extender for Canon on my 1Dx and on my 5D cameras. And the results, I must say, are excellent. I saw none of the loss of quality that I would expect in the corners. No doubt it is there—after all, no piece of glass inserted between you and the object you are looking at will improve the picture—but if it is imperceptible, that’s an amazing feat. For less than half the price of the Canon version that it imitates.

With any lens, you expect vignetting, i.e. a little darkening in the corners. In this extender, I see very little. And you can fix it in post-production. First, the original; second, the version I fixed in Lightroom:
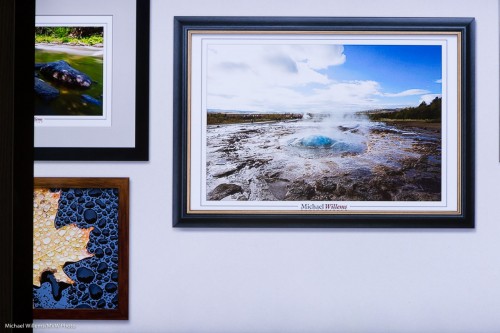
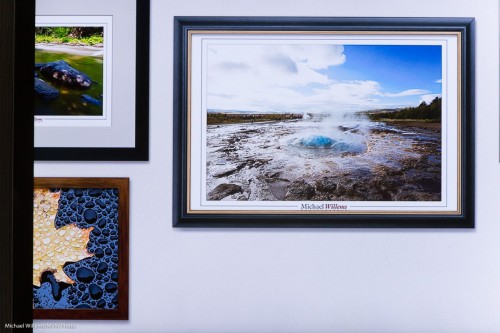
Can you see that the first one has a tiny bit of vignetting?

Talking about distortion, do not use the “Enable Profile Corrections” feature in the Lens Corrections section in Adobe Lightroom. If you do, you will see significant extra distortion, instead of a lessening.

Chromatic aberration was minimal, and the “Remove Chromatic Aberration” function in Lightroom’s Lens Corrections panel took care of it completely.
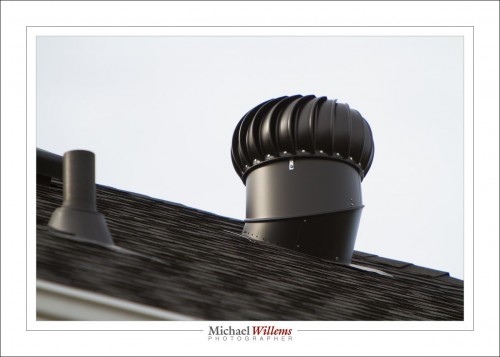
Autofocus appears to work just fine. I saw no discernible decrease in AF speed or accuracy.
Extender in action: a 400mm shot

Metering seems two stops off. In testing, I needed to set the meter to somewhere between –1 and –2 stops to get a correctly exposed photo. This was the case whether I used spot metering or evaluative metering. I used the centre spot, in case metering is biased to the selected focus spot. If this is indeed systematic rather than me doing something wrong, I do not care: it is easy enough to aim at –2 instead of 0.

Conclusion

The Yongnuo is an excellent clone of the Canon extender. While perhaps there are quality differences, they are so small that I was unable to detect them. And for one third of the Canon extender, this is a very good deal. It is this price that may get many of ytou rushing to the store to get one.

In that case I have a tip for you: you will get a special price if you mention discount code “Speedlighter” to Tim Payne at Yongnuo USA: http://yongnuousa.net/contact. And please note that I have not been compensated in any way for this mention or this review: I paid for my own extender.

 

Treasure Trove (reblog)

A re-blog of a post from 2 years ago:


Your old photos are a treasure trove.

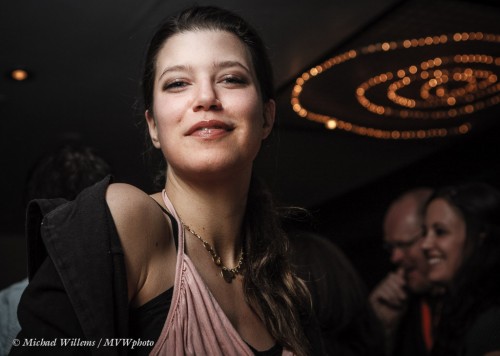
I reminded myself of this again last night: searching for some images for a client, I came across many great images that I had overlooked before. Like this, of Miss Halton 2009, Evangeline Mackell:

Some images are great because they remind you of the times you shot them in. Others, because they show friends you may have almost forgotten, or places that seemed humdrum at the time, but carry meaning in retrospect. Or perhaps they show people who have since become famous. Yet others, because they are artistically good. Some, because you simply overlooked them, and that is more common than you may think. Always revisit your images multiple times.

Also, over time, you get new insights into how to finish images. The image above is desaturated – my flavour of the moment. In this image, it makes it good.

One thing to do with your images is to:

  1. Date them in the filename.
  2. Organize your images in folders by date.

TIP: When images are imported into Lightroom, you have options, and here are two of the most useful ones to apply automatically when you import any image:

  • File renaming. My images automatically get renamed upon import to “year+month+day+original filename:, so that an image named “MVWS0318” becomes “20100114-MVWS0318”. That way whenever I find this image on my hard drive in the future, I can quickly go to folder “/photos/2010/2010014-Toronto” to find the other pictures from this shoot.
  • I set the camera calibration Profile to “Camera Standard”, not “Adobe Standard”. That way the images look more like the way they look on the back LCD after I shoot them.

More images:

As you see, even the waitress can make for a nice shot. Or people with nice backgrounds thrown out of focus:

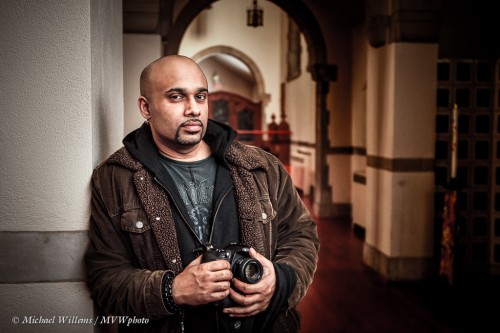
Or people like my friend, animal lover and incredibly talented photographer Baz Kanda, who came to the Willems Studio Residence (i.e. here) to accompany me to a Flash course I taught a while ago. Here he is at Storey Wilkins’s residence and at a church, in January 2009:

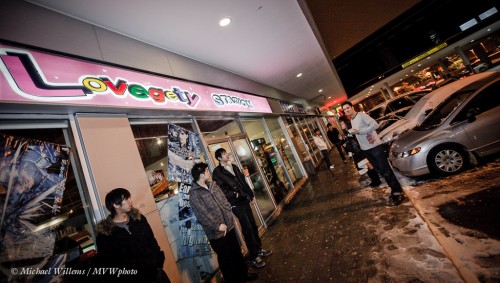
Dallas Hansen at Lovegety Station – only the Japanese can come up with a word like “Lovegety”…:

And those are just a few random picks from a few random days a few years ago. Can you see the potential of revisiting old photos? They take you back.