Less is more.

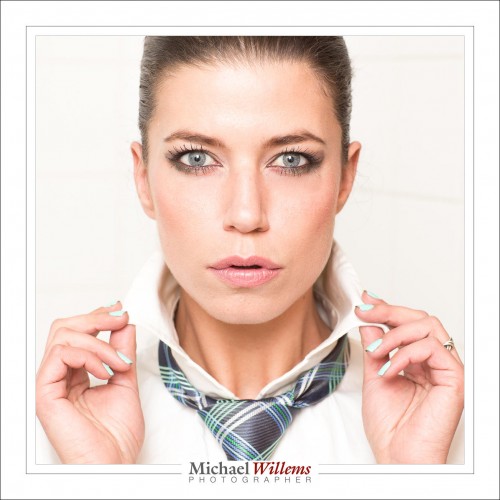
Sometimes, simple is all you need. Like in this headshot:

This shot is simple in many ways:

  • Shot with simple camera settings: f/5.6, 1/125 sec, 400 ISO.
  • I am using just one flash on camera, aimed 45 degrees up, behind me. The catch lights are the circle that my flash throws onto the ceiling.
  • The flash is using TTL (automatic flash metering, in other words). Of course since this is a high key scene, I set flash compensation to +2 stops.
  • I am filling the frame. Yes, cutting off the head is allowed.
  • The pose is a simple one, as is the composition.
  • The location is a simple white bathroom: smaller is great since it allows great bounce without the high ISO values you would otherwise need.
  • The dress is a simple white shirt, against a simple white background.

All this “simple”, combined with the right model and a razor-sharp (obscenely sharp, some might say; look at full size) 85mm f/1.2 lens, makes for a good shot. No studio complexity needed in this case; no pocketwizards, no complicated anything. Simple does it; less is more.

So if anyone tells you “you cannot do this, you need more equipment”: it ain’t necessarily so!


Art Discussion, Continued

After yesterday’s post, a reader left a comment (and you are all invited to leave comments and engage in discussion on this blog!) that I consider interesting enough to republish, and to answer/discuss, here today.

1. “More please! please! this stretch into art and feeling is terrific and welcomed in your subject matter here on speedlighter.

>>Do you see them? And do you feel them ?<<
Well no. I have no awareness of Hopper. where do I go to gain more of this, just the museum? But you have provided one here. More please! please!

2. You have written about IP and ownership before. How are you able to post a Hopper photo on your site? no (c), no reference, no link?”

Great, let me answer those in turn.

First, art. Yes, I think photography is part craft and part art, and the art component is something we do not talk about quite enough. Photography is not about bits and bytes and f-numbers. Those are just tools. It is about what you do with them.

Photography is a serious art form. My favourite artistic photographers include such people asNan Goldin, Annie Leibowitz, Mike Disfarmer, Sally Mann, Edward Weston, Richard Avedon, Diane Arbus, Andreas Gursky, Jan Saudek: their images fire up my imagination, speak to my emotions; evoke places and times; and that is what art is supposed to do.

And for painters, Hopper comes an easy number one for me. This is entirely personal, of course, but there is no painter whose work speaks to me more than Hopper. You have not heard of him? I bet you have seen Night Hawks, his most famous painting:

Can you feel the alienation and loneliness?

To learn more about Edward Hopper, my first stop would be here, and of course Google. In general, as a photographer, I recommend you also look at paintings, go to museums, read about art. The various arts have much in common, after all.

Why do these artists resonate with me? I do not know, but I do try to analyze that a little. Part of the fun.

And me? Do I produce art?

I think that is the wrong question; or at least it is one that I do not feel qualified to answer. I do try to put feeling into my work. Like into this self portrait:

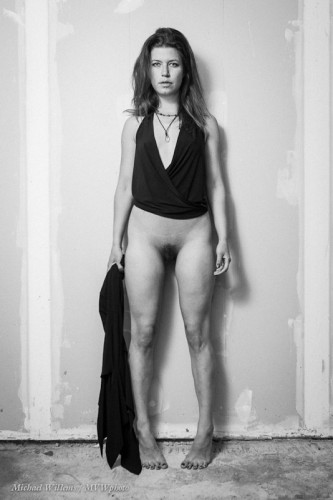
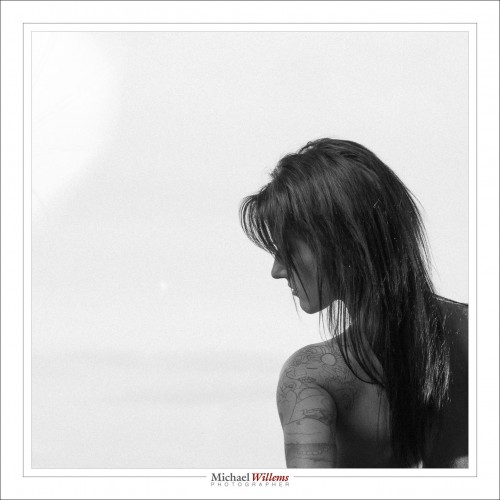
…and into my art nudes, like these three examples:
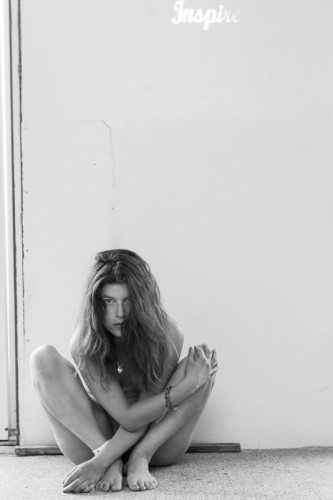
Inspire

“Panta Rhei”

“Nude Against Drywall in Garage”

And into shots like these two:

“Sailboat on Lake Ontario”, 2013

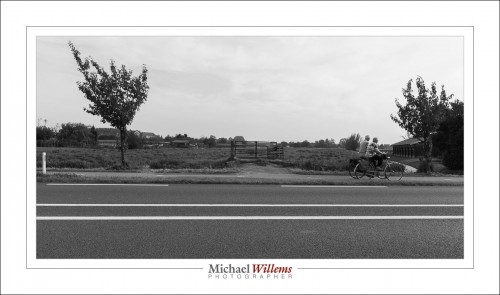
“Bicycle in Schoonhoven”, 2013

…and there’s much (much) more. I occasionally showcase some of it on www.michaelsmuse.com.

Am I comparing myself to those greats? No, of course not. Comparisons are not useful, anyway: what counts in my work is that it touches me. And if it does that, it has achieved its goal. If anyone else likes it too, that’s great. If someone wants to call it art, good. If not, fine. I do these for me. Or perhaps more accurately, for having done it. Creating an artistic photo is a satisfaction all of and by itself. A tree falling, and I was there to hear it fall.

Finally, then, copyright. On some, or perhaps all, of Hopper’s work, copyright has run out and has not been renewed. But it’s a moot point, because it is generally agreed that under the right circumstances, art can be used under Fair Use rules, and I am sure that this, a teaching blog, constitutes exactly the right circumstances. Hence, no problem.

Analyzing which artists of the past or present inspire you can be a very useful exercise for a photographer.

 

Seat of the muses

The muses inspire us, and we each have our own muses and inspirations. My inspirations include the work of painters, notably John Singer Sargent and Edward Hopper, two American painters of, respectively, the 19th/20th and 20th century.

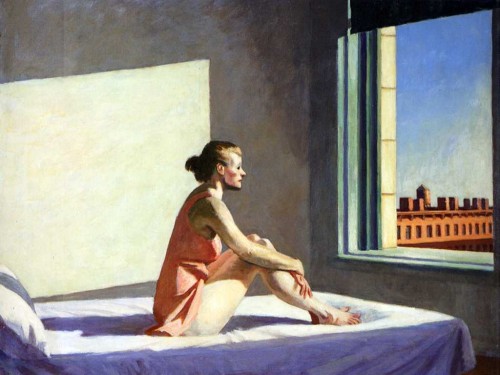
Here’s a Hopper, “Morning”:

And when I say I am inspired by Hopper, I mean not that I copy him, but that he evokes certain feelings (like a combination of “alienation” and “nostalgia”), and places, and times in me. Hopper is an easy artist to admire.

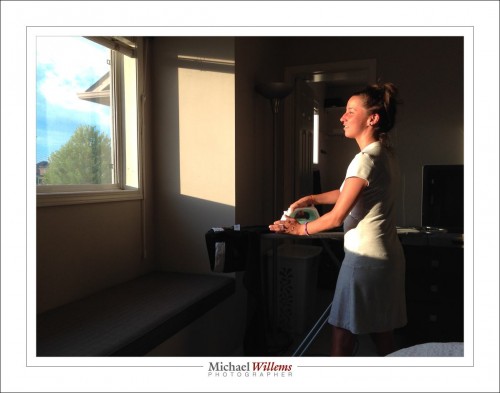
But it is also easy to recognize similarities. Like in this recent photo:

The moment I took that I was struck by the many obvious similarities to the above Hopper: similarities in shapes, colours, and subject; even in mood.

Do you see them? And do you feel them like I do? Perhaps, and perhaps not. The first one is a good thing: that is what learning art is all about. The second one, feeling them a I do, is not necessary, not even desirable: we should not all be struck by the same things.

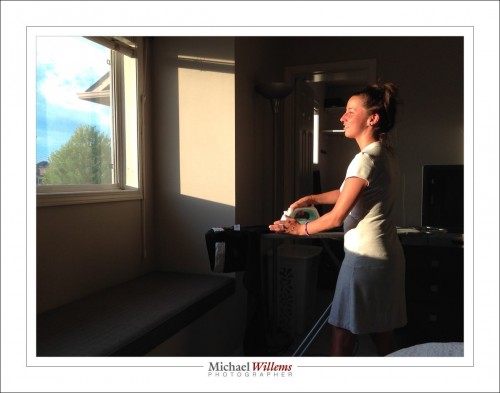
But seeing them, that is what “learning” art is about. And appreciating the basis of good art, like simplicity. Since the above picture is art, not photojournalistic, I feel free to make changes in post-production. What change did I make to this picture? I removed a line in front of the subject’s face:

Can you see how distracting that is? So the objective part of creating art is that sort of thing: no-one can argue with me that that line is not distracting: it should go. The subjective part is the appreciation of the art itself, and there we can differ.

Oh, and that “seat of the muses” in the title? That is what “museum” means, and that is where you will find Hopper and Singer Sargent; and that is where you can go for inspiration.


Deep.

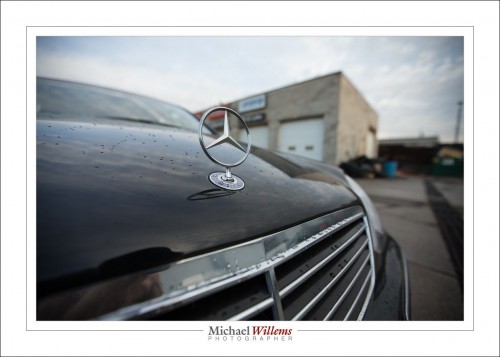
Deep. As in, “this photo has depth”:

One of my cars, outside the mechanic’s yesterday.

So how do you get depth? You know!

  1. Have a close-by object (we call this: “Close-Far”);
  2. Have diagonal lines in the image (the foreground needs lines or texture, preferably)
  3. Use a wide angle lens.

The wide angle lens facilitates 1 and 2, and also has two other advantages: it is easy to get everything sharp if you wish (here, I did not wish); and it is easy to shoot at show shutter speeds.

So pack your 16-35 lens if you have a full frame camera, or your 10-20 or similar if you have a crop body, and go shoot some depth pictures.


REMINDER: Have you thought of a training gift certificate for a private custom lesson with me as a gift for this coming season? A gift which is not only fun, but leads to your loved one making better family photos. And you’re done with shopping immediately. So everyone’s a winner. Go to http://learning.photography to order your gift certificate now.


Experiment with aspect ratios

Your camera produces an image in the aspect ratio 3:2 (or 4:3, if you use a four-thirds camera). But why not let go of that, and use your own ratios?

Like square.

Or like wide.

Or odd-shaped.

I am a firm believer in “make the picture whatever shape you think fits the picture best”. Not “whatever the frame-makers in China or the paper-makers in Switzerland have decided for you”. Make the picture the way you like, and then cut white edges off paper, and have custom frames made.

On that note: no, you cannot print a 4:3, say, on 3:2 paper without either cropping the picture or cutting off white edges. It’s the reality of life.

I have found that often, people do not understand this: “yes but I want my 4:3 picture to fit on this 8:10 paper and no, I won;t accept cropping or white edges”. Well, here’s news: you have to. To understand why, imagine you have a square picture. Try fitting that on an 8×10 piece of paper, and now you will see why it cannot be done. So you either crop to the paper aspect ratio prior to printing (Lightroom is very good at that), or you print with white edges, which you then cut off. It’s one of those “it is what it is” things.


Myth-busters!

(To the tune of “Ghostbusters”).

Often, my posts point out common myths and misconceptions. Of which there are many… many. On the Internet, no-one knows that you’re a dog, and no-one knows that you are wrong.

So, two oft-heard “truths”:

  1. You cannot shoot with TTL if you are a pro.
  2. You cannot use just one light for a serious portrait.

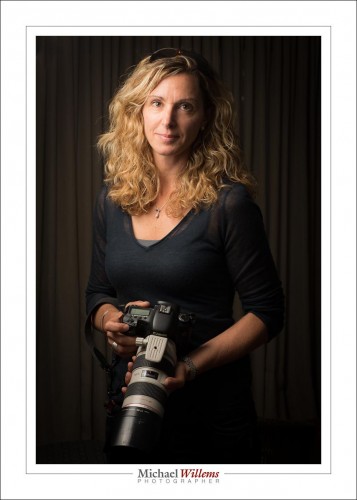
So. TTL was used in this portrait of students and friend Diana; remote TTL in fact (light flashes from on camera flash drives off camera flash); and the light was one flash through an umbrella. The on camera flash was disabled, except for those light flashes.

1/125 sec, f/8, ISO100.

The curtain was chosen as a classy background, but the umbrella was close to the subject so the curtain would get little light. TTL handles this fine; if the subject had been too light or too dark, a touch of flash compensation would have sorted that out.

The one light-with-umbrella gives us enough light for a portrait with Rembrandt lighting. Fairly dramatic chiaroscuro-type lighting, but not so dramatic that it becomes unflattering. On the contrary, this is nice light.

The blonde hair stands out nicely against the dark background; dark hair would have needed more light.

So there, a real portrait with “studio settings”, i.e. just one light, and using TTL. I could do that all night.


What’s with the long lens?

So when I shoot portraits, my favourite lens, if I can use it, is the 70-200.

Why “if I can use it”?

Because it is long. That means I need a large studio to stand back a lot. And not every studio is large. In all probability, your kitchen isn’t large, and I bet you do portraits there sometimes.

OK… but why would I want that long lens in the first place?

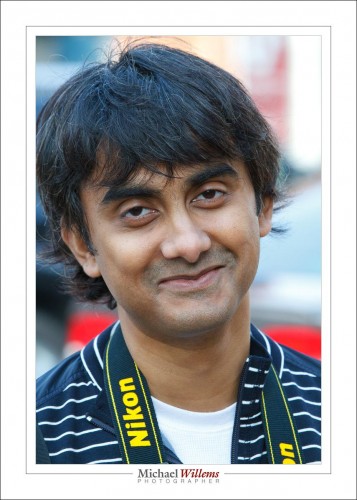
Because then I get very little distortion. Here’s a student, a few years ago on an Oakville Photo Walk, from far away, with the 70-200mm lens:

That’s what he looked like.

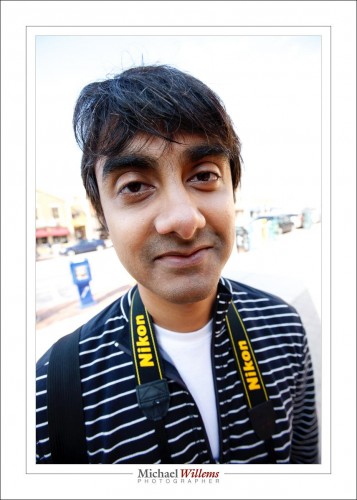
But now let’s get closer. And closer. So we zoom out. Closer still. Wide angle. Closer still. Now we have a very wide angle lens (16-35), and we are very close:

Can you see that’s a very different (and distorted) person?

Sometimes, in an environmental portrait, you may want to get close to the second picture—though never that close, distortion is out. But generally speaking, if it’s a headshot, you want accuracy, and the farther back you stand, the more accurate the representation of the person is.

There is a second advantage to being far away: you are not “in their face”. That means you are not perceived as threatening and something to fear. Which in turn means your subject will relax more. Basic psychology.

Practice: 50mm (on a full frame) is the minimum for half body shots; 85mm (ditto) is the minimum for headshots; longer is better for neutral, accurate portraits.

Lesson learned: If you go wide, stand back. Because of course it’s not the lens that does this magic: it’s how far away you stand. The lens just facilitates that.


KISS

Photos are good when they contain what’s needed, and no more. Often, that means they are simple.

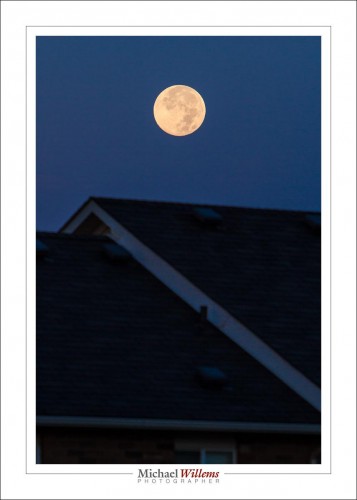
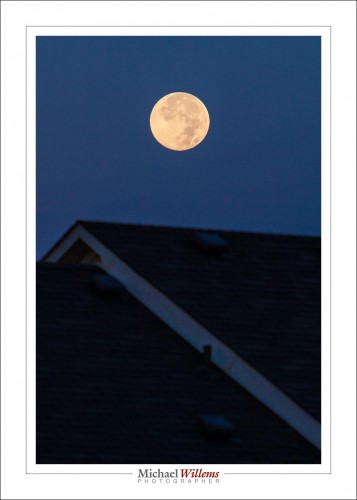
This was outside my front door an hour ago:

Nice and simple. But I can make it simpler.

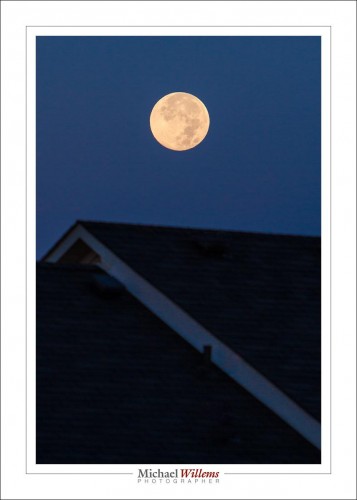
I could even remove some of those distracting things on the roof:

Since I do not think the stuff I removed was essential to the photo, the simpler ones are better for me. I say “for me”, because after all, it IS art, and you cannot argue over art. (Doesn’t stop people though.)

Now Google the most expensive photo ever sold. $4m. Look and tell me what you think.


How you think: an example

Often. it’s not the “what”, but “how”. How do you decide what settings to you in your cameras? What to shoot?

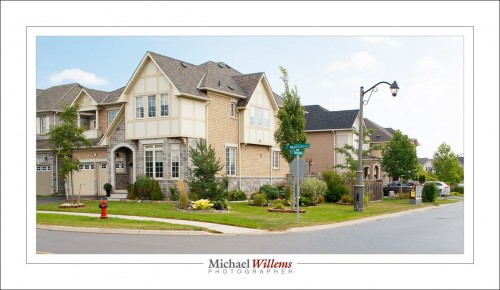
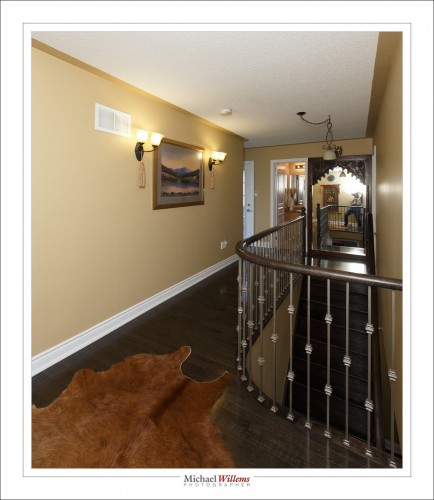
I shall use myself, and today’s shoot, as an example. I shot a house, for a real estate agent:

When shooting something like this, my camera is in manual model. So I need to make many decisions. And I need to be quick: cannot afford to hang around, for the home-owner’s sake, the realtor’s sake, and my own sake.

So before the shoot I decide :”outside, tilt-shift”. Arriving, I had my tilt-shift lens on the camera already. Using the sunny sixteen rule, before even starting I set my camera to 1/100 sec, ISO100, and started at f/11. I looked; that was a little dark, the meter told me, so I went to f/8. Perfect. Then came the fine tuning: I wanted a faster shutter for hand held, so I used 1/200 sec, which necessitated f/5.6. (shutter gave me one stop less light, which I fixed by aperture giving me one stop more light).

Then I focused manually, held the camera straight, and shifted the lens up. Click. Done. Time taken: Seconds.

Now inside. I already knew I would want the wide angle lens, so I put it on, the 16-35mm f/2.8 lens. Inside, I saw mainly simple white ceilings, so I decided simple flash bouncing with one flash, and combining that with ambient, would be fine. Then the sequence was:

  1. I set my camera to 400 ISO: that is my starting standard for bright indoors.
  2. I selected f/5.6: with a wide lens, that will give me sharpness from “near me” to “infinity”.
  3. Then I selected 1/50 second, which, I was sure, would give me visibility of inside light fixtures.
  4. I selected flash exposure compensation of +1 stop, and turned the flash upward behind me at roughly 45 degrees.

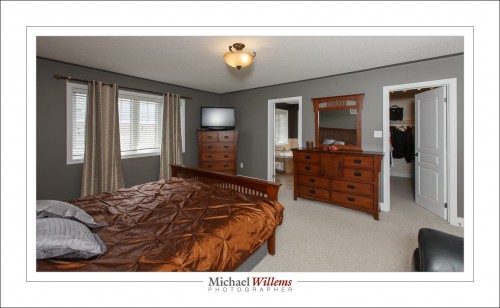
I got:

And that confirmed what I wanted: outside not too crazy bright; light fixture visible, room well lit. Done. Now for the rest of the shoot all I changed was the shutter speed:

  • I first tried 1/50 second.
  • Where “outside” was important, I went up to as much as 1/250 second. This gave a colder inside but better outside.
  • Where “inside” was important and outside could be a little blown out, I went down to as little as 1/20 second.

Once the basics were taken care of, now I started to think about what to shoot:

  • Diagonal into each room; straight-on in the kitchen.
  • I shot from slightly below eye-level (but not below cupboard level if that meant seeing the bottom of cupboards).
  • Of course I went wide, very wide… but I resisted going TOO wide: over-promising and under-delivering is not a very good strategy.
  • I ensured that all the lights were turned on in the rooms I shot.

And of course I avoided this error:

Can you see the error?

Yes, you need to be extremely cautious in a house with many mirrors.

I estimated an hour for this shoot. Time taken: Exactly 56 minutes. A good job, if I am allowed to say so myself, and it feels good to do a good job. This is a beautiful home, and I trust my photos (103 of them) will help secure a very quick sale for list price; perhaps even list price “plus”.


It’s not rocket science.

Photography is not rocket science., But it IS a skill that needs to be learned, and if you want to do it well, just like a rocket scientist, you need to dedicate time to learning.

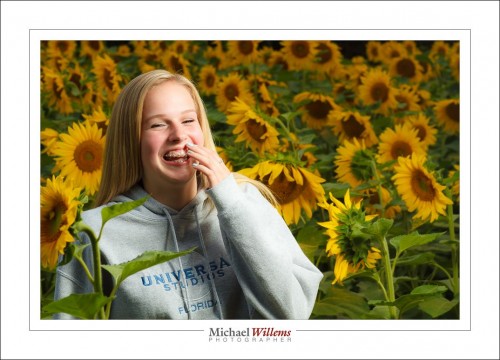
Followers of this blog know that I have a particular style; and my style is what I would call the dramatic portrait. Darker, saturated colours. I.e. like this:

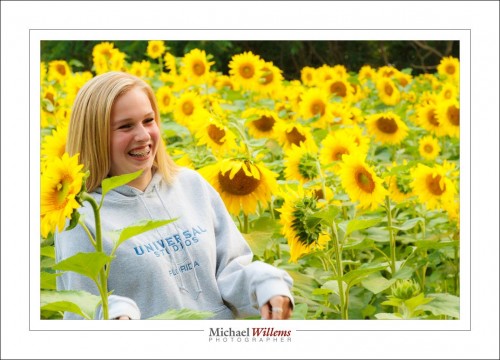
…rather than like this:

So. Which one is right? Both. Either. Neither. Whichever you like.

My personal answer is very clear: the first, for me. I don’t suppose I have to explain again: expose for the background, -2 stops as a target; THEN worry about flash. Read the flash book (buy it today at http://learning.photography) and take a course from me to learn how to do this like an expert.

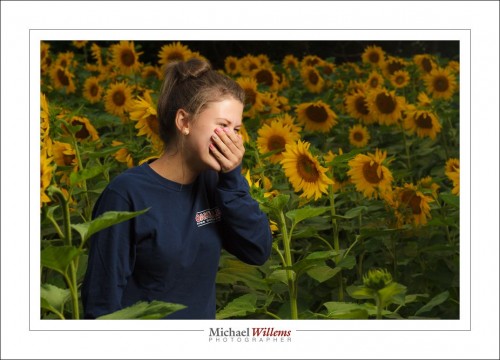
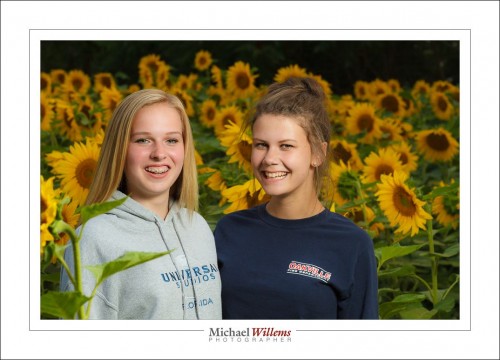
But look at the girl. Isn’t that a great picture of a tween? Silly, unable to be serious… during a recent shoot,  two girls and a set of grandparents turned up; I offered to take their picture, and did. Why do people not have pictures of their children like this? Surely not to save a few dollars…?

The two friends together:

And the girls themselves? When they’re all grown up, wouldn’t they want better pictures of their onetime bff than the iphone selfies they have (and will inevitably lose!) hundreds of? Please, have a pro do some cool pictures of your children. or learn how to do it yourself. Buy the book, take a course, and never look back.

And now back to regular programming.