Test Shot

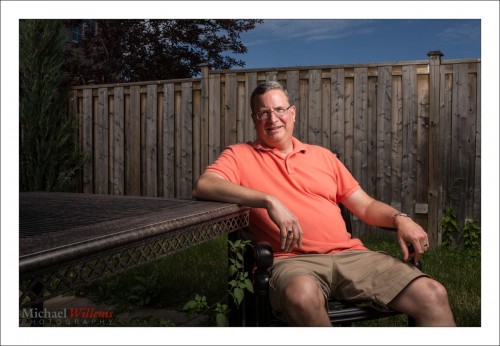
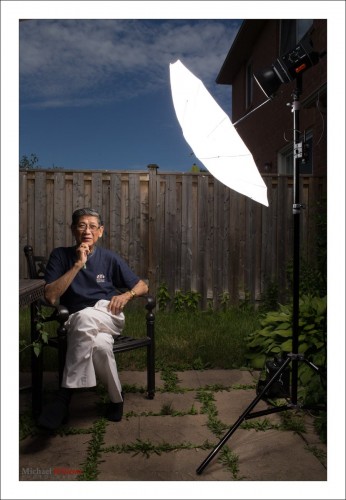
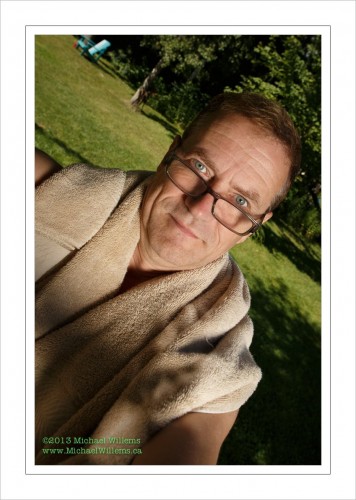
I spent yesterday shooting portraits. And here is my test shot:

Why “a test shot”?

For outdoor portraits, I set up a single softbox. I check my ambient light and underexpose that slightly: I start with 100 ISO, 1/250th second, then see what aperture that needs. Then I set my flash to the desired brightness to give me that aperture.

But then I do one single test shot – that is all I need. I check:

  1. Is the background dark enough? (*)
  2. Is the foreground bright enough? (*)
  3. Do I see a catch light?
  4. Are glasses free of reflections?
  5. Are the shadows in the right places?

(*) I judge this by means of using a Hood Loupe, and/or using the histogram, and the “blinkies”. Not just visual inspection of the rear LCD in bright sunlight!

Of course here since I am holding the camera and a pocketwizard, my expression and the composition are not quite right, but that is not the point. The light is right.

And provided I do the setup right, one test shot is all I need.

Come to NSI to learn more – Sunday-Thursday next week!


Light it up.

A reminder:

Bright pixels are sharp pixels.

But they are also pixels without a lot of detail. And where do we not want such detail? Skin, and other surfaces where detail means bad things like pores and wrinkles.

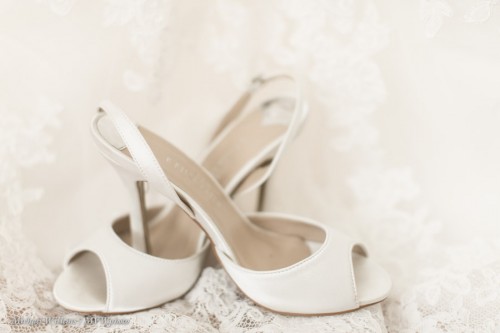
Arguably, also here:

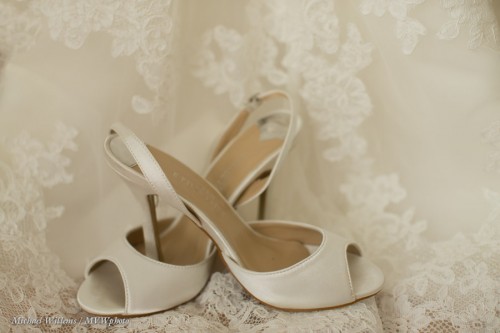
And now we will add an extra couple of stops. All detail will now go to the top of the image in terms of RGB colours. That means that if in the previous picture the darker detail takes half the colour space, say, then here it takes one eighth. Less distraction from the shoes, which are the subject.

The second picture is also better because it is more true to life: it was bright, But my reflective light meter gets that wrong, of course: it does not know I am shooting a white dress. So I need to help it along.

Summarizing:

I expose highly and brightly:

  1. When the subject is bright.
  2. When I want the subject sharp and crisp.
  3. When I need to reduce detail, as in bad skin, say.


In pictures like this I am looking for just a little bit of “the blinkies”, and a histogram to the right. Done!


Outdoor Opportunity Beckons

Learn a lot of photography with me in a four-hour photo walk!

"Remembering" (Photo: Michael Willems)

On August 25, right in between the Niagara School of Imaging and a trip to Timmins, I am doing a photo walk in Oakville, Ontario.

On this walk, we will:

  • Go over all the basics, from exposure to focus to camera modes to aperture to colour.
  • Go over composition, the use of lenses for effect, introducing depth.
  • Practice motion.
  • Learn about street photography.
  • Practice problem-solving techniques.
  • Help open your eyes to what is around you. Help you see opportunities.
  • Take you to various environments: shopping street; old homes; urban; lakeshore, etc.
  • Teach you how to express what you see and what you feel.

I will take no more than 10 students, so book soon: there are still spots open.

You need a camera (preferably an SLR) with an empty formatted memory card and a full battery. Additionally, if you have them, bring a telephoto lens, a wide lens, and a flash. A soft cloth or two in case of rain is good, too.

To book, go to http://cameratraining.ca/Schedule.html and select “other 4-hour course”. I will confirm your spot (or if the walk is full, immediately issue refund).


Blurry Backgrounds

Another beginner’s tip for you today. Blurry backgrounds.

How do you get blurry backgrounds? Any of the following:

  1. Larger aperture (“lower f-number”).
  2. Zoom in.
  3. Get closer.

Do not forget numbers 2 and 3. Take this picture, taken at f/4:

That’s a nice blurry background. But if we want it blurrier, we can, as one of the options, simply get closer. The very same settings (same lens, same everything; f/4, again, but closer), give us this:

See how much blurrier the background is? So if you cannot afford an f/1.4 lens, then just get closer.

Another thing you notice, perhaps, in picture two: it’s simpler. Simplify! As Antoine de Saint-Exupery said: “we achieve perfection not when there is nothing left to add, but when there is nothing left to take away”.


Coming up… taking requests!

As you all know, I teach!

I love to share, and I love to teach.

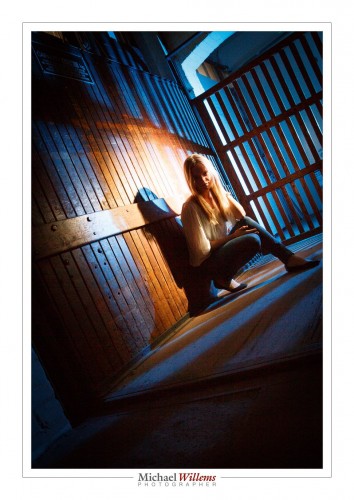
A lot of that teaching takes place in my friend Sam’s wonderful and fully equipped studio at www.hamiltonstudio.ca. Because it is easy driving distance from both the Toronto area, and because it is affordable (I don’t want you to have to pay a penny more than needed), and because unlike a lot of Toronto studios,  it is easy to reach from the freeway. But most of all, because it is ideal for teaching. A cool place, an old warehouse.  You will see the courses listed at www.cameratraining.ca. Here’s a pic we shot at the studio:

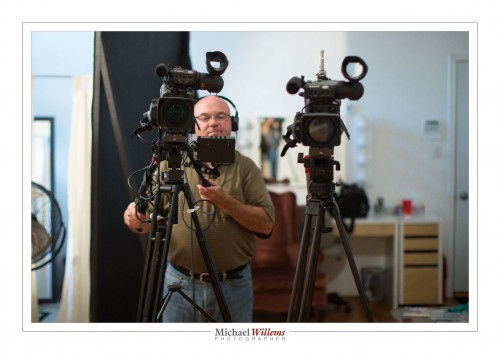
Sam is a TV- and video-pro: next to photography, TV is what he does for a living.  So here’s some good news: we are adding video to the arsenal of teaching tools. As a complement to the in-person teaching and the e-books.

Here’s Sam, filming me today, using his pro gear:

That shot was taken how? I was in a hurry because I was talking to the camera, and I did not want to look away from the camera for more than a fraction of a second. And there is no strong back light or anything else that makes auto-exposure hard. So I used Aperture mode, at 3200 ISO. I used a 50mm lens. At f/1.6 (after all, I want to blur the background), that gave me 1/320th sec shutter speed, which is plenty fast to not get a shaky picture.

I think you will like the videos a lot, by themselves or as a complement to in-person training. Some will be very long, some in between, and some will be short “tips and tricks” videos, of a minute of two. You will see them start to appear in the next weeks and months: stay tuned.

But do better than staying tuned. Take part in the process. I would like to know what short (or indeed, long) subjects you would like me to talk about. Send me your requests, and if I can fit them into the schedule, I will do so. Often, subjects are easier explained by a live human than by printed words: think about those subjects. Anything mystify you? Anything you still do not quite “get”? Here’s your chance to ask me to explain in person! Not quite the same as being in my live courses and workshops, but not a bad alternate – especially if used as a complement. So let me have your requests. Please Email me with a subject line that contains “VIDEO IDEA”. Let’s have some fun!

I shall look forward to your ideas!

End notes:

  • My sons tell me “no-one uses tape anymore” for anything, and no-one under 30 knows what it even is. Not true – check these cameras. And check a live studio. Plenty of tape. The same is true of film – ask Quentin Tarantino if he films “digital”.Take that, boys!
  • For those of you who read yesterday’s post, there is a blog post about yesterday’s Picture Change opening here, on the Photosensitive blog!
  • I plan to be in Las Vegas, NV this weekend and for a few days afterward – anyone there who wants to meet up, learn something, have me shoot anything, or anything else at all: drop me a line!


Photo Walk; 25 Aug 2013

Yes, an Oakville walk: Sunday 25 August 2013… 1-5pm; you can go to www.cameratraining.ca to book now, or send me an email to reserve your spot. 10 students max!

I chose Oakville to ensure a good location with a mix of urban, people, buildings, plants, nature, lake, and much else. We shall cover everything from basics to advanced camera use, motion, colour, composition, lenses, you name it. Bring an SLR camera and whatever lens or lenses you have!


Photo walk

Anyone near Oakville, Ontario: interested in a four-hour photo walk with me? If so, let me know and I will set one or two up in Oakville in August.

This will be four hours of walking and learning and review of basics, including camera use, composition, problem solving, flash, lens choices, and much more. Everything from basic stuff, aperture, focus, manual mode, to people techniques. Maximum ten students.

We’ll do it in August and/or September on a weekend: I am thinking Sunday, or if you prefer, a weekday. Cost $125-$175 per student depending on interest level.

Let me know your day preference in August and September, any other preferences. Email me at michael@michaelwillems.ca or leave feedback here.

Michael

What…

….camera should I buy? In particular, if I already have lenses, should I upgrade?

In general, I recommend you upgrade your camera body every 3-5 years because of higher ISO. So when a friend just asked me what to replace his old Canon 40D with, I thought it might be helpful for me to share my thought process in today’s post on the DAILY blog.

First off, I said yes, replace it. It’s time. Higher ISO is a good reason.
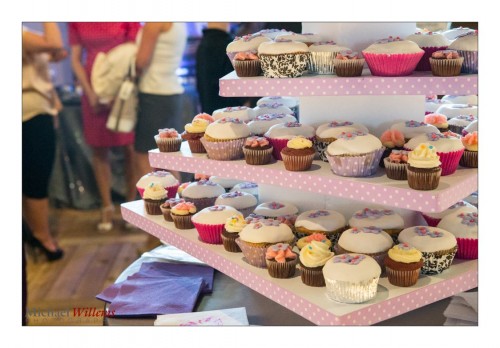
1/80th sec, f/6.3, 16,000 ISO (yes, 16,000, not 1600)

For my friend, his options if he wanted to stay in the mid range camera bodies would include the Canon 7D and the newer 6D.

  • The 7D is a crop camera with a not-all-that-great sensor at high ISO values. It has pro features, like fast rapid shutter release,  great focus system, and more. Great studio camera, not as good when you need the high ISO values.
  • The 6D is a more modern camera with great high ISO, and it has a full frame sensor. Great quality camera, but leaves out some of those cool “pro” features you would get on the 5D (of course).

Unless I needed the pro features, like the focus system, I would go with the 6D if I were him.

But then what about lenses? When you update to a full frame camera, you can no longer use your crop lenses (on some Nikon cameras you can, but then you get limited use out of them).

My friend had two EF lenses (can be used on any body) and one EF-S lens (can only be used on crop bodies), the 10-22 f/3.5-5.6 lens.

When you buy lenses today, keep in mind tomorrow you way upgrade to a full frame body. I only buy EF lenses for that reason. Which my friend did, except for the wide lens, which there is no other option for – he had to buy the EF-S to go that wide. So he only has one lens to replace. Only one EF-S lens makes it easy: I would sell the 10-22 and buy a 17-40 f/4L, in his case.

___

OPPORTUNITY KNOCKS. Questions like these, and many others, can also be answered in a one-to-one online coaching session.

I do those over the Internet (using Skype and similar tools) and I work 24/7. Give it some thought: a one- or two-hour private session can really help you get pro use out of your camera. It can:

  • Answer your equipment questions.
  • Identify, and then solve, gaps in your knowledge.
  • Go over your work in the form of a portfolio review.
  • Teach you specifics you need to know.
  • Enthuse you and inspire you.
  • Give you homework.
  • Keep you focused!

And I have great news. The usual fee is $125 per hour plus any applicable taxes, but to encourage you to try it out, for July 2013 only, I am discounting that by 35%.

You need to book soon and the training needs to take place in July. Email me (michael@michaelwillems.ca) or call (+1 416-875-8770: Eastern US time) to set up your time and date.

 

Recipe, another

Yesterday’s recipe was the “Willems 400-40-4 rule” for indoors flash shots.

Today, another one. Say that you want to go outside for a saturated colour flash shot like this, on a fully sunny day at noon.

So for that you need a flash with a modifier. I used a strobe, but you can use speedlights if you are willing to fire them at high power and have them close to your subject.

Here’s my strobe:

Now follow my logic.

Step One: ISO and Shutter. The sun is bright and I am competing with it. So to cut the sun, I will be at low ISO (meaning at 100 ISO, the minimum) and high shutter speed (1/200th sec, the fastest sync speed for many cameras). This is a given, an “always” starting point: by default. sunny day means 100 ISO and 1/200th sec).

Step Two: Aperture. At that speed, a “normal” exposure would be f/11 (this is the Sunny Sixteen Rule in practice – look this up on this blog – yes, there is a reason I teach you all this stuff. At 200 ISO it would be f/16 “sunny sixteen”, so at 100 ISO, we’d need f/11.). So we arrive at 1/200th sec, 100 ISO, and f/11… this looks like this:

But wait – I want that background darker, to get saturated colour as in the first shot, not light as in the second shot. So we go to at least f/16, one stop darker than “sunny sixteen”. Now, indeed the background is darker.

Step three: Flash power. Now we adjust the flash to give us enough power to get to f/16. If we are using a small flash, that means no modifier (loses too much light); if using a strobe, we adjust it until the brightness matches f/16. Use a meter, or use trial and error.

So the method was:

  1. Set low ISO and fast shutter;
  2. Decide on aperture you want;
  3. Set flash to match that aperture.

And to this, we add:

  1. Use a modified flash if you can – like shooting through an umbrella, as I am doing here. But modifying loses power, so you may need a direct flash, or have the flash very close to the subject.
  2. Use off-centre composition (avoid the centre – use the Rule of Thirds).
  3. See if you can get diagonals included to lead into the image and give it depth.
  4. Avoid direct sunlight on the subject’s face: it shows wrinkles and it causes squinting. Sun from behind gives you “shampooey goodness” instead: much better.
  5. See if you can angle the flash w.r.t. the subject, off to the side, and turn the subject into that flash. Also raise the flash 45 degrees (looks natural and you see no glasses reflections).
  6. See if you can get lucky and include all three primaries, red (-ish); green and blue, in the image. If so, you have a good image!

Let’s see that image again. Click on it and click through to see the original image at full size:

That looks like a photoshopped image, and yet it is not – it is the way I shot it in the camera. yes… and I can teach you the same – it really is simple, once you get the idea.

___

The Pro Flash Manual e-book is designed to teach all this and much, much more, and it dovetails into this site and into my classes. Learn about both these e-books here on my web site. Want to learn? Check out www.cameratraining.ca as well.


Simple Setting Tip

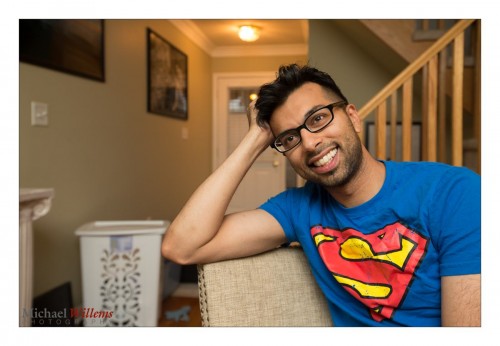
You have all heard this before, but one more time: here is a simple setting for “indoors flash in a typical living room”. For photos like this, in other words, of my friend and colleague photographer Taha Ghaznavi:

Not bad, eh? Would you like to learn to make photos like this, with those nice warm background colours, and natural looking shadows? Well – you can, if you have an SLR and a flash. Here’s how:

  1. Camera on MANUAL (“M”)
    1. ISO: 400
    2. Shutter: 1/40th second
    3. Aperture: f/4
  2. Set the White Balance to FLASH
  3. Ensure that the Flash is set to TTL (that is its normal auto mode: it says something like “TTL” or “ETTL” on the display on the back).
  4. Aim the flash 45 degrees up – BEHIND you (ensure there is a ceiling or wall).

Magic! Your background is dark, but not too dark. There’s no reflection off the glasses. The face looks not flat, but three-dimensional.

Simple starting settings like the Willems 400-40-4 rule above are important. Recipes. Of course they are just that – simple start settings. If your subject is too dark, for instance, it may be that the ceiling is too high for good bounce. In that case increase your ISO to 800 or even to 1600. Or if your subject is wearing white, you may need “+” flash exposure compensation. And so on.

So you may need to vary, but by starting with good rules of thumb like the Willems 400-40-4 rule you will not be too far off for a start!

___

These recipes are the basis for my Photography Cookbook – a recipe book that will get you started with many good situations. But a thorough knowledge of the fundamentals is also needed if you want to be a good photographer. The Pro Flash Manual is designed to teach that. Learn about both these e-books here on my web site.