Prom Season

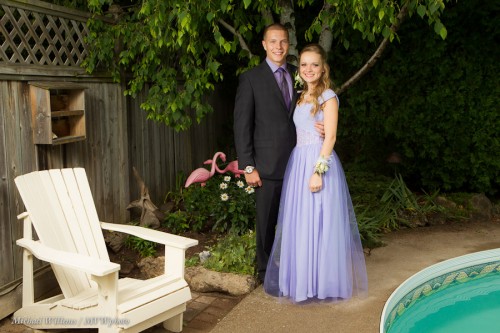
To help out a proud mom, I shot some images the other night of a young couple about to go to their high school prom. I thought I might share that process here.

The day was wet and dark – warm, but raining. And then it stopped raining – but it was still very dark, totally overcast, and remained that way.

Perfect. We want dark, so that:

  1. The sun will not cast harsh shadows;
  2. Our speedlights can overpower the ambient light, to make our subjects the “bright pixels”;
  3. We can render colours saturated (darker is more saturated).

So let’s start. First of all, of course I shoot manual. I set my camera to “sunny sixteen”, i.e. 200 ISO, 1/200th second, f/16. Then I go to f/5.6 to match the light (look it up: Sunny Sixteen, and totally overcast, no visible shadows). Then I go back to f/11 to make everything two stops darker. Then I go to 1/300th and f/9.0 – that is the same exposure but f/9 makes my flash more powerful than it would be at f/11, while the shutter speed makes no difference – provided I stay at or below my sync speed (on the 1D4 this is 1/300th).

Then I added flash – off-camera flash firing into an umbrella. My on-camera 600EX was disabled except for commands; the 430EX in the umbrella did all the work. So all I carried was a camera, two flashes, and a light stand with umbrella, with bracket to mount on pof those flashes. Light and easy.

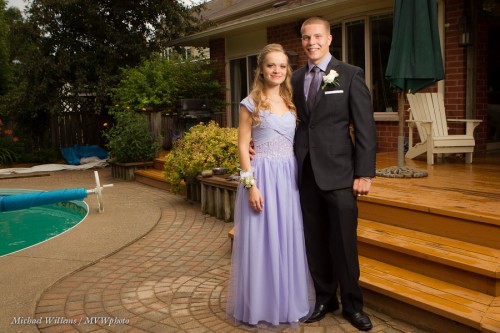
Then, the setting. As the Speedlighter, I opted for outside, of course. A great back yard with a pool gives us this shot:

Note the Rule of Thirds, and note that I wanted a “home backyard prom” look, not a studio look, so while I photoshopped (Lightroomed, actually) away some items I did not want, I did want the chair, the pool, the lovely pink flamingoes, and the other items that show where we are.

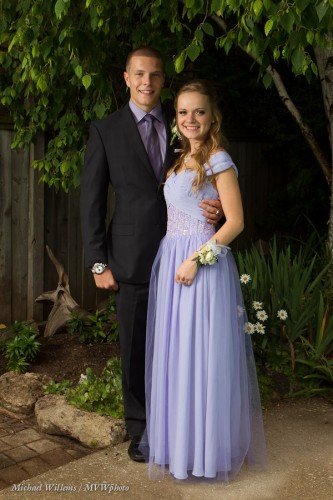
Still, I did also take one more traditional vertical shot without all those trimmings:

The important thing is to have models look toward the umbrella: always watch where the light is.

I used TTL flash for this, so needed to occasionally change Flash Exposure Compensation (FEC).  Note: In my courses I teach you all this stuff. I do private coaching – and stand by also for my seminars at Vistek in Mississauga, starting 21 July – dates here soon.

Finally, I made some that make the scene even more of a home scene. In the following shot I electronically removed a container of chemicals, a barbecue gas tank, and a decorative frog:

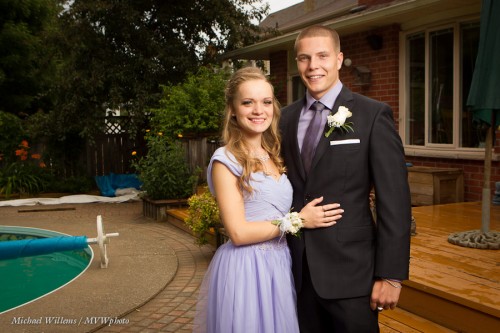
…but I also made sure to zoom in and do a close-up:

In the above shots I had the umbrella on my right so that Vanessa was looking into the light – flattering for women – while her date James gets Rembrandt Lighting – flattering for men.

Postscript: when I say “looking toward” – I should be clearer, I mean “their faces turned toward”. Photographer’s jargon!

Do you see how this all works? Fun, isn’t it?

___

If you are in the Toronto area or elsewhere where I find myself and want lovely family portraits or “senior shots”, please contact me – you owe your family some great heirlooms…!

 

EV

You will have perhaps noticed that in the EXIF Wizard post the other day, theere was a value called “EV”, or exposure value. That is the absolute “exposure value” that corresponds to a certain “light value”. The exposure value is basically a camera setting for exposure, where:

(N = aperture number, t= exposure time).

0EV corresponds to “1 second at f/1.0”. A typical exposure value for a full daylight scene at mid-day in full sunlight at 100 ISO is 15.

And this is useful, why?

First, because it allows you to realize that there is such a thing as absolute exposure values. Second, more practically, because using this, if you use a tool like Exif Wizard, you can see what the light value was when you took a certain picture.  And that is always useful for a photographer. And third, because light is predictable (the sun is always equally bright, for instance – rememer the “Sunny Sixteen Rule”?), so you can use the theory behind this to calculate camera settings.

This article on Wikipedia is good reading, if you feel like a little light academic liftwork.


Direct flash?

Can you ever use a flash aimed directly at the subject? I mean.. the victim?

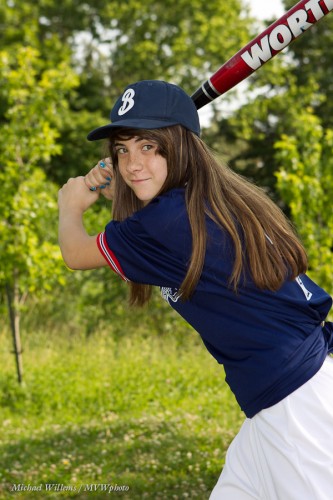
Yes. Outdoors, you can do this. Look at this shot from a recent softball shot:

To do an outdoors shot like this on a summer day (it is the first day of summer on the northern hemisphere, after all):

  1. Ensure the subject is not in direct light – sun behind them if possible.
  2. Go to the maximum shutter speed when using flash (1/250th sec on most cameras). If the light is fairly constant, I am assuming you are using manual mode, as a pro or someone who wants to shoot like the pros.
  3. Find a nice background.
  4. Now set the aperture for the correct background (around -1 stop on the meter perhaps). This was around f/5.6 at 100 ISO in the shot above.
  5. Then turn on the flash and shoot – with the flash aimed directly at the subject of you cannot bounce.
  6. Use flash compensation if you need (if the subject is too bright or too dark).

The awful “direct flash” effects are minimised by the available ambient light filling in the shadows: your flash is now the “key light” and the ambient light is the “fill light”, which fills in the shadows left by your flash.

Result: an OK picture even though you are not using modifiers like umbrellas. Yes, these would be even better but you can’t always use them.


Metering: The Light Meter Lives

Using a light meter, you say, is oldfashioned.

Not so!

  1. A light meter is fundamentally different from a camera-based meter. The former is an incident light meter and does not depend on the subject’s brightness. The camera based meter, on the other hand, is a reflected-light meter, and hence depends on the subject’s brightness. In fact the camera’s meter can only indicate the right number when you aim it at a grey card (and when using the spot meter, at that).
  2. For manual flash you can only use a light meter, a so-called “flash meter”.

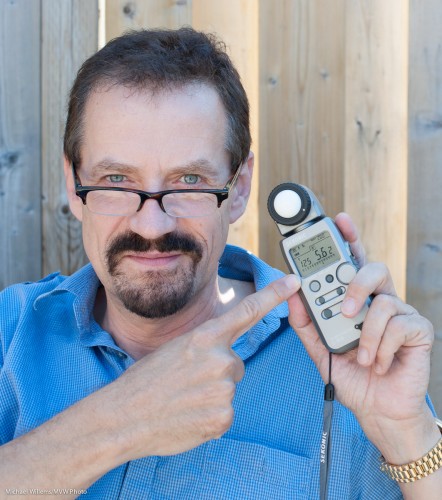
A modern meter like my Sekonic is both ambient and flash meter.

To use it for ambient light, as I did for the student photo above, do the following:

  1. Move the white dome all the way out.
  2. Turn the meter on.
  3. Using the MODE button, set the meter to ambient metering (the sun symbol). Select the mode where you set the aperture and the meter will indicate the shutter speed. (The F-number has a square around it on the Sekonic). You could also choose to set the shutter speed, and have the meter calculate the aperture instead. But let’s assume here that you choose the aperture and want the camera to calculate the shutter speed.
  4. Set the ISO to the ISO you choose to use on your camera (200 in the shot above).
  5. Set the meter’s aperture number to the aperture you have chosen on your camera.
  6. Hold the meter exactly where the subject will be, facing the camera. Ensure you are not blocking the light that falls onto the meter.
  7. Click the reset/measure button on the side.

And now you read the shutter speed you need with that ISO and that aperture. (You can change ISO and/or aperture and a new correct shutter speed will be displayed that match those ISO/aperture settings.)

Set that shutter speed on your camera – and you exposure is correct. Spot on.

You see, the benefit of using the meter is that you ace the exposure. Not like the camera meter, where you have to allow for darker-than-a-grey-card subjects (expose less than “0”), or lighter-than-a-grey-card subjects (expose more than “0”). With a light meter, no such adjusting.

Yes, you can use a grey card, and you can use the zone system. Sometimes you have to – mountains do not lend themselves to you running over to them with a light meter. But generally, if you have the time and the light is steady, consider using a meter and be a pro in terms of exposure.


Catch If You Can

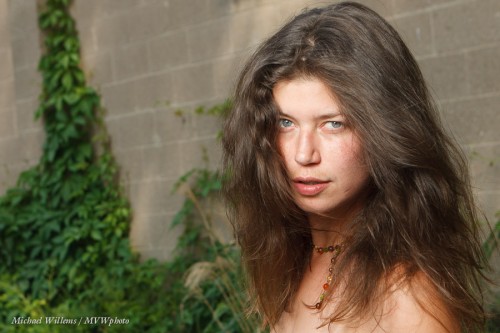
…and I mean catch lights. And you should always have them in portraits. Like in this one of model Kim that I took a few hours ago:

The catch lights are the little sparkles of light in the subject’s eyes. They make the subject look alive.

To get them, make sure there is a light source in front of the subject, above. This can be…

  • A reflector.
  • A natural light source, like a window with non-direct light.
  • A flash in an umbrella, like here.
  • Or a flash in a softbox – this gives you a square catch light.
  • A flash on your camera, bounced at the ceiling behind you.
  • A flash on your camera, direct or with a little bounce card.

The last option is not ideal since it will give you a small, centered catch light. Ideally, the catch light is high in the eye. Not in the middle of the pupil, and that is what direct flash gives you.

If your light source does not show in the eye, move it lower.

Like most things in photography, it is simple once you know it – nd especially, once you start paying attention to it! So from now on, look for catch lights in your subject’s eyes, and do what you need to get them if you are not getting them!


The Art of the Dramatic Portrait, Continued

At the risk of being repetitive, let me deepen your understanding of dramatic portraits a little.

A dramatic portrait, in my world, is one where:

  1. I emphasize the subject.
  2. I darken the background.
  3. I make the subject the “bright pixels”.
  4. I carefully shape the light.
  5. I carefully direct the light.

You have heard me say this many times, but as said, let me deepen your understanding.

To show you want I mean, look at a few samples from a recent shoot the other day. These are outtakes, but they serve well to see what I mean (for actual shots, come see the Never Not Naked: Natural Nudes exhibit – an exhibit with a twist, June 22-July 8).

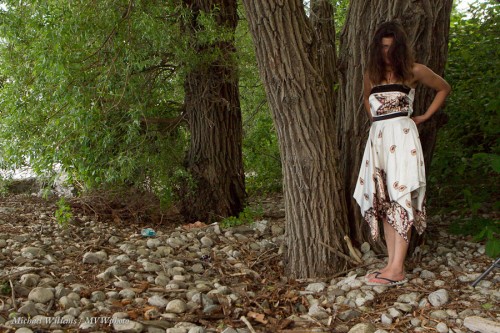
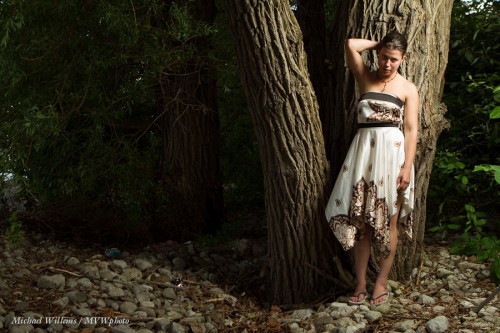
Let us start with a typical snapshot. 100 ISO, f/5.6, and this would be around 1/30th second. This is what available light and “Auto” or “Program mode” would give you:

Fine, but there are several things that can be improved.

  • The subject’s face is lit uneventfully and insufficiently.
  • The subject is “dark pixels”, not sharp “bright pixels”.
  • The subject competes for attention with pretty much everything else.
  • The tree bark’s texture does not really come out very well.

So now let’s do it properly. When I say properly, I mean “Michael Dramatic”. And “Michael Dramatic” for me means three stops below ambient. So I move the shutter to 1/250th second. Three stops darker than a “normal” exposure, in other words. (1/30 to 1/60 is one stop; 1/60 to 1/125 another; 1/125 to 1/250 the third stop).

Three stops is my dramatic portrait. Often, of course, you use less than three stops darkening. Like when you want less drama. Or when your flash is not powerful enough to provide three stops above ambient light.

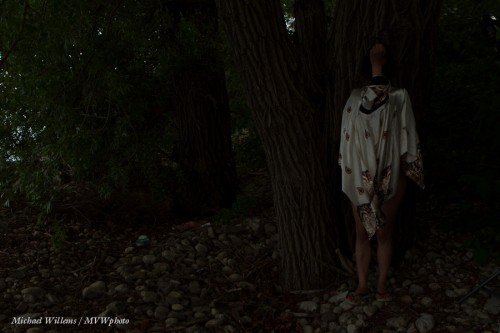
Anyway, three stops below gives us this:

That’s dark. Um yeah, that is what I had in mind.

Because now, finally, we add a flash. And we get what we came here for:

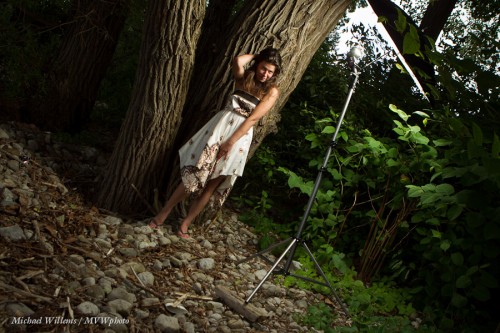
That was done with a single off-camera 430EX speedlight close by, fired into an umbrella. Like this:

You see there are several aspects to this, right?

  • The darkening of the non-flash lit part of the image (the “background”).
  • Properly lighting the subject.
  • Softening the light for the human.
  • But also the shaping and directing of the light. When I see a tree, I think “texture”, and side lighting brings out that texture.
  • Good composition.
  • The Inverse Square Law: light drops off away from teh flash.

Yes, all this needs to come together for a good shot. Go try a photo like this, and tell me how you did!

___

Note: You really can learn this, and in not many hours. My June Special is stil on: $75 per hour plus tax for private coaching, for June only (normal price is $95 per hour).


What to start with?

So you are outside and want to darken the background for a mixed light picture. You’ve heard me talk about this repeatedly.

What can you do? Yes, the triangle, of course. Aperture smaller, shutter faster, ISO lower. But which do I prefer?

Outside in bright conditions your flash is competing with the sun. So you do not want to reduce effective flash power. Yet both aperture and ISO do not just reduce the background: they also affect the effective flash power.

So in those conditions:

  1. You start with the shutter, always. As fast as you can, which is the shutter sync speed: 1/200th sec on cheaper cameras, 1/250th on most, and 1/300th on some (like my 1D  Mk IV). Go to that speed.
  2. Then, and only then, if you still need to darken more, start messing with higher “f-numbers ” or lower ISOs.
  3. If you now end up with insufficient flash power? Add flashes. Bring the flash closer. Use more powerful flashes. Zoom in with your flash heads. Or as a last resort, wait until the light is less intense.

Simple rules make the technical aspects of photography simple and that is what we want.

After the click, an image taken thus at 100 ISO at 1/300th at f/6.3. (It’s a slightly NSFW image so it is after the click. For those of you uncomfortable with the unclothed human body, like those of you in Anglo-Saxon or Muslim countries, or who buy at large photo retailers in Ontario: you may not want to click. Everyone else: click away, it’s entirely harmless!):

Continue reading

Silhouette How-To

I have talked about silhouettes recently – let me share another one.

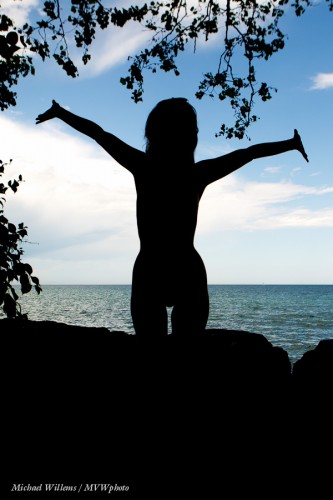
This was an accident: my flash had not charged yet so did not fire. It shows how to make an accident into a nice shot.

  1. Make sure your subject is in the shade, and the background is bright.
  2. Expose for the sky: aim your camera at the sky and set exposure to “0” for that on the meter if shooting in manual mode, or if in an automatic mode, press the Exposure Lock button (AE Lock, or on Canon, “*”).
  3. Recompose.
  4. Shoot.
  5. If you have to, in Lightroom drag “Blacks” to the left (if  you have LR4).

That is all – simple, and something you should sometimes do.

Flash Ethics

I bumped into another pro yesterday at The Distillery. She was about to teach a workshop and thought I had come to attend. Which I had not.

Turns out this photographer does photojournalistic weddings and family shoots, and never uses flash, and, astonishingly to me, for the following reason: because she has “ethical problems shooting flash”. I think was unable to convince her to even take a look at speedlighter: flash was a no-go area for her.

Ethical? Artistic I can understand, but in my experience, pros who do not use flash have several reasons:

  1. They do not really know how to, especially TTL flash with all its limitations and complexities. This is the vast majority of non-flash users.
  2. They have genuine (and in my view, misguided) ethical problems.
  3. They have reason (1) but say it’s (2).

Category 2 is a minority, and in my opinion, a misguided one!

As a newspaper shooter, I could never alter a picture: cropping, white balance and exposure is all, and any other alteration would ensure I would never work in press photography again. You need to trust the photos you see in the paper. So I get ethics! But adding light has been allowed for many, many years. What are you supposed to do when there’s not enough light?

I shoot, and teach shooting, with flash. Either:

  1. On its own (in a studio); or in a mixed environment, namely:
  2. Mixed with bright outside light, when you need to kill that light
  3. Or with dim indoors light where you have to boost that light.

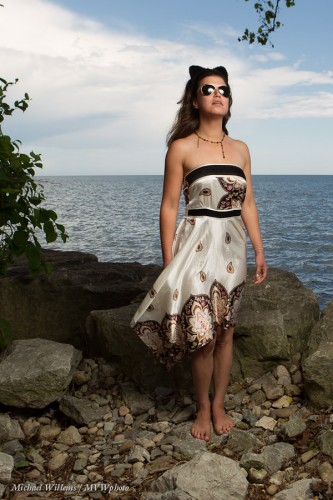
The main point is not not the adding light – the main point is the creative options that this opens. By saying “I only shoot with flash” you are denying yourself a great number of opportunities. Like this, taken a few hours ago at Lake Ontario in Oakville:

I used an off-camera flash. Am I ethically sinning by adding light and making this a nice picture? No way. As for events: bounce behind you and use the flash as additional light. You are not committing ethical breaches by doing this!

So go ahead, learn flash, and use it for both technical (adding light) and artistic purposes. Have fun!


Another example

…of outdoor flash here.

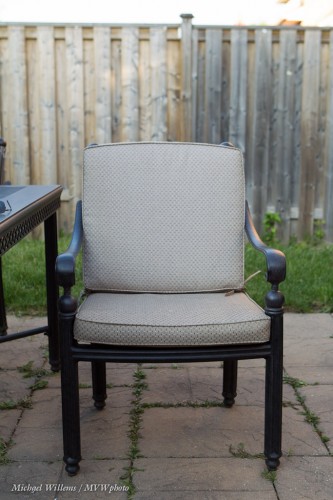
Take a typical back yard on a sunny day. Set your camera to “P”, or the green AUTO mode, or A/Av mode, and click.

Mmm. Why do we avoid just snapping? Because it can be a little boring and it gives you no control. Let’s take control, instead, and

  1. Darken the background (I do it in manual mode, or you can do it by using “-” exposure compensation). Set shutter, aperture and ISO to give you a dark background (dark colour is saturated colour)
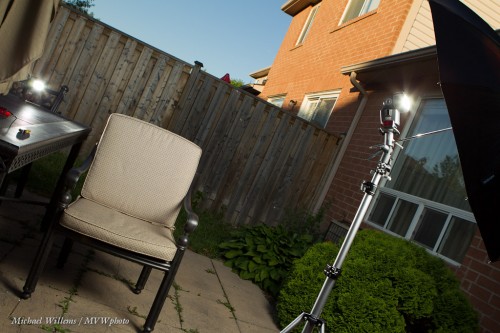
  2. Add a flash or two, using wireless TTL (wireless with manual flash power setting is better if you have the time and things don’t move position while you are shooting, but TTL is faster – I used TTL here):

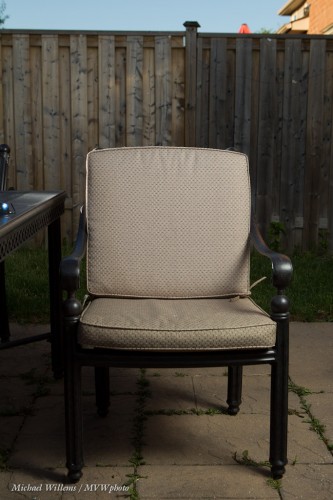
…which gives us a chair like this:

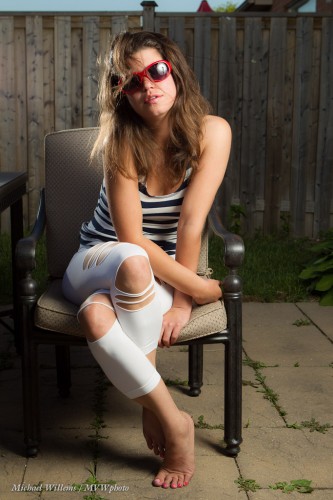
And a pic like this:

See how rich and blue the sky is (in the first picture it was featureless white)?

That’s a stock quality image and the point is, you can shoot it in seconds. Learn flash (from me in a private session, or wherever I teach) and your pictures will become immeasurably better.