Fun with flashes

Off-camera flash rocks. And all your camera have the ability to take the flash off camera. On a Nikon, or a Cano 60D or 7D, you can use the pop-up fl;ash to drive the external flash. On other Canon cameras you need to use a 580EX flash or an IR controller on the camera.

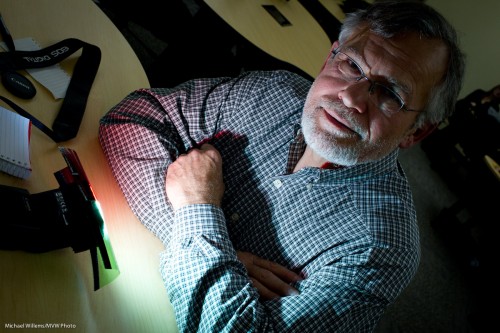
And here, to motivate you, I shall show you another example or two, all take on Halloween night during a class at Sheridan College:

First, lit from below with a dual-color gelled flash:

Halloween (photo: Michael Willems)

Lit from below, suitable from Halloween:

Halloween (photo: Michael Willems)

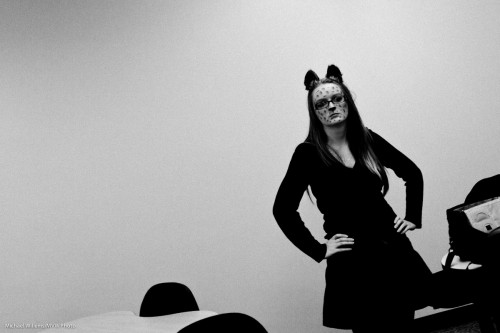
The following photo actually uses one flash on camera, but aimed behind me. Note how I made the image B/W and added grain to give this photo a stark feeling:

Halloween (photo: Michael Willems)

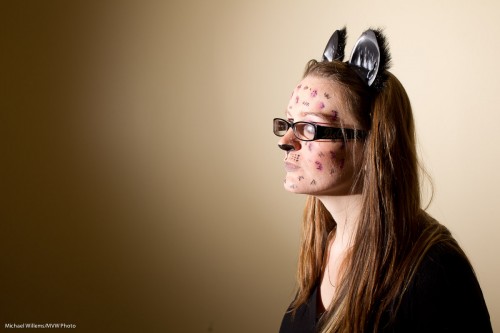
Now a direct flash from our left:

Halloween (photo: Michael Willems)

Yes, even direct hard flash is usable, as long as the flash is not in line with the lens!

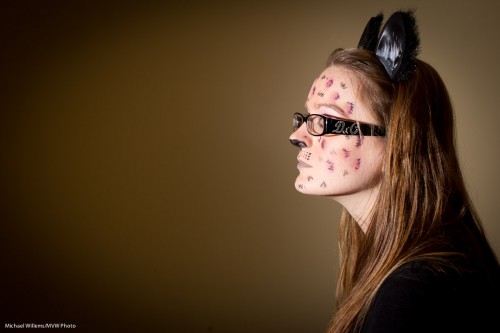
And here the same but with a grid on the flash, in case you want to avoid hitting the wall with light. (as a side effect, the grid also serves to slightly soften the light):

Halloween (photo: Michael Willems)

As you see, you can do a lot with a simple flash off camera.


Building a portrait

In my “quickly building a…” series, here is another one: building a traditional standard studio portrait.

Set your camera to manual, 100 ISO, 1/125th second, f/8.

Start with one light, the main, or “key” light. 45 degrees off to the side, and 45 degrees up. Using a diffuser like a softbox or shoot-through umbrella. Use a flash meter to do this and you get:

Portrait (Photo: Michael Willems)

Good light, good catch lights in the eyes.

OK, so now add a fill light, say, two stops below the key light. Use a bounce umbrella or some other diffuser.

Portrait (Photo: Michael Willems)

Oh, that is a little too bright. Turn it down a little, and then add the next step: a hair light. From behind, to give the hair that look of flowing shampoo awesomeness. Use a snoot or grid, so the light only goes where you want it to.

Portrait (Photo: Michael Willems)

Good. Almost done. Now add a background light, aimed at the background. Consider using a gel, and again, perhaps a grid.

Portrait (Photo: Michael Willems)

I like to have a bit of a pattern to it, a dropoff, as you see.

And that’s all – simple, if you take it methodically. If you start with all four lights, you will get muddled.

And thanks to the pro “chick that clicks” student who volunteered for this the other day during a light coaching session.


Star burst

How do you create a star burst like this?

Fine Cuban (Photo: Michael Willems)

You may want to edge or window the sun or light – but the most important technique is very simple: use a small aperture (a high “f-number”). I used f/22 in this shot (and that gave me 1/50th second at 200 ISO).

Yet another little factoid to store away in your knowledge base.


Stick around with me and I promise many more – and for new readers, do consider reading the entire archive here – or quicker, come in for a course or coaching session. December is a great month, so that you can be ready for the holidays and all the wonderful family and event shots you will take. Remember: photography is time travel.


Evolution of an exposure

To help you see how to expose something well, here’s a way – the thought process that might go through your head.

Of course the way to guarantee a right exposure is one of:

  1. Use a grey card and spot meter off that.
  2. Use an incident light meter.

But failing that, you can do it with the in camera meter, if you are willing to go through a little bit of a process. With experience this comes were quick indeed.

First, shoot:

Uh oh, too light. Oh yeah… plants are dark. But the camera does not know it is shooting plants, so they look “normally bright”.

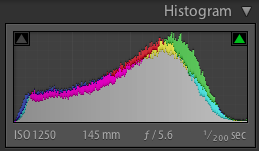
The histogram for this shot shows this:

Yeah, a general “normal” exposure.

You could now stop and pull the exposure back in Lightroom alter, of course (exposing to the right, a good technique to get best quality and lowest noise), and that would be fine.

But let’s say you want to expose well in the camera. Then find the right exposure… say -1 to -2 stops of exposure compensation.

And that gives you a proper hedge row:

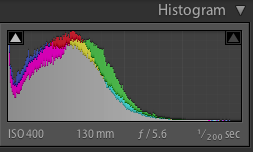
Proven by the now correct-for-the-scene histogram:

But the colour. Mmm. Wonder if switching to “cloudy” or “shade” might give you a less blue, more green plant?

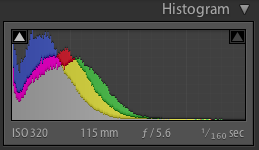
Evidently yes. See the histogram: the blue is pulled back:

And so that is how you might make an exposure without a grey card or incident light meter. A little thought is all that is required – and the histogram helps!


Stop!

Before you take a picture outside, stop and think a moment.

You know you do not want a picture with your subjects squinting into the sun. So, turn subjects away from the sun.

But you also do not want this – a picture of the same people pointing the other way. In tis picture, my students on my photo walk on Sunday are no longer squinting, but they are too dark, and the background is too bright:

Students (Photo: Michael Willems)

Not bad.. but noise hides in the shadows, while bright pixels are sharp pixels.

Better:

  1. Reduce exposure of the background to two stops below ambient (-2 stops, e.g. by using exposure compensation, or by using manual settings for aperture, shutter and ISO);
  2. Use flash. Even a single flash on camera.
  3. Consider making that flash warmer by using a 1/4 Hol photo CTO Gel (set your white balance to “flash”).

You now get what you want: brighter people and yet, a darker, more saturated, background. We’ve turned things around!

Students (Photo: Michael Willems)

Better eh!

(Yes, I grant you, straight flash is sub-optimal, so off-camera flash or softboxes (or a combo) would be even better of course. If I had had it at hand, I would have put my Honl softbox on the flash. Or you can use the Fong Lightsphere perhaps. Or raise the flash with a bracket. Or set up two flashes, one left and one right, to get a little rim lighting, as in image one – but lit well. Or use a flash turned down a little using Flash Exposure Compensation. Flash really has no limits to how you can use it creatively.)

For sure, this one is acceptable.

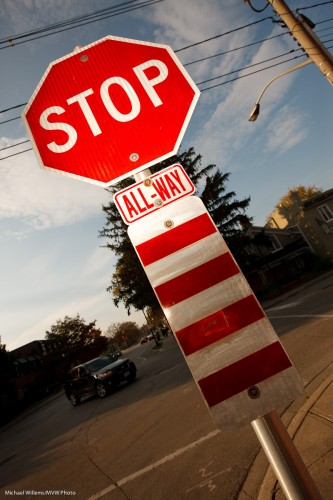
Here’s another one using the same technique:

Stop! (Photo: Michael Willems)

Make this STOP sign your beginning: go make a picture exactly like mine. On a bright day, using on-camera flash.


Balance

Let me talk about balance, again. Balancing flash and ambient light.

Here’s how my thinking goes:

  1. Bright pixels are sharp pixels.
  2. So the main subject of your photo should be brighter than the background.
  3. So you expose for the background by making it two stops below “normal” exposure for ambient light. That gives you good saturation, too.
  4. Then you light the main subject with extra lights (use your flash meter: see yesterday’s post).

Like this:

Which gives you this:

That’s straight out of the camera. To do this you need:

  • Camera, in manual mode
  • Light meter
  • Light – in sunlight, probably a strobe powered by battery
  • Stands pocketwizards, cables, small materials

Easy, and you can use speedlights too when the sun is not too bright. The principle is the balancing of the background light with the flash light, where the background is darker by 1-2 stops.

I teach this during my workshops – it is easy to learn and I urge you all to make the effort!


Portrait tip

When you do a studio portrait, you usually want to use your portrait lighting alone – the room light should not interfere. Room light should be invisible.

Does this mean the room has to be dark?

No. It just means  the room has to look dark to the camera.

So for a studio shot, first do a test. Disable the flash, and set your camera to:

  • Manual exposure mode
  • 100 ISO (or 200 ISO if 100 is impossible on your camera)
  • f/8
  • 1/125th second

Fire off a test shot:

Bingo. Now the flash will light your subject – and only the flash.

Was that room dark? No. To you or me (or to a caerma with different settings) the room looked like this: quite bright, what with the room lights and the flashes’ modeling lights!


Portraits

Don Draper said it best, in the season-ending episode of Mad Men season 1, as he was winning the Kodak Caroussel account.

The Carrousel, he says, is

“a time machine… nostalgia… it goes backwards… forwards… it takes us back to a place we ache… to go again.”

My God those are powerful words. That is so true about photography in general. This is why I am a photographer, and that is why we should all be photographers.

And when you look at the photos he shows of his life – they all feature people. People photography is magic… it truly is time travel.

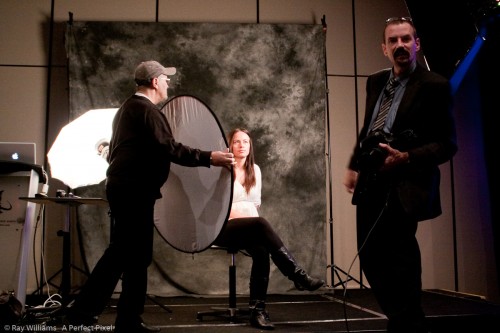
So you should know how to photograph people. People doing things; but also formal people portraits. And that is part of what I taught at the Exposure show. Things like how to get from one light to a lit portrait: we build this up in stages.

Like this portrait of today’s kind volunteer:

First one light, with a softbox:

Portrait lesson (Photo: Michael Willems)

One light – but with White Balance set to “Flash” instead of “Auto”:

Portrait lesson (Photo: Michael Willems)

Now we add a Reflector on our left side:

Portrait lesson (Photo: Michael Willems)

And now we add a hairlight from behind left:

Portrait lesson (Photo: Michael Willems)

Or by bringing the reflector closer, we could make the light flatter:

Portrait lesson (Photo: Michael Willems)

And then we could go from there and get creative. Or stop there. In any case, it seems to me that a competent portrait is what you must learn to do if you want to capture life in order to be able to go back to it later.

And that is why I teach photography. From workshops to coaching to The School of Imaging, I teach people who to make a permanent record of their lives and their loved ones. Please… spend some time and a little money and learn how to do this!