White Balance Tip

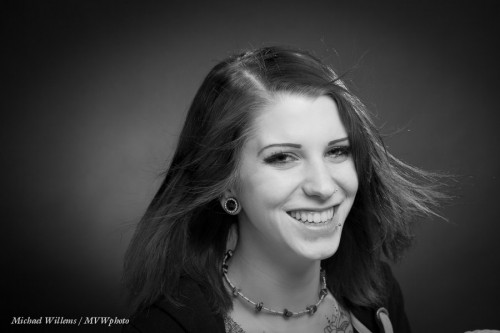
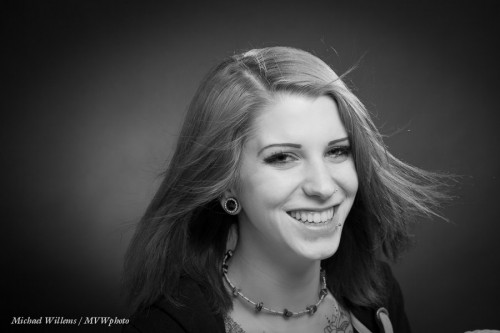
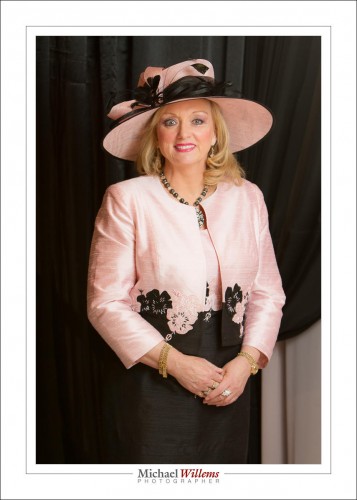
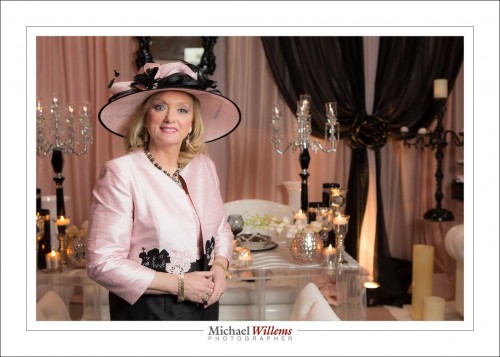
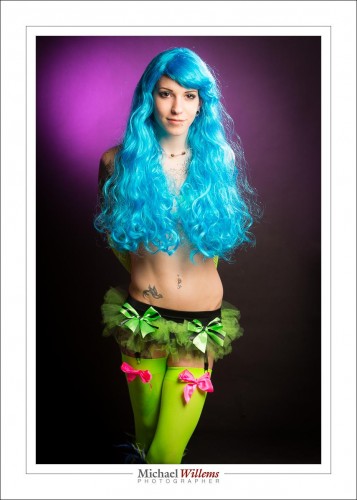
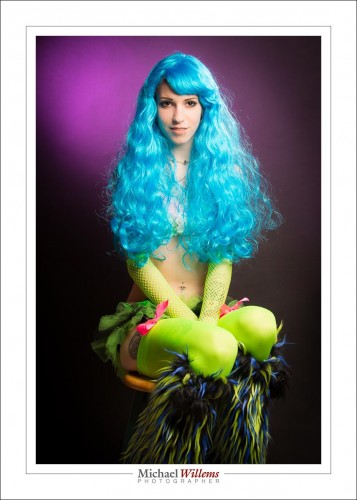
Why, I was asked yesterday, do I need to set my white balance to “Flash” when shooting studio-type pictures like the one of friend Liz below? Isn’t “Auto” enough?

Well, in a sense Auto is OK, since you can always correct later—assuming you are shooting in RAW format. (If shooting JPG, you must set the white balance accurately when shooting). But while you can shoot with the wrong balance, why not get it right? Your previews will look great, and there’s less work later.

So why is Auto wrong in this case?

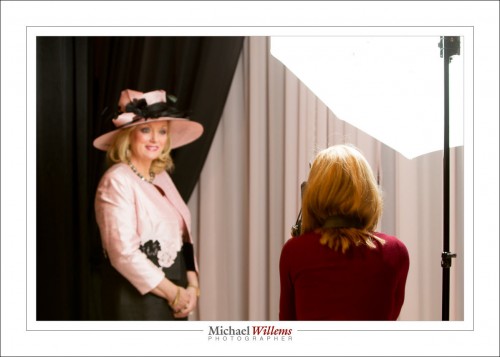
The key phrase is “studio type” shooting. That is distinguished from speedlight shooting in one major way: namely, that you connect to the flash via either a cable or a radio trigger such as a Pocketwizard.

And that means the camera does not actually know you are using flash! So it does not set its white balance to Flash for you. And Auto is wrong, because you cannot measure flash white balance automatically. Why not? Because that measuring is done before the picture is taken, and before the picture is taken there is no flash! So the camera will base its white balance on the lightbulbs in the studio rather than on the flashes. And that’s wrong.

So now you know yet another little thing about flash!

ADMIN NOTES:

If you are in the Oakville, Ontario area: I have one spot open for Sunday’s Advanced Flash workshop. be quick and be part of this!

Also, of course, there’s the e-books: go check out what people are saying. The books and courses work very well together.

And finally, I have that 50mm f/1.2 lens for sale. Check that out too: and remember, $125 off for readers of this blog.

 

Black and Why?

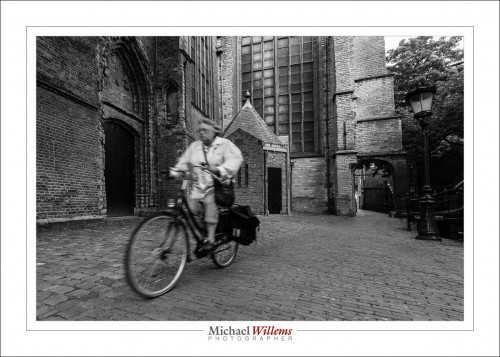
Black and white (or monochrome) is underused nowadays. Yes, colour is great–I love colour, as you see in much of my work–but “mono”, as in the picture below of a cyclist on Gouda, the Netherlands, has something going for it in several ways.

The colours do not distract from the subject. Unless the colours are the subject, avoiding this kind of distraction is a good thing.

Mood can be enhanced: mono can be a storytelling device. Mono can also evoke the past. Mono is thus used in much photojournalism.

But there are also great technical benefits to using mono, and that is what I want to briefly talk about today.

You should shoot RAW and set the camera’s “image type” to monochrome, so you see a preview that at least looks somewhat like what you will get in monochrome, but the RAW file contains all the colours.

First, white balance is unimportant. Whatever you set it to will be fine.

Second, quality of a converted file will be better; or rather, deficiencies will be less noticeable. And third, you can make changes afterward by emphasizing or de-emphasizing individual colours. This is like using coloured filters in film photography (e.g. a yellow filter to make the blue sky darker); with the difference that you can do it afterward, so you can try different “filters”.

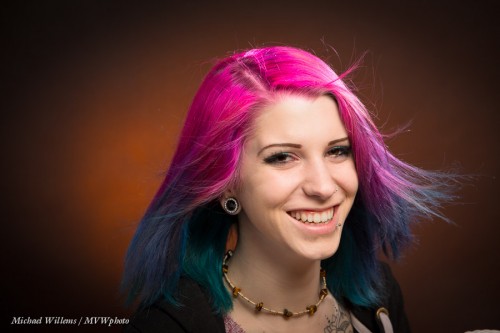
Take model Khoral:

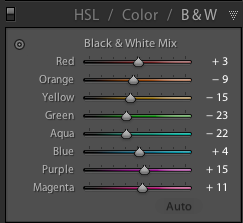
If I do a standard B/W conversion in Lightroom’s DEVELOP module, using its “HSL/Color/B&W” pane, I get this weighting of colours:

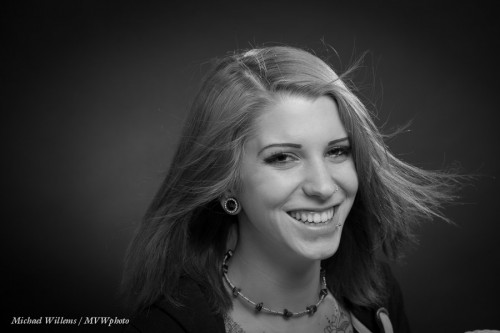
..which gives me:

Which of course looks fine.

But if I turn down Magenta and turn up orange (= skin colour) a little, I get:

Alternately, I could turn up both magenta and orange:

…which gives me:

Can you see how powerful a tool this is? You can try any combination of colour weighting to get the results you want. A distracting colour can be made as bright as the surrounding area so it no longer distracts. Skin can be improved (making orange a little brighter makes skin brighter, which looks clearer).

I hasten to add, of course, that if you are actually doing photojournalism, you should not mess with the original other than a standard conversion, unless your photo editor allows you to use standard colour filters, say – but this would have to be a very explicit agreement, and any edits should not alter the appearance of the scene materially. Why? Because we need to trust that what our media show us is in fact “what there was”. That’s one reason I am not a great fan of “citizen journalism” taking over the news.

But if you shoot art or commercial or family portraits, go wild. OK–maybe no going wild, but you get the idea.

One more thing. Lightroom also allows you to add “film grain”, and that can be very nice in B&W too, to give that old look – and it smooths out skin imperfections. Film grain, unlike digital “noise”, can look good.

OK – lesson over: go shoot some B/W!


Exposing or bracketing?

A reader asks:

“When I’m shooting, sometimes I bracket exposures; I’ll do three shots, one neutral, one over and one under. When I get home, I often find that the neutral one is the correct exposure, so I delete the over- and underexposed shots. But I hear people say to expose to the right so often these days that I’m wondering if I would be better off keeping the overexposed shot instead (assuming that there are no blown highlights) and adjusting the exposure setting in post processing, because the overexposed shot should in theory, have more information than the neutral image. So, is one approach better than the other, or does it even make a difference?”

Good question.

Read my thoughts on exposing to the right here. Basically: Yes, a good technique if you do not mind the extra work, but indeed, not to excess (blowing out the right would be excess).

As for bracketing, there are two schools of thought a bout ‘routine’ bracketing. One says “you don’t have to, now that we have the histogram and instant review’. True.  The other says “why not? it used to cost a lot of money (3x the previous cost), but now the cost is essentially zero”. Also true!

I do not routinely bracket because of the extra decisions, the extra work. But I do bracket when I want to do HDR (high dynamic range) photos – like when shooting desert rocks in a bright midday sun, where one half is bright, and the other half almost completely dark. This does not happen often, but when it does, I am grateful for the convenient bracketing function on my camera.


Before and After

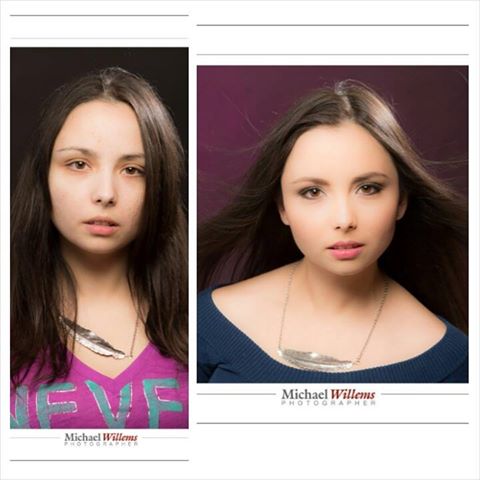
Here’s the power of a make-up artist: “before” and “after” shots of Liz Medori:

Now of course you will notice a few things. First: on the left we have done nothing to make the image look good. NO make-up, but you will also notice the lack of a background light, the lack of a friendly expression, no fan for the hair: while this is not a deliberate “let’s make her look bad” shot, it’s certainly not a “let’s make her look good” shot!

The photo on the right has all those things and a little post work, but in regards to that post work, I want to emphasize “a little”. I do not like to “Photoshop” (Lightroom, really) the heck out of someone to make them look like something they are not. I never, ever do any liquefying, or anything like that; only minor fixes of skin contrast, fixing of temporary blemishes, and so on.

So what we did on the right:

  1. Lit the background
  2. Better expression
  3. Used a fan on the hair
  4. Fixed minor blemishes
  5. Decreased “Clarity” a little (skin-tone contrast, if you will) – but not by much. -15 to -20 is a common setting for me. Much more and it gets obvious, porcelain dolls, and while some photographers love that look, I would rather see people the way they are.

A rule of thumb: if any alteration to a person is obvious upon seeing it, I do not like to do it. I am not fan of the “Portrait Professional” ads that show people made into something completely unlike the way they actually look.

Anyway – the make-up is the major difference: thanks to Melissa T. for doing make-up, and to Liz Medori for modelling.


Headshot

A future new book will be about photographing people. One shot you need to learn is the standard headshot. And today, a tip for these headshots.

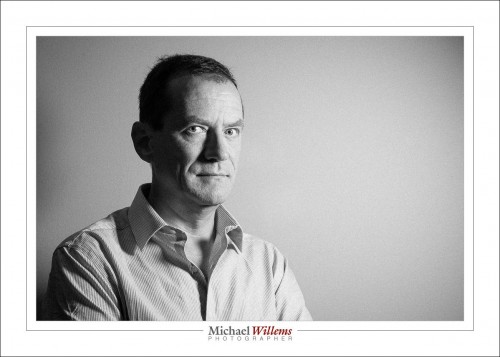
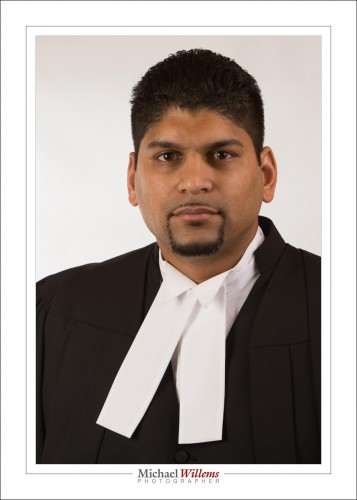
Look at this (unfinished) image of new lawyer Arvin (congratulations!), from a shoot last night:

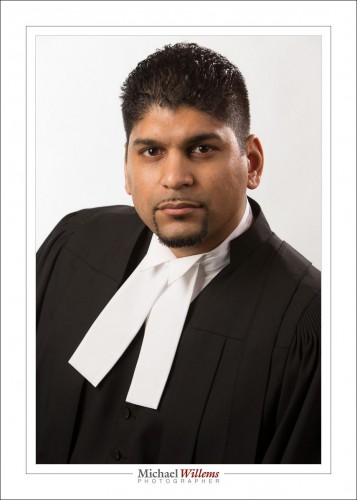
And now look at the second (also unfinished) photo, taken a second later:

Both are fine –  but the second photo is very different, isn’t it?

I have lit it differently, to create some modelling. Modelling means “showing that it has three dimensions”. The first face looks flat; the second one looks like an actual, three-dimensional, face. Lighter on our left, darker on our right. The lighting in the first photo might be more suitable for a beauty shot of a woman, perhaps – but it shows little depth.

I also added the hair light in the second picture – the “shampooey goodness™”.

But there’s more. I have also asked the subject to

  1. drop his shoulder (the one on our right);
  2. aim his head toward me, i.e. stick it out like a giraffe. That feels weird, but it looks good in photos (provided I am shooting almost straight one);
  3. tilt the top of his head slightly to our left (opposite direction to the dropped shoulder).

This gives us a nice strong jaw line and a more personal look. Mission accomplished. Now I can go finish the pictures (crop, rotate, adjust exposure, fix small flaws, etc).

The moral of this post: both lighting and positioning (not “posing”) of your subject are of great importance when shooting a portrait. Learning portraits is this, as much as the technical bits.

___

TIP: Do start with my books to learn the technical and lighting techniques: www.michaelwillems.ca/e-Books.html


Hold on.

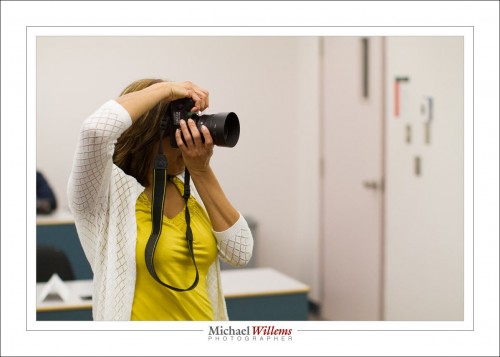
And here’s HOW you hold on: you hold the camera with your left hand under the lens. Not on top of, which beginners all do. Yes, sometimes I have major posts about complicated stuff; sometimes, however, it’s simple yips, and this is one of those days.

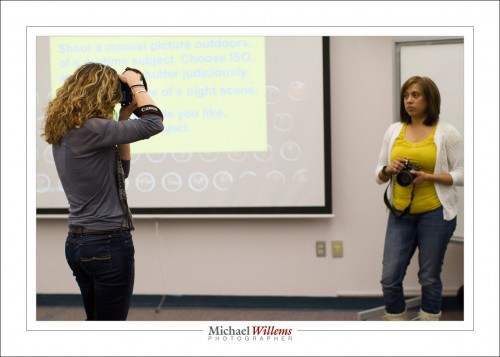
And when taking a portrait-orientation shot, the shutter goes on top, not below. So you do it like this (one of my students at yesterday’s class at Sheridan College):

Even better: wrap the strap around your wrist, too, so that if you drop the camera, it doesn’t fall to the ground:

Why? It’s more stable. That’s the main reason. Less shake. See yesterday’s picture: 1/10th of s econd handheld with a 50mm lens? Yup.

Also, you do not waste time moving your hand back and forth. And finally (this one is important for the guys): you look like a pro.


You can.

You know that you should not shoot at shutter speeds lower than “1 divided by your chosen focal length”, unless you have a stabilized lens.

So a 50mm lens with a speed of 1/50 or faster is OK. Slower, not.

Or is it?

I shot the above picture of Shiva (Lord Shiva the destroyer) just now, at 1/10th sec with a prime lens at f/1.4, 800 ISO, Canon 7D. Against the rules, but  as you can see, it worked.

Why?

Two reasons.

  1. I can hold my camera very steady. Underhand under lens grip, no breathing – like target shooting with a handgun.
  2. I took the picture five times! One was unsharp, two OK, and two very sharp. When shooting handheld at “slower than possible” speeds, always take multiple shots. Ten, if you can.

And that is why you should never be afraid to try to break the rules. It may not work. But then, it may.


Runway Bride

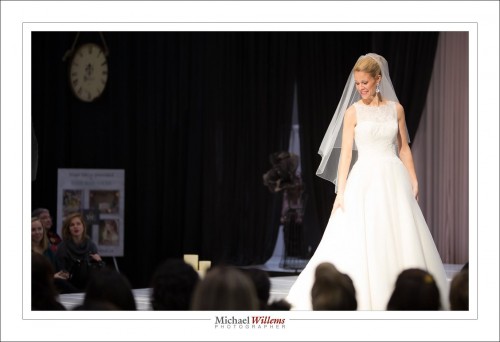
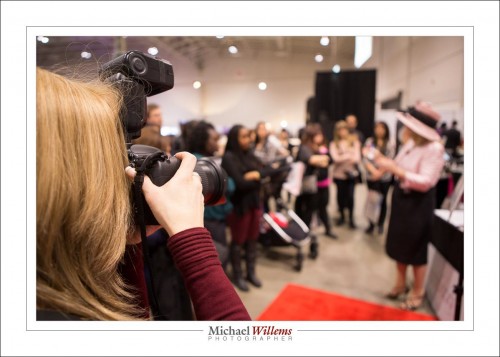
Today I and my assistant shooter shot some pictures at the Toronto National Bridal Show, and I think it might be useful for me to share a few things about that shoot. As you know, I like to share what I do and how, so that you can learn more quickly than I did. Photography is part art, part trade, part technical skill, and all three swirl around each other like a three-core DNA string.

Today was part portraits, like this of TV wedding organizer Jane Dayus-Hinch:

Those studio-type portraits were the easy ones. All I needed was:

  1. Camera with 24-70 and 70-200 lens (the latter preferred but only if I have space);
  2. Pocket wizard on the camera;
  3. A portable light stand (yeah, we carried it through the exhibition hall);
  4. Bracket for mounting umbrella and flash onto light stand;
  5. Flash;
  6. Shoot-through umbrella;
  7. Another pocketwizard on the flash side;
  8. Cable between flash and pocketwizard.
  9. Flash set to manual, 1/4 power
  10. Camera set to manual, 400-800 ISO, 1/60th sec, f/4 when mixing ambient light with the flash; 1/125th sec at 800 ISO and f/5.6 when not: play with the settings until the right balance between background and flash is obtained.

Those are simple, because you turn the subject to the umbrella, ensure the brim does not catch too much light, and once you have the exposure right, keep the distance the same as in other shots and every subsequent picture is good – guaranteed.

Now you can concentrate on composition, expressions, and so on.

But the rest was different. Some involved only ambient light:

For these, it is important to get a fast enough shutter, and shoot when the right light is on the subject. And use high ISO – I went to 1600. And here I used something I seldom do, namely a combination of:

  • AI Servo (Nikon: “AF-C”) focus;
  • The camera chooses the focus area, not me!

That is anathema to me normally, especially the latter; but here I found the subjects moved just a little too fast for me to set the focus point accurately, since I was shooting at f/2.8 with a long lens, meaning critical depth of field/focus. So I thought quickly and after a couple of shots set the above settings. Razor sharp shots as a result. Dogma should never get in the way of results.

Finally, some pics needed ambient light and a little fill flash:

For that, turn the fill flash level down – I used minus 3 stops flash compensation.

So: many different shooting situations today. A great way to do a Sunday, since photographers need to keep in practice just like airline pilots do. I am happy with my work, and if you learn the basics (do get the e-books: http://www.michaelwillems.ca/Buy_Books.html), so will you be with your work!


Today’s photo

Today’s post is once again a “a day in the life of” post. The photo of the day one I took today of model Khoral, who is of course totally gorgeous, but much more importantly, who is both intelligent and a very nice person. Those are rare qualities: more rare than good abs (or whatever physical attribute you wish to name).

And as you see, she has dress sense too.

But how did I shoot her?

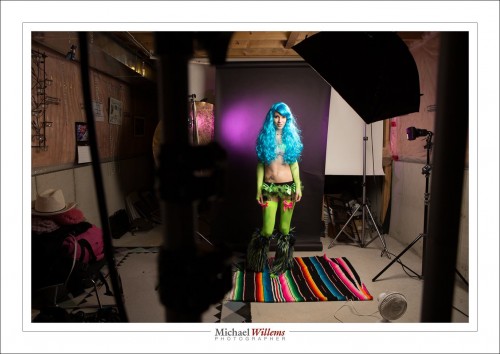
I shot her like this, in the studio:

The details:

  • The main light was a strobe with a softbox, mounted on a boom. It was fired by a Pocketwizard.
  • The hair light (needed for Shampooey Goodness™) was a strobe with a snoot. It was fired by using its cell (i.e. when the main flash fires, it senses the flash, and fires too).
  • No fill light was used, but in some pictures I used a white reflector as the fill light.
  • The background was a black paper roll. Black is good: it eats up stray light and given enough flash power, I can make it any colour I want, since it does not pick up white light from the other flashes.
  • The background light was a speedlite (a Canon 580EX), also fired by a Pocketwizard. It was fitted with a purple Honlphoto gel stuck on top of a 1/4″ Honlphoto grid (the gel colours the light; the grid restricts it to a small area to produce that nice oval with dropoff).
  • The camera was a 1Dx with a 70-200m lens. The longer the lens, the less distorted and more flattering the pictures.
  • Why the purple gel? This was a key decision. Her clothes were extremely colourful, and I had to choose a colour that matched. Purple was a good choice.
  • The camera was, of course, set to studio settings: 100 ISO, f/8, 1/125th second. You can finess this. For instance, if you have insufficient light you can either turn up the light, or turn up the ISO, or turn down the f-number. (Not the shutter speed. Why? Read the flash manual).

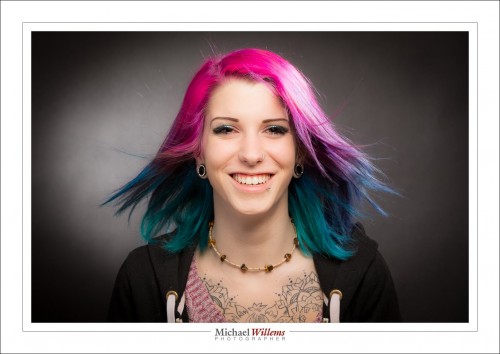
And one last one, one that shows the model’s genuine smile – an asset much greater than other assets people can have. No, models do not always need to look grumpy.

(You will see that once again, I used a fan for some of the shots, since she has longish hair).

One more word. Was this all done in camera? Yes, with a few exceptions. Slight exposure and white balance changes in post production (for which I use Adobe Lightroom) are OK: as long as they are slight, and could not have been done in camera. Skin blemish fixes are fine – but this model has almost perfect skin, so little needed to be done. Removing the odd stray hair? Fine. A little vignetting in post is fine too. Cropping and rotating, ditto. And I made the pink cushion into a red cushion (using the Lightroom masking tool and its colour setting). But these photos were mainly done in camera. You need to learn to do it in camera if you wish to call yourself a photographer. But even when you are, do realize that every ophoto needs a little TLC in post until you can call it “done”.

Computers.

Since I am teaching a lot of beginning photographers and emerging pros, I want to talk today about cameras, and how important all the technical functionality in modern cameras is. Signal processors, menus, LCD screens, a plethora of settings, multiple levels of sophisticated focus functions: all this is stuff we cannot live without.

Or is it?

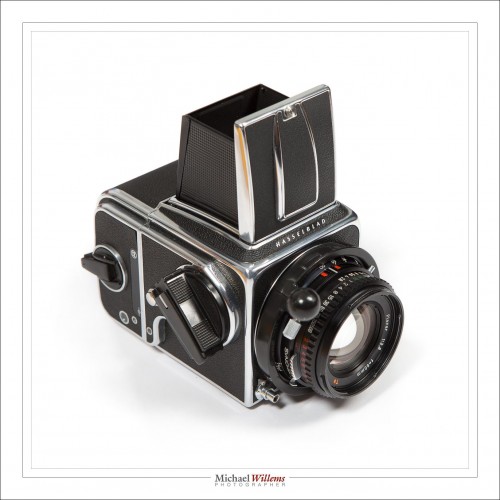
Until a few years ago we used this:

And guess what. This camera had:

  • a setting for aperture
  • a setting for shutter speed
  • a viewfinder
  • and a focus ring you had to turn.

Yes, that was it. A film (with a given ASA); a shutter speed setting; an aperture setting, and a focus ring. That is all you need for great commercial, studio, fashion, product, etc photography. I wish I had one.

So when I teach you in my courses (and in my books too), while you will learn all the buttons and menus and switches, you also majorly learn the fundamentals, Only when you know those do the menus and processors help.

For those fundamentals, by the way, you can download an entire chapter from my Learning Your Camera e-book. Click here to download it. And learn the basics before going on to sophisticated electronic functions. They’re great – but they are not necessary.

A challenge to you: shoot your next week’s pictures entirely in manual exposure mode. If you learn to do this, you will be a real photographer.

___

NOTE: This content is brought to you free of charge. The blog posts; the articles; and things like the free book chapter. Yes, in addition I sell e-books, training and photography sessions, but this blog is provided free of charge. Since this is a business, though, let me ask you to so something in return: please send this blog’s address to three friends who may be interested. That way even more people benefit from this advice and these free lessons. Fair deal?