Ratios

Say you do a shoot. Say, you set up lights, have a model or setting, and spend a few hours shooting, and you end up with 300 images.

The question? How many are good when a pro is shooting?

The answer is: it depends on the shoot. Sometimes I make 4 exposures and 3 are great. But typically, I take as many angles as I can, which results in a few hundred images.

I then rate them:

  • One star: technically lousy
  • Two stars: technically passable but not a great shot
  • Three stars: suitable for sharing with client
  • Four stars: Great shot in this shoot
  • Five stars: Portfolio shot

You may be surprised that for me, a typical shoot has something like 300 shots, of which:

  • One star: 3 shots
  • Two stars: 35 shots
  • Three Stars: 230 shots
  • Four stars: 30 shots
  • Five stars: zero to two shots

So while almost all shots are technically good and most are also suitable for going to the client, fewer are great shots and I am delighted if one or two are portfolio shots.

So do not feel discouraged if you do not get 150 great killer shots out of every shoot. I tend to share many shots as you all know, but most photographers only share their very very best only. You may be better than you think!

 

Exposure Exposé

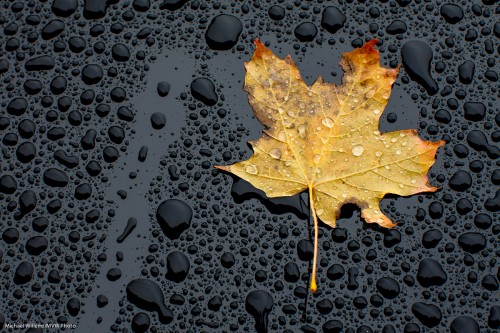
So how do you expose a shot like this (yesterday, on my car):

You will remember that your built-in light meter gives you an exposure based on an “18% gray scene” – the same reflectivity a gray card gives you. This scene, however, is “bright plus dark”, but not “18% gray”. A challenging shot, then – for which you have the following options (roughly in order of expected exposure accuracy):

  1. Use an external meter – an incident light meter. Hold it above the leaf aiming up, then meter. Set those values in your camera.
  2. Spot meter off something gray – i.e. hold a gray card in the same light and set your camera’s exposure scale to zero while pointing your (spot-) meter at that.
  3. Use normal evaluative metering and adjust later in post-production.
  4. Spot meter off the leaf and set the scale not to zero (grey subject), but to +1 (lighter than grey subject).
  5. Using manual exposure, set your meter to a value you think might be overall right, then take a test shot and adjust to taste – using the histogram.

I did the latter – I always use manual mode when the light is steady, as it was here. Once set, it is set, and all future exposures will be right. And with a little experience, you can get very quick at this.

I used 1/50th second, 400 ISO, f/7.1. (On a side note, the “sunny sixteen rule” failed miserably here – just to try, I used 125 ISO at 1/125th second at f/4 – that should work, but it was at least two or three stops too dark. Such rules are guidelines!)

And finally: 1/50th of a second using a non-stabilized lens pointed half way down is a challenge in itself. Why? Motion blur. The best way to handle this? A tripod. But failing that, do what I did: take the shot five times. One or two will be razor sharp.


All you need is a little…

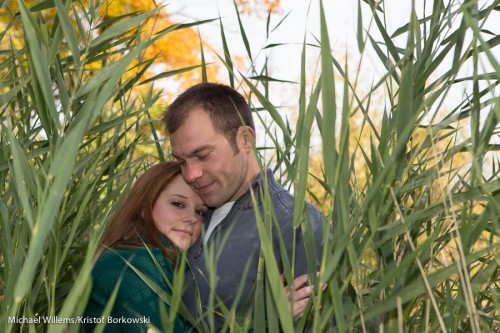
…a little flash, that is. Often, at least for the photo, that is enough, like in the image above. Here, colleague Kristof positioned the couple in the tall grass. But to get the shot, I needed a little flash to light up the couple – if I had used just ambient, the yellow fall colours behind them would have been lost. Direct flash is OK for this if you have to.

For this, since the flash is just adding a little fill light, you can use a Flash Exposure Compensation (Flash Exp Comp) setting of -1 to -2 stops.

Careful though:

  • Canon cameras using TTL will do this by themselves if they detect enough ambient light to “guess” that you are using fill flash.
  • On Nikon cameras, if you use Exp Comp, that also sets Flash Exp Comp.

Often, those small engineering decisions, largely undocumented, can make your life difficult.

Oh – and you also need a little love in life. Ask the happy couple above!


Portraits can be.. simple.

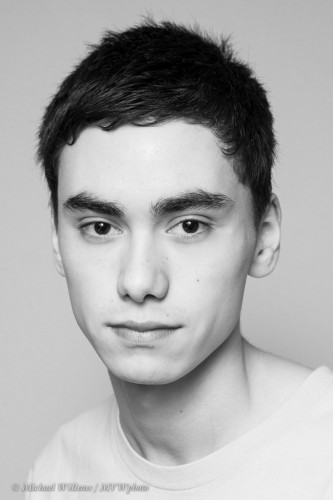
Take a studio portrait like this, of my son Daniel last night:

A studio shot.. but taken without a studio in, oh, one minute. Here’s how:

  1. Camera on manual; 1/125th sec, f/8.0, 400 ISO. (These settings are to ensure that the ambient light does nothing: it’s all flash. I could easily have used the usual 100 ISO, but I am using a speedlight, and want to ensure it has enough power).
  2. Speedlight on the camera, on TTL.
  3. Speedlight aimed 45 degrees up, 45 degrees behind me, to bounce off the ceiling.
  4. Subject positioned against an even light-coloured wall.
  5. Flash Exp. Comp. set to +1 stop.
  6. Tried various poses: right, left; shooting from above; from below.  Took several shots in each position. Watched for shadows and catchlights as well as for expression and shape of face.
  7. Picked one.
  8. Converted it to B/W in Lightroom.
  9. Increased orange a little in the conversion to smooth and lighten skin.
  10. Done! Exported as JPG.

That is how you use studio techniques even without a studio. It’s not the gear: it’s the knowledge.

___

This is what I teach – and teaching photography is what I do at least as well as doing photography. Contact me (michael@michaelwillems.ca) to hear more. To those of you in or around Mississauga: Basic and Advanced DSLR courses at Vistek tomorrow: sign up right now!


No direct flash

You have heard me say it many times: do not use direct flash (like your popup flash), especially when that direct flash is right on top of your camera (like your popup flash).

But what if you have no choice? Can you do it if you have to? Of course you can. The better the camera, the better. The better your control of that flash, the better. The farther the flash from the camera. And the better-looking the subject, the better.

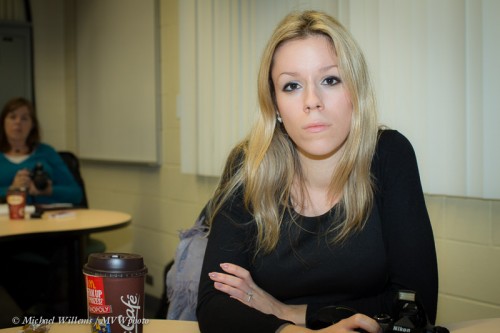
Here’s an example from my class on Monday at Sheridan College. An example of what I would normally not do: unmodified straight-on flash.

I would normally not do this. Shadows. Reflections. Catchlights in the centre of the eye instead of high, where they belong.

Now to be fair, I did have to slightly lower the reflections on her face, especially on the nose. But other than that slight adjusting, not much done, and so you see – if you must do it, you can. In fact for young women, straight light can work well – it makes skin look very smooth. So remember to take everything I say as a guideline. A serious guideline – but one you can break if you must.

One caution. TTL flash will often (depending on your flash, your camera and your lens) take into account where you focus, and will expose for that. So if you focus wrong, your picture will be exposed wrong. As in this example of what not to do:

See? I focused on the background, so the TTL system exposed for that background. Keep this in mind. (And with this in mind, can you work out why you should keep recomposing to a minimum also?)

It’s all very logical, really.


The Flash Power Challenge

So from my posts, you have seen that in using flash outdoors, the big challenge is:

To make the background darker without also affecting the flash power to the point that it is no longer sufficient.

To make an outdoors background darker, other than actually making it darker (sometimes the simplest option is the obvious one: wait for a solar eclipse, shoot later in the day, or use scrims), you can do four things:

  1. Use ND filters
  2. Decrease aperture (use a higher “F-number”)
  3. Decrease ISO
  4. Increase the shutter speed

Unfortunately, the first three of those also affect the flash: every use of those will negatively affect your flashes’ available range too. So you want to avoid them if possible.

And what about the shutter speed?

That does not affect your flash range. So it is the obvious one to use to make the background darker. But… only up to your camera’s synch speed (depending on your camera, this is normally around 1/250th sec). Beyond that, you cannot use flash.

“Yes you can, Michael, you can use Hi-Speed (Auto FP) flash”, I hear you say.  That is true – but that too negatively affects your flash range. Catch-22! So no, it does not help with your flash power. (Then why do we have it? Ah.. to allow outdoors shots with the blurry backgrounds that only large apertures will give you.. apertures that need fast shutter speeds!)

So. Again, as said yesterday, a nicely balanced outdoors flash picture (i.e one in which the background is darker), needs you to first of all use method 4 above, up to your flash sync speed.

After that, you must do one or more of of the folowing to still have enough flash power:

  1. Bring the flash closer.
  2. Forego the use of modifiers and use direct flash.
  3. Add more flashes.
  4. Use more powerful flashes (strobes instead of speedlights).
  5. Zoom in your flashes to concentrate the light (giving you more intensity over a smaller area).

Work though the logic of this post very carefully. Step by step – the logic is important, and it is important that you thoroughly understand it. This is not esoteric theory: this directs you in every day shooting, every single day!

One more time… flash outdoors

Even experienced photographers ask me how to use speedlights outdoors. So let me give you one more step-by-step for pics like this:

A method:

  1. Set your ISO to 100
  2. Set your shutter speed to your fastest sync speed (typically, 1/25oth sec)
  3. Now, ignoring any flash, select the aperture you need for a good background exposure. Probably something like f/8 to f/16 (the lower the number, the better, for your flash’s sake).
  4. Now set your flash to manual, full power.
  5. With that setting, try to see how close the flash needs to be to light up your close-by subject effectively. If that is too close for you, use it without modifiers and/or zoom it in manually. Or add  more flashes.
  6. Then, once you know what you are working with, you can choose to use TTL or manual, keeping the flash at that distance or closer.

That kind of methodical thinking will get you going quickly.

Typically, on a cloudy day it’s easy; on a sunny day. you will struggle with a speedlight, meaning you need to be close and/or unmodified.

Try it and ask here if you have questions, or do some coaching: I’m here to teach you this stuff quickly.


Engagement

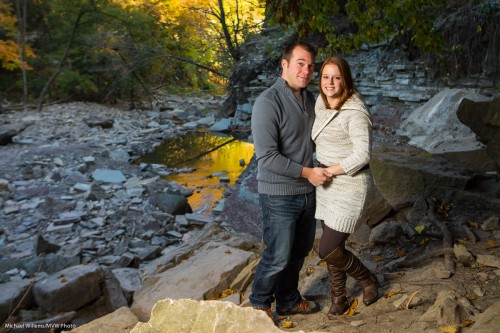
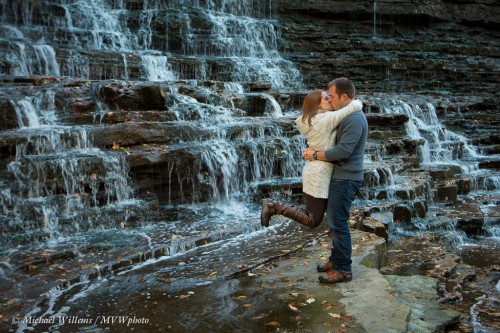
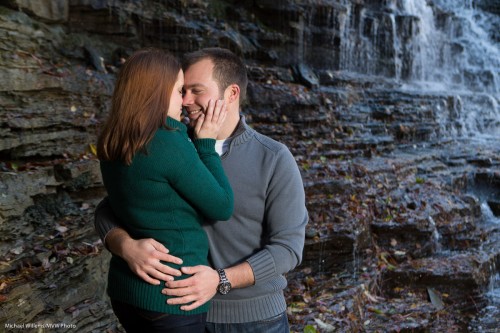
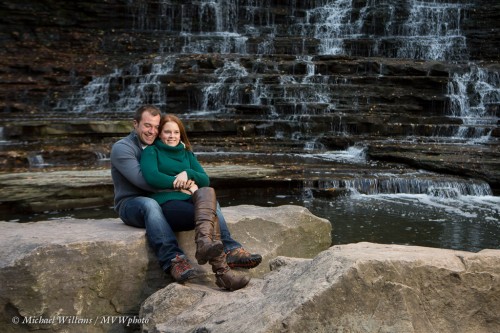
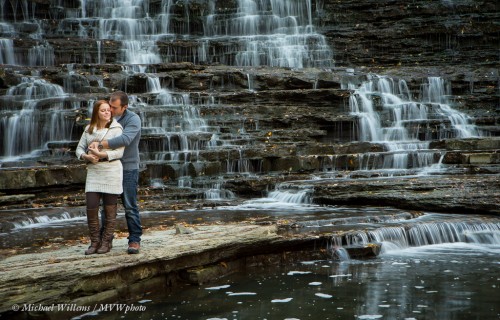
An engagement shoot, this morning. It was cold, but the young lovers, Kristen and Dan, aren’t showing it:

In a shoot like this, you may want to keep in mind a few things.

  • There is bright stuff – the sky and directly sunlit areas – and dark stuff – the rest. It is impossible to get both in a shot well exposed (unless, of course, you use flash to light up whatever darker areas are important to you. Like your subjects.).
  • The White Balance of both areas are different. Shady areas look very blue if you white balance for the sunny areas (or for your flash, which is equivalent).
  • You need to simplify. Take out annoying branches, cigarette butts, and so on.
  • Do not pose. Position, instead.
  • Spontaneity is good. But sometimes you need to direct. Take a detached view.
  • Use the Rule of Thirds.
  • You can shoot a little wide and then crop later, if you wish.
  • However nice the wide angle shots are, also shoot some close-ups. Or vice versa.

Here’s a couple more samples of this wonderful couple – with minimal adjustments made in post. It is good to shoot it in camera if you can.

Technical details: I shot with the camera on manual, set for the right background. For light, I used an off-camera flash on TTL (using light-driven remote TTL).

So what do I do for a shot like this, which needs slow shutter?

Tricky. To get the slow shutter, I need a small aperture. But that kills my flash power. So I compromise:

  • I use the flash with no modifier (which also steals light).
  • I manually zoom the flash in to 200mm. This concentrates the beam, leading to higher available power.
  • Then go to the smallest aperture that gives me acceptable flash output.

Note that “just use an ND filter” is the wrong answer. Unless you have lots and lots of flash power to get through that filter. Which brings me to my last suggestion: use multiple flashes. Each doubling of the number of flashes gives you an extra stop of flash power!

___

Michael teaches these techniques and many others. Contact him to see how he can help you through a course, some coaching, or through a number of other methods all designed to increase your state-of-the-art speedlighting knowledge quickly.


Challenging Shots

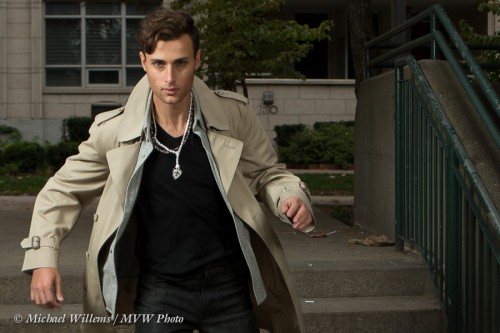
Some shots can be a little tricky. Like this one, from Sunday’s shoot:

Tricky why? Because the model is jumping, making it hard to focus.

The solution? You could try AF-C/AI-Servo, i.e. continuous focus. But often in these cases a better solution is this (and that is what I did): pre-focus, then hold that focus while he jumps. So I had the model stand where he would be when I take the shot; then focused there and held that focus while he moved back and jumped; then I shot when he was once again in the same place.

Why is he not blurry? Because he is substantially lit by the flash, which fires faster than 1/1000th second.

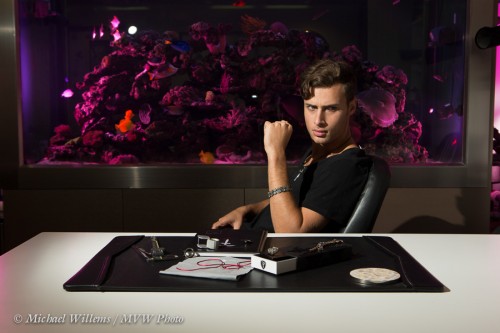
Another, different challenge was presented by this shot:

Why? Because the original plan was to light the aquarium in part from behind. But I was shooting TTL, and guess what? I found out on Sunday that the light-driven TTL does not work through an aquarium. Fancy that. You learn something new every day, even when you have been doing it forever.

The solution was to light it from the sides instead, after removing the aquarium side doors. Sometimes you just have to change your plans a little bit!

Enjoy your speedlighting, everyone. I am off to sleep – finally, at 3AM.

More from Sunday

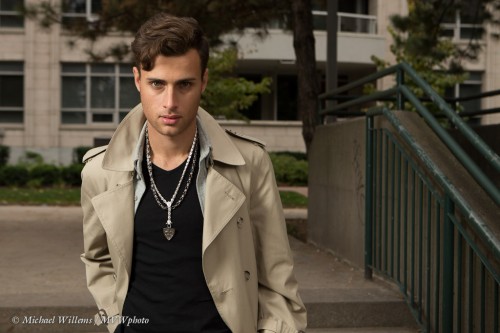
From Sunday’s shoot, here is another shot:

The scene was to be urban, so after we walked into the park I settled quickly on the concrete wall and stairs. Stairs are good; concrete is good; leading lines are good.

Now, a shot like this needs the same care and attention as the previously discussed shots. The same people – jewellery people, hair stylist, make-up artist, wardrobe people, model, assistant, and so on.

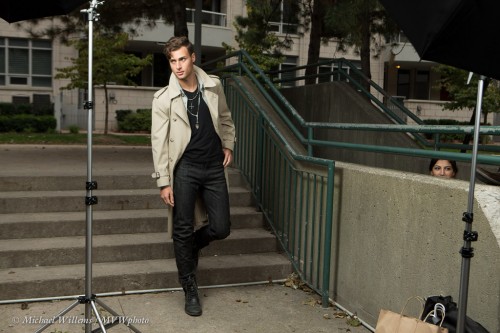
It was cold – very cold. So, fortunately, a shot like this can be done with relatively simple equipment. You can see some of it here:

Two umbrellas with speedlights, driven by one speedlight on my camera.

Of course that means line-of-sight is necessary (unless you can afford all radio-driven flashes). This needs some athletic moves on the part of the photographers.

Also, if you are using umbrellas, use sandbags or get someone to hold on to them: they will be blown over constantly.

The light, you say? Why flash outside?

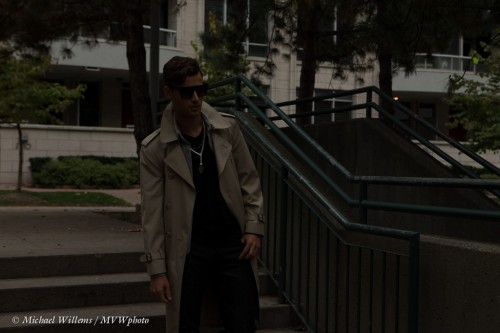
Here’s why. I want the background darker. The camera is on manual, of course: I used 200 ISO, 1/125th second. f/5.0. Look what happened when the flash did not fire:

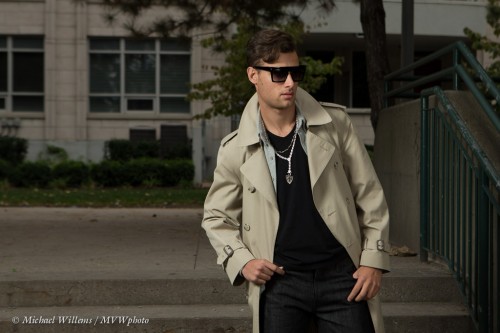
Nice – for the background. And with flash that becomes:

So my subject is now the “bright pixels”. Remember Willems’s Dictum: Bright Pixels are Sharp Pixels. I lit with two flashes: one from the left at higher power, and one on our right at lower power (to get modelling in the face).

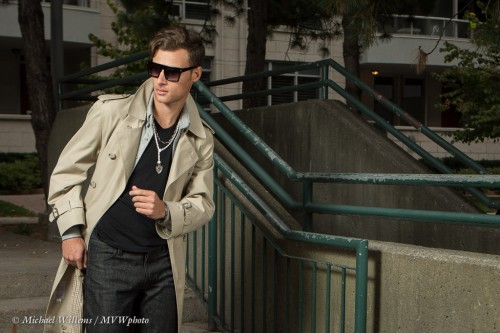
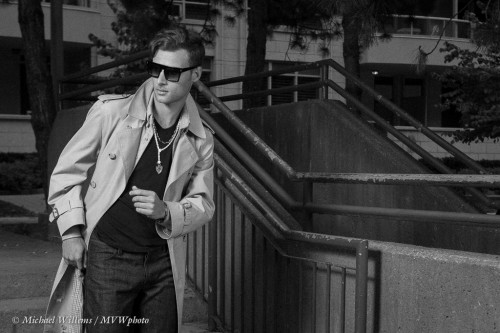
I like colour for these, but a black and white version with grain added can also work well. Compare these two versions:

Which one do you prefer?

The lesson here? Light is good. Speedlights rock. And photos take some thought. The final click is just the culmination of experience, people, preparation and thought.

And the good news: there is virtually no post work on these pictures. If you prepare well, you can often get results in the camera, not on the computer.