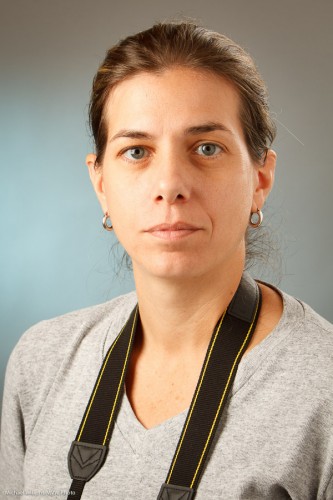
Auto ISO

When you are using “auto ISO”, meaning the camera sets ISO for you, be careful.

In this mode, the camera will raise ISO and lower it – but it will get it wrong in some situations.

Low light. The camera will raise ISO to give you a handholding-suitable shutter speed. But do you want that? Or do you want quality (low ISO gives you that quality) and use a tripod? Night shots, twlight shots, fireworks, lightning: these are the obvious examples. For night shots, use low ISO and a tripod. So: low light: if you can use a tripod, use low ISO.

Motion needs. When there is enough light, the camera will lower ISO to give you good quality and shutter OK for handholding. But when you need that extra shutter speed, for sports, say, or for anything else that needs motion frozen, you need higher ISO. You may need 1600 or even 3200 ISO for hockey, but no auto ISO will give you that. So if you have motion, then raise ISO to suit.

My rules of thumb for ISO:

  • Outdoors, or low light with tripod, or studio shoots: start at 200 ISO
  • Indoors, even when using flash: 400 ISO
  • Difficult light – sports, motion, museums, churches: start at 800 ISO

In all cases, vary as able or as needed (if there is more light, use lower ISO; if you still get motion blur, use higher ISO).

Note – Auto ISO and manual will, on many cameras, give you a “aperture PLUS shutter priority” mode. This can be a cool thing to play with.

 

Mountains. Move them.

You know the saying, attributed to Francis Bacon? “IF THE MOUNTAIN WILL NOT COME TO MOHAMMED, MOHAMMED WILL GO TO THE MOUNTAIN”.

Photographers know this too – but we sometimes forget it. So let me remind you. When you have a background you do not like, or a wall with the wrong colour, or a ceiling that is too high, you can try to deal with it the best way you can.

You know how, right? So you read my blog – you know this. 4 -40- 400!

  • 400 ISO
  • 1/40th sec
  • f/4

And the flash aimed behind you.

Nice, but.. if you have a better background or a better wall, why not use that?

Ask your subjects to move.

And then you get..

So.. please remember that as a photographer, you can shape your environment. Do it, and your pics will be better.


Studio setup

A few readers asked about the “background post” of the other day – how was it lit?

Here’s how:

Studio Light (Photo: Michael Willems)

Four lights:

  • A softbox strobe as main light.
  • An umbrella strobe (not pictured) as fill.
  • And two speedlights: one with a Honl Photo snoot as edge light, and one with Honl Photo gel as background light.
  • All manual
  • One strobe and both speedlights fired with Pocketwizards; the other strobe with its cell.

That’s a very standard setup for me, and yes, you can learn to do this too.


Background woes

Backgrounds. We like to have control over them in portrait shoots, don’t we?

One question I often get is “why can I not light up my background? Nothing I do works!”

This is quite simple. To light up a background, you need a colored light (a gelled flash?) shining onto a dark background.

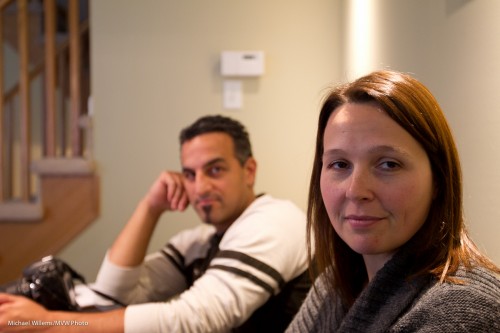
So if the background is already light, you cannot easily colour it. As in this shot of a kind volunteer in my Sheridan College course the other night:

My main two lights are spilling onto the background, lighting it up.

So how do you get the background darker?

  • Use a darker backdrop
  • Move the subject farther away from the backdrop
  • Move the light closer to the subject, so the relative distance changes.

Any combination of those three gives you something more like this picture of another kind volunteer (in this case I moved the light closer to the subject, and then turned it down correspondingly):

And now I can add my background light, a gelled speedlight in this case, set to 1.4 power, which a nice bright gel – Honl Photo Egg Yolk Yellow:

Simple once you know, n’est-ce-pas?


Interested in lighting? Consider some private coaching, where I explain all, you get to practice and take actual shots, and all will become clear. The December/January special is still on: 10% off during those months.

Glasses are not a problem

In a shot with glasses, avoid reflections – and it is easy. Move the lights (umbrellas, softboxes, whatever you use) 45 degrees to the subject’s side, and 45 degrees up.

If you see a reflection, like this:

..then do the following:

  • move the lights a little further up
  • or ask the subject to aim his head down just a little.

And often, “simple” is all you need. Just remember to pay attention to possible reflections!


Depth of field…

….is affected by aperture – the lower the “F-number”, the more shallow the depth of field.

But let me repeat…  also by lens length (the longer the lens, the more shallow the depth of field), and, importantly, by proximity. It is the relative distance difference that matters!

Same settings in these two pictures:

Slightly blurry background… Now with the same settings, but we get closer:

Tip: to learn these things well, use a prime lens. That takes one variable out of the equation.


The best camera…

…it is often said, is the camera you have on you.

But you need to use it well. I shall share with you an example of an iPhone picture I took, to illustrate this.

To do an iPhone picture is easy. But to do it well, you need to:

  1. Compose well. Do not take a pic with the subject in the centre – use the Rule of Thirds, tilt, get clos, do what you need.
  2. But do not get too close or you will distort.
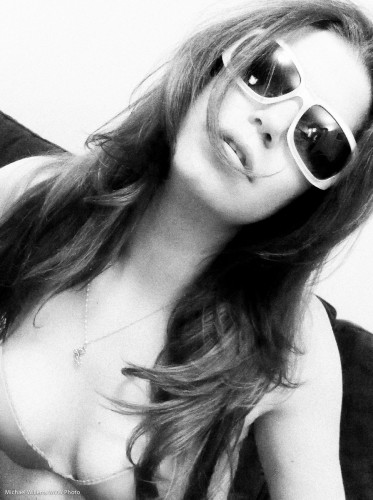
  3. Light well. Not the intensity – this pic was taken in very low light with no flash – but the direction (I turned the subject to the light and tilter her head up to catch that light)
  4. Post-process – in my case, in Lightroom. First, I converted the image to black and white.
  5. Then I applied an enhanced contrast style.
  6. Then I reduced the noise
  7. But then I applied lots of film grain. Love that grainy look (view full size to see it):

The result:

Model Kim Gorenko (Photo: Michael Willems)

Not a bad shot eh, and taken with an iPhone in low light.

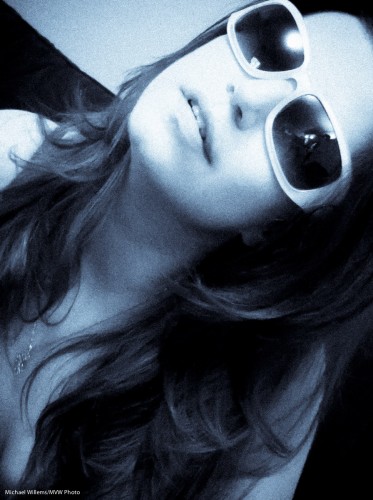
Here is another example, with Selenium Tone style applied (and the same other tuning done):

Model Kim Gorenko (Photo: Michael Willems)

So do not make the mistake of thinking a good photographer is nothing without great equipment. Yes, it expands your possibilities, but if all you have is an iPhone, use it well!


Studio tip

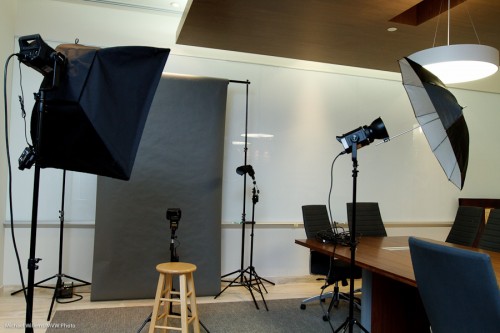
In a studio setup, we usually use strobes – big, outlet-powered lights. Like the two main lights here, with softbox and umbrella:

Studio (Photo: Michael Willems)

Fired by a pocketwizrds: you can see one on the left.

But if you look carefully, you will also see two speedlights there.

Speedlights? Yes, but fired manually, also via pocketwizards. For which you need a pocketwizard and a cable from www.flashzebra.com for each one.

Why do I small flashes for hairlight and background light?

  • Smaller
  • Lighter
  • Less cabling, since they are battery-powered
  • And not least, the ability to use Honl Photo small flash modifiers such as grids, snoots, and gels.

All of which I use here, and the resulting photos look like this (shot on a 1Ds MkIII with a 70-200mm lens):

Studio shot (Photo: Michael Willems)

(PS if you are buying those modifiers, and I recommend you do, as a reader of this site you are entitled to use the Honl Photo web order discount code which Dave just made available for you: enter code mvw2011 which gives you 10% off the price!)


Building a portrait

In my “quickly building a…” series, here is another one: building a traditional standard studio portrait.

Set your camera to manual, 100 ISO, 1/125th second, f/8.

Start with one light, the main, or “key” light. 45 degrees off to the side, and 45 degrees up. Using a diffuser like a softbox or shoot-through umbrella. Use a flash meter to do this and you get:

Portrait (Photo: Michael Willems)

Good light, good catch lights in the eyes.

OK, so now add a fill light, say, two stops below the key light. Use a bounce umbrella or some other diffuser.

Portrait (Photo: Michael Willems)

Oh, that is a little too bright. Turn it down a little, and then add the next step: a hair light. From behind, to give the hair that look of flowing shampoo awesomeness. Use a snoot or grid, so the light only goes where you want it to.

Portrait (Photo: Michael Willems)

Good. Almost done. Now add a background light, aimed at the background. Consider using a gel, and again, perhaps a grid.

Portrait (Photo: Michael Willems)

I like to have a bit of a pattern to it, a dropoff, as you see.

And that’s all – simple, if you take it methodically. If you start with all four lights, you will get muddled.

And thanks to the pro “chick that clicks” student who volunteered for this the other day during a light coaching session.