Star burst

How do you create a star burst like this?

Fine Cuban (Photo: Michael Willems)

You may want to edge or window the sun or light – but the most important technique is very simple: use a small aperture (a high “f-number”). I used f/22 in this shot (and that gave me 1/50th second at 200 ISO).

Yet another little factoid to store away in your knowledge base.


Stick around with me and I promise many more – and for new readers, do consider reading the entire archive here – or quicker, come in for a course or coaching session. December is a great month, so that you can be ready for the holidays and all the wonderful family and event shots you will take. Remember: photography is time travel.


Evolution of an exposure

To help you see how to expose something well, here’s a way – the thought process that might go through your head.

Of course the way to guarantee a right exposure is one of:

  1. Use a grey card and spot meter off that.
  2. Use an incident light meter.

But failing that, you can do it with the in camera meter, if you are willing to go through a little bit of a process. With experience this comes were quick indeed.

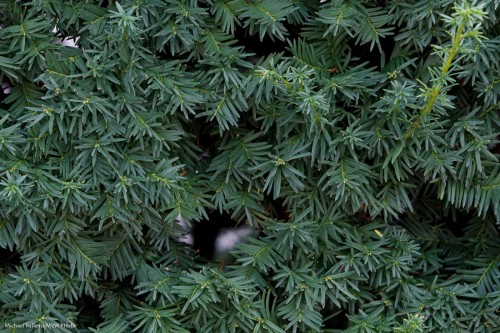
First, shoot:

Uh oh, too light. Oh yeah… plants are dark. But the camera does not know it is shooting plants, so they look “normally bright”.

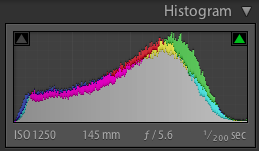
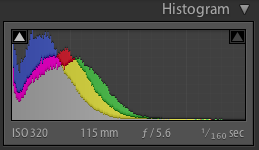
The histogram for this shot shows this:

Yeah, a general “normal” exposure.

You could now stop and pull the exposure back in Lightroom alter, of course (exposing to the right, a good technique to get best quality and lowest noise), and that would be fine.

But let’s say you want to expose well in the camera. Then find the right exposure… say -1 to -2 stops of exposure compensation.

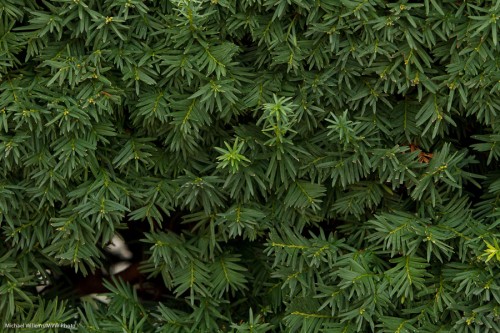
And that gives you a proper hedge row:

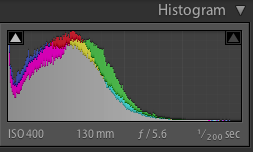
Proven by the now correct-for-the-scene histogram:

But the colour. Mmm. Wonder if switching to “cloudy” or “shade” might give you a less blue, more green plant?

Evidently yes. See the histogram: the blue is pulled back:

And so that is how you might make an exposure without a grey card or incident light meter. A little thought is all that is required – and the histogram helps!


Hallowe’en Challenges

So. You want to go out and shoot pics of the kids trick-and-treating at Hallowe’en?

Challenges, challenges.

  1. It is dark. Backgrounds get very dark.
  2. Slow shutter speeds result.
  3. But bright bits are too bright.
  4. And flash can blow out everything.
  5. There is nothing to bounce that flash off.

There is no single answer, but there are strategies. And your strategies will centre around:

  • Avoiding blur. Fast lenses will help, as will correct exposure (if the picture is dark, you need to make it appear dark enough, which means faster shutter speeds.)
  • Being aware of the light. It is, and should look, dark.
  • But also, avoiding the bright parts of the images from getting overexposed.
  • Equalizing flash and ambient parts of the image.
  • Perhaps diffusing your flash.

So these tips will help:

  • Use high ISO: 800 or 1600.
  • If possible, fast lenses (low “f-numbers”).
  • And if possible, wide angle lenses – these are easier to focus and to use at slow shutter speeds.
  • You can use White Balance set to the “wrong”setting to get more eerie light (try “daylight” or even “cloudy”).
  • Expose to make the image dark (exposure compensation, minus, when most of the picture is dark, or manual exposure mode).
  • Consider using a monopod.
  • When using flash, considering turning that down (using flash exposure compensation, minus).
  • Consider using a gel on the flash – perhaps a slight CTO gel.
  • Consider turning your camera upside down and bouncing the flash off the ground, for ghoulish effect!

The good news: you have a few days to practice!

Michael


Stop!

Before you take a picture outside, stop and think a moment.

You know you do not want a picture with your subjects squinting into the sun. So, turn subjects away from the sun.

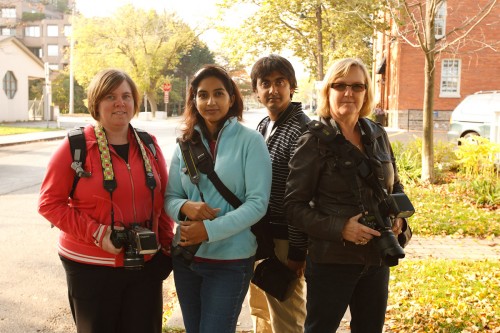
But you also do not want this – a picture of the same people pointing the other way. In tis picture, my students on my photo walk on Sunday are no longer squinting, but they are too dark, and the background is too bright:

Students (Photo: Michael Willems)

Not bad.. but noise hides in the shadows, while bright pixels are sharp pixels.

Better:

  1. Reduce exposure of the background to two stops below ambient (-2 stops, e.g. by using exposure compensation, or by using manual settings for aperture, shutter and ISO);
  2. Use flash. Even a single flash on camera.
  3. Consider making that flash warmer by using a 1/4 Hol photo CTO Gel (set your white balance to “flash”).

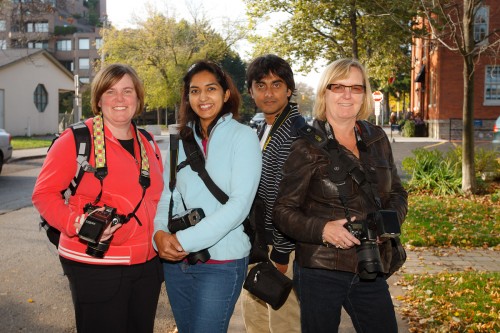
You now get what you want: brighter people and yet, a darker, more saturated, background. We’ve turned things around!

Students (Photo: Michael Willems)

Better eh!

(Yes, I grant you, straight flash is sub-optimal, so off-camera flash or softboxes (or a combo) would be even better of course. If I had had it at hand, I would have put my Honl softbox on the flash. Or you can use the Fong Lightsphere perhaps. Or raise the flash with a bracket. Or set up two flashes, one left and one right, to get a little rim lighting, as in image one – but lit well. Or use a flash turned down a little using Flash Exposure Compensation. Flash really has no limits to how you can use it creatively.)

For sure, this one is acceptable.

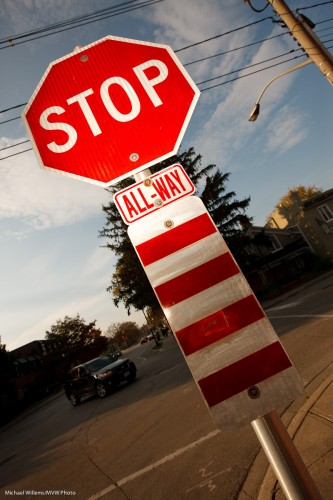
Here’s another one using the same technique:

Stop! (Photo: Michael Willems)

Make this STOP sign your beginning: go make a picture exactly like mine. On a bright day, using on-camera flash.


Change of plans?

Sometimes as a photographer you need to be ready to change your plans.

The other evening I did a corporate headshot session at a financial institution in downtown Toronto. This means driving there with an SUV full of lights and associated equipment. My plan was to shoot in front of a window, showing downtown. I have done many of these before, mixing ambient and flash light, like this  (straight out of camera, unfinished):

Headshot (Photo: Michael Willems)

But in this room, at this time, it just wasn’t happening. Here is my excellent assistant and second shooter Denise (who is a very good fashion photographer) – and of course this is just the main light, not a finished portrait:

Denise McMullen (Photo: Michael Willems)

But even this main light alone already shows me too many reflections (see her top reflecting behind her?). And the background is too dark even at 1/30th second. And the building in the background is a competing institution.

We tried for about ten minutes. And then I decided – “fugeddaboudit”.  You have to be willing and able to cut your losses. This can be tough – but it has to be done. Could I have done it? Perhaps, perhaps not. But it wasn’t worth more trying.

And as it turned out, not a loss at all – the texture of the wall on the other side of the room was good, especially when I lit it with a gridded speedlight, to get that nice oval of light:

Denise McMullen (Photo: Michael Willems)

Nice, no? And another one:

Denise McMullen (Photo: Michael Willems)

And just like every doctor in my opinion needs to undergo a digital rectal exam before graduating, so every photographer must be photographed. So here’s me:

Michael Willems (Photo: Denise McMullen)

The moral: know when to cut your losses and try a different approach. Just like a pilot needs to be ready to decide to  go to an alternate airport: “get-there-itis” causes many deaths.  Do not stick with an idea if it is not working. Go to your alternate.


Portrait tip

When you do a studio portrait, you usually want to use your portrait lighting alone – the room light should not interfere. Room light should be invisible.

Does this mean the room has to be dark?

No. It just means  the room has to look dark to the camera.

So for a studio shot, first do a test. Disable the flash, and set your camera to:

  • Manual exposure mode
  • 100 ISO (or 200 ISO if 100 is impossible on your camera)
  • f/8
  • 1/125th second

Fire off a test shot:

Bingo. Now the flash will light your subject – and only the flash.

Was that room dark? No. To you or me (or to a caerma with different settings) the room looked like this: quite bright, what with the room lights and the flashes’ modeling lights!


Portraits

Don Draper said it best, in the season-ending episode of Mad Men season 1, as he was winning the Kodak Caroussel account.

The Carrousel, he says, is

“a time machine… nostalgia… it goes backwards… forwards… it takes us back to a place we ache… to go again.”

My God those are powerful words. That is so true about photography in general. This is why I am a photographer, and that is why we should all be photographers.

And when you look at the photos he shows of his life – they all feature people. People photography is magic… it truly is time travel.

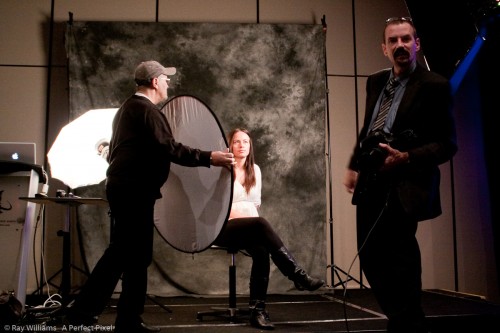
So you should know how to photograph people. People doing things; but also formal people portraits. And that is part of what I taught at the Exposure show. Things like how to get from one light to a lit portrait: we build this up in stages.

Like this portrait of today’s kind volunteer:

First one light, with a softbox:
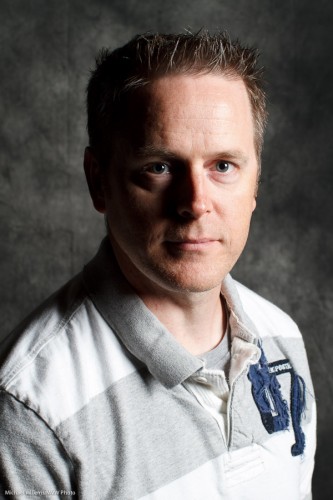
Portrait lesson (Photo: Michael Willems)

One light – but with White Balance set to “Flash” instead of “Auto”:
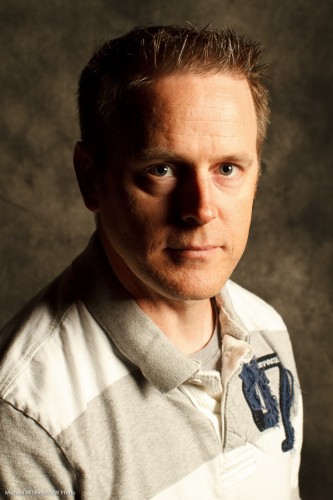
Portrait lesson (Photo: Michael Willems)

Now we add a Reflector on our left side:

Portrait lesson (Photo: Michael Willems)

And now we add a hairlight from behind left:

Portrait lesson (Photo: Michael Willems)

Or by bringing the reflector closer, we could make the light flatter:

Portrait lesson (Photo: Michael Willems)

And then we could go from there and get creative. Or stop there. In any case, it seems to me that a competent portrait is what you must learn to do if you want to capture life in order to be able to go back to it later.

And that is why I teach photography. From workshops to coaching to The School of Imaging, I teach people who to make a permanent record of their lives and their loved ones. Please… spend some time and a little money and learn how to do this!


Magic Bowl

A simple trick for you today.

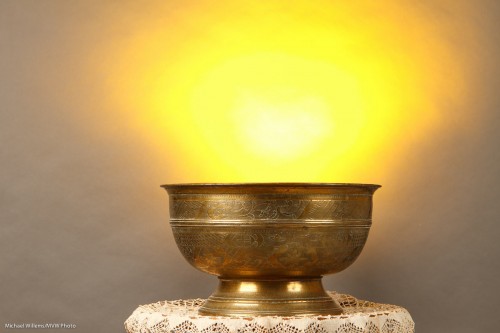
How do you create a magic bowl like this?

Magic Bowl (Photo: Michael Willems)

Gold? Incantations?

Simple technology, of course – you knew that, or I would not have mentioned it here.

  1. Use studio lighting with a key and fill light.
  2. Use a darker background – or move the subject away from a lighter background, to also make it darker.
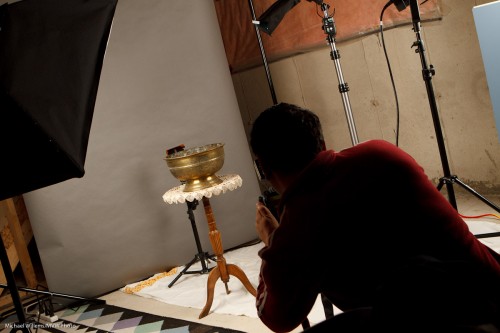
  3. Then light the background with a flash with a gel – I used a speedlight (as it befits the speedlighter), with a Honl Photo “egg yolk yellow” gel.

That looks like this:

Magic Bowl Setup (Photo: Michael Willems)

See the flash behind the bowl, aimed up? Simple, innit – once you know?


Hazy? Solution here!

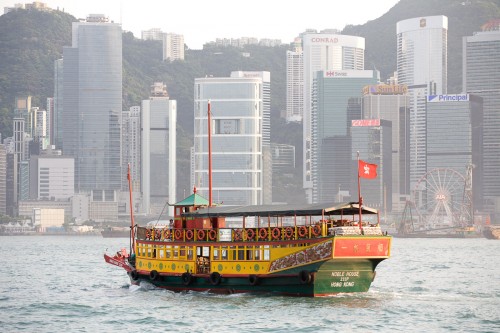
I have asked this before… what do you do when it is hazy? Like in this shot of Hong Kong?

Hong Kong (Photo: Michael Willems)

No-one will be impressed.

So you can take the image into Lightroom, and drag “blacks” to the left and “exposure” to the right. Or do a “Levels” adjustment in Photoshop.

True. But as said before, you can make the drawback into a benefit. Male lemonade out of the lemons. And I thought I would show you another “improved” example. Here:

Hong Kong (Photo: Michael Willems)

So you find a sharp object to put in front. Simple – now the haze becomes a benefit. Making lemonade out of lemons.


Tools

As I recently said here, you need to do what you need to do with whatever tools do it. And sometimes those are not the ideal tools.

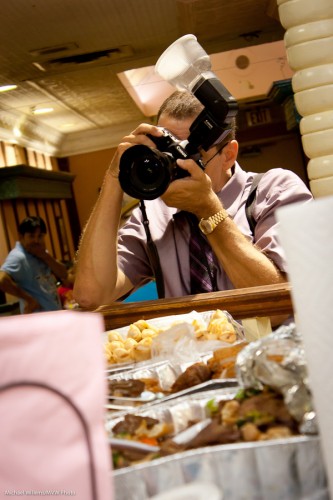
And once again, let me say that the tool of last resort for me is the Gary Fong Lightsphere. I can be seen here using it at a recent shoot:

That is needed in an environment where it is hard to bounce. So then I get acceptable pictures by all acounts: not art but not bad either:

As you see. a shadow, but not a hideous one. This is light I can live with, and you will see me using this kind of light in events regularly – but only until I can find a place to bounce.