Lightroom 4.3 is out

Lightroom users (and why aren’t you all?): Lightroom has just been updated.

Currently, on my Santa shoot job, I am shooting “tethered” – meaning my camera is connected to Lightroom, which shows the client what I am shooting as I am shooting it.

Problem is, it would hang up several times a day, causing long delays.

Now, in the new update, Adobe says the follwoing is fixed:

Tethered capture fails when turning camera off and back on. This also can occur if the camera goes to sleep and then wakes. This occurs only with Canon cameras and on Mac only.

Since I am using a Mac and a Canon camera, that makes sense. Let’s hope it is indeed fixed. Many more Santa pictures to come… 12-5 today and tomorrow at Hopedale mall in Oakville.


Share! Share!

As you all know, I share my knowledge and experience freely (and for free). Information wants to be liberated – keeping secrets helps no-one.

So a request to you, my thousands of readers: I am asking you to reblog, tell your friends, share my posts too if you like them. Simply click on the little “share” icons at the top of each post to share the post on Facebook, Twitter, etc… you would be doing me a favour. I want to educate the world: it is such a beautiful world, and photography is such a beautiful way of sharing it, and everyone can learn. Help me spread the word!

Thanks,

Michael

Studio and more

I often shoot on location – many of my shoots do not require a studio, and I generally find studio environments too clinical.

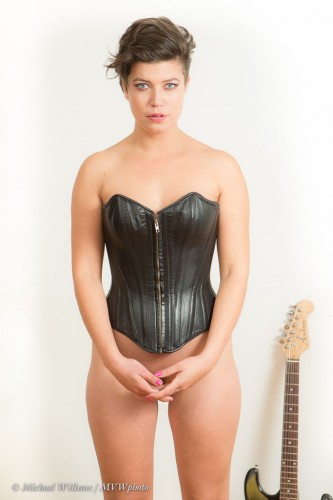
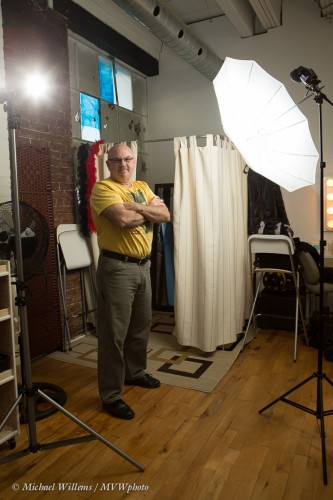
But now I have found a new studio I like, really like… in an old factory building full of photographers and other artists. I shot there today. Using my speedlights (of course!), I did studio shots like this:

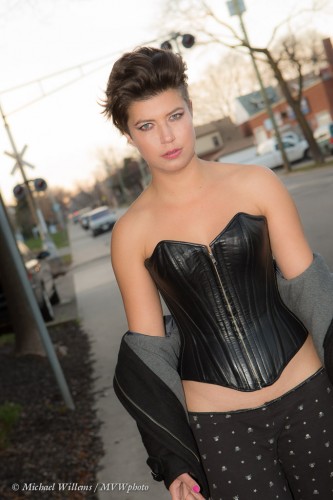
The great thing about this studio, though, is that it is entirely suitable for cool environmental shots too. Even outside the studio:

Cool buildings.. train tracks… trees, privacy.. amazing.

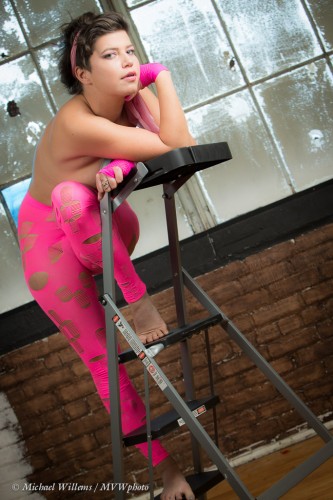
As is shooting inside not using backdrops. Look at this cool window and brick wall:

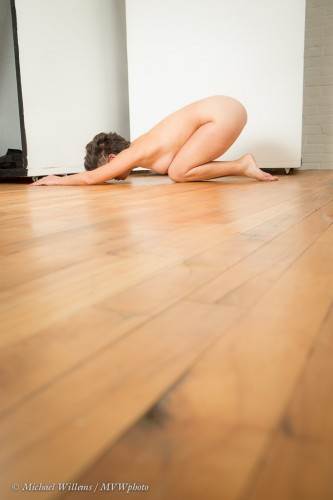
And inside using the wooden floor:

All this may help you in several ways.

First, you can do a lot using just simple equipment: three small flashes on two light stands, and one on my camera, all using a simple 24-70 f/2.8 lens.

Second, you can go to www.hamiltonstudio.ca and talk to Sam about studio rental per half day or day.

Third, even better: whatever your level of experience, you can have a private (or group) lesson from me in this studio on this type of studio shooting, either with speedlights or with strobes! Contact me for details – soon, before Sam fills up his studio!

Here’s Sam in his well equipped studio, in Hamilton, Ontario, a short drive from Toronto:

If you call him, mention my name. He’ll see you right with a special offer for speedlighter.ca readers.


Another note on primes…

“Why should I buy a prime lens”, I am asked often. The answer is always the same: sharp, small, fast, and consistent. Oh – and fun.

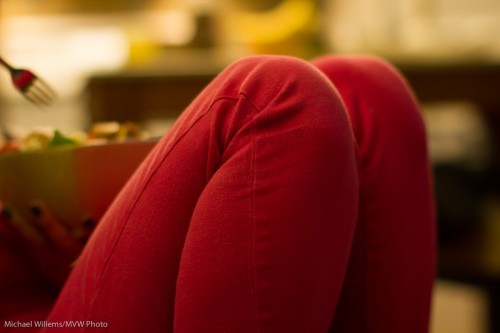
Look at this photo:

A typical prime shot: 50mm lens on a crop camera (meaning a “real” 80mm). In available light, I used the following settings:

  • Manual exposure mode.
  • 800 ISO
  • 1/80th second shutter speed
  • f/1.6 aperture.

Let’s say I had used a consumer lens: f/5.6 at 50mm. That’s almost four stops slower, so I would have had to use either:

  • A slower shutter, like 1/6th second; meaning a shaky picture;
  • Or 12,000 ISO, meaning a grainy picture;
  • Or a combination, meaning a little of both.

And the background would not have been nice and blurry, and simple.

Even an f/2.8 zoom lens would have meant 1/25th second or 3200 ISO, or a combination. And again, less blurriness.

So in real life available light situations, a fast prime can be invaluable. So you can document everyday moments and tell everyday stories, which are often the best. Here, the storytelling is done by the simple composition, the leaving out of the face, and the fork hovering expectantly.


Mood in a portrait.

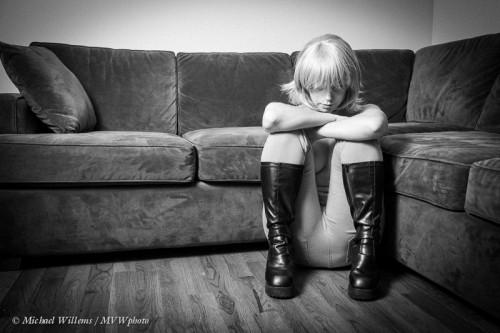
Here’s a portrait I made a few days ago. A portrait I am very proud of; very proud indeed:

This portrait shows a young woman apparently reflecting. It raises questions – and as I have said many times, raising questions, in stead of spoon-feeding the answer, is what makes an image effective and interesting.

Here, the questions include: “On what is she reflecting? Why is she sitting there? Why is she looking at the floor? Is she sad? Is she waiting? For what?” Those questions are what matter, more than the answers, which you have to come up with. Her apparent loneliness is emphasized by the empty space around her, the bare couch, her guarded pose: existential loneliness, or just a break?

We do not know. But we can all identify. An image like this makes us think about our own lives, and the experiences we have had. The human condition is deliciously complex, sad, and wonderful; and sharing it with others is what art is about.

The composition also helps. I am not sure analyzing art is all that productive, but if you asked me I would say the following are effective technical elements in this image:

  • Bare couch. Simplifying any image is key!
  • Simple setting; negative space.
  • The use of the rule of thirds.
  • Simple black and white.
  • A slight vignette.
  • The subject’s face is not looking at us and is mainly hidden.

In a technical sense, this is easy. The use of off-camera flash is effective in creating just enough shadows. I used a Canon 1Dx, with an off-camera 430EX through an umbrella. Camera in manual mode, 1/200th sec, f/5.6, 400 ISO; with the flash in remote TTL mode. I used a prime 35mm f/1.4 lens.

You really can take images like this using a very simple setup, so think about subject, story and composition, not about the technical settings.


Tilt-Shift question

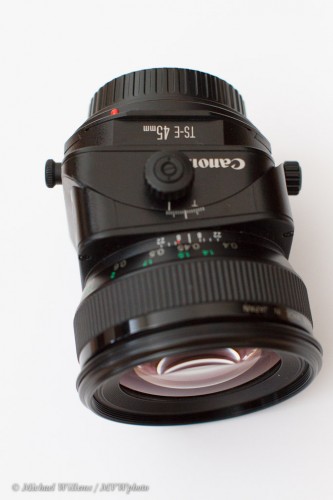
I have talked here before about tilt-shift lenses (search in the search field on the right). I love my 45mm TS-E tilt-shift lens, and I mentioned it in my talk to the Brampton Photo Club.

David H asks:

On Thursday at the BPG meeting you mentioned using tilt-shift lenses for architectural photography. But people have told me that given the price of the lenses, you are better off using photoshop or lightroom for correcting perspective. Now, I realize that tilt-shift lenses have other uses such as their control of focus, but for architectural photography are there other advantages of using them that you can get from using Photoshop or Lightroom?

Good question, David.

And yes, there are benefits to using one of these lenses.

First, the tilt-shift lens has other benefits than architecture. Moving the field of focus (tilting) is often important, rather than perspective correction (shifting).

Second, a Tilt-Shift lens is a prime lens, meaning it is sharp and has a large aperture – f/2.8 typically.

But even for perspective correction there are benefits to doing it in lightroom. Sure, Lightroom makes it easy to correct the convergence at the top you get with vertical lines when you aim a camera upward – a couple of clicks and you are done.

But this is at the cost of

  • Pixels. You draw out the center pixels, meaning that is an image is, say, 4,000 pixels wide, when you are done correcting the top may be only 3,000 pixels wide – meaning less resolution in the finished image. The tilt-shift uses your whole sensor – al 4,000 pixels in this example.
  • Space. By cutting, you are losing bits of your picture.

All these benefits of this type of lens means you may well consider renting one to see what they are all about. Read the articles I wrote here about them and then decide. Remember, you have to both expose and focus manually when using one of these – but that too can be a benefit. Humans know more than chips!


Show without showing

As I pointed out in a recent post, you can often show without showing.

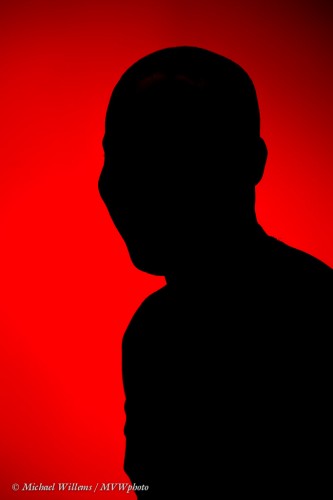
In the following image, we know that the subject is smiling:

Odd, since we did not show the one thing we are trying to show: the smile.

The same is true of many other photos. You can show expressions with eyes. A car’s speed without showing the car. An accident without showing the wreck. Disease with showing wounds. War without depicting the victims. The list is infinite.

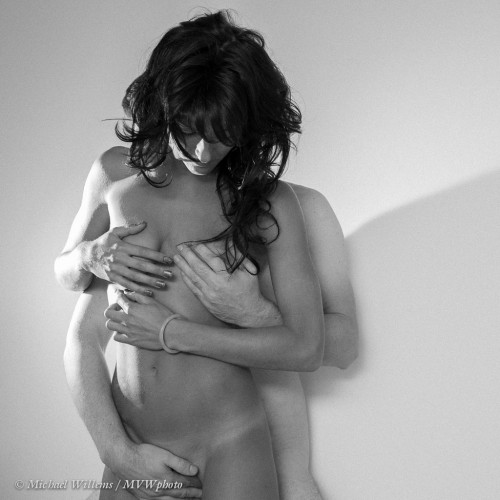
One assignment you might set yourself is to show something without showing the actual thing itself.  Like I did in the following recent examples, which show nudity and sex without actually showing nudity or sex. As in so many forms of art, implying, making the viewer work it out, is the art of it.

No-one reasonable could object to these images – the Vatican contains a lot more graphic detail in its artworks – but more importantly, all of these make the viewer do at least some the work of working out what is happening.

A side note: all these were shot the way you see them, not made in Photoshop.

Model in bath, using speedlights and high-key exposure:

Lovers holding on – two speedlights, in black and white:

Man and woman in bed:

The last shot, by the way, is a good example of why we use fast prime lenses. All of the last three were shot with a prime 35mm lens on a full frame camera – I love that lens, and in the last example I also needed that lens: blurring out with an aperture of f/1.4 is often the best way to not show something.

 
(For those interested: more of this and subsequent shoots on my tumblr art feed (nsfw): http://mvwphoto.tumblr.com).
 

Grain

Not the kind you eat.. the kind you look at. Grain. Or noise, as it is called in digital pictures. Bad! Grain must be avoided at all cost!

Perhaps not.

  • First: there is a difference between the look of electronic “noise”, which results from the use of small sensors, high ISO values, or great exposure pushing in post-production, and film-type grain. This electronic kind of noise is ugly.
  • Second: while electronic noise is ugly and must be avoided, not so for film grain; not necessarily. Film grain can be very attractive, as in 1960s photos shot on Kodak Tri-X film.

Which is why you can now add film grain in many apps. Like in Lightroom.

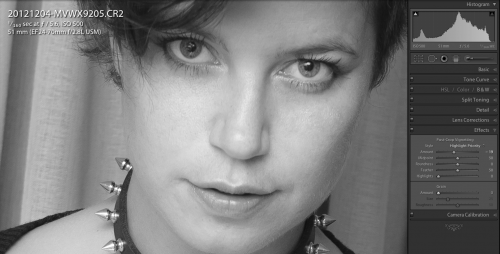
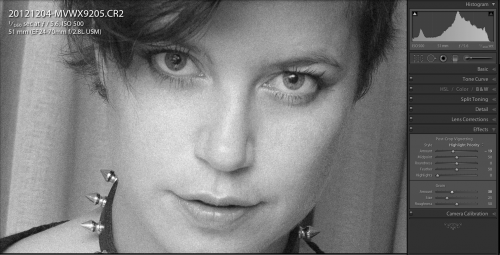
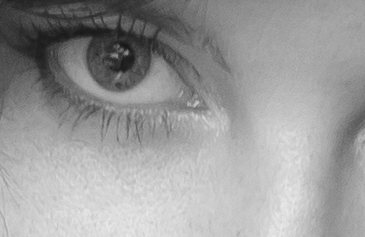
Here’s a detail of a picture. You need to click to see it at original size. This screen print shows the EFFECTS pane in the DEVELOP module:

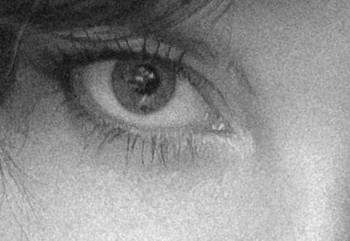
Now the same, with some grain added (look at the slider on the bottom right):

Again, click all the way through to the “Full Size” link. You will see a difference somewhat like this:

I often add some grain to my black and white images, to give it that authentic film look. As an added bonus, this treatment also hides imperfections that can result from sharpening.

Don’t go crazy and add 100% grain to all your pictures – but used judiciously, this is a great addition to your arsenal of tools (if I can be forgiven for mixing metaphors).


A lesson – for me!

I too can sometimes take a few minutes to get things together in my head. Sunday was a good example.

I was at my Santa kids shoot (using strobes). During a quiet period, I was showing my second shooter a few speedlight tricks. Bouncing, and so on.

But.. the speedlight was not working! Every time I fired, I got dark pictures. I started at 400-40-4 (i.e. at 400 ISO, 1/40th second, f/4: the Willems 444 Rule for indoors mixed light flash), and then got dark pictures -background good as per 444, but flash part dark. Huh?

  1. First thing to do in these cases: Turn your flash to MANUAL mode, at full power (1/1). That shows you if you have enough power available at all – if the picture comes out overexposed, all is well and you have enough power available, so the problem must be a metering or setting problem. And that was the case: bright pictures, way overexposed. So there was enough power available: it was simply a TTL metering problem or hardware problem.
  2. Second thing to do: check that metering is not “spot”; check all other camera settings, like flash exposure compensation; and verify that you are not sdhooting a very dark or very bright subject. Nope, no problems there.
  3. Third thing to do: reset camera and flash by powering down and up; remove flash, clean contacts; reconnect; turn it all on again. Did not work.
  4. Fourth thing to do: try a different flash. Same problem!

Now what?

This is where I was flummoxed for a few moments. Huh? I do not like surprises like this.

Until it hit me. D’oh! Each time I fired, my speedlight’s preflash (that is how TTL flash works) was setting off the nearby second strobe (which uses a cell to detect when it must fire). So the TTL measurement got way too much light back – hence the flash was told to fire at ultra-low power.

The solution was simple: turn off the slave cell on the strobe. Now, no extraneous flashes, and all was well.

So remember: Accidentally co-firing strobes can leave your pictures extremely underexposed – or extremely overexposed (whether over ort under is unpredictable because it depends on the exact timing of the strobe flash).

Of course I knew this, but I was momentarily not thinking. Goes to underscore: all photography is always problem solving, and if you take it logically the answer wil come to you!