Come Learn With Me….

Here’s another opportunity to learn from me. If the five-day workshop at The Niagara School of Imaging at Brock University in August is too long for you, or if you want to learn basics or need a refreshes on both simpler and more advanced subjects, then attend my series of three hour seminars at Pro store Vistek in Mississauga!

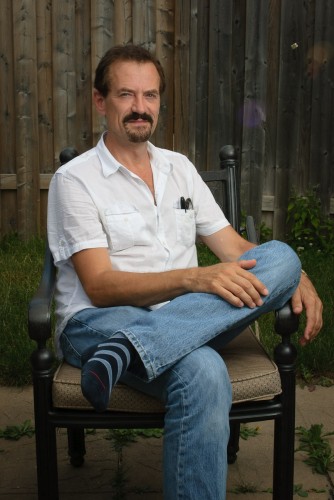
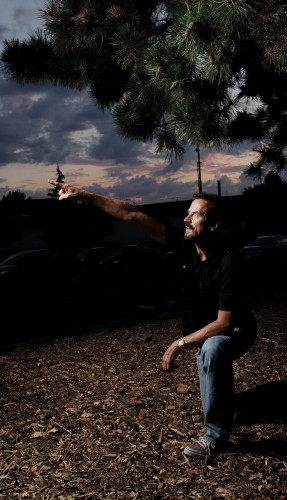
To give you an idea of the kind of skills you can gain, here is an image taken of me yesterday by my Sheridan College student George Kartken – great job.

Want to learn how to do this type of thing? Join me in my courses. Starting within a couple of weeks, these are a great opportunity to learn a lot in a very short time. Space is limited: see the list, and sign up, here.

 

Reader Question

A reader asks:

A lens – say a Canon L lens that are f/2.8 – is the amount of light the same when it is wide open on an an APS-C sensor vs Full frame sensor? Does it get stopped down on APS-C ?

Great question. No – the light is the same. Area is smaller, but an f/2.8 lens lets in the same light on a smaller sensor that it does on a large sensor. f/2.8 is f/2.8!

Follow up:

Then how does the 2x or 1.4x extender get stopped down when added to 70-200 for example? is it because the barrel gets longer?

Exactly.  f/2.8 means the lens’s focal length divided by that is the circle’s diameter, so that does make a difference.

New exhibit

Shooting anything artistic is very rewarding, and I am once again sharing some of my work with the world: 26 uly-26 August in Toronto’s Distillery District, at the Kodiak Gallery. Curated by Gregory Talas, this exhibit will show (and sell) a number of my Art Nudes. Come see it!

I will even, for regular readers, throw in some hints and tips and short teachings. As always – you can’t stop me teaching!

All works are framed and for sale, and if you want one on your wall: if you quote this site you will get a discount. 🙂

A snap dissected

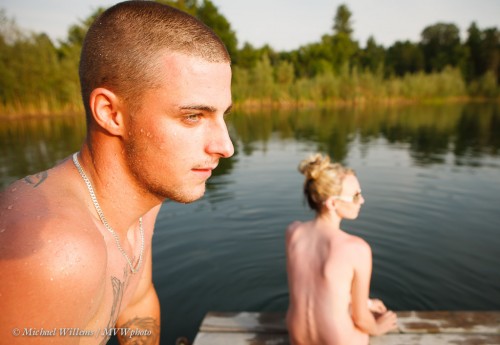
I thought perhaps I would show you a photo taken last weekend.. a snap, at first sight, but in fact a lot of thought goes into a photo.

Here are Justin and Pam, who have been together for two years:

So what kind of thought goes into a shot like this?

  • The lens is a wide lens (24mm on a full-frame 1Ds Mk3), so we get depth in the image.
  • I shot late afternoon, so the light is good (nice and warm) and if I shoot at 1/25oth second, I can use f/4.5, so get a blurred background.
  • Nevertheless, this is not all available light – I aided the light by using an umbrella on our right with two TTL 430EX’s (yes, two, to overpower the sun). Hence the 1/250th second maximum (the synch speed).
  • I composed using the Rule of Thirds – Justin top left, Pam bottom right
  • I cropped to make the image suitable for distribution to their parents etc.
  • Since this is an environmental portrait, I kept the environment in – enough to see it is a dock on a lake, and they are skinny dipping.
  • The wave emanating from her feet produces a nice pattern and adds liveliness.
  • I avoid them looking at the camera in this shot.
  • And hence, very importantly, I make the viewer think; guess; wonder what they are looking at.  Each viewer wil have their own questions. Why is he not looking at her? Why are they apparently nude? What is the expression on his face telling us? What is she thinking?

As you see, if you apply basic rules – rules of composition, storytelling, light – your snaps can be more than just snaps. That’s what portrait photographers do, and with some training, you can, too.

___

Stand by for exciting news: the Never Not Naked: Natural Nudes solo art exhibition is coming to Toronto’s historic Distilery District, July 26 – August 26 at The Kodiak Gallery.


When all else fails…

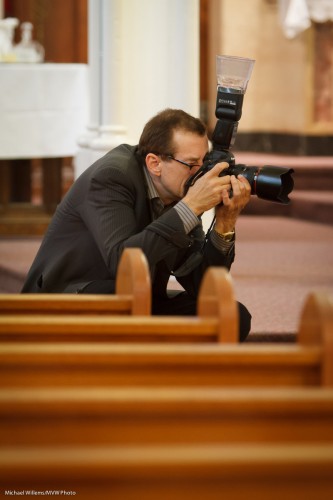
….then you use the Gary Fong Lightsphere. As I am doing here, in a recent wedding (the shot, in the church, is by my assistant that day, Merav):

You see, normally when using flash I want to direct the light – tell it where to go. I don’t want to just bathe the room in photons – and yet that is all I can do here with a Lightsphere.

But sometimes it is the only choice: namely, when there is no single good bounce surface, sending light everywhere can be better, and usually is better, than direct flash. You may need to increase your ISO to allow for losses, and watch for light going forward directly (I cover the front sometimes).

So while the Lightsphere is the antithesis of creative light, it is sometimes the only thing that will get you good photos. That’s why I carry one in my bag. I don;t use it much, but when I need it, I need it!


Of Pigments and Dyes

A quick word about inkjet printers today.

My Canon Pixma Pro 9500 13×19″ art printer broke recently as you will have read – so I bought a Pixma Pro 9500 Mark II printer. These are pigment printers, as opposed to the more usual dye printers.

What is the difference?

Dyes, which are absorbed by the paper they are printed on, are easier to keep predictable in terms of colour, and hence are cheaper; pigments, on the other hand, which sit “on top of the paper”, whilst more expensive ($200+ for all ten cartridges on my printer) are permanent. Pigment inks can last more than 200 years on some paper types under ideal (museum-quality lighting and framing) conditions; dye inks fade quickly (sometimes in as little as days; usually in 20-30 years). Which is why art prints are made on pigment printers: you presumably want a piece of art to last forever.

When you use a pigment printer, you need to make sure that you use paper suitable for pigment printers. Good papers (like the Inkpress pro Silky I like to use for photos, or the Hahnemülle Fine Art papers) will say on the box when they are suitable for both dye- and pigment-printers. Pigments combined with long-lasting natural-fibre Fine Art papers, once you get all the settings and drivers right, give you extremely consistent, predictable, and lasting museum-quality prints.

Also, my Pixma printer accommodates Fine Art papers by having a straight (flat) paper path – this requires a complicated feeding procedure that takes time, and only individual art sheets can be loaded, but it is worth is since it does not bend the paper.

So when anyone asks “why does a print cost like $80?”, the answer is above. The cost of supplies, paper and printer, combined with the time needed to make a pro print, combine to make the finished product not cheap. But it is “museum quality” and lasts forever.

So before you go to Wal-Mart for a quick print – do some research, and consider having it done by a pro using pro pigment inks and art papers – or buy your own, and do the work to set it all up. There’s nothing like a quality, lasting print to show off your work!


Funny math, and…

Remember the main aperture numbers? f1.4, f2.0, f2.8…

No, let’s do that again properly:

f/1.4,  f/2,  f/2.8,  f/4,  f/5.6,  f/8,  f/11,  f/16,  f/22,  f/32, f/45, and so on.

(Note: Corrected the f/35, my typo)

The last list is correct since an aperture number is a fraction. Strictly speaking, it is not “f 8”, but “f divided by 8”. Where, simply explained, f is the focal length of the lens and the result of the fraction is the diameter of the lens opening.

Why are these numbers important?

Because every next number is a stop darker (or when you move to the left in the list, a stop brighter) than the previous number.

A stop means halving or doubling the light. Hence the funny numbers; the ratio between these numbers is √2, or around 1.4, since to halve a circle’s area you reduce its radius by √2; halving the radius would instead you a quarter of the area (πr2).

So why are these numbers good to know? Well, imagine you are shooting at f/5.6 and 1/50th of a second. If instead I wanted to go to 1/100th second, what f-number would give me the same exposure?

The answer: 1/50th to 1/100th sec is one stop less light. So the aperture needs to provide one stop more light. Which means f/4, and you can set that instantly if you know the table of main values. Hence its importance!

Happy July 4th, US friends!


Light Meters Are Old Hat. Not.

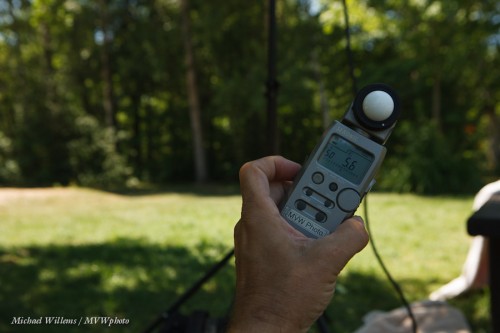
Not! A light meter is an indispensable tool if you want to ace your exposures first time.

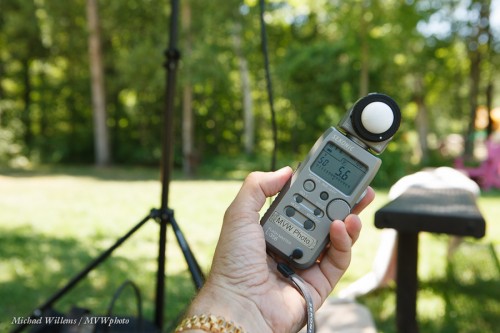
Take this scene (taken, incidentally, amidst a whole bunch of naked people):

That meter is well exposed. Perfectly, in fact. Values were 100 ISO, f/5.6 at 1/50th second.

How? By reading the values off the incident light meter (a meter you hold where the subject will be):

  1. Set the meter to ambient (not flash) metering
  2. Move the ball out
  3. Select the camera’s ISO and the aperture you want
  4. Hold the meter where the subject will be.
  5. Click and read the value for shutter.
  6. Set those values on your camera
  7. Click.

With the camera’s built-in light meter, however, the exposure came out like this, since the light background was also read by the meter:

That’s nice for the background, but if the meter is the subject, this exposure is all wrong – 2 stops too dark (the camera thought 1/200th was the correct shutter speed).  You would now have to adjust the exposure manually, or instead aim your camera, set to spot metering, at a gray card held there. Which is less convenient.

And that is why light meters are far from old hat. Pros use them all the time, even as ambient light meters as here.


July Celebrations

We had July 1st in Canada yesterday, and our US friends have July 4th in a few days.

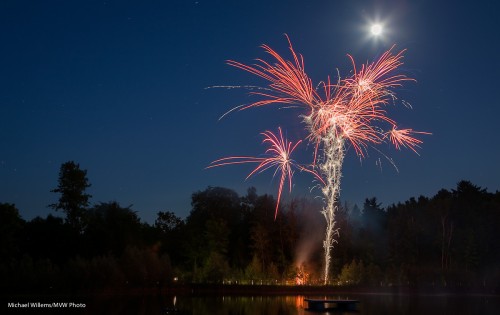
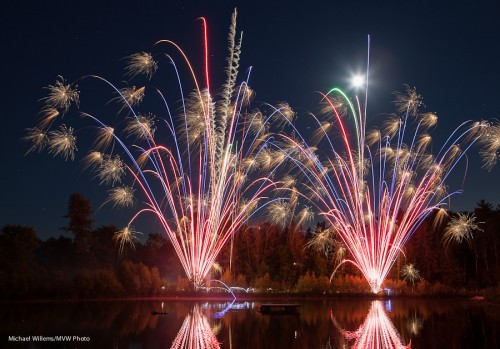
This is from our Canadian July 1st celebrations, in Newmarket, Ontario:

Technical tips:

  • Mode: Bulb, with remote release
  • ISO: 100
  • Aperture: f/8 – f/11
  • Shutter: 1 to 30 sec; usually 2-5 seconds if there is some background light at all.
  • Focus mode: Manual focus, prefocused “where it will happen”
  • Shutter mode: One shot
  • Camera mount: Tripod (this is mandatory!)

And the usage tips:

  • Set up your camera on a tripod, and aim at the fireworks source
  • Avoid being downwind (the smoke will ruin some of your pictures).
  • Manually pre-focus where the fireworks will go up (or on “infinity”).
  • Use wire/radio release, so you do not need to touch the camera.
  • Start before or as a particular firework goes up, and hold the shutter open until that one  is done (but avoid getting the next one in the picture, unless it is aimed differently). This will usually take 2-5 seconds but can take longer to get light into the background.

Because it was an extremely dark country setting, the venue yesterday needed 30-60 seconds per shot to get any light into the background at all, so you can imagine I was happy that there was a short break between firework volleys going off, so each time I was able to open the lens for 30 seconds prior to the fireworks. Otherwise the background here would be pitch dark.

Try it out – above all, have fun, and happy 4th of July!