Stop!

Today, a word about stops.

First of all, they are called “stops” because the rotating wheels, like the one for aperture, used to click at certain settings (in the case of aperture, settings like 2.8, 4.0, 5.6, 8, etc).

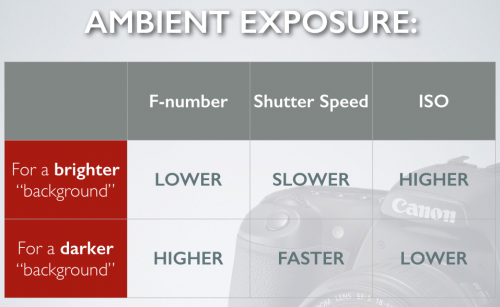
These “stops” are chosen so that in all quantities, a stop is half, or double, the light. Here’s the options:

  • ISO: 100, 200, 400, 800, 1600, 3200, 6400  –> brighter as you increase
  • Aperture: f/1.4, 2.0, 2.8, 4, 5.6, 8, 11, 16, 22, 32, 45   —> darker as you increase
  • Shutter speed: 1 sec, 1/2, 1/4, 1/8, 1/15, 1/30, 1/60, 1/125, 1/250, 1/500, 1/1000   –> darker as you go faster (to the right).

To keep a picture at the same brightness, you need to increase and decrease by equal amounts. The three are related, in other words, like this:

So these would all be the same brightness:

  • 400 ISO, f/4, 1/125
  • 800 ISO, f/5.6, 1/125
  • 200 ISO, f/8, 1/15
  • 100 ISO, f/1.4, 1/250
  • 1600 ISO, f/16, 1/30
  • 100 ISO, f/1.4, 1/250
  • 1600 ISO, f/5.6, 1/250
  • 100 ISO, f/5.6, 1/15

So as you see, there is not “one setting” that suits a situation.

Look at the last three. The first one is what I can do in the room I am sitting in right now, with my fast prime 85mm lens. Now if you have an f/5.6 consumer lens, you need to either go to 1600 ISO (grain!), or to 1/15 sec (motion blur!). Just saying.

If you want to be a pro, you need to get a feel for this and for the numbers. So today, set your camera to manual and go take pictures. get a feel for “normal settings”. You should know, without trying, that a dark room at night will not work at 100 ISO, 1/500 sec and f/11. Or that a sunny day will look all white at f/1.4, 400 ISO, 1/40 sec.

And it’s cool to know this stuff!


Yes, you can.

I teach Lightroom, among other favourite things I teach. And that means I see many students’ computers.

And often, I see less than I expect. Often, options, important options, are missing.

Like the toolbar.

What toolbar?

No toolbar there.

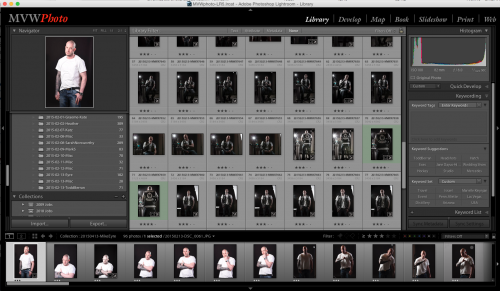
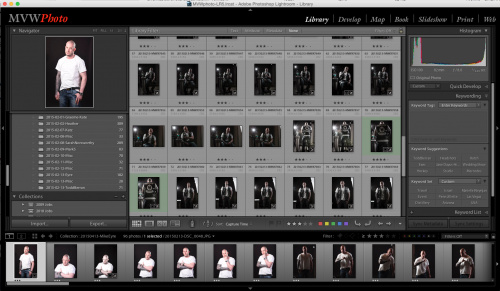
I mean the toolbar that appears when you turn it on by pressing the letter “T” (it toggles, so if it is already there, it will be removed), or by using the menu function VIEW–TOOLBAR. This toolbar, in other words:

See it there, between the grid and the negative strip?

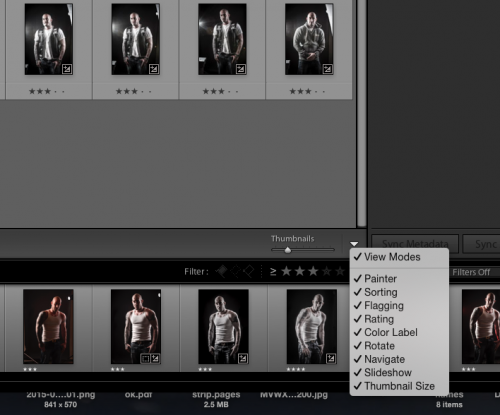
Now, within that toolbar, see the last option, that pulldown arrow? Click on it and you see a bunch of options. You may want to turn those on:

Now your toolbar will have all the tools. Check them out, then disable the  ones you are sure you will not use.

Another option that is often missing is also a very handy one: the filter bar. At the top. You toggle that one by first being in the LIBRARY module (press “G” to go directly to the Grid view, for instance), and then pressing “\” (the backslash key).

(NOTE: In the DEVELOP module, the backslash key \ has a different, but also very useful function: it shows you the “before” view of a picture. In other words, the picture as it was when you imported it, or when you made the virtual copy. The image at the start of its edit history, in other words).

There are many, many other cool little tools in Lightroom. You do not need to use all of them, but I recommend that you use the ones you like; the ones that are good for your way of working. And there is one simple way to learn them: just check out all the menus and try every function. Learn them. Yes, you can!


End notes:

First, I teach Lightroom, and I will help you set up your Lightroom installation: file structure, import methods, backups, disks, and more. Worth every moment of the session I assure you.

Second, Lightroom only takes a few days to learn and is 100% worth your time and effort. Learn it. And as a supplement to my teaching and consulting, also watch my tips videos: see www.youtube.com/user/cameratraining/videos.

Third: just saying: if the subjects interest you, then my e-books (see http://learning.photography) are worth your money also. As is my teaching (see the same site).


Wizards

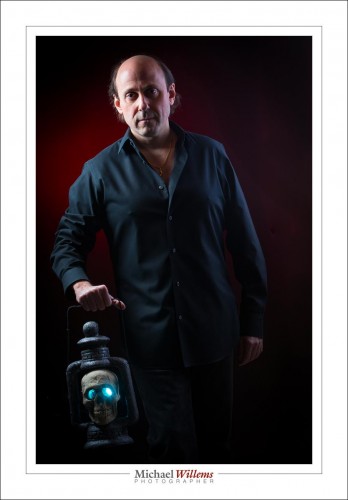
For the making of this kind of wizard, I need another type of wizard.

Namely, Pocketwizards. This is manual flash, fired by Pocketwizard radio triggers. I used a key light (camera left), a fill and rim light (right), a background light (gelled, background left), and a fourth flash, a gelled flash behind the skull. Four flashes, fired by five Pocketwizards.

“I don’t have that kind of money, to buy five radio triggers”, I hear some of you say. “I am going to just use wireless TTL, my camera’s built-in system (Canon e-TTL, Ninon i-TTL/CLS, etc)”.

Let’s have a look. 5 Triggers can cost up to $500. Wireless TTL is included in your Nikon or Canon (or Sony, etc) system, so costs nothing. Easy decision. Of course TTL is cheaper. Right?

All I need for the cheap “TTL solution” is four flashes by Canon or Nikon. Or, if I have a pro camera that does not contain a pop-up flash, five flashes by Canon or Nikon. One needs to be a 580EX/600EX (Canon) or SB800/900/910 (Nikon). Total cost? Between $1500 and $2500. Peanuts.

And for the expensive Pocketwizard solution, I need five expensive triggers; say $500. And then five “any type” flashes: any brand, any type as long as they use a standard hotshoe or an x-type connector, and they can fire manually at a power level of my choosing, and I can disable any auto-switchoff timeout. These flashes can be as little as under $100. And I only need four at most. Say, $400, then. And perhaps cables from Flashzebra dot com, another $100. So the total cost can be as low as $1000.

Wait. The cheap solution is $1500-$2000, and the expensive solution costs $1000? Perhaps things aren’t so simple after all. Just sayin’.

Yes, using radio triggers can be cheaper because you do not need your brand’s TTL flashes. Whatever brand you use, the remote flashes can be new or old and can be made by Canon, Nikon, Vivitar, Olympus, one of the Chinese, Taiwanese, or Korean clone makers: don’t care.  And that can save you a lot of money.

____

Check out my e-books on http://learning.photography/collections/books and learn everything I know. Taught in a logical fashion, these extensive e-books (PDFs with 100-200 pages each) will help you get up to scratch quickly with all the latest techniques. And when combined with a few hours’ private coaching, in person or via Google Hangouts, you have no idea of the places you’ll go. You’ll be a pro!

Burn baby burn

…it’s a disco inferno!

OK, so my cheesy headline refers to a record by the Trammps that you may remember if you’re as old as me. Disco. Watch those dance steps and those flared trousers. Yeah baby!

But it also refers to the practice of burning discs. CDs or DVDs.

And discs are going the same way as disco. My MacBook does not contain a DVD drive, and soon, no devices at all will contain one. CDs and DVDs will be as obsolete as 3.5″ floppy disks, 5 1/4″ floppy disks, 8″ floppy disks, papertape, and core memory. Remember those?

Quick. Imagine that right now, this moment, that moment has come and you can no longer read CDs and DVDs. How many photos have you lost?

I hope the answer is “zero”, but I fear that the answer is “lots”. Many of you keep photo backups on disk.

Bad idea. They will become obsolete, but they will also decay and become unreadable.

And that is just one reason you should print your work. The others are in this article [click].

My recent art photo garage sale was a case in point: prints are beautiful. But they are also a way to preserve photos that would otherwise be lost. Your CDs are decaying and are becoming obsolete. Your hard disks will break: not “if” but “when”. But your prints will adorn your wall, and your photobooks will be on your bookshelf, for as long as you are there.

So please: if your photos only live on a medium that will soon be as current as clay tablets, save them to a new medium, and make prints today. That way your selfies and your works of art will all remain at your disposal.


ISO, continued

Let’s continue with the “High ISO” talk.

First, a photo mad4 with the Canon 7D at 3200 ISO. The 7D is a crop camera which is not very good at higher ISO values. And yet, 3200 ISO looks like this:

Fo comparison, here;s the Canon 1Dx, the top of the line camera, at the same setting of 3200 ISO:

Looks about the same, eh. Now let’s look at a small part of the photo at real pixel size (once you click and view it full size):

And the 1Dx at 3200 ISO:

Look at the meter and see the difference. Considerable.

But let’s look at a photo that is well lit instead of dark. First, using the 7D:

And the 1Dx:

And now the same small real pixel size (again, once you view at full size):

…and on the 1Dx:

As you see, a well lit picture does not show a lot of difference, or at least, not as clearly.

The moral: it’s not that big a deal: you can shoot at high ISO values and if the photo is well lit and you do not “pixel peep”, you’ll be just fine,. More so than you thought, I bet.


How much is too much?

I get asked “you say use higher ISO when bouncing, if the ceiling is high. So what is too high an ISO value”?

There is no answer for that. It depends o you and your camera. My 1Dx is good, and it shows this:

12800 ISO, no noise reduction:

51200 ISO, no noise reduction:

51200 ISO, Lightroom noise reduction:

51200 ISO, Lightroom noise reduction, detail actual size (once you enlarge to real size:

So this shows that with this camera, even at 51,200 ISO, all is well and you can use this for large 13×19″ prints that look great until you are right on top of them. Even then, they look better than my pictures looked in the 1980s.

So… no worries. Be happy. I shoot up to 1600 ISO without even thinking about it. Learn what you will accept from your camera, and then live a happy life unworried by high ISO concerns.


Multiple OCF’s today

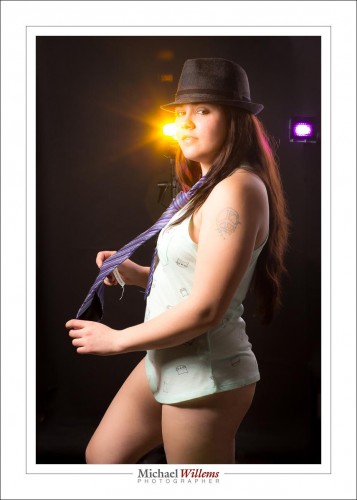
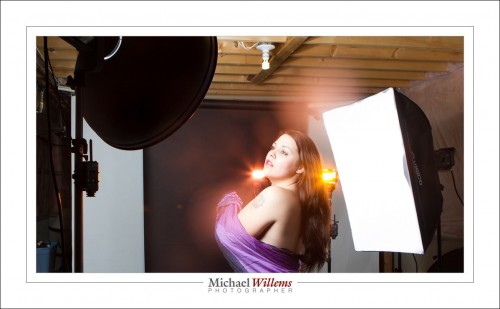
OCF = Off-Camera Flash. And OCF is the name of the game. Why? Because off camera flash gives you control over light direction. And you can have fun, like here, in today’s shoot:

(1/125 sec, 200 ISO, f/8)

The yellow flash fires into the camera, This works fine with some lenses, but not with others. If you get a  lot of flare when trying this, try another lens, use the lens hood, and remove any protective lens filters.

This yellow flash and the purple flash are speedlights fitted with Honl photo grids and gels. The main light was a beauty dish on our left; fill light was a softbox on our right, feathered forward. As hair light, a snooted light on our left behind, aimed forward (not visible). So:

The speedlights and one strobe were fired using Pocketwizards; the other two strobes with their light-sensing cells.

The moral: try and have some fun with your speedlights and strobes.


TWIP

NEWS: On March 2, I will co-host TWIP—This Week In Photo, the world’s best and most popular weekly photography podcast.

If you don’t follow TWIP yet, start now. http://thisweekinphoto.com/ – live that day, and online the week after. Don’t miss it.

And if you have not heard it, listen to my previous appearance on TWIP, a long 2012 interview with Frederick Van Johnson. This was taped while I was teaching my 5-day Flash course at Brock University for The Niagara School of Imaging. Frederick is a funny and engaging interviewer.

TWIP is a pleasure to listen to, and it will be a pleasure to co-host it.


Let there be

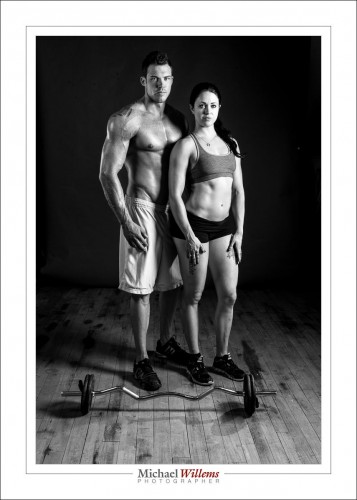
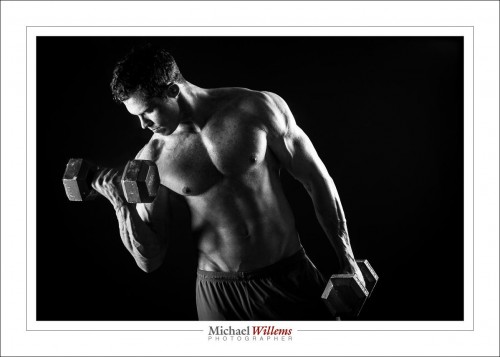
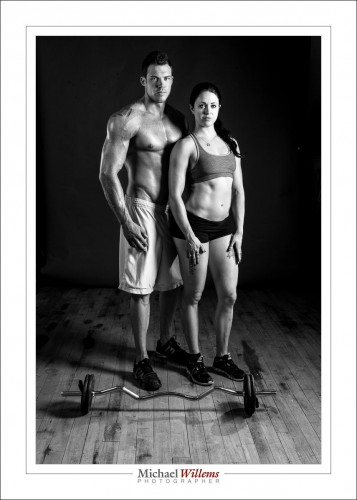
I shot a couple of bodybuilders recently: reason enough to share a few of the pictures and the settings.

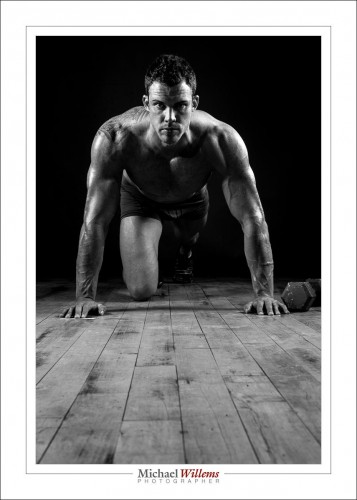
I decided, for this shoot, to use pretty dramatic light, with a significant sidelight component. Why? Because sidelight shows texture, muscles, and similar detail. So I used a softbox on each side of the subject, aimed forward and positioned carefully to keep it off the background:

(100 ISO, 1/100 sec, f/13)

Post treatment is minimal: B/W setting; then in the BASIC panel, I moved the whites and highlights up a tad, and the shadows and blacks down a bit. The resulting images are dramatic and show muscle:

Do keep in mind the fact that the face should be appropriately lit. Like in the image above.

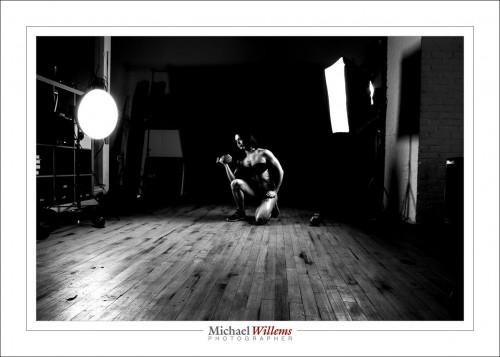
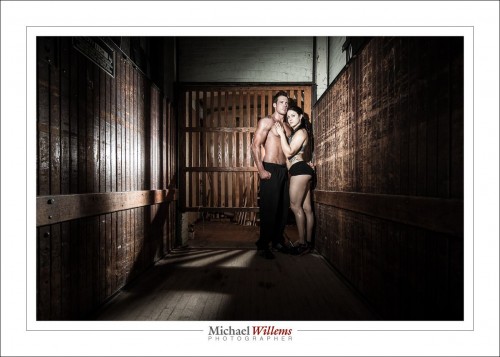
In the image below, a flash behind the subjects aiming towards me, and a flash with a grid on camera left, aimed at the subjects:

This shoot was all about light.

___

Want to shoot better portraits? Get the new e-book! Click here to buy, and immediately improve your portrait photography.


Ad lucem

…or “to the light”.

But contrary to that Latin phrase, a little tip today for when you don’t want light. Like when you want to hide something.

Hide something? Example, please?

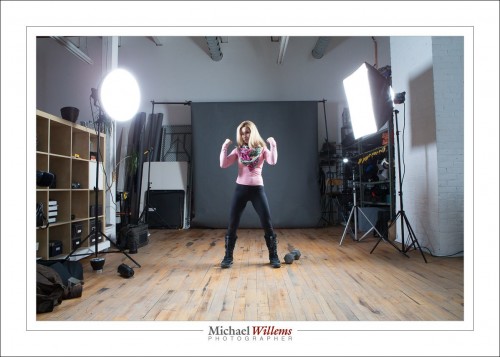
OK. Say you have a roll of paper in your studio. and you want to shoot a full length portrait. Normally you would pull the roll all the way forward so the subject stands on it. No transition can be seen at their feet because there is no transition.

But if the roll is too short? Then you will see a clear (and ugly) transition from “floor” to “roll”:

But this is solvable. It is in fact simple: keep the transition in the dark. Then you will not see it. Like this:

To keep it in the dark, you must do two things:

  1. Set the camera so that ambient light plays no role (i.e. without flash, the picture is all dark), Standard settings like 1/125 sec, 100 ISO, f/8 will take care of that. This means all light in the photo will be from your flashes.
  2. Ensure your flash light does not reach the transition. By definition, that will result in the area being dark. So you need to point away from the area and have enoughdistance from the background.

That is it. So if I use two softboxes as above, and feather them away from the background, I will not throw any light on the background. That means it will be dark. And since the floor is light when you are, it will be a gradual darkening.

Simple. Two softboxes and a too-short-really paper roll, and that’s the result. Things do not always need to be complicated.