Fringe.

Or rather, de-fringe.

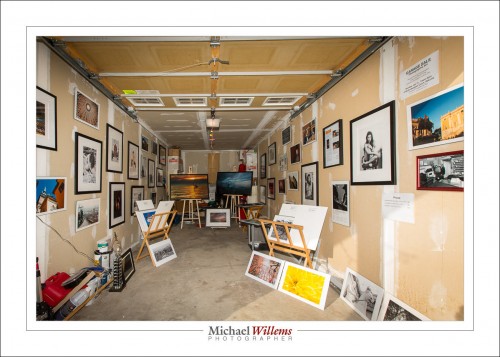
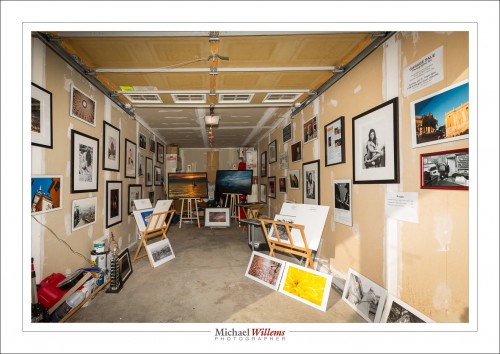
Look at this photo of my garage during last Sunday’s garage art sale:

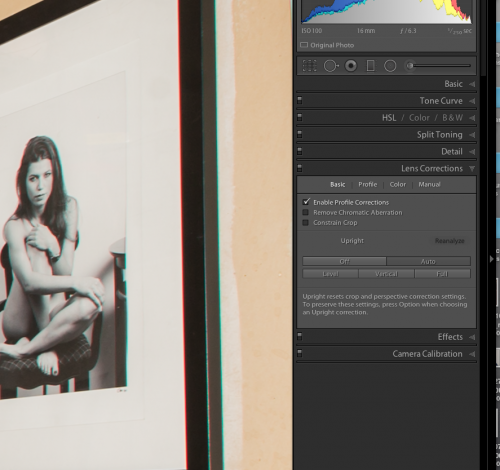
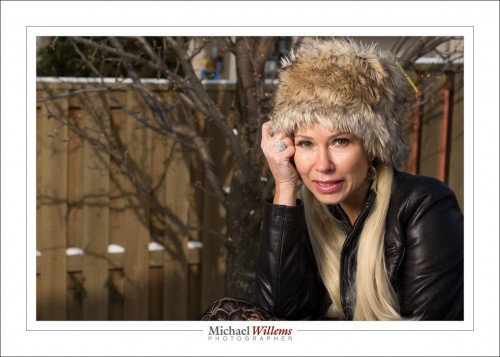
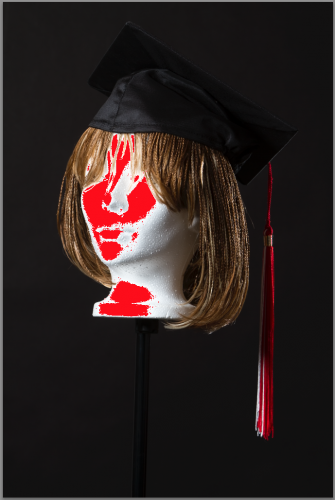
But look at original size and at the very edges, where there is back light (think: a tree against a sky), you will see some colour fringing (known as “chromatic aberration”). Look at the black picture frame, or perhaps even more clear, at the model’s head, and you will see purple/red on the left, blue/green on the right (it may help to look at the image full size):

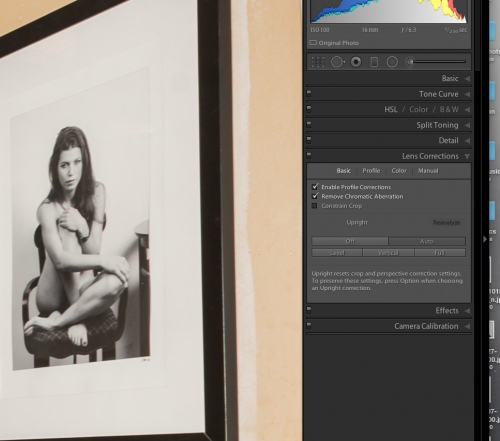
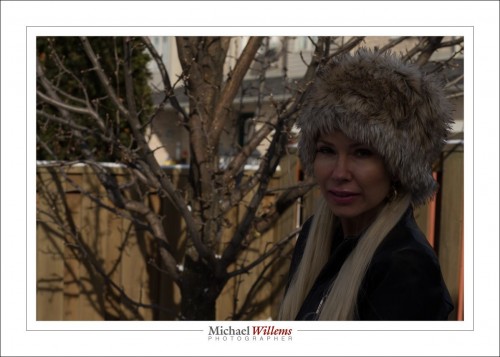
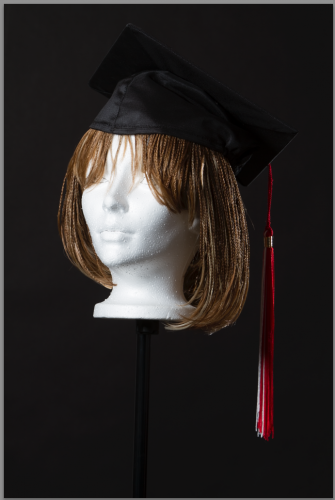
Now, in the “Lens Corrections” panel, you see the option “Remove Chromatic Aberration”? Let’s click that on. Now we see:

Can you see how it is now gone? You can go into the “Color” tab within this panel and tune the settings, but you usually do not need to do that.

Now, back to the exhibit. Look at the full image at its original size. That was my Garage Wall Art Sale. Now “was”: it is my sale, since it is ongoing. I am selling framed prints and unframed prints, mainly at 13×19″ size, some larger, in categories including:

  • Colourful: images whose bright colour is the main feature
  • Travel and cities: images of iconic cities like New York, Hong Kong, Toronto, London, Jerusalem, and so on: I have worked in 40 countries.
  • Black and White: images that look great as artistic B/W prints on any wall.
  • Nudes: artistic nudes, of which I have hundreds, featuring my muses
  • Sailing: showing that even “Lake Onterrible” can look great.

These prints are handmade by me on permanent museum quality paper using permanent pigments (not dyes, which can fade after just a few decades). They are also autographed, and are made in limited editions or even as one-offs.

In other words: they can form the basis of your wall art collection. Collecting such wall art can be an amazing hobby. See www.michaelsmuse.com for more detail, and remember: if you buy out of the garage, Garage Sale prices apply, and these can be as low as one quarter of art gallery prices. So, come see what’s in the bins and display racks and decorate your home with originals today.

 

Lenses

Another repeat post:

I regularly mention that the lens is the most important part of your equipment. Great lenses especially add to your photo-taking capabilities. Now let’s look at one aspect of that greatness again: the “speed” of a lens.

Speed is of course a misnomer. When we say “a fast lens” we simply mean “a lens with a large aperture (low “f-number”). This large aperture lets in a lot of light, which makes it possible to shoot at faster shutter speeds at the same ISO, hence the word “fast”. So a low f-number means you can obtain faster shutter speeds under the same conditions.

Like the 50mm f/1.2 lens I am selling (sadly; but I bought the 85 f/1.2 and I cannot financially justify keeping both these lenses; and for wedding portraits, the 85 will be more useful).

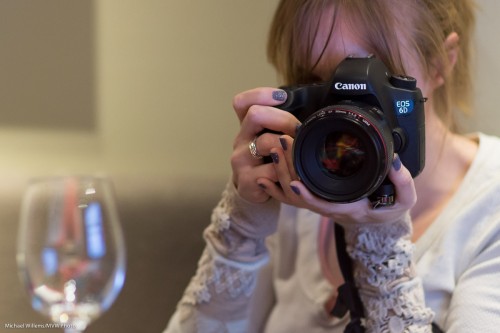
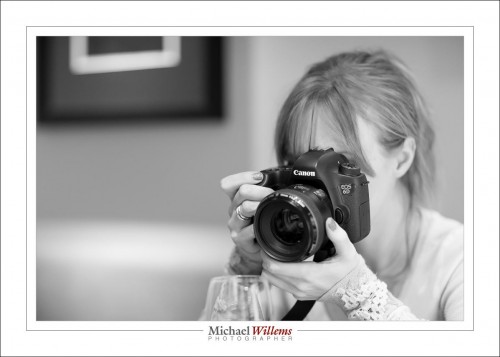
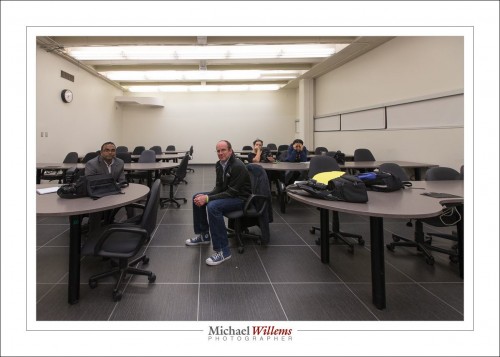
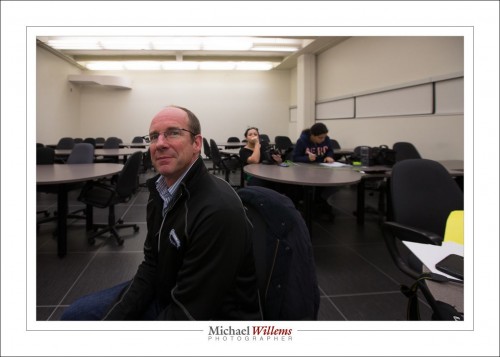
Here’s student Becky with the 50 f/1.2L mounted on her Canon 6D:

I was able, by using the large aperture of my own f/1.2 lens, to take that picture at a fast shutter speed, handheld. And I get a blurry foreground and background at the same time,  which helps me to emphasize the subject.

How fast? Let’s look at a real example.

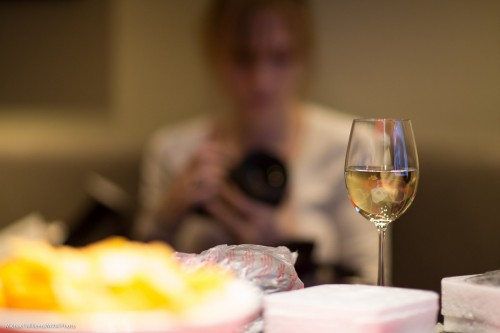
A shot of a glass of wine. That is what I focused on, so that is, of course, sharp:

I shot that at f/4.5, which is typical of the kind of lowest “f-number” that a kit lens would allow you to use. At 1600 ISO, that necessitated a shutter speed of 1/30th second. That is at the limit of what I can hope to do handheld; in fact it is beyond that “rule of thumb” limit, with an 85mm lens. So I am lucky that the shot is sharp. Also, I am lucky that nothing in the photo moved, because pretty much any motion would show, at that slow a shutter speed. And yes, the background and foreground are blurry – but they could be blurrier.

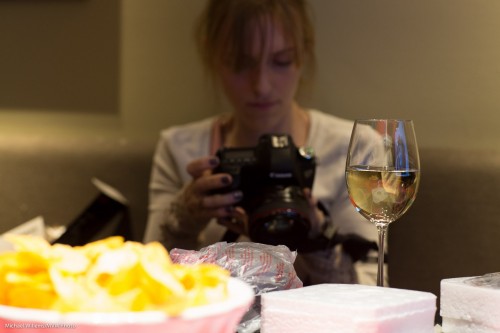
Now the f/1.2 lens, this time wide open at f/1.2:

The “f/1.2” means that:

  1. At the same ISO value, I now needed only 1/320th second shutter speed. I.e. a much faster shutter speed (i.e. less time; shorter time period; all these mean the same thing).  That means I can easily hand-hold, and also I need not be afraid of motion.
  2. The lower f-number also allows me to through both Becky and the chips in the foreground way out of focus. The glass is still sharp (I am, after all, focusing on it!), but the depth of field at this low f-number is extremely shallow; meaning that foreground and background are very blurry indeed.

Now, I do not of course always want shallow depth of field; but the point is, that with a fast lens, I can. And that expands my picture abilities; in a dark evening setting I can shoot handheld without flash, and if I want, I can get extremely blurry backgrounds. And that is one of the reasons that I use an SLR in the first place. And any SLR would do this – it’s the lens, not the camera, that determines these things.

Which is why I am happy to spend on lenses. What’s not to love?

And a good lens lasts decades, both in technical terms and in value. So if you are going to spend, and why not; then spend mainly on lenses.


Today again repeat post, because this still happens all too often: People confuse the DPI setting in an image with something meaningful. News Flash: By itself, saying “300 dpi” or some such means nothing at all about the quality or size of the picture. So here goes, from 2010:


I keep hearing people say “I want this picture at 300 dpi”, or “send it to me low quality at 72 lpi”.

When talking about a given image, that by itself is meaningless!

Let me see if I can explain. I will simplify and assume that dpi (dots per inch), ppi (pixels per inch) and lpi (lines per inch) are the same. They are not, not exactly; but assume for a moment that they are, since it makes no difference for this explanation.

Folks, the dpi (or lpi) setting makes no difference to the quality of an image. Not by itself. It is just an instruction to the printer.

It is the number of pixels that makes the difference. Not the number of pixels per inch, which is just an instruction to the print device.

Let me try to explain.

Let’s start with the image. You have taken a picture. It is a certain number of pixels in size. Say, 640 pixels wide, or 1,200, or 4,500. That is the resolution of the picture. The more pixels, the higher the resolution. Very simple. So let’s say your camera is a 6 Megapixel camera – that means your image is 3000 pixels wide (3,000 wide x 2,000 high = 6,000,000 pixels, or 6 Megapixels).

When someone says “send your picture to me at 72 dpi” or “send it to me at 300 dpi” that means nothing by itself. Try it: export your photo from Lightroom (or whatever you use)  as 72 dpi, and then again as 300 dpi, and compare the two images. Identical number of kilobytes, and when viewed full size, identical detail.

DPI means “dots per inch”. So by saying “take this image and make it 300 dpi” that is just telling the printer “take this image and print it ten inches wide” (3000/300 = 10). Setting it to 72 dpi means “print it  42 inches wide” (3000/72 = 42). But it neither increases nor reduces the quality!

What people need to say if they are talking about image quality is:

  1. “Send it to me 10 inches wide at 72dpi”.
  2. Or “send it to me 10 inches wide at 300 dpi”.

Which just translates to:

  1. “Send it to me 10 x 72 pixels wide, i.e. I mean 720 pixels wide”
  2. or “”Send it to me 10 x 300 pixels wide, i.e. I mean 3,000 pixels wide”

So if you mean 720 pixels wide, or 3,000 pixels wide, why not just say that?

That is the essence. After all, it is easier to set one variable (pixels wide) than two (dpi and size); and pixels mean something real.

Unless we are printers, we are talking about it from this perspective, so we should use clear terms. Telling me “send it to me at 72 dpi” is only meaningful if you also add the inches. So be clear, and say “send it to me 3,000 pixels wide”.

Wall Art

I held a Photographic Art Garage Sale today at my home. And it was literally a Garage Sale:

This taught me a few things. First, how important it is to have prints made of your photos. The tactile experience of holding a print is something special. Prints go on walls and add something when they do. Prints do not get lost when a hard drive crashes. They do not need batteries. They can be seen by many people at once. They have a certain value that an LCD display cannot approach.

Also, it reminded me that there is benefit in starting a wall art collection and adding to it over the years. Add a little here and a little there and before you know it you have a great collection. And it is “a little bit here, a little bit there” because there is a cost involved in prints, especially in framing.

Third, I was reminded how nice a wall looks with prints. Even my garage wall. Any wall livens up with prints, and its character changes completely when you switch the prints around. And the more you have, the more switching around you can do. Do not keep the same prints in the same place forever.

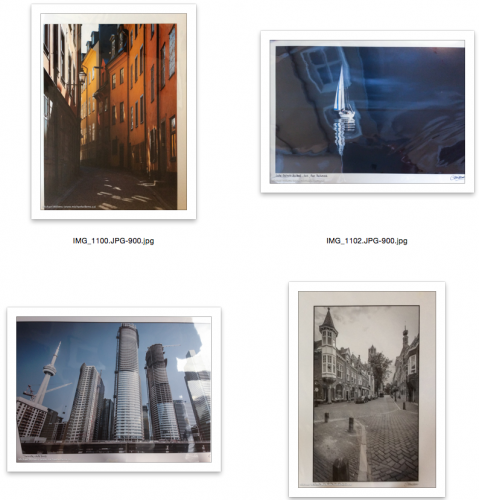
Fourth, I learned again how taste differs and how you cannot argue over taste. Sold prints included:

A sailboat and three urban scenes: Old Stockholm, Toronto under construction, and Utrecht. I can see the attraction of putting major cities on your wall in suburbia. But there are some prints I think are great that attracted no-one; conversely, there was a lot of attention for some photos I thought interesting.

In fact most people looked at the black and white photos, but bought colour photos. perhaps B/W is more artistic, but colour fits better in most people’s homes.

In conclusion, prints have something special, and I strongly recommend you buy, make, and shoot for prints.  You will not regret it.


Did you miss the sale? If you live in the Toronto area, come for a private viewing: the prints are still available.


Flash is for when it’s dark?

No, that’s not just what flash is for. Take this image, made on a sunny day:

That was a flash image. Without flash, it would have looked like this:

Of course I could have just increased exposure *(lower “f”-number, or slower shutter, or higher ISO). But then, the entire image would have been brighter:

That’s not bad, but it doesn’t emphasize the subject, and I lose the opportunity to shape the subject.

So there are many shots where flash is not necessary per sé; it just increases the creative options available to you. Always carry flashes, is my motto: it makes my creative life easier by giving me more options.

___

Today, I host a Photographic Art Garage Sale at my home (scroll down). There is a very special deal on the e-books (http://learning.photography/collections/books) as well. 9AM-5PM: Come by if you are near Oakvillle, Ontario!


The Camera Puts On Ten Pounds

…or so it is said, in the case of TV, where the camera does really put on ten pounds. Why? Because TV is made with wide angle lenses.

To illustrate this, let’s make a portrait using a 200mm lens:

An undistorted view of the subject. Now let’s zoom out to 35mm. But then, wait….  the subject will be small, very small. So we will have to get closer to keep the subject the same size. It is that closeness that causes the subsequent distortion:

All distorted, and again, this is not because of the wide angle; it is because of the closeness that the wide angle necessitates. That is why we say:

“Do not use a wide angle lens for portraits”.

What we really mean is:

“Do not use a wide angle lens for portraits where the subject is large, because then you’ll have to be too close and you’ll get distortion as a result of that closeness.”

That does not sound quite so punchy though, does it?

Sometimes we can use that distortion for a deliberate comical effect:

I suppose the one thing you may want ti take away from all this is: know your lenses and when to use which one. Pay attention in particular to:

  1. Depth of field.
  2. Perspective distortion.
  3. Susceptibility to (or resistance to) motion blur.

All three of these have something to do with focal length. When you are learning photography, it is your job to figure out in which way.


Exposing to the right

I am studio shooting, and I like to get my exposure right. And there’s one things that always occurs to me: the difference between camera and Lightroom. The camera says this image is overexposed:

That’s what it looks like on the camera. But in Lightroom, that same image looks like this:

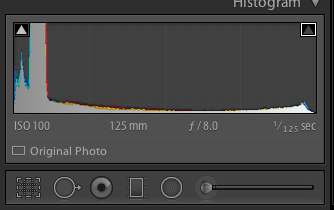
Looks pretty perfect, and that is confirmed by the histogram:

There are several reasons for this.

  1. The camera shows me the JPG that is built into the RAW as a preview. But in Lightroom, I have the actual RAW. Which has more exposure space due to its having more bits per colour channel.
  2. Lightroom prevents overexposure when importing, as part of its current develop profile (so if you like overexposed backgrounds, tough—I have commented on this before).
  3. Cameras and Lightroom are not calibrated the same. There’s always some difference.

So here’s my studio tip for the day: know your camera, and know how to expose on your specific camera to get an image that is exposed to the right (i.e. bright white areas appear at the very end on the right in the histogram, without actually touching the right side). Every camera is different. On my 1Dx, for instance, I need to see overexposure by about 2/3 of a stop, in order to get a Lightroom image that is just shy of being overexposed. As long as you know, this does not matter.

1/1/2015: you have a few hours left to buy three of my e-books at a 50% discount. Only today!


Ring in 2015 with an amazing deal.

To celebrate 2015, TODAY ONLY, you get an additional $15 off the Portrait Pro Mini Collection of three of my e-books.

Three amazing e-books for not the usual $60, nor the $44.95 special price, but TODAY ONLY, for just $29.95. That’s 50% discount off the regular price.

Go here to order. Then use discount code PortraitProSpecial on the last page when ordering and you get $15 off the discounted price. Act now… TODAY only!

This discount is valid only for 24 hours. After that, price returns to the regular discount price of $44.95, which is still an amazing deal. Learn about camera and photography fundamentals, flash, and portraiture, all in one package.

My e-books are all between 100 and 200 pages, and they are PDF files without DRM. This means you can read them on any of your phones, tablets, pads, or computers without permission hassles.

If you already own one of these books, you may substitute another. Simply indicate that in the comments when ordering, and mention order number or date of original order.


f/4 and sharp

I often hear students say “but I had to go to f/16, because at f/4, it would not be all sharp from foreground to background”.

False. Or rather, “it depends”. Depth of field depends on lens focal length, and distance to close object, and aperture. So at f/4, if you are not close and use a 16mm (wide angle, on a full frame camera) lens, you get:

Yeah, at f/4 you can have everything sharp, from close to far. Check the tables, etc. All sharp.

But get close, and with the very same settings, now the background is blurry:

Now, at the same settings, the background is blurry.

So keep that in mind, And also, always distinguish focus blur (above) from motion blur:

That’s because I shook the camera, and that has nothing whatsoever to do with focus or with depth of field!

I wish all my readers a very happy 2015. Love, health, happiness: everything else is secondary or can be bought. And keep shooting. And reading. See http://learning.photography for the e-books: if you have a new camera or new gear, this is the time to start using it to its full potential. Go for it. You live only once.