Shadow avoidance

One reason we bounce our flash off the ceiling (behind us) is to avoid those nasty drop shadows, especially the side shadows.

But what if we can’t? If there is no ceiling, perhaps. Or that ceiling is bright red. Or it does not reflect enough light, because it is pitch black. or it is a very high ceiling. What then?

Then we can use many other means, like reflectors. Or off camera flash, with modifiers. Or a ring flash. Or we simply ask the subject to move to where it is possible (d’oh!).

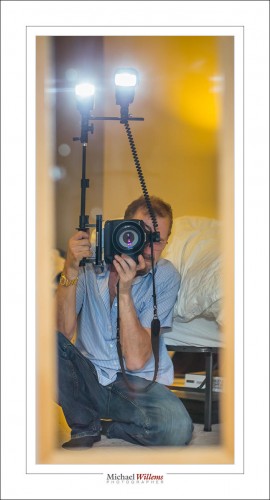
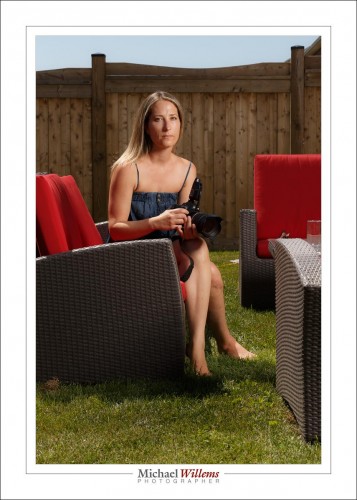
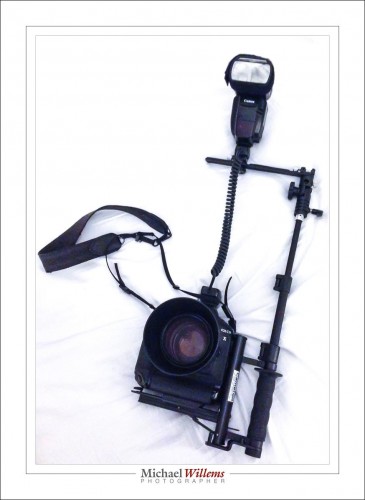
There is one more option, one I have not discussed before: we use a bracket to move the flash away from the camera and keep it above. Like this Cameron V-H Flip bracket (marketed under various names):

It has some pretty good features:

  • It moves the flashes away from the camera, see the extending pole. Up to 28″ above, and this means that there will be less shadow and no red-eye.
  • It keeps the flash(es) directly above the lens, so any remaining shadows will not be side shadows.
  • It can fit two or even three flashes.
  • It swivels, to keep the flash where it is while the camera turns 90 degrees (but note, it turns the wrong way, which is awkward. I would not want to use this bracket for a lot of vertical shots).
  • And unexpectedly, this bracket can use a small umbrella. You’ll look funny, but oh boy, the light you will get!

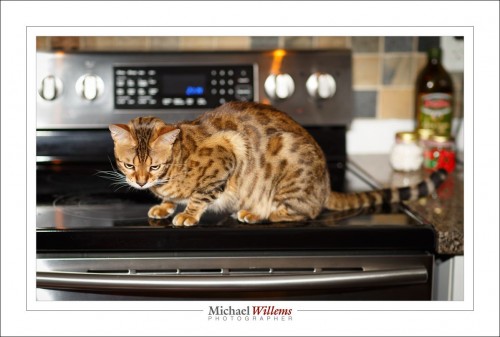
While bouncing, or off-camera flash with modifiers, is generally still better, this solution can work well:

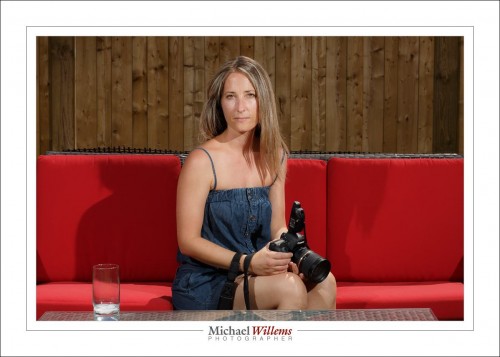
Best of all, it can hold two (or even three) flashes:

Now we get extra light, plus the light from one flash can almost eliminate the shadow from the other.

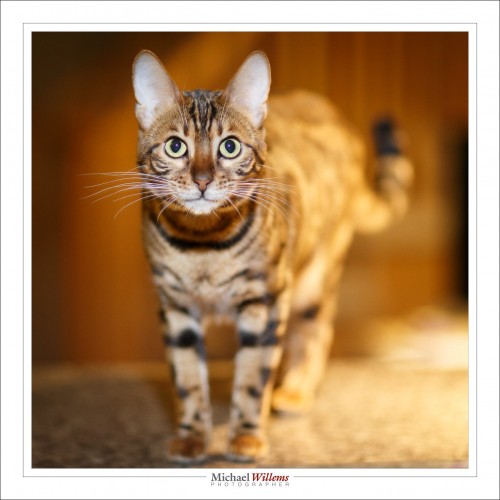
That doesn’t look like a “direct flash:” photo, does it? And beauty pictures, with a small modifier, seem another obvious candidate (“butterfly lighting”).

The moral of today’s post: There are many ways to use flash, and there are many ways to use it well. A bracket is one of those ways. Not the be-all and end-all of flash; just one more cool tool that can sometimes lead to fabulous pictures.


___

Footnote: Have you considered really learning flash? Worth every hour—and dollar—that you invest in it. See learning.photography for a good option. And don’t forget to order the flash manual now. You’ll know the secrets the great pros know; and more importantly, you’ll be able to use them.

 

Manual or TTL?

When making flash pictures, your camera will be on manual mode—I hope so, anyway. It’s the way to go. This means you set ISO, aperture and shutter yourself.

But your flash does not need to be on manual. That is to say, flash power can still be metered and be adjusted by the camera, automatically. We call this “TTL” (Through The Lens metering). And TTL can work even when the camera itself is on manual.

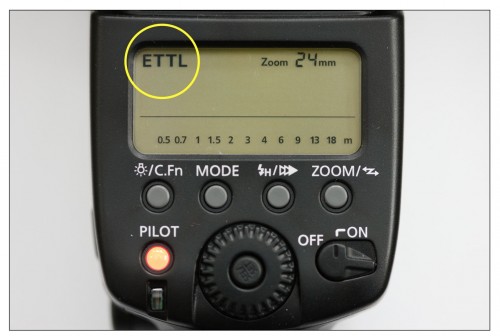
When your flash is in TTL mode, the back looks something like this:

You see TTL, ETTL, TTL-BL, i.e. something containing the letters TTL. This means the flash power is adjusted automatically by the camera. If you are close to something, the flash will fire at low power; if you are far away, a high power flash will be emitted. Magic!

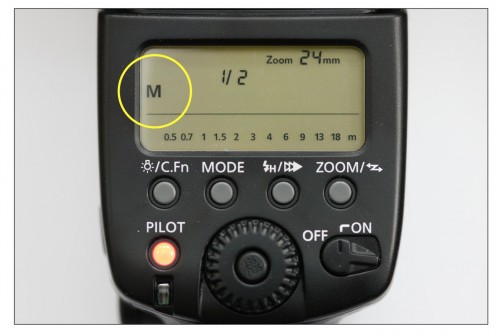
The alternative is that you set the flash power. Manual flash, in other words. Press the MODE button on the back of the flash and set it to Manual:

In the photo above, the flash is set to half power (1/2). It could also be set to full power (100%, or 1/1), or to quarter power (1/4), or one eight power (1/8), one sixteenth (1/16), and so on; or to some level in between.

Try this now. Set your camera to manual mode, 1/40 second, 400 ISO, f/4. Now turn on your flash and set it to manual, and set it to 1/64 power. Using the viewfinder, take a photo. Check the photo: You will probably be hard pressed to see the flash, especially if your subject is far away.

Now set it to full power (1/1, or 100%). Do the same again. Whew, probably a grossly overexposed picture!

But you probably noticed something else. You did not see the flash through the viewfinder. “Did it work?”, you may well have asked. That is because when the flash is on manual, it fires just once, at the power level you set. You do not get the metering pre-flash that it uses when set to TTL mode (a flash at 1/32 power that is used to determine the needed power level). And that preflash is the one you can see through the viewfinder. The actual flash you cannot see!

Now, an exercise.

  1. Find an object to photograph. With the camera set as before, and the flash on MANUAL, find the correct power level for a good picture. Aim the flash straight ahead for this exercise.
  2. Now move 40% farther from the object. E.g. if your original distance was one metre, make it 1.4 metres. Or if you were 4 feet away, make it 5 feet 7 inches (that is 40% farther than 4 feet).
  3. Now find the correct power level for this picture. How much more power did you need? And (an advanced question for mathematicians): why? (Hint: it’s actually 41.4% farther).

Have fun.


Connecting Your Flash

When you use an off-camera flash, you somehow have to connect that flash to your camera.

How?

You could use an old-fashioned cable, of course. But cables are a bit of a pain: they have people fall, or drag cameras to the floor, their connector reliability is less than stellar, and they are hard to get. But fortunately, there is good news: there are a few other practical ways to connect your flash or flashes to your camera.

Let’s look at all possible ways to connect:

  1. Using a cable from camera to flash. As said, not a terribly good idea.
  2. Using optical remote operation; using the “TTL”-system built into the flash. This works well, but only if there is line of sight, or a reflected light path, between camera and all remote flashes.
  3. The same, but using radio; the system is built into the flash (currently, Canon 600EX only).
  4. Operation using “TTL” (full function) radio triggers (e.g. Pocketwizard Flex, Yongnuo 622).
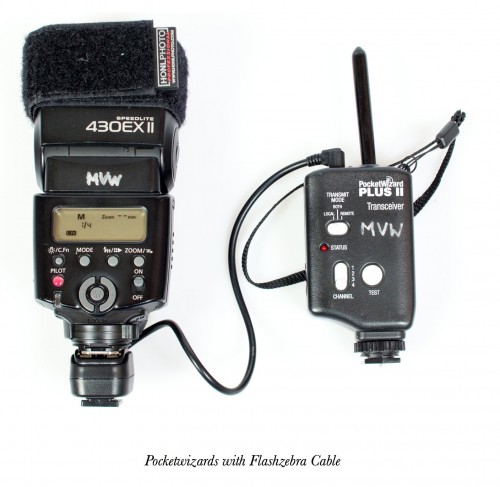
  5. Operation using “Simple” (restricted function) radio triggers (e.g. the “old” Pocketwizards, Yongnuo 603) and a special cable from Pocketwizard to flash.

This short article is about the question “4 or 5?”. i.e. you have decided to use wireless triggers, like Pocketwizards, and now the question is :”which ones: triggers that give you full TTL control or just simple ones that do not support TTL, i.e. that need you to set flash power manually.”

In this case, I argue for 5.

Why? Why not use TTL control?

  1. When doing pro shoots with Off-Camera Flash (OCF) you are more likely to use manual flash settings than TTL anyway, so the additional benefit of TTL is minor, and needs to be offset against the following drawbacks.
  2. Triggers that support TTL (Through The Lens metering) need to be reverse engineered, since the protocols are proprietary. Reverse engineering always carries the risk that it will not always work properly under all circumstances, now or in the future. (The history of the TTL Pocketwizards proves this.)
  3. TTL triggers need to use all the contacts on the flash, as opposed to the single contact a simple manual system needs (ground plus one signal lead). And again, extra stuff means extra complexity, which carries with it the risk of malfunction.
  4. TTL triggers need to send actual data. Non-TTL triggers merely turn a switch, as it were; a signal lead without binary data. As before: complexity…
  5. TTL triggers are brand-specific (you cannot use a Nikon Flex on a Canon camera, for instance). So if you have a problem you cannot just reach out and borrow one from a colleague. You need to stick with Nikon- or Canon-versions of your triggers.
  6. Because of their complexity, TTL triggers need firmware updates. One more thing to worry about: life is complicated enough already, in my opinion.
  7. TTL triggers need you to use a flash made by your camera maker. Non-TTL systems have a huge advantage here, namely that your flashes can be any make, any age, any brand: as long as you can set the power level, the flash will work.
  8. Many TTL triggers use small batteries, while Pocketwizard non-TTL triggers use two AA batteries. If there is anything sure in life it is death, taxes, and AA batteries.

And that is why I prefer non-TTL triggers.

It is rare that a post has me falling asleep while I am writing it. But it is 2:46AM: time to get some sleep. More tomorrow.

Michael

Boko Not Haram

The Nigerian terrorists known as “Boko Haram” are well known. Loosely translated, this means “Books are bad”.

I would say “Boko Halal”. Books are good. And not just for Muslims.  Books are good for everyone. You all know about my e-books I hope: head on over to http://www.michaelwillems.ca/e-Books.html to read all about them and to order them. They are not DRM-addled (i.e. you can put them on all your iPads, tablets, phones, computers, anything that can read PDFs) and there is a README that gives you permission to print a copy for personal use—this README is not a formality, because without it, you cannot have Staples or any other office supply store make a printout for you.

So, books are good I am very proud of my books; they reflect years of teaching experience, combined with my photographic skills.

But while books are good, I think you need more than just books. Books are invaluable combined with practice and interaction. Practice: we learn by doing. The books are useful because they tell you what to do (“before the practice”) and they explain the background (“after the practice”). They thus put it all into context and shorten your learning time. Third advantage of books is that they are your permanent memory.

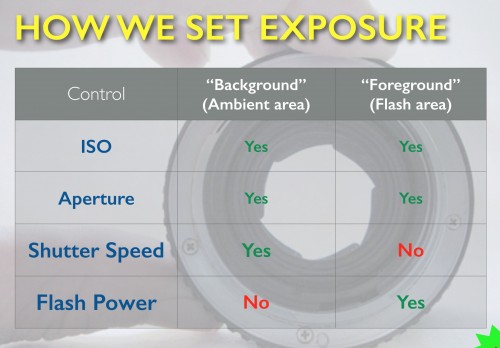
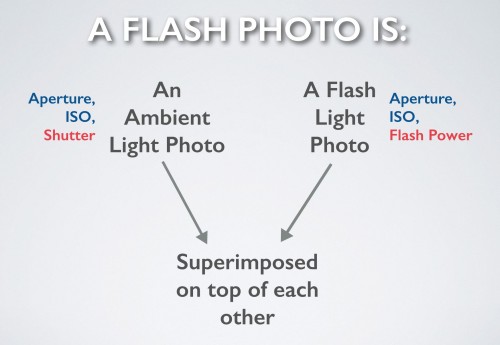
To give you a taste, let me share a couple of images from my books: here’s how a flash exposure works:

In other words, a flash exposure has ambient light as well as flash light. And these are affected differently by the camera settings. Which is a good thing, because it enables you to balance the two.

Here’s a clearer look at how:

…and this is what I teach you in my books, my courses, and my various forms of online training. That is why books are good: when you do one of my courses, you do not need to spend the bulk of the time making notes.


Myth-busters!

(To the tune of “Ghostbusters”).

Often, my posts point out common myths and misconceptions. Of which there are many… many. On the Internet, no-one knows that you’re a dog, and no-one knows that you are wrong.

So, two oft-heard “truths”:

  1. You cannot shoot with TTL if you are a pro.
  2. You cannot use just one light for a serious portrait.

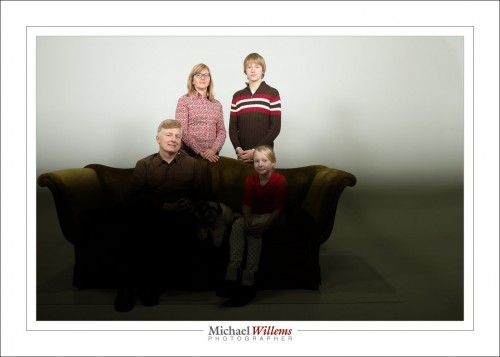
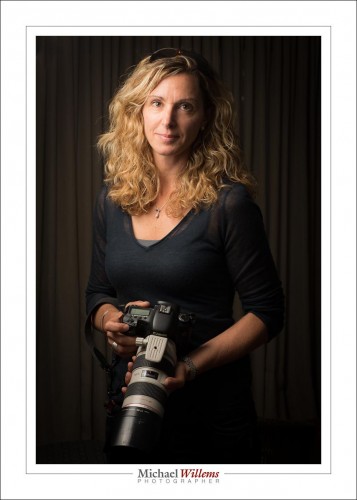
So. TTL was used in this portrait of students and friend Diana; remote TTL in fact (light flashes from on camera flash drives off camera flash); and the light was one flash through an umbrella. The on camera flash was disabled, except for those light flashes.

1/125 sec, f/8, ISO100.

The curtain was chosen as a classy background, but the umbrella was close to the subject so the curtain would get little light. TTL handles this fine; if the subject had been too light or too dark, a touch of flash compensation would have sorted that out.

The one light-with-umbrella gives us enough light for a portrait with Rembrandt lighting. Fairly dramatic chiaroscuro-type lighting, but not so dramatic that it becomes unflattering. On the contrary, this is nice light.

The blonde hair stands out nicely against the dark background; dark hair would have needed more light.

So there, a real portrait with “studio settings”, i.e. just one light, and using TTL. I could do that all night.


Blur

I asked a photographer about studio the other day. She said we needed 1/200th sec, to freeze motion. After all, you cannot shoot moving things at, say, 1/40 second. Right?

Wrong. And right.

That is: if you use only flash (i.e. your settings make ambient light go away) then you effective shutter speed is the speed of the flash—which is 1/1000 sec or faster.

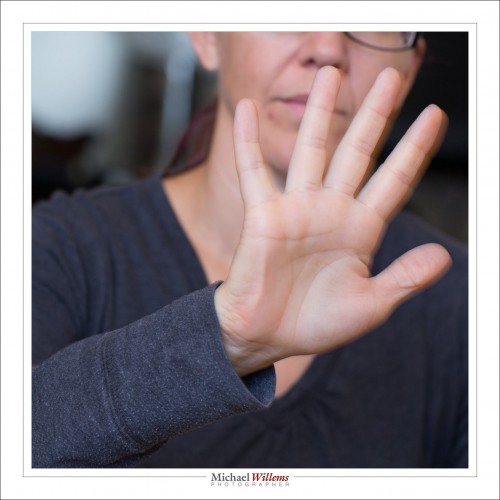
So this shot was taken at 1/40 sec while the subject waved her hand quickly:

What you see is:

  1. The hand is substantially sharp: that is the flash part of the exposure.
  2. There is some “ghosting”: that is the ambient part.

If we had gone to a smaller aperture, say f/11, that part (2), the ghosting, would have disappeared. Even if I had shot at 1/10 second.

This is ONE reason that flash gfives you sharp images: it “freezes” everything.


Post

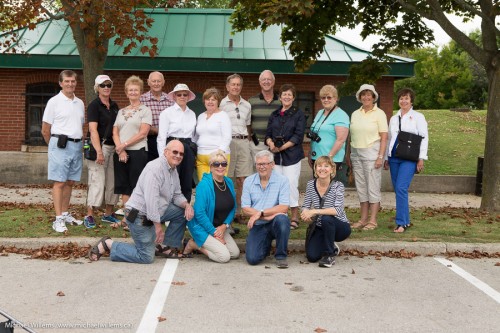
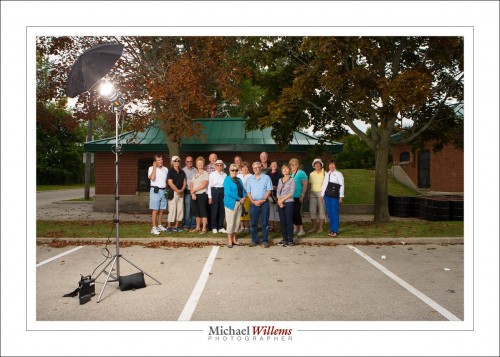
I did a photo walk yesterday, in Mississauga. And after that, a group shot of the people I did the walk for. Arrange the group nicely and I get:

Not bad, and it’s what a competent photographer might well do.

But wait. There’s more. I want modelling; less flatness. Saturated background light. And I want my subjects to be the bright pixels. So that they stand out.

Meaning I need light and control over that light. Meaning:

  • A flash for key light. I used one studio flash (a Bowens 400 Ws flash)
  • For power, a Bowens battery pack).
  • A modifier (umbrella, here).
  • A sand bag to stop the light from falling.
  • Camera settings that make my background go darker (ideally, –1 to –2 stops below ambient).
  • And do not forget,  shutter speed less than my camera’s fastest flash sync speed (1/250 sec for me).

All that looks like this:

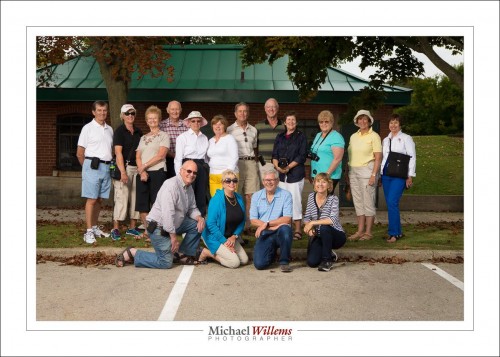
So the resulting picture is:

(Canon 1Dx, 24-70 lens, 1/125 sec at f/6,3, 100 ISO)

Compare that final shot with the one at the very top and see if you can see, and appreciate, the differences. Then, you are on your way to lighting professionally.


Tip!

Tip for flash users.

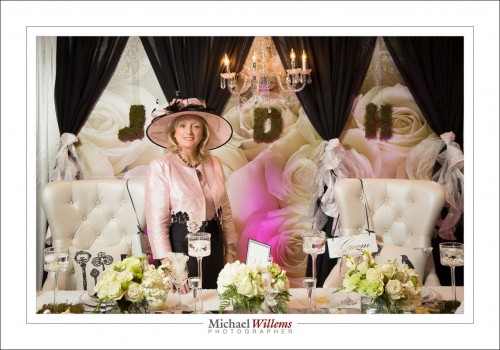
When you use a flash off camera, like here, you often use Pocketwizards. Which means the flashes are on MANUAL mode. Like here, wedding organizer Jane Dayus-Hinch, whom I photographed at the Wedding Show today:

Off Camera Flash 1/8 power. Canon 1Dx, 1/80 sec at f/4.5, 1000 ISO

Those camera settings let in enough ambient to act as fill light.

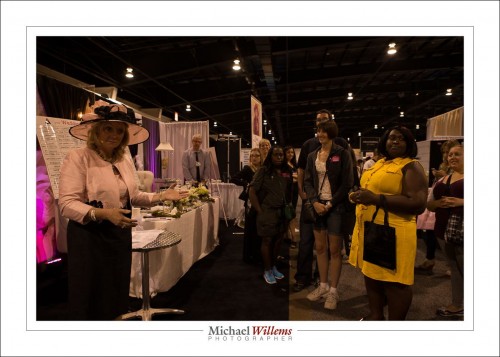
So anyway… if you use an off camera flash, there is one problem. Every 60 seconds or so, the flash goes to sleep and turns off. Meaning you get a shot like this… fill light only:

The solution: You have to set a custom function on the flash to disable the timeout. C.Fn 01 on Canon (set to “1”); menu driven on the Nikon flashes.

Done!


High Noon

Just let me dispel that persistent myth that you cannot shoot at high noon. In bright sunlight. Well, you can shoot, but you will get awful pictures.

Nonsense.

Here. Look at this. Talented photographer Tanya Cimera Brown, yesterday, at noon, on what must be the brightest day this year so far. So this is in bright, harsh, horrible, colour-saturation-destroying, full-on sunshine. Straight out of the camera:

The sky is nice, the red-blue-green theme woks, the model is great, the sun provides a nice “shampooey goodness” hair light: what more can we ask for? And that is with a camera that can only sync at 1/160 second. With my 1/250 sec 1Dx I could do even better. With the old 1D I used to have, even better, at 1/300 second.

OK. That’s using a strobe. Can you do it with speedlights? Sure. You may need to go unmodified, to have enough light; and that means off camera. Here: two speedlights, aimed direct at the subject from off camera positions, do this:

And this: two of me, by Tanya, using the same techniques:

All those were also SOOC (Straight out of Camera).

So learn flash already!

For best results, do my Flash in the Plan program: take my course and get the book (for both, go to http://learning.photography); then follow with a hands-on session, and you will know how to do this. It’s not rocket science, but you need to learn the background, understand the constraints, and learn the artistic tips. Then, you can do this too (provided you have a model as beautiful as Tanya, of course):

Because yes, you CAN do great work at high noon. All you need is flashes and skills. And a camera, of course. Show the world what you can do!