I cleaned my sensors today. On the 1Ds Mark III and the 1D Mark IV. This took more than an hour.
So I thought this might be a good opportunity to talk about sensor dust.
Unlike a negative, which gets “replaced” for every shot, the sensor on your camera can gather dust over time. This then shows up under certain circumstances on your images.
When? When do you notice it?
To understand this, image a small piece of dust just above the sensor. If the lens has a wide open aperture, this piece of dust will not cast much of a shadow, because light from the left might cast a shadow on the right, but light from the right lightens that shadow. The wider the lens aperture, the less defined the shadow cast by the dust.
Now imagine a narrow aperture, a pinhole. Each piece if dust casts a nasty shadow. I.e. it is visible. That’s what dust spots are: shadows from dust specks.
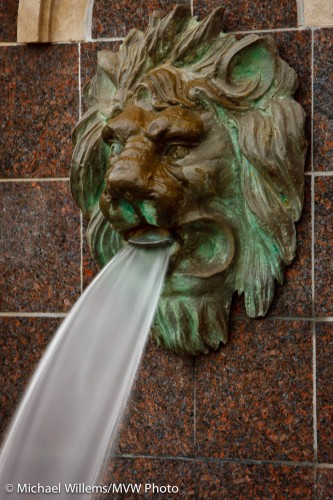
Now think along with me. Say I want to shoot this, as I did during the Henry’s Creative Urban Photography session I taught in Oakville on Sunday.

Lion and Water
Evidently I need a long shutter speed to blur that water: in this case I selected a quarter of a second.
For which I need a small aperture. f/22 or f/32. A tiny opening in the lens.
So then, when you shoot at small apertures (large “F”-numbers), and especially in plain areas like the sky, dust shows up. Which got me here.
To clean dust, you need:
- A freshly charged battery.
- A spare camera in case you break the sensor (which I have never heard of, but I am sure it happens).
- A rubber air blower, your first port of call.
- A rotating brush from Visible Dust.
- Also from Visible Dust, pads in the size of your sensor (1.0, 1.3 or 1.6), and the appropriate liquid.
- A healthy dose of patience, and a calm demeanor.
First, measure. Switch the lens to a wide angle, and switch to manual focus. Focus close, then while gently moving the camera, shoot a distant white wall, using an 8 second exposure at f/32 at 100 ISO. Adjust as needed to get white, but not blown out. Now check by zooming in and you see dust and smears.
Now clean. Make sure you have a full battery. Now use the manual sensor cleaning function on your camera to open the shutter. Then remove the lens. Carefully blow first, using the bulb blower. Now close the camera, turn it off and on, and repeat the test.
Then if it’s not yet fixed, repeat using the brush, which you first rotate for a few seconds first. You may have better results. But you will equally probably make it worse instead of better.
In that case, repeat again using a pad, after you drop 3-4 drops of liquid onto it. Again, you will make things worse before you make them better.
This is where the patience comes in: after using up three or four pads you will despair. Smears, dust: it gets worse and worse. Every time you remove one dust speck, you add two. Will you ever get it done? Is your camera toast?
And yet… after an hour you get to a point when suddenly, there’s no significant dust. That is when you stop.
So after more than an hour, I now have two as-new cameras.
Two more things:
My camera does this by itself! Yes, but it does not clean off all the dust with its ultrasonic shaker.
Is this not risky? Yes it is. Do this at your own risk. (That said, I have been cleaning sensors for a decade without any mishaps.) My advice: do this when needed, but do not obsess. If you never shoot at f/16 or beyond, don’t worry. If you do not see the dust, do not worry. But if you do – get it done.

