TTL: 10 Problems, 20 Strategies

I shot an event yesterday that prompts me to give you some TTL management strategies. This is a long post – one that you may want to bookmark or even print and carry in your bag.

TTL Management Strategies? Huh?

Yup. TTL (Through The Lens) flash metering is great, but it can have its challenges. Unpredictability, or perhaps better variability, being the main one.

So why use TTL at all? Well, for all its issues, it is the way to do it since you are shooting in different light for every shot, and you have no time for metering. Metering and setting things manually (or keeping distances identical) in an “event”-environment, especially when bouncing flash, is usually impossible. So TTL (automatic flash metering by the camera and flash, using a quick pre-flash) it is.

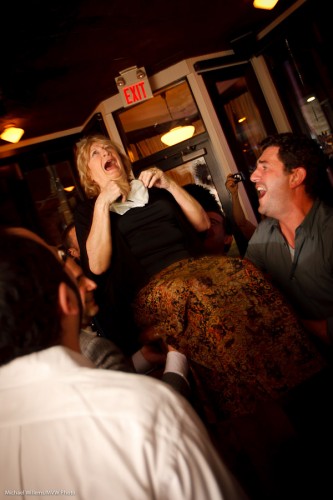
Cheers! (a Michael Willems signature shot)

Yesterday’s event was in a restaurant that had been closed to the public for the night. Challenges for me were:

  1. Light. It was dark. Very dark, meaning achieving focus was tough and settings needed to be wide open and slow.
  2. Consistency. The venue was unevenly lit: parts were light, parts even more dark. Meaning that achieving “one setting” is difficult.
  3. Space. Space was limited: hardly enough space in a small venue to walk around, let alone to compose shots.
  4. Bounceability. Walls were all sorts of colour, mainly dark brown, making bouncing a challenge.
  5. Colour. This also created coloured shots. Orange wall = orange shot.
  6. Predictability. Long lens? Very wide? Fast lens? Every shot seems to need another lens – which is impractical.
  7. Reflections. There is a good change reflections of glass or jewellery will upset your shots, causing them to become underexposed.
  8. Motion. People kept moving (uh yes, especially when the chair dances started).
  9. Technology. Batteries run out. Flashes stop working. Cards get corrupted. Nightmare scenarios we all know.
  10. Time. People were not there for me – it was of course the other way around. So my ability to ask people to pose and to move was limited. They are there for a party, not for the photographer.

So then you shoot and you notice that shots are too dark. or too bright. Or faces are too bright while backgrounds are too dark. But this is all in a day’s work for The Speedlighter… that is what I do for a living!

Mazel Tov!

I am sure everyone who has ever shot events is familiar with these issues. To solve them and come up with solutions, I have developed a number of strategies. So let me share some of them with you here.

(Click to continue and read the solutions…)

Continue reading

A quick flash tip

One of the things you may wish to do this festive season is use off-camera TTL flash.

I.e. holding the camera in your right hand and the flash elsewhere – for instance in your left hand (or your other fight hand if you have two – well spotted, Mike).

In any case: away from the camera – this is key to good pictures.

All brands of camera allow this, and if you have a Nikon, or a Canon 7D or 60D, you do not even need additional hardware: just your flash and your camera, with its popup.

The popup (or on other camera, the on-camera flash) now sends commands to the other flash. So you can light a subject – like the student in Thursday’s Flash class – from one side, in this case with a flash in an umbrella on our right side, with a reflector on our left:

Off-camera flash using TTL

Much better than straight flash!

You can even use several flashes, divided into groups. In the next shot, we have an additional flash on our left, rather than a reflector. That flash has a red gel (one of the Honl Photo gels) on it, to see clearly which light is doing what work:

Off-camera flashes, using TTL

But what you must remember is this:

Disable the on-camera flash.

That is, the pop-up or 580EX/SB900 on your camera still sends its commands to the other flashes, but when the actual photo is beingtaken, it does not flash.

If you forget to disable it, it will fire. And then you get this unfortunate effect:

On-and Off-camera flashes, using TTL

Deer in the headlights. Harshness. Shadows. Brrr: baaad.

So your tip: use off-camera flash, and disable the main flash from firing actual flashes. The camera menu (or the flash on your camera) has functions for this.

If you want to learn this and many other techniques before the holiday, take the advanced flash course in Mono (see http://www.cameratraining.ca) next week. Else, take a course with me or at Henry’s early in the year. It is worth learning flash!

Add a splash

Further to Thursday’s post, I thought I would brighten your day with some more colour.

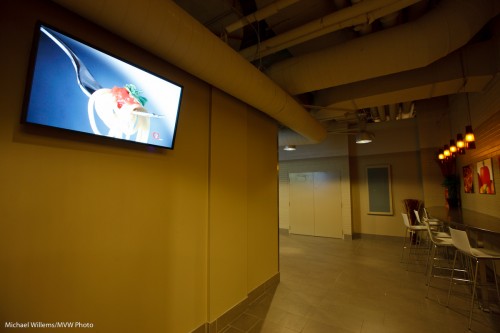
You see, sometimes you need to shoot things that are a bit, well, drab. Like this wall – the screen is great but the wall is a bit dull:

Wall with screen

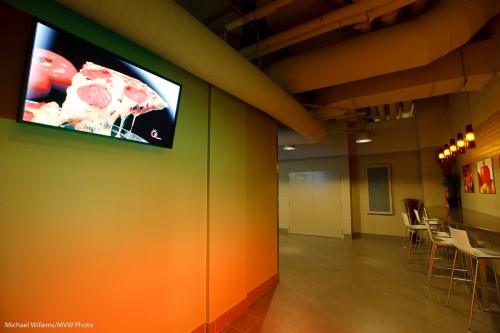
So then, as you also saw two days ago,  I shot it again, this time with two speedlites:

Wall with screen with gels

How was this rainbow effect achieved?

  • These two 430EX flashes were fired with TTL using a 580EX on my 1D MkIII.
  • They were aimed at the wall, one above the other, aimed in the same direction (good idea from my assistant).
  • They were fitted with Honl speedstraps and with a Honl gel each: red for the bottom flash, green for the top one. No other modifiers: other than the gels, they were bare.
  • The ratio between red and green was set on the back of the 580EX until I was happy.

That was simple, and I think you will agree it’s a better shot.

Flash tip

Today, a quick but important (and as far as I can tell, pretty unique) TTL flash tip.

So you want to know if you can do a certain shot? TTL outdoors is fighting against the sun. Do you have enough power to do the shot? It’s always a battle.

You can of course fire a test shot. If the flashed area is dark, try exposure compensation, maybe. Or spot metering, or using FEL (flash lock). Or rely on the LCD display on your flash to tell you the expected distance. All very time consuming and uncertain. What if I just want to know “do I have enough power in my flash to do this shot” and then if yes, figure it out from there?

I am glad you asked.

  1. Set your camera to highlight review mode (“blinkies” on)
  2. Set your flash to MANUAL
  3. Set power on the flash to FULL (100%, a.k.a. 1/1)
  4. Take the shot!

Now you know:

  • Blinkies means yes, you have enough power. Turn the flash back to TTL and go from there.
  • No blinkies means that however you compensate or meter, nothing you can do. Get closer, or increase your ISO, and try again.

Simple, innit? This trick has saved me countless times.

Tricks like this one, and many more, is what you will learn in Las Vegas next week, and in Mono, Ontario the week after. Come join me and David Honl in Vegas and me and Jospeh Marranca in Mono to learn more!

Flash tip of the day

When you are using TTL flash (metered, automatic), you sometimes get too-dark foregrounds.

This can be because a setting is wrong, or because there is just not enough power available from your flash. It is important to know which one it is!

The settings that affect your flash brightness are:

  1. Aperture
  2. ISO
  3. Shutter, after a point (because exceeding the synch speed and using “fast flash” means you lose power)
  4. Distance
  5. Flash Power
  6. Flash zoom

My trick: to ascertain whether it can be done at all, fire a test shot using manual flash at full power!

  1. Set your camera to its max sync speed (eg 1/200th sec)
  2. Set flash to manual (take the flash off TTL and set it to M).
  3. Adjust it to full power (not TTL but M, and power at 1/1, or 100%).
  4. If your subject is centered, zoom in the flash head (lighting edges that have no subject only wastes power).

If your picture’s flash subject is now still too dark, it cannot be done. Open the aperture or get closer.

But if your flash subject is now blown out, it means your picture can be done with current distance. Go back to TTL, figure out what you are doing wrong, fix it, and try again!

Manual flash or TTL flash?

You know (if only because I have discussed it before) that you can set your flash to manual or TTL. I thought I would revisit this, and show you some shots I took Wednesday.

Manual means you set the power level; TTL means the camera fires a preflash and measures the return, and then sets the power level based on that. TTL (Nikon calls its version i-TTL, Canon calls its version e-TTL) is the default setting (the panel on the back of your flash says something like “TTL”).

An on-camera flash

An on-camera flash

Unlike David Hobby, I tend to use TTL most of the time, not  manual.

TTL is a major revolution in camera technology, because it allows you to shoot varying scenes without having to worry about distance. In particular, you can bounce anywhere you like, off a different wall for every shot, and you can use whatever modifiers you like, and not worry about measuring. And you can use “fast flash” to exceed the camera’s flash sync speed – useful on sunny days.

A sample, shot with TTL on Wednesday:

Pretty bartender at a reception

Bartender at a reception, shot using TTL

Indeed as David points out, TTL has drawbacks: the major one being that it’s not perfect. Its measuring is finicky. If you always aimed your viewfinder at an 18% grey surface you would be fine, but the meter is in evaluative mode, and on top of that it has an undocumented bias toward the focus point. All that means that if I focus on a black area I get grey (too bright), and if I focus on a white area I also get grey (too dark). So I need to use flash exposure compensation. And check the back of the display frequently.

TTL’s pluses, then, are:

  • You can use it anywhere, any time.
  • You do not need to meter or set anything.
  • You can do it when the subject varies.
  • You can bounce off varying surfaces, like when you shoot an event and both you and the subjects are constantly moving around.
  • You can exceed your camera’s flash sync speed by using “fast flash” (“auto FP flash”in Nikon terms)
  • You can use any modifiers you like

And its minuses:

  • It can be infuriatingly inconsistent.
  • Your subject’s brightness makes a difference.
  • Reflections can spoil a picture by underexposing it.
  • You’ll need to do more post-production work, as in a fast-moving event, where the setup changes with each shot, quite a few images will be half a stop under or over.
  • You’ll even miss a few images.

So TTL is great when things are predictable, but it is also very useful when things are not predictable (like when you, and they, move).

Now let’s move to manual flash. Manual is the opposite to TTL: it is utterly predictable and consistent but you need to do all the work, and it is totally useless when you and the subject move.

So I use manual when:

  • I want consistency, and I can ensure that nothing moves (like in studio portraits).
  • I have time to meter.
  • The flash is just adding light, like an accent, or like fill on a sunny day, when the exact power level is not that important (if the flash were a bit under or over it would not make a material difference to the image)
  • I am using Pocketwizards, e.g. for outdoors shots – which will therefore need to be predictable.

Don’t get me wrong, I love the predictability of manual flash firing, not to mention the predictability of the use of Pocketwizards.

So in fact I shoot manual flash if possible, and if not, then TTL.

Do I sound like I am contradicting myself? No. Because I shoot events. And events mean I need to be on my feet in a constantly changing environment. And that is when TTL shines (pun intended). Every shot I am in a different room, and I bounce off different surfaces. So that is why I usually use TTL.

And when using TTL, it is all about knowing how it is going to react, and being able to solve the problems. That is what I teach in my courses (e.g. at Henrys School of Imaging, and in the all-day course coming up on 30 May, and in Las Vegas on July 12+13, and many more times in between). There’s a lot of problem solving, involving tools like:

  • Flash lock (FEL/FVL)
  • Fast flash
  • Flash compensation
  • Knowing exactly what it will do

Remember, while a setup shot has to be right, in a fast-moving event, the objective is to get within half a stop to a stop, as long as you shoot RAW.  And believe me, this is eminently doable.

Another sample from Wednesday, where bright ambient light necessitated 1/400th second, which meant using Fast Flash:

Oakville's mayor Rob Burton and family

Oakville's mayor Rob Burton and family

Snacks, also from Wednesday:

Snacks at a high-end reception

Snacks at a high-end reception

Do try to bounce, and use you camera on manual settings (flash is still measured). The following may work, but only if you are lucky:

A photographer using popup flash

Photographer using popup flash

I would like to see her shots, but I know they would be better if she used an external flash and bounced it off the ceiling behind her!

Flash: TTL or manual?

Do I set my flash to TTL or manual?

Both.

TTL (fully automatic flash measuring) is a revolution, and you should use it whenever:

  • The subject moves
  • You move
  • You have little time
  • You use one flash on camera
  • You use multiple flashes but they are within eyesight of each other

Use it as is (your flash shows “TTL” on the back display), and do not forget to use Flash compensation to adjust to taste (or when shooting dark or light subjects).

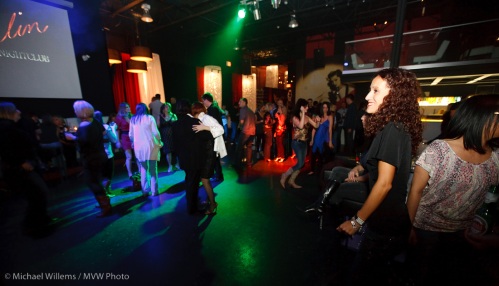
I used TTL here, Sunday night (with -2 stops flash compensation, or it would have been too bright):

Berlin Nightclub in Oakville

Berlin Nightclub in Oakville

Manual (your flash displays “M” at the back and you set the power level to 1/1, or 1/2, 1/4, etc) is useful in cases almost opposite to the previous, namely:

  • You and your subject are stationary
  • Things are predictable and you want full control
  • You have time to meter, try, and iterate
  • You use multiple flashes and they cannot see each other
  • You use Pocketwizards

You can even mix: use TTL for most flashes but fire small accent lights using Pocketwizards and manually set flashes.

Earlier that same Sunday night, when I had time, I used three speedlites set to manual and fired by Pocketwizards, here:

Berlin Nightclub in Oakville

Berlin Nightclub in Oakville

You can probably see I also used some Honl gels: one red and one purple. And one flash was zoomed in to light the picture.

A good photographer knows both TTL and manual. Practice with both, and make them “your own”.

Off-camera flash kept simple

Sometimes it can be simple: off-camera flash can be really easy. Like in this student’s recent portrait:

Off-camera flash portrait

Off-camera flash portrait

You can also see how nice the splash of colour is in the background, right?

A matter of choosing manual mode with just the right combination of aperture and shutter speed and ISO to get enough light into the background. And Flash White Balance makes the tungsten light look nice and orange.

My message today: although flash can be done in a very sophisticated manner, it is not always necessary to make it complicated. Often, very simple is all you need. “Off camera” is often enough to just make it work. And an off-camera flash cable, while not cheap, is the simplest way to achieve this.

Why would you use flash outdoors?

So why would you use flash outdoors during the day?

Sometimes it is obvious: to fill in shadows on backlit subjects. Or to soften hard shadows. But sometimes you do it for more artistic reasons.

Let me illustrate this with a shot taken during the Get Out and Shoot run we did in Toronto early this week – the workshop I wrote recently.

Imagine you are shooting someone – me, say – on a bright day, but in a spot where I am in the shade against the shady side of a grey building. Before you know it you get a dull picture: grey and low-contrast on all counts: blaah.

So that’s when you bring out the flashes. Say, two remote “slave” flashes, fired by a “master” flash on the camera. One slave to the camera’s left, shining into a Honl reflector, and aimed at the subject’s face, to add bright light to the subject. The second flash is equipped with a Honl Speedstrap and on it, a green gel, and this flash is aimed at the grey wall behind the subject to make it less grey.

Now you get this:

Outdoors Flash

Outdoors Flash Used During the Day

You will agree, I hope, that this is a lot better than it would have been without the help of flash. Even, no, especially, on this bright day.

Want to learn about all this stuff: read here of course, but also: join me for training.

(Thanks to colleague photographer Rob Corrado for the picture)

A quick product shot

Today, I am sharing a quick product shot.

Here’s the shot, of my “nifty fifty”, a 50mm f/1.4 lens:

And here’s how I shot it:

  • I used a Canon 5D camera on manual at 100 ISO, f/4 and 1/125th second.
  • The lens was on a table with a white sheet of Bristol Board underneath.
  • The background was an improvised white background (I used a reflector).
  • I used a 430EX flash with a Honl grid, diagonally above the lens, as the main light. The grid causes the dropoff from the centre.
  • I used a 430EX flash with a Honl blue gel and a Speed Gobo to illuminate the background.
  • I used e-TTL to fire the flashes, from my 7D’s pop-up flash (the 7D will support this, like Nikon cameras. On other Canon cameras I need to use a 580 EX flash on the camera to drive the remote flashes).
  • I set a flash ratio of 8:1 a:b, where A was the main flash and B was the product flash.

All of which looked like this:

Simple. It only took a few minutes to set up, which is good since I was tired.

One tip: when shooting this type of product clean it well using a soft brush, or else you will spend hours in Photoshop or Lightroom aftereard, cleaning dust.