See the light!

Tip of the day:

To see the colour of the light you are shooting in, to really see it, take a first test-shot in every shoot with the white balance set to daylight (the sun symbol). That will show you the real colour of the light. Then you can take it from there.

You can judge by yourself, by looking at the back of  your camera, or you can look at the colour histogram, if your camera supports that.

More technique:

Here’s me, shot by Christy Smith of Studio Moirae:

Yeah, I model too.

But wait. That cool blue urban look. Was it actually like that?

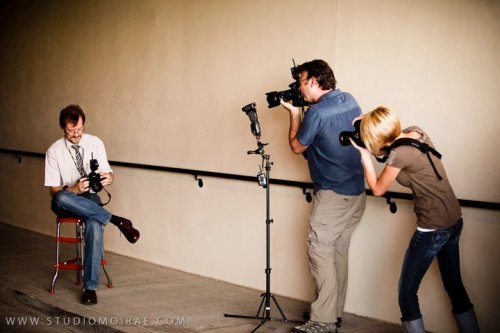
No. The actual scene was like this. Here’s Christy and David Honl taking a test shot:

So wait. How come it’s all blue?

That’s because Christy and Dave set their camera’s white balance to “Tungsten”. That will turn daylight blue.

But then I would be blue too!

Except they are lighting me with a flash with a CTO (“Colour Temperature Orange”, i.e. Tungsten-coloured) Honl gel and with a Honl Grid to make the light go mainly to my head and shoulders. The flash was aimed straight at me and set to manual, and it was fired with pocketwizards.

That’s the kind of cool technique Dave and I taught the participants who came to the workshops Monday and Tuesday in Phoenix, Arizona. If you have the chance, come to a future one: they’re fun and you will lean sooo much.

C? F? No, K.

K for Kelvin, that is.

If you find that your white balance setting still leaves your pictures yellow when taking pictures in tungsten light even when you set the white balance to Tungsten, try a Kelvin value if your camera supports that. I find, for instance, that in my bedroom 2700K is about right.

If your camera does not support that, use a Custom white balance setting after you shoot a white sheet of paper.  Your camera’s manual will help in this.

Of course if you shoot RAW [corrected]  this makes no difference, but I still recommend doing this: it reduces your post-production work, plus your back-of-the-camera previews look better.

Eyeball it

You shoot RAW, perhaps (at least I hope you do). That means you need not worry about setting white balance while shooting.

So how do you set white balance in post-production?

Ideally, you include a grey card and use the dropper tool in Lightroom (if that is what you are using) to take a neutral reading off this. But if you do not have a grey card in the photo?

Look at a student who kindly agreed to be the subject of a test picture. One: the original photo

Two: after I take a white balance off the eyeballs:

Three: as a personal preference, since I like warmer light I then always drag the colour temperature slider to a slightly higher temperature (a slightly warmer light):

And hey presto – done.

This is quicker than doing it on the camera, and more accurate, and you do not waste your subject’s time.

Chili chicken.

I have always thought that for clarity, “white balance” should be called “colour balance”.

White balance means “interpret the red-blue-green respective channels to match the colour of the light hitting the subject, in order to neutralise the colour cast”. Your camera does this every time (Auto White Balance, or AWB).

When it gets it wrong, which sometimes happens, you see a red, or blue, or green cast to the light. In that case, you can correct this by manually telling the camera the colour of the incident light. Setting the white balance, in other words.

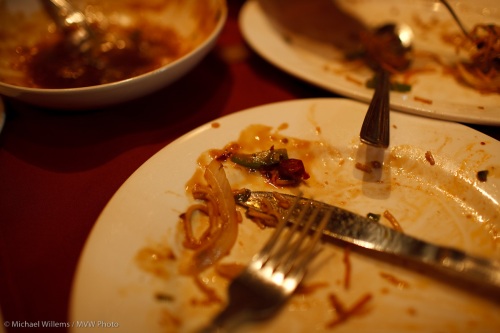
So you go from this (tungsten light):
MVWS0116

To this (corrected).

MVWS0117

That was the chili chicken I had with Baz Kanda, a very talented Ottawa/Mississauga photographer, just the other day. Or rather, it was the remains after we had eaten the chicken. And a photographer plays with his camera even when eating dinner. And when you use a fast lens, like the 35mm f/1.4 I was using here, available light is enough.

TIP: if you shoot RAW (which I do 99.9% of the time) you can leave your camera on “auto” at all times and do it in Lightroom or Photoshop later, on your computer. By clicking on a white item (e.g. the place) with teh white balance dropper. Yes, that’s a bit more work while editing – but it’s also a lot less work while shooting. Guess what I prefer, so I can concentrate on the Chilli Chicken?