Flowers

Pssst… wanna know a secret? Come closer. I’ll tell you a secret or two… closely guarded… don’t tell anyone…

Toronto, May Morning
This is about shooting flowers. We all like shooting flowers, so I suggest you go shoot some. And if you do, the following tips should help.

  • Use a Tripod
  • Shoot them after a gentle spring rain. Or better, create your own, with a squishy water spray.
  • Try a black background behind the flowers – a piece of paper will do.
  • Stop the wind from moving them. Get someone to hold a coat, or a piece of paper, around the flowers.
  • Shoot them from ground level; or shoot up at them rather than down.
  • Use a long lens and stop down to f/16 or better, if you can.
  • Use soft light: not sunlight or flash, whatever you do! Use a cloudy day, or open shade, or window light (great light, just like for portraits!), or if you have to, flash bounced off, or through, a softening surface, like a sheer curtain or white sheet.
  • Use a long lens or a macro lens.
  • Get in close.
  • Use a tripod, did I mention that?

There you go. Nice flower pictures, and they look professional. Don’t tell anyone!

Keep it Simple, Student

The other day, when teaching a class on studio lighting, I decided I may as well be the model. So here it is: my portrait, shot by a student. Sharper than any I have ever had.

Michael Willems - August 2009

Michael Willems - August 2009

Students were shooting with a classical setup. Classic does not have to be expensive. This is all we used:

  • A paper backdrop behind me.
  • Three affordable studio strobes (Key, fill, and hair light)
  • Three light stands
  • Two umbrellas on main and fill light
  • A snoot on the hair light
  • To set it off, two pocketwizards
  • A light meter to measure.

But at last they were using 1Ds Mark 3 cameras (or their Nikon equivalent) and “L” lenses, yes? Right?

No. While there was a wide range of equipment, the picture here wsa taken with a Canon Digital Rebel XS (the cheapest Canon DSLR) and a 50mm f/1.8 prime lens – the cheapest Canon lens. If you could see the picture full size as I am seeing it, you would be amazed (and perhaps a little depressed at the million pores we all have).

That 50mm lens (available for Canon, Nikon and several other brands) is one of the sharpest, and a great lens for these portraits. It used to be a “standard lens” but it is now, with crop factor cameras, a great portrait lens (50mm is now equivalent, on those cameras, to 75-80mm). And very affordable – well under $200.

It is really all you need for this type of professional studio portrait.

Note the way I am leaning forward. That makes a portrait more dynamic. And note the catch lights in my eyes – those are necessary in a portrait.

If you want to learn this type of photography, take a course. Worth doing and worth spending a few dollars on – especially since one thing you may do not need to do is to spend lots and lots of money on expensive equipment.

I'll be your private da… eh, teacher.

Camera

A quick divergence – once only! – from my usual teaching blog. Instead of teaching, let me talk about another option for learning.
In my daily work as a photographer and teacher of photography, I meet many people who would  like to learn more about photography. Digital photography has unlocked a world of new possibilities: digital means new technologies, great affordability, and quick learning because of the instant feedback inherent in the technology.

I refer these people to Henrys’ School of Photography and its excellent courses, which I teach. But if they need training that is different from eth available material offered by Henrys, or if they need at-home training instead of classroom training, my colleague Peter West and myself are happy to oblige. This kind of training is very affordable and effective.
In this kind of “taught by the pros” courses, you will learn exactly what you need to know, when you need to know it. You will learn about your camera, your specific types of favourite photography, and your personal points for improvement. Then you get to practice them.
Whether you know a lot already or have never held a camera before, this type of training in the comfort of your own home can be useful. Even if you think you know all the basics: are you fully aware of how to:

  • Use your focus system? One point vs many? Auto, one-shot or continuous?
  • Choose the right lens for the right job?
  • Shoot in “Manual” mode?
  • Use exposure compensation?
  • Shoot and handle RAW images?
  • Use the Rule of Thirds?
  • Use your camera’s multi-flash system?
  • Use a flash when it is bright outside? And why?
  • Shoot at night?

Because this type of training is individual, we will be able to meet your exact requirements.
Where do we offer this? Anywhere at all. Usually in the Greater Toronto area, but everywhere else is possible too.  And as a traveller who has worked in 33 countries, when I say everywhere, I mean pretty much everywhere.
Check out the site here [link].  And start your next phase of photography.

The Honl Flash Modifier System

More and more, I leave my studio lights at home – strobes are a hassle to carry – and I shoot with speedlights modified with the Honl Photo flash modifier system:

MVWS6659
This system, which consists of the Honl speedstrap, grid, gels and snoot, makes small speedlights practical for studio-like shooting without the hassle. As a photojournalist and on-location general shooter, I use it all the time.

The shots below, taken in a few minutes of my friend Storey the other day, illustrate some of the effects.

My camera, a Canon 1Ds MkIII, had a 580EXII flash on it to drive the second (key) flash; the key flash was a 430EX, handheld. The 580EX did no work other than drive the key light; all the work was done by the key light, i.e. the 430EX, combined with ambient light. To achieve this, the camera was fired in manual mode at 400 ISO and the speedlights were using E-TTL.

Picture 1 : straight flash aimed at the subject.

StraightFlash

Picture 2: using the grid. More focused light on the subject. The kind of “Euro” effect I used to achieve in Photoshop. Now I do it in camera – leading to efficiency gains. Don’t you love this kind of “light falloff outside the subject” effect?

HonlGrid

Picture 3: now using the snoot (and -1 stop FEC). Now we are really lighting just the subject. Drama, baby! (Of course normally I use the snoot not for this but to add hair light).

HonlSnoot

And finally just for fun, picture 4: grid combined with a red effect gel. And setting the white balance right now means the background turns green even without a green flash or green ambient light. Magic!

HonlGel

This is all very easy. Honl is now available at Henry’s. If you come on one of my courses I would be delighted to show you these products – they are entirely solid. Get yourself some speedstraps and snoots, grids and gels (both correcting and effect), and do pro work with a few speedlights and preserve your back.

Close-Far Adds Depth

MVWS7604

In my teaching role, I am often asked “why are my pictures not spectacular the way the real thing was”. Usually in the context of something impressive and grand, like the eponymous Canyon.
The reason is usually “because you have added no depth”. Our eyes help our brain see in two dimensions, as does the fact that we move about. In a photo, neither of those happen. So your photos can look flat.
As I have mentioned before, there is a way to avoid that. As said earlier, we call this technique “close-far”. By adding a close object, and making it large, the far distance seems more distant – i.e., we see depth.
To do this, we use a wide angle lens and get close to the close object.
One thing I have not pointed out before is why exactly this happens. Is it due to the way wide angle lenses are constructed? Something special in the glass?
No. It is simply “where you are”. The difference in relative distance. In principle, any lens would do this.
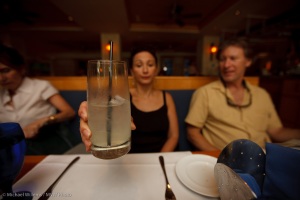
In the picture above, Lynda is three times farther away from me than the glass. That is why the glass, being three times closer, looks three times bigger – giving my rain a clue as to its whereabouts. If I stood back a few meters, the glass and her face would be almost the same distance away from me, so they would look equally large. That’s all – relative distance. The lens does not come into it – except of course if I stood back and had a wide angle lens, Lynda and the glass would both be very small. That’s why I would use a long lens when standing back.
That, and that alone, is why we use wide lenses close to a close object to emphasis distance to a far object.

Nuking the sun

Daniel Alamo

My trip to Texas brought it home again – or it would have, if it weren’t already firmly home. Flash, especially in bright weather, is essential.
I thought it might be good to illustrate this once more by way of example, using some of last week’s Texas pictures.
When, then, do you need flash? Leaving aside the obvious “when it is dark”, I will concentrate on three more interesting cases, both to do with mixing light.
Case 1: to light backlit subjects. Look at Jason in Little Rock, Ark (on our way home). In image one, he is backlit, so while the background is exposed properly, he is too dark. Short of putting him into the sun, there is no way of escaping this problem other than by metering off him or using “+” exposure compensation (which would make the background way too bright), or by using what we call “fill flash”.

No Flash
You can even use your popup flash for this: it gets you from image one to image two, where Jason is lit properly:

Flash

Look how much better that looks. And note that in this case, where the flash is adding to existing light it is OK to aim straight at the subject.

Case 2: to darken the background; in particular, the sky. It comes as an epiphany to most photographers when they realise that you can make a blue sky anything from deep brooding dark blue to milky white, just by adjusting the exposure. Turning the sjy dark by overpowering (or “nuking”) the sun is a very powerful creative technique.
The picture of Daniel above, at The Alamo, illustrates this. I metered using the fully automatic evaluative (Nikon would call this “3D Matrix”) metering, and I used an exposure compensation setting of minus 1 stop. That darkened the sky. Then I used my 580EX MkII flash to add light to Daniel’s face, which would otherwise be way too dark. The shutter speed was 1/250th second (the 1Ds’s maximum sync speed) at f/14 at 100 ISO.
Case 3: to add colour. The BBQ picture below shows how this is done. Available light alone would not have made the meat (and Texas is all about meat) look at bright, vibrant, and if you are a carnivore, inviting. Adding flash (and in this case, bouncing it off the wall to avoid shadows) adds vibrancy to the colour that you would otherwise miss dearly.

BBQ

So turn on your flash and have fun!