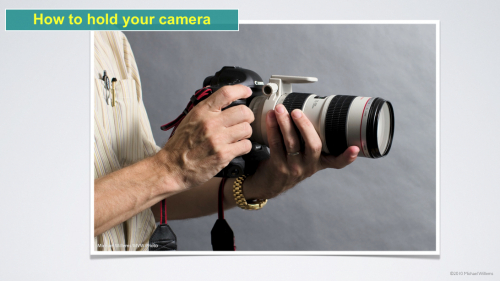
How to hold your camera

Look at how I am holding my camera here:

Holding a lens (Photo: Michael Willems)

Even without the long lens, that is how you should normally hold your camera: left hand under the lens, and turned so that the four fingers are below the lens, and the thumb left/above.

Why? Because this way, you stabilise the camera more. And unless you are using a tripod, stability is everything.

To zoom, use thumb and ring finger of your left hand – hand stays where it is. And to take a portrait shot, with your right hand, move your camera a quarter turn up – the left hand stays as it is.


Lightroom Shortcuts

Abobe Lightroom is about productivity. The faster you can work, the more time you have for shooting, not editing.

My main three Lightroom shortcuts are very simple:

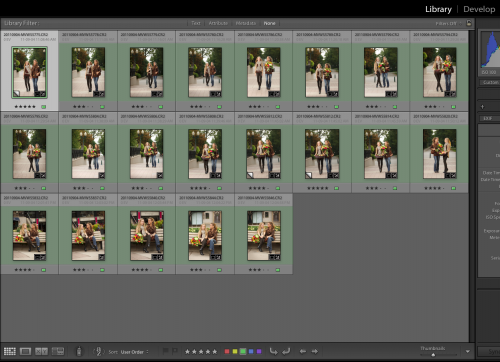
G – takes you to the “Grid” view in the Library module:

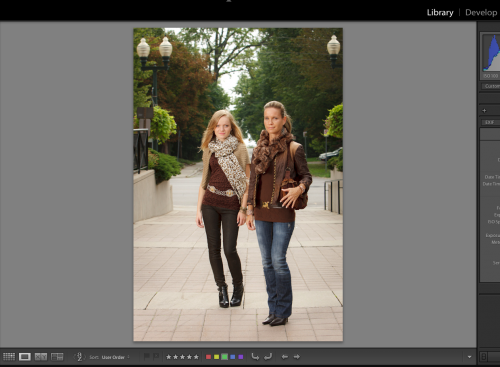
E – takes you to the “Loupe” view in the Library module:

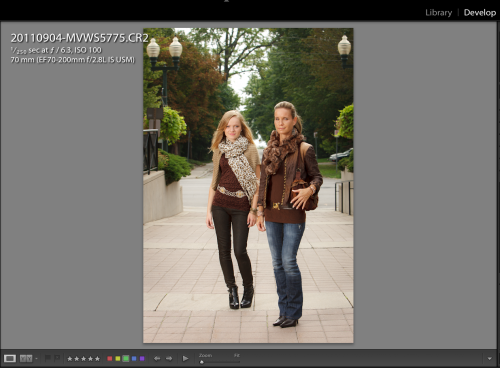
D – takes you to the Develop view in the Develop module:

I switch between these views many times a day – it is amazing how a few simple shortcuts like this can make your life more productive.

Also try F (full screen toggle: tap it three times to cycle through the options) and L (Lights out – ditto).


There are of course many more shortcuts and nice-to-knows: Michael does photographer coaching, both remotely and in person on location: contact me if you are interested.

Vignette

I admit to a guilty pleasure: I like vignettes. In other words, I like a dark area around my subject, to make it stand out.

Like this:

Which , when subtle enough (yes, I am laying it on a little thick here so you can see it clearly), looks better to me than this, the original:

You can achieve a vignette like this by using the “Post Crop Vignette” function in the Lightroom Develop module’s “Efects” pane. Or in Photoshop.

But you can also do it with your lens. And in some cases, like when I shoot news, this is the only way: when shooting any editorial picture, you may not change anything (other than cropping, white balance and exposure adjustments). Distorting is not allowed!

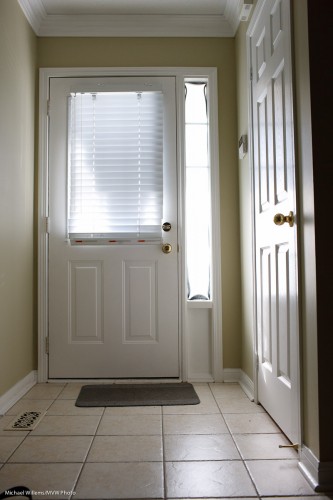
But if I shoot with a fast lens wide open, I can get the same. Here’s my 35mm lens at f/4:

Hallway (Photo: Michael Willems)

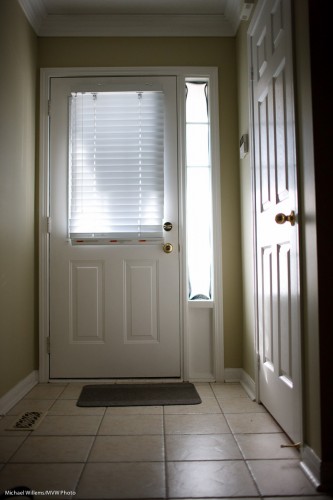
And here it is at f/1.4 – wide open. See the effect?

Hallway (Photo: Michael Willems)

And no editing was done here – so I can do this for news pictures when I like.

Of course the drawbacks are obvious: very narrow depth of field can be too narrow.  But often, the vignetting effect is beneficial, which is one reason I sometimes shoot wide open.


Lightroom tip – today only

I see that today, Adobe is offering their Lightroom 3 software at 50% OFF.  (Today only – that is October 11th – until 11:59pm).

That’s $149.50 (US) – half the usual $299 price.

… and yes, this offer is valid in Canada.

Check out www.adobe.com for details. Right now. Lightroom rocks, I run my entire workflow on it – and it is available for Mac or PC.


Lightroom Tip: Go Solo

In Adobe Lightroom, the organizing/editing app of choice for most pros, you can use (and hence, see) a lot of panes full of functions to the left or to the right of the image or images you are looking at. In Develop module, these panes include Basic, Tone Curve, HSL, Detail, and so on; each pane with its own set of functions.

All those panes can result in a long list of functions: one that can be impossible to get a quick overview of.

And that is why we have “Solo” mode. Right click on any pane’s name, as for instance I am doing here on the “BASIC” pane in the DEVELOP module:
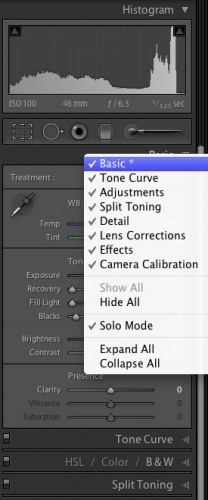
And as you see, there is an option called “Solo Mode”. Turn that on, and from now on only one pane opens at a time in that module.

So if for instance I click on the “Tone Curve” pane, the Basic pane and any other panes that are open, instantly close.
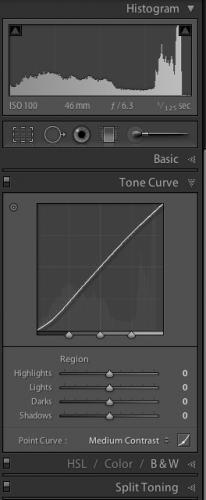
This makes Lightroom much easier to use.

Note, you only need to turn this on once, but you need to to it on each side (left and right) in each module (Library, Develop, Print, etc).


There are of course many more shortcuts and nice-to-knows: Michael does photographer coaching, both remotely and in person on location: contact me if you are interested.

Props and stories

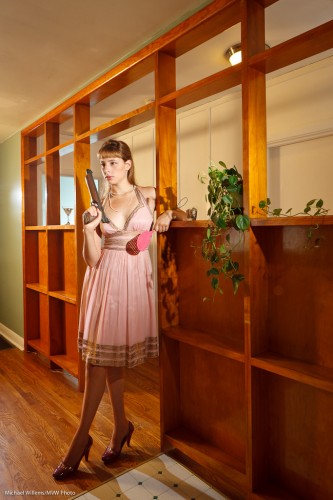
This photo, from a recent workshop Joseph Marranca and I taught, shows the importance of props:

The props here make the story. A well-lit pretty girl is interesting (see all the shadows?), but the photo becomes artistic when it has “off-kilter” items.

Like the 1960s background. And the martini-glass. (“Mad men”, anyone?). And then there’s the red Wizard of Oz shoes, and the dress. And of course the gun. And the flyswatter.

So when you next do a creative shot, ask: what odd , interesting, juxtaposing, curious props can I add?


Magic Bowl

A simple trick for you today.

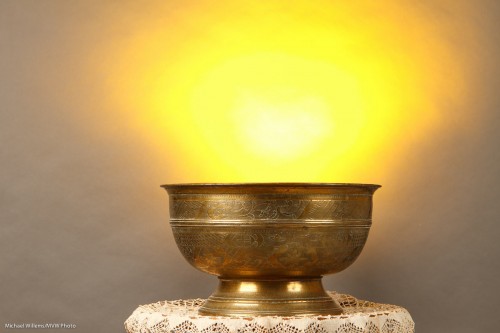
How do you create a magic bowl like this?

Magic Bowl (Photo: Michael Willems)

Gold? Incantations?

Simple technology, of course – you knew that, or I would not have mentioned it here.

  1. Use studio lighting with a key and fill light.
  2. Use a darker background – or move the subject away from a lighter background, to also make it darker.
  3. Then light the background with a flash with a gel – I used a speedlight (as it befits the speedlighter), with a Honl Photo “egg yolk yellow” gel.

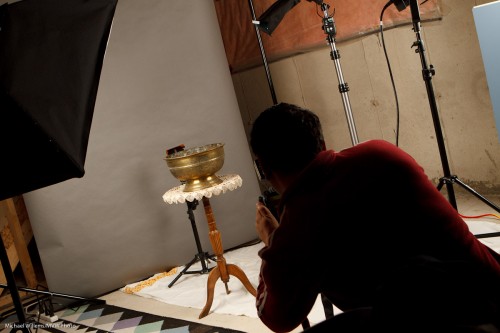
That looks like this:

Magic Bowl Setup (Photo: Michael Willems)

See the flash behind the bowl, aimed up? Simple, innit – once you know?


Hot lights, strobes, or speedlights?

There are three types of studio light:

  1. Hotlight: continuous lights. Like lightbulbs.
  2. Strobes: big studio flashes.
  3. Speedlights: small on-camera or off-camera battery-powered flash units.

Hotlights (or continuous lights; i.e. light bulbs, like tungsten or fluorescent) have the advantage that you can see what they do while setting up the shot. They are what you learn at school, since they are easier. They have the drawbacks that they get hot, and that they use a lot of power – meaning more $$$ in bills, and larger cables and fuses. And they can make subjects squint.

Strobes are big flashes – they have none of the drawbacks, but also lack the advantage pof previews. This is why they have added “modelling lights” – continuous lights so you can see where you are aiming the light before you actually flash. But still, flashes take more metering and trial and error than continuous lights.

Speedlights are like strobes but they are portable and light. Drawbacks include the facts that they are not powerful, and that they are powered by batteries which run out, and that they can need more time between flashes to recharge.

Most studio photographers use strobes today, but there is no bad or good decision. Like driving diesel or gasoline, they both get you from A to B.

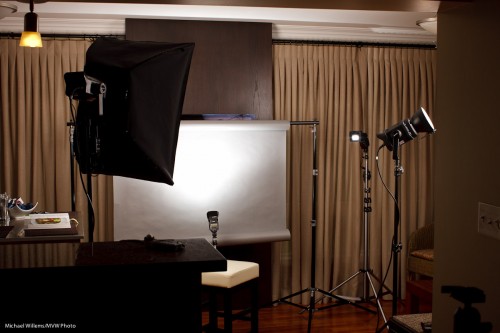
Here’s a recent portrait setup: I used two strobes here, and two speedlights (for space reasons).


Do you need fast lenses?

A recent comment on a post prompts me to remind you of what I have explained here many times before: it ain’t all aperture that makes blurry backgrounds.

Of course aperture is a main factor: the larger the aperture (i.e. the smaller the “f-number”), the blurrier the background. So an f/1.4 lens sure is handy that way.

But other factors count too!

  • Sensor: the larger the sensor, the blurrier your backgrounds can be. (Try to get blurry backgrounds with a little small-sensor point-and-shoot camera: good luck!)
  • Proximity: the closer you are, the blurrier your backgrounds can be.
  • Focal length: the more you zoom in, the blurrier your backgrounds can be.

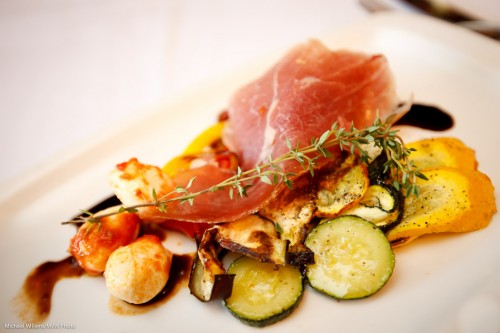
Here, my food the other day at f/2.8: blurry background because I am close. I did not need f/1.4 (even f/4 would leave the background perfectly blurred).

Food at Julia's in Oakville (Photo: Michael Willems)

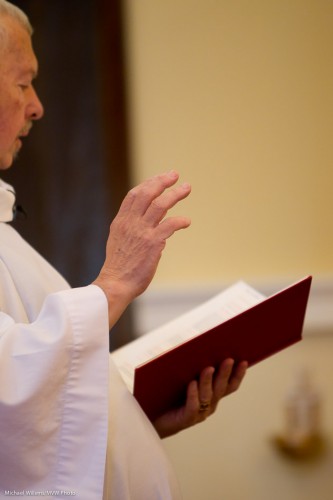
And here, the priest at St Andrews at f/2.8. This time, blur because I am zooming in, using a 200mm focal length. Again no need for f/1.4.

Fr Coughlin at St Andrews in Oakville (Photo: Michael Willems)

OK, so you do not always need an f/1.4 lens for blurred backgrounds.

In that case, why do I love my primes?

  • Light. A faster lens lets in more light, meaning you can get reasonable shutter speeds without crazy high ISO values.
  • Quality. A lens is usually best when stopped down a couple of stops from wide open. So an f/1.4 lens at f/2.8 is likely to be better than an f/2.8 lens at f/2.8.
  • And yes, sometimes you do want blurred background when you cannot get closer or use a longer lens!

I hope that clarifies things. You see, to be a competent photographer you need to fully understand this – it has to become part of your DNA, as I told my Sheridan College class the other day.


Exception

I think for once -and this is a big exception on this daily blog –  I will desist from a post: I think today may be a good time to wait a bit and to remember Steve Jobs, who passed away last night.

On a photography blog? Yes – because Apple hardware and software is big in photography, and because he did what he believed in , and because just last night in a class I was saying Apple should design digital camera interfaces. If that was the case, I would be able to cut the length of my beginners’ classes in half.

So – sad news, even if not unexpected. Steve Jobs was 56.