Long or wide?

When I shoot an event, like last Saturday’s Christening, I usually shoot with both long and wide lenses.

So here I had:

  1. A Canon 1Ds3 with a 50mm f/1.2 lens
  2. A Canon 1D4 with a 70-200mm f/2.8 lens (meaning really a 90-260, since the 1D has a 1.3 crop factor).

I shoot the 50mm lens when I need:

  • More light – if I shoot at f/2.0 I let in a stop more than the 70-200 f/2.8 can, and at f/1.4 another stop. This can come in handy.
  • Consistency.
  • Super Blurry backgrounds.

And I use the long lens when I need:

  • Grabbed shots of expressions: “candids”.
  • Distance – because I cannot come too close during a solemn ceremony without spoiling the mood for everyone.

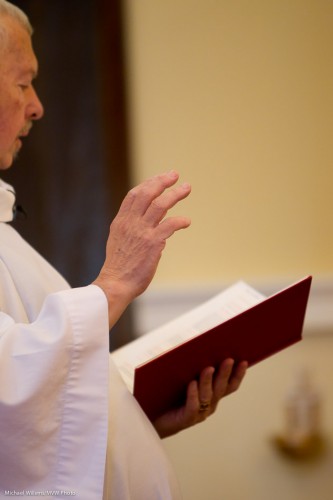
An example of the long lens:

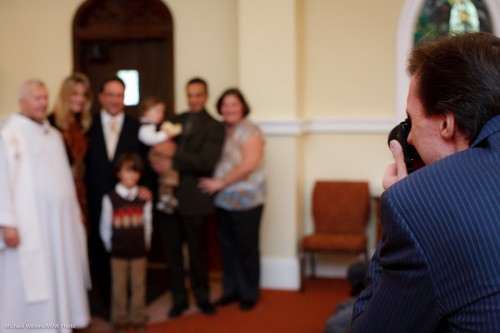
And one of the 50mm lens:

Could you shoot an event with just one lens? Sure. That just means you will be shooting one type of photo. not all types of photo. If you only bring a wide lens, for instance, you will need to forgo the candids and get closer, instead. But of course it can be done. Do not get into gear too the extent that you think the gear determines how good you are. It doesn’t – it just helps bring it out by extending the range of options at your disposal.


Dark

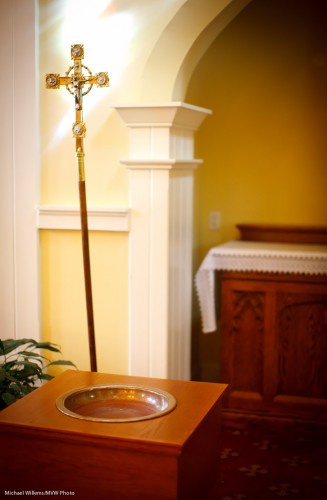
Sometimes it is dark. And yet you need to make it look light, like this, from last weekend’s christening shoot:

Church (Photo: Michael Willems)

I shot that with a 50mm f/1.2 lens, at these settings:

  • RAW
  • 1600 ISO, f/1.4, 1/100th second
  • And then I had to push it in post-processing (and remove the resulting noise)

So imagine. At f/2.0 that would have been 1/50th sec, and at f/2.8 barely 1/30th second. Which is too slow to avoid motion blur. And worse, many of them I had to shoot at 1/30th second. That would have been 1/8th sec at f/2.8 – not doable at al.

The lesson: some situations are really really dark, and if you cannot use flash (either because you cannot bounce, or because you are not allowed to use it) you have to either go to very high ISO values (like 3200 and above), or use very fast lenses, or push process. Only fast lenses and flash do not affect quality.

Affect quality:

  • Push processing
  • High ISO (1600 and beyond, depending on the camera)

Do not affect quality:

  • Flash (except light quality)
  • Fast lenses (except depth of field)

So… I love fast prime lenses, and now you know why.


Photoshop, Elements or Lightroom?`

An often-heard question, here at Willems Central: which one should I use?

  • Adobe Photoshop Creative Suite, at around $1,000?
  • Adobe Photoshop Elements, around $ 100?
  • Adobe Lightroom, around $300?
  • Apple Aperture, around $150?

Actually, that’s a comparison of Apples to Oranges. They are different and address different needs.

Photoshop and Photoshop Elements address the need for “deep editing” single images. Getting Vogue front page and want to move a nose? Stretch legs? Turn red into green? You probably want to use Photoshop.

Lightroom and Aperture address a different set of needs. They offer:

  • Asset management. Great tools for comparison between images. Ranking, rating, organizing, searching, sorting, filtering, keywording, and so on. Amazing tools.
  • Quick editing – much quicker than in Photoshop. Not as deep, but as deep as a photographer usually needs.
  • Non-destructive editing – your original images never get touched.

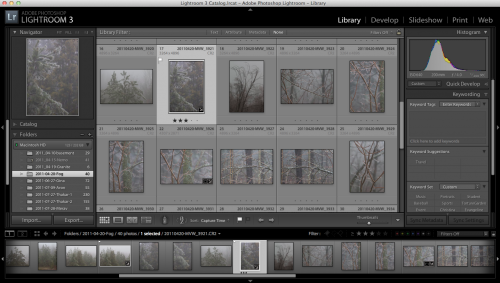
You can see Lightroom here:

Other differences:

  • Lightroom and Aperture can be learned in a few days. Photoshop will take you months to fully master.
  • Aperture is more Apple-like in that it wants to organize where your files are; Lightroom is more free in that it more readily leaves it to you.
  • Aperture is for Apple only; Lightroom is for Apple or Windows.
  • Photoshop CS contains “everything”; Elements is “for photographers”.

So what did I choose:

Both.

I work in Lightroom 99% of the time. LR saved me 75% of my post-production (finishing) time. ‘Nuff said! But occasionally I need to pop from LR into Photoshop. If you have more tan one image to finish, I recommend you start with Lightroom (or Aperture); and add PS/Elements later.


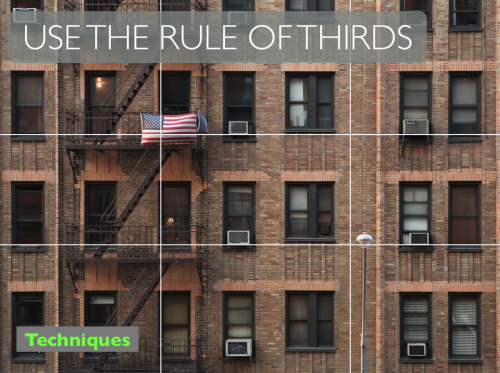
Rule of Thirds

One day I’ll talk abou the rule of threes – but today, I’ll repeat the rule of thirds.

Like in the image above, taken from my room in the Chelsea Hotel in New York City a few years ago.

Simply said:

  • Divide your picture into three columns and three rows.
  • Put lines (like people, buildings the horizon) near the lines.
  • Put objects (like the flag) on the intersection of lines.

That usually makes your pictures look much more pleasing. Don’t be Uncle Fred who puts every object in the centre of the image. Off-centre composition, using the Rule of Thirds, makes your images more pleasing.

Of course if you have a reason to centre your subject: do. But in the absence of such reason: use the Rule of Thirds.


Make it RAW

If you are shooting with a digital camera, your camera may give you the option to shoot in JPG format or in RAW format. All SLRs have this option; many compact camera do, too. Check the menu.

Why shoot RAW? It has drawbacks!

  1. A RAW file is three times larger than a JPG, so fewer images will save on your card, and it will take longer to download them. And you will need more hard disk space.
  2. A RAW file is in a camera-maker’s proprietary format and you may need extra software installed to read it. You cannot take it into the camera store for a print unless you first convert it to JPG.

Yes, true.

But it also has advantages, which greatly outweigh the drawbacks.

First, a RAW file contains much more information about light than the JPG that you will eventually make from it. That is a key part of your understanding: eventually, a JPG file will be generated. If doing this in camera, this means that the image is processed a certain way by your camera. While if you do it later, on your computer, then if you have under- or over-exposed a RAW image, for instance, you can “fix” it before you make that JPG.

And second: When a JPG is made, many settings are applied. Settings like:

  • Should it be a colour or black and white image?
  • How much sharpening should be applied?
  • How much extra saturation should be applied?
  • How much extra contrast should be applied?
  • What white balance should be applied?
  • What colour space should the JPG be encoded in, sRGB or AdobeRGB?

Believe it or not, you have settings in your camera for all of the above, so whether you are aware of it or not, whenever you take a picture, you are always making all these decisions. And if you are making a JPG in the camera, all these settings are applied to the image. So they are final. While a RAW file also contains your settings, but only as suggestions, and all the original data is part of the file. So if you want to change your mind: no problem. One click in Lightroom, Aperture, Photoshop, or whatever software your camera maker gave you, and you can change any of these settings, without any loss of quality.

So if you set your camera to black and white and you create a JPG, not all the king’s horses, or all the king’s men can bring the colours together again. But if instaed you shot RAW, one click and bingo, colour is back.

That is why I only shoot RAW images, ever.

“But it’s extra work, Michael!”

No it isn’t! IF your exposure and all the above settings were all correct in the camera, your software will follow them and create the right JPG for you – correct first time. No extra work.

It’s only extra work if you choose to not set it all while shooting. I often don’t  worry about white balance while shooting, for instance, since it saves me time while shooting – one click later at home will set the white balance. So in choose to not spend time worrying unduly about white balance while shooting, so I can concentrate on composing. That’s a choice!

SO if you are not yet shooting RAW images: you should be. Unless all your camera settings are all correct whenever you shoot. In that case, hats off to you, and carry on with JPGs!