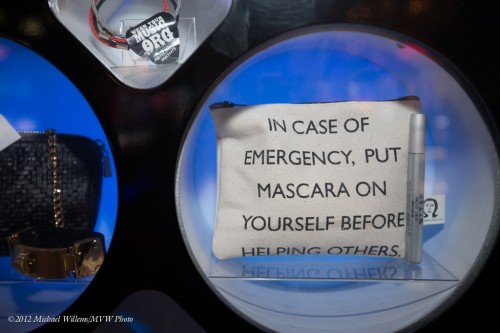
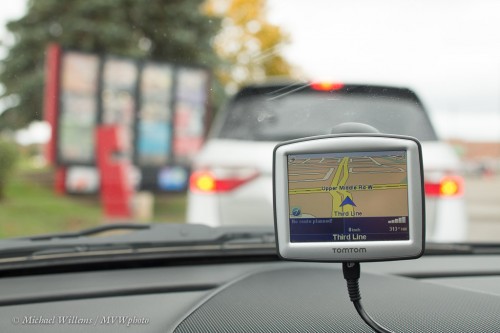
…I always carry a camera, and whenever I see anything funny, I shoot. Like at a casino vending machine yesterday.
Monthly Archives: November 2012
The Decisive Moment
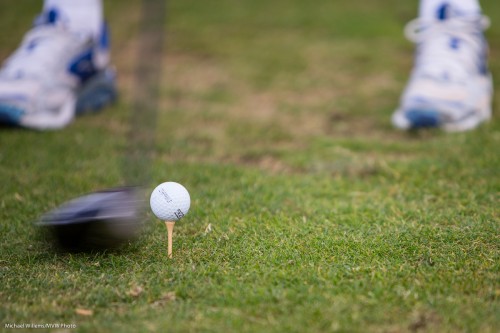
Sometimes time is the important part of an image. Like here, in this image taken yesterday afternoon of a golf ball about to be wacked:
Time is of importance here in two ways:
First, the moment. A millisecond later would have been too late; a millisecond earlier, too early. How do you capture these moments? By shooting a lot, set to continuous shooting. Shoot streams like this and if you are lucky, maybe one in five will have a good image like this. And that is with a fast-shooting camera like my 1Dx, which shoots 10 frames a second; a slower camera would give much less of a success rate.
Second, the motion. A faster shutter speed would have failed to show the club’s motion; a slower shutter speed, and we would have seen just a blur.
I shot this image with a 70-200mm lens, with the camera in manual mode at 400 ISO, f/2.8, 1/1000th second.
And for the record, I am a lot better shooting golf pictures than I am actually hitting the ball…
Red
One thing I have always told my students: “Include something red”. OK, that is a little exaggerated. But there is a grain of truth!
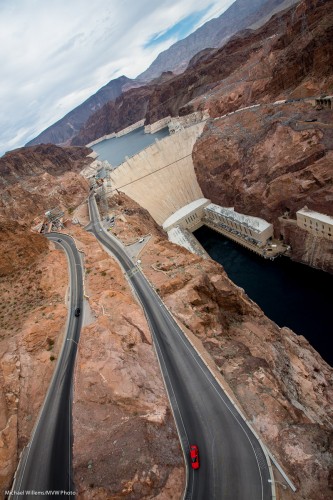
Look at today’s image, of the Hoover Dam:
What makes this a good image? Well.. I would say: the wide angle, the colours, the tilt, the rule of thirds, the curves, and, as the cherry on top, the red car. A little contrast like that is great. Juxtapositions. Contrast. Storytelling. And red, in a green and brown and blue nature scene.
Techniques When It’s Tough, Continued
Tough shoots, when nothing works for you? “Gibt’s Nicht Gibt’s Nicht“, as a German acquaintance used to say. you can always do it.
Here’s yet another way. Shoot without flash if you must, in a hurry, even with the wrong settings and fix later.
This image, from last Saturday’s Bat Mitzvah party, was taken at 1600 ISO but the flash was not ready. Nevertheless I wanted the moment and could not wait, so I took the image:
Now since I shoot RAW ( a must!), I can then pop up the exposure by, wait for it… 2.8 stops. Almost three stops and yet a very usable picture results:
Now do not get me wrong, I am not advocating making bad pictures and then trying to fix them in post. What I am saying is that you have a large number of techniques at your disposal, and sometimes even this one comes in very handy. A safety net, if you will.
___
A good photographer has all these at his or her command – that’s why you hire a pro for shoots. And those of you who want to learn these techniques: I am available for training, one or one or groups.
Traveling today
I am on my way to the American southwest, on Southwest Airlines. So a short post that comes to you from 36,000ft (SWA has wifi).
When I travel, I put the wide angle lens on as my default lens. Sure, I can use other lenses, and often do, but the default is the wide lens.
It is dramatic. It introduces the depth we crave in travel images. It is small and light and flexible. It is also easy to use at slow shutter speeds and it is very easy to focus “all over”.
That’s why my 16-35mm f/2.8 lens is my default on a full frame camera. (On a crop camera, it would be a 10-20 or similar).
Look forward to some images soon. And one more tip: rent a wide angle lens for the weekend and see what it does for you!
Time Tip
TIP: set your cameras to the correct time now. All your cameras. Right now! This is especially important to those of you in areas where the time changed recently to winter (or summer) time.
A ‘Tog Gotta Do What A ‘Tog’s Gotta Do
If you are an amateur or an emerging pro, be careful before agreeing to shoot an event! Events mark important milestones in life, and they should definitely be photographed. But they are tough. Very tough. Much more difficult than studio shooting.
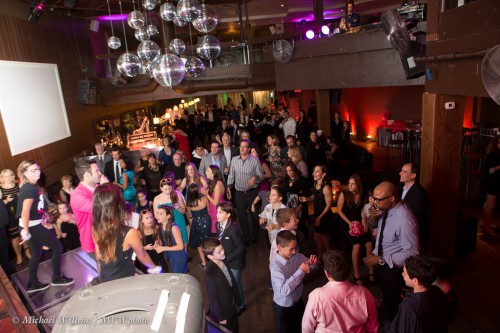
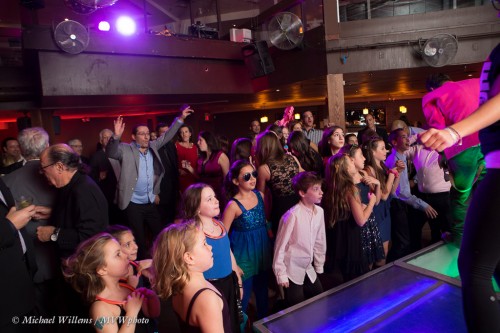
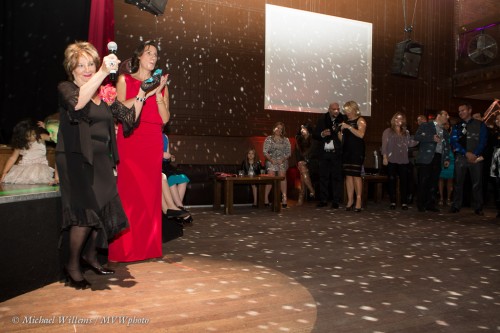
At a typical event, last night night’s Bat Mitzvah party, I need to get shots like this:
I must get this. No ifs or buts. This is a must-have: the Bat Mitzvah girl’s chair dance.
Alas, the photographer at an event like this is faced with:
- It’s way too dark.
- It’s also too contrasty: spotlights bright, background dark.
- No bounce options in areas with high-dark ceilings.
- Other areas have beams stopping my light.
- Other areas have coloured walls or spotlights.
- You set up for one area and then the action moves quickly to a different area – no time to redo your settings.
- Action is too fast for me to follow.
- You get ready and then the subjects turn away from you just as the important thing is happening!
- In the dark I cannot see my camera’s controls.
- In the dark I cannot autofocus.
- It’s all moving too fast to manually focus.
- No-one tells me when important moments are going to happen – or where!
All these and more – but failure is not an option. That’s why you hire a pro to do it.
In the next weeks I shall touch upon this subject repeatedly, with some techniques to get you started. Unless you are an experienced pro, do not attempt to shoot an event (like a wedding) until you have practiced many times. But anyway, my tips and techniques will help.
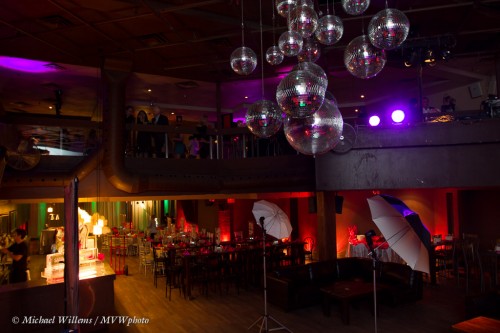
Today – what to do when you cannot bounce off a black, high ceiling? Like this:
Well you can do sub-optimal stuff, like use a Fong Lightsphere (a useful device to save your behind sometimes, but not creative), or use direct flash. Ouch. Better if you get creative!
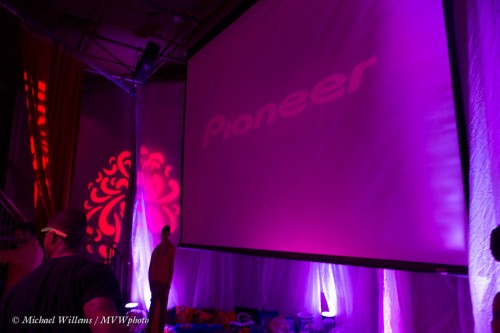
On the stage behind me, I had noticed a big projector screen:
So now I have a solution. Zoom my flash in to 80mm and then aim it behind me, directly at the screen – something like this:
See the bright screen left? Be VERY careful how you aim your speedlight: miss the screen and you have no effect at all.
But if you do it well, you have now solved your problem: a great big softbox on the wall!
BONUS TECHNIQUE:
One I discovered a while ago by accident. But in retrospect it should have been obvious.
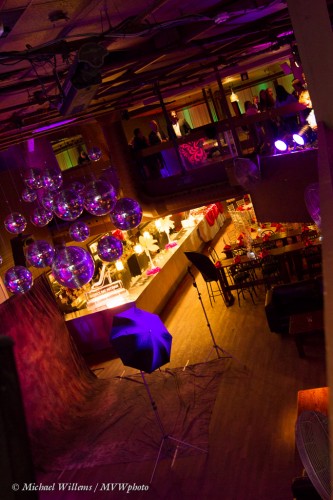
You saw, in the first shots, those disco balls? Aim your flash directly at them and you get great glittery decoration of otherwise humdrum shots:
So there’s just two of hundreds of technique points for you – have fun in this festive season! And remember: don’t give up. Photography is problem solving!
Another Softbox Tip
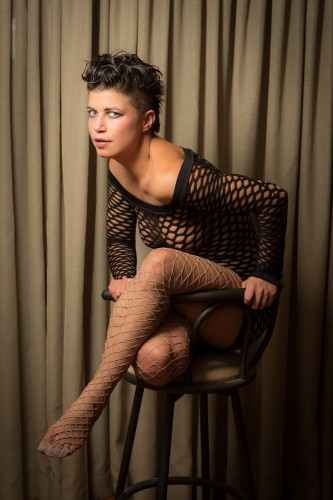
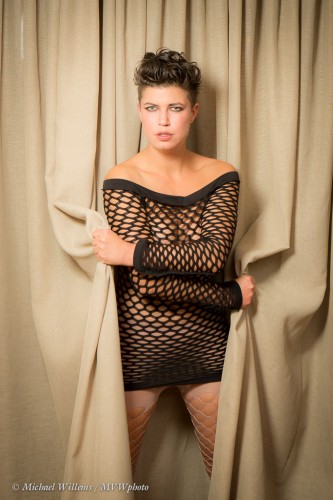
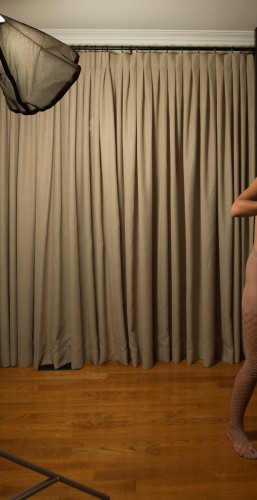
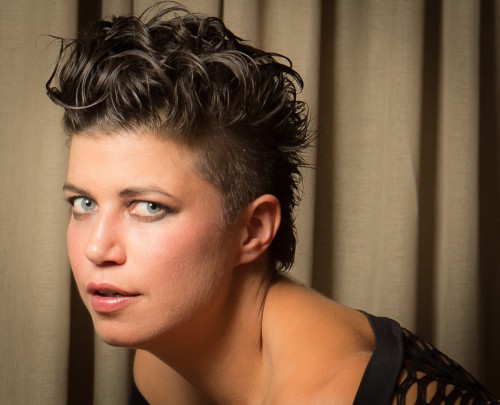
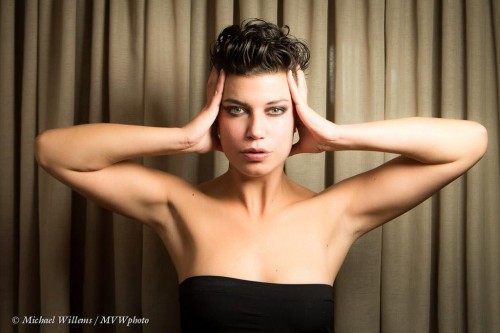
Tonight, I shot my model with her new short hairdo using the simplest of means. And yet, they look like studio shots. With the minimum of post work done, the images look like this – and this was an hour or two ago:
What did I use for this? Simply an available background, a camera, and two speedlights.
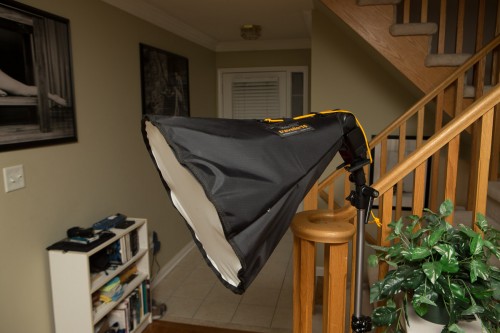
One on the camera, and one on a lightstand, equipped with the Honl Photo Traveller 16 softbox. This softbox, which is much larger than the Traveller 8, looks like this:
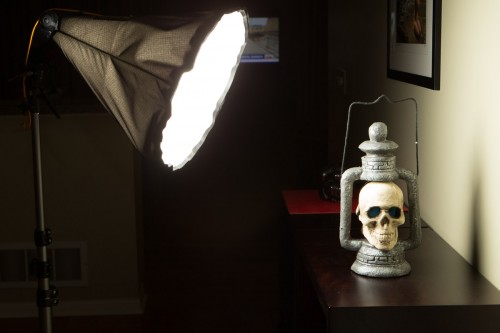
I used a Canon 580EX as the flash. The softbox comes equipped with an inside baffle so that the light spreads evenly:
(Can you tell that Halloween was a couple of days ago?)
The baffle makes the light spead evenly, but it does mean the Traveller 16 is not the obvious choice for outdoors daytime, where power is at a premium. But for outdoors on darker days, or for indoors, it is perfect:
I used this setup:
- Canon 1Dx with 24-70mm lens.
- Camera on manual, 1/200th sec, 800 ISO, f/5.6.
- Speedlight on the camera: 600EX, set as master, but also firing, bounced off the ceiling on the opposite side to the softbox.
- Main speedlight: 580EX II as slave, with the Honl Traveller 16 softbox on a lightstand.
- Master:Slave ratio set as 1:8 (meaning the bounced light just adds a little fill light – three stops below the key light).
Always take a pullback shot! Here’s the main flash:
The results? They are, as you see, very good.
One thing I like about the Honl softboxes is the nice round catch light:
The point of this post: That with simple tools, you can get very good results. You do not always need the clinical studio setting. In fact, I avoid it as much as possible: clinical means intimidating, and strobes mean arthritis.
If you can do it with one or two speedlights, as I did here: do it!
“Manual”
I frequently point out to my students that there is no such thing as “manual” – there are many “manuals”. You can set (not sex) exposure manually. Or focus. Or flash power. Or focus point selection. And so on.
So today let’s talk about manual focus. When you you use manual focus?
If you are me, the answer is “fairly frequently”. Like when I was picking up lunch just now:
The full list of reasons can include:
- Because you like having control.
- Because your lens only supports manual focus.
- Because you are better than your autofocus system.
- Because you are doing macro shots and accurate focus where you want it is critical.
- Because the scene has no clear focus areas (your camera needs good light and good contract).
In my case, all of the above sometimes apply. The AF system is quicker, and pretty good; but I am pretty good also.
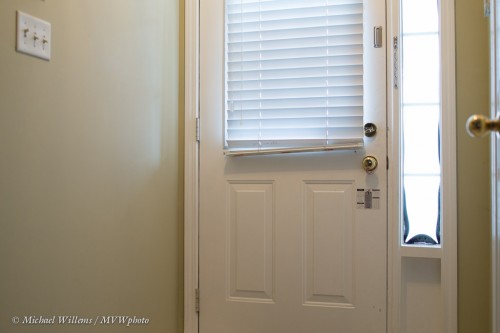
My front door, earlier today:
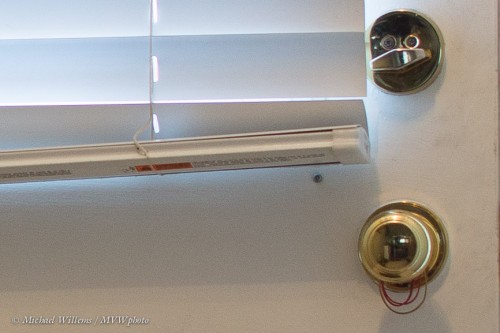
Which as you can see is sharp:
So try doing manual focus for a day. Set the switch on your lens to “M” and do it by hand.
The best technique is to go back and forth around the sharpest point, making the oscillations smaller and smaller. While this is slower then the AF system, it can rival, or sometimes exceed, its results, especially on full-frame classical SLRs, with their bright viewfinder and their clear sharp view. It is a little trickier on smaller-frame SLRs and on transparent mirror cameras like some Sony cameras, but it is still doable.
When do I not use manual focus?
- When the subject is moving
- Especially when I am using AI Servo/AF-C mode (the AF system keeps tracking the subject).
- When I am in a hurry.
But failing this, manual can be a good way to do it.
Oh, and my lunch? A Big Mac, and taken with the Canon 45mm Tilt-Shift lens – a lens which only has manual focus abilities.
Sharing A Shoot
Say you have sot with someone else. Now you want to do your post, and then send them the work you have selected. The RAW files, but also what you have done to them.
If you use Lightroom, that is easy.
Go into the Library module.
Select the shots you have chosen to share. Verify that you have selected them (at the bottom, Lightroom will say something like “125 of 200 selected”).
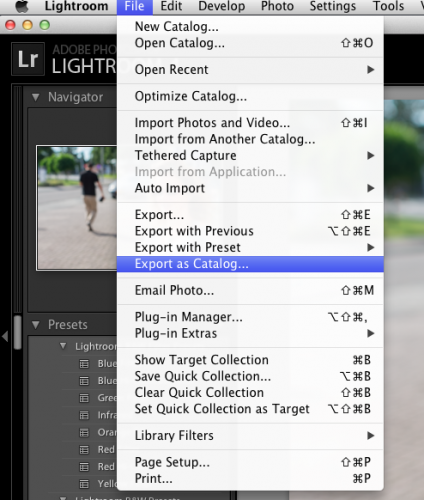
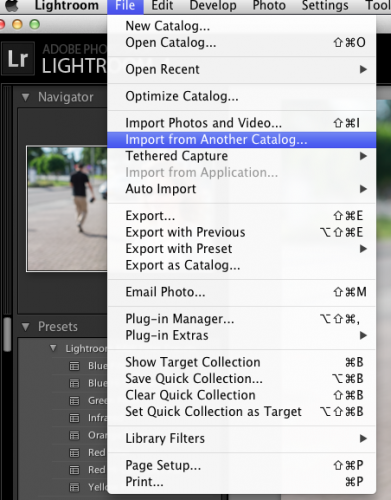
Now go to FILE and select EXPORT AS CATALOG:
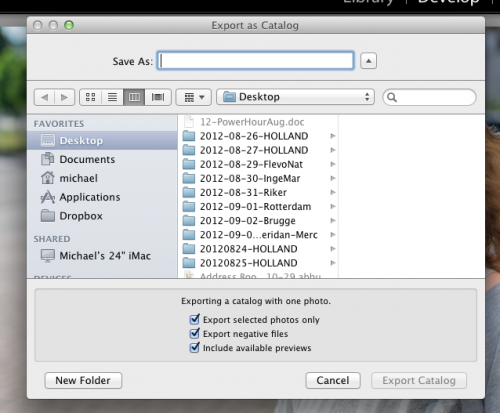
Select a location (I like my desktop). Make sure you turn on “Export Selected Photos Only” and “Export Negative Files”!
Now share the resulting folder and all its sub-folders (e.g. via Dropbox – ensure that you have enough Dropbox space).
Then on the receiving side, select “Import From Another Catalog”, and indic ate te folder in question.
Those folders are now added to your library, and the originals are moved in as well. Mission accomplished!

