Show your work!

As readers here know, I am a big proponent of printing your work: a photo isn’t a photo until it is printed and framed and hung on your wall.

That said, web shares can make sense too. Like this one here, which I made in minutes using Lightroom:

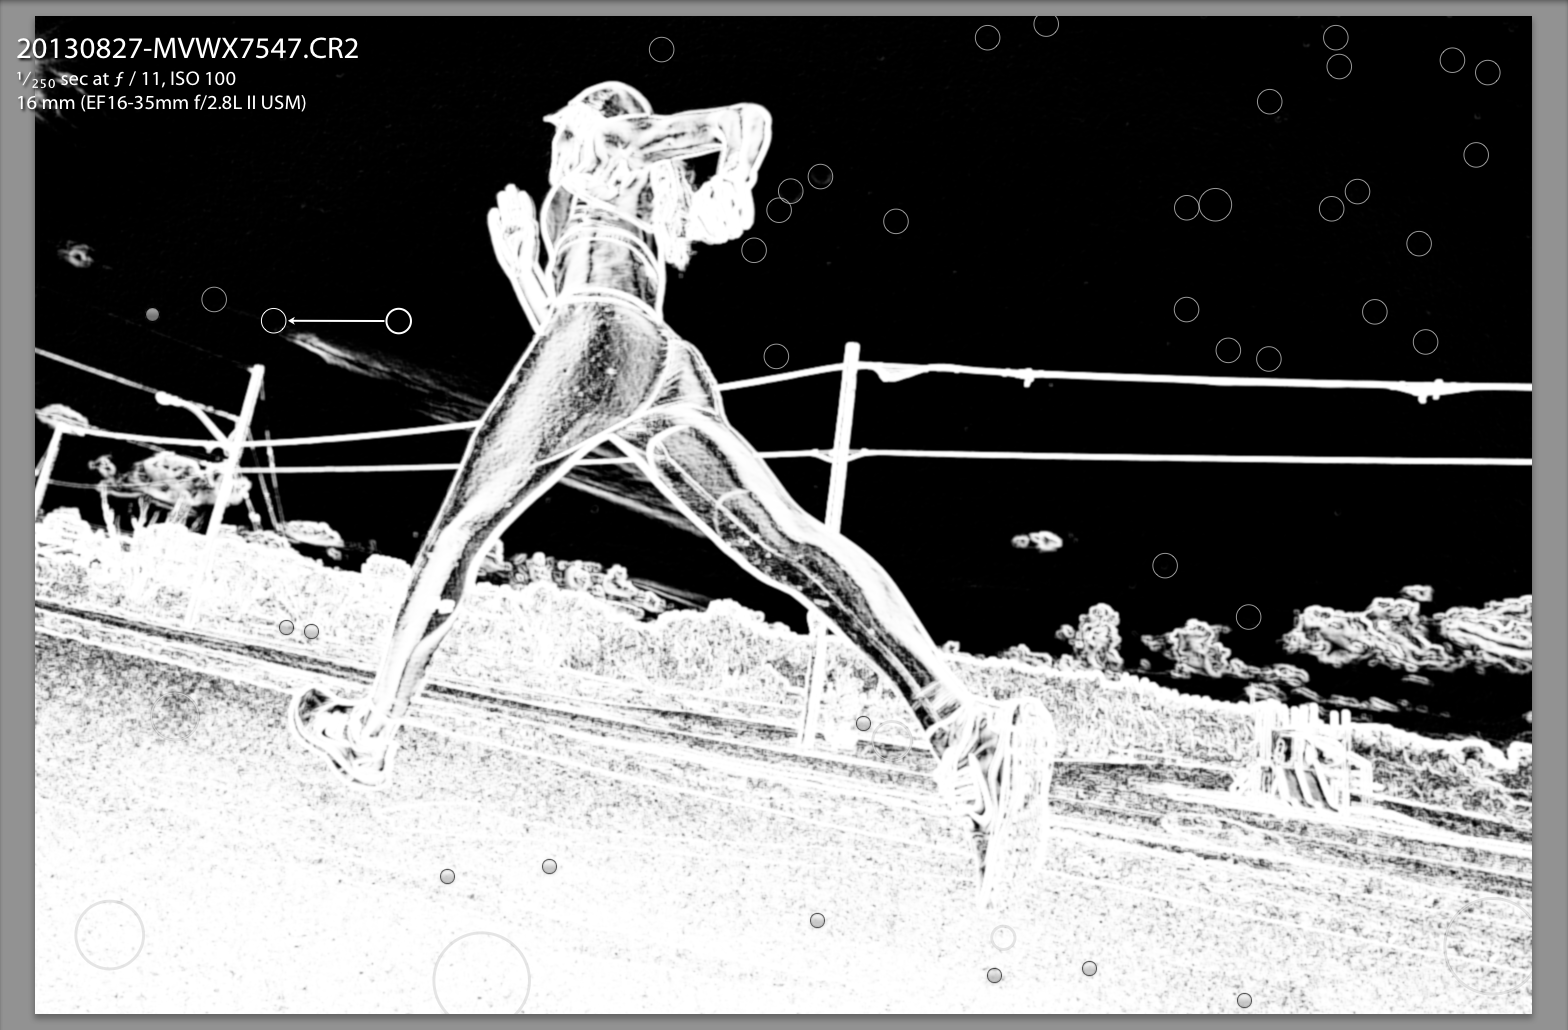
The URL is http://www.mvwphoto.com/PrintSale/

So how do you do this in Lightroom?

The Lightroom part is easy. There are several ways, but here’s how I recommend you do it:

  1. Make a collection of your intended photos.
  2. Sort them into the order you like (that’s one reason you use a collection: you can sort in collections, but not in folders).
  3. Go to the WEB module.
  4. Select a starting layout on the left side.
  5. Now tune that to your liking with the fields on the right side – they are pretty self-explanatory. Just see what each one does.
  6. When done, EXPORT your site. I expert to my desktop, and I call it something meaningful, say “PrintSale”.

Now the more difficult bit. You need:

  • A web site you manage.
  • FTP access to that site (you need a username, and a password, and the ability to upload stuff to your site using that username and password).
  • The ability to create directories in your site, which then will become added to the URL.
  • An FTP client, such as Cyberduck. Which is free.

Ask your provider about this, quoting the stuff above, or direct them to this post.

I manage all my sites on 1and1.com, but there are many other excellent providers too.

So now you upload your new pages:

  1. I start my FTP client (Cyberduck)
  2. I log into my site using its URL and the FTP username and password.
  3. I navigate, if needed, to my site’s root (basic) directory.
  4. I now drop the afore-made folder (e.g. “PrintSale”) from my desktop onto the site.

And I am done! My site is http://www.mvwphoto.com, and when I upload the folder I just made, called “PrintSale”, I can now navigate to http://www.mvwphoto.com/PrintSale/!

This is one if Lightroom’s very cool features, so I recommend you get to know it. Or you upload to Flickr or Facebook, more about which in a future post – but then you get less control.

Two more notes:

Yes, I am doing a special print sale: Back to prints! Follow the URL and contact me if you want one of my works. Details and pricing also on www.michaelsmuse.com, but note, I have special pricing in the period leading up to Christmas.

I teach Lightroom in private coaching sessions, to beginners as well as to pro photographers. In a few hours you learn all you need to kickstart your productivity.


B&W is alive and well

When you look in art galleries, what do you see? Black and white prints. Although this is sometimes silly – in the 1970s, colour started to be seen as art too, so let’s get with the times – sometimes it’s a good thing.

Here’s the rebuilt gate to the Jewish cemetery in Gouda, the Netherlands. The city I went to high school in.

This gate was rebuilt in 1980, long after the Jewish cemetery itself was moved – since no Jews lived in Gouda anymore after the war. One terrible example:  Friday, April 9, 1943, the Jewish retirement home in Gouda was raided by the SS, assisted by Dutch police from The Hague and Gouda. All residents were deported; none ever returned. The Dutch have always “respected authority” – order is order.  Awful, and there’s a lot to make up for. Fortunately, many Dutch families sheltered and hid Jews at severe risk to their own lives.

Incidentally, I believe I am wanted in The Netherlands, for not paying a speeding ticket from last year (they time you on the freeways and then do the math and send you the fine, no trial, no argument. Over my dead body would I ever live there again!). Problem is, they send the ticket to you even in Canada without a payment method, unless you are Dutch and in Holland. No credit cards, no cheques. So of course I did not pay. So I shall be arrested next time I enter that country. All because I drove like 5km/h (3 mph) over the limit on a freeway. Blind and inflexible adherence to “law”. Have they learned nothing since the 1940s? The Nuremberg laws were “law”, too.

Just outside Gouda, this is what things looked like then, and it is what things still look like today:

You see those trees? That’s what I remember, riding my bicycle westward to school every day, fighting that damn wind.

Black and white pictures are a great way to convey such moods.

Here’s how you do this:

  1. Shoot RAW – this is essential
  2. Set your Picture Style to B/W. (“Monochrome”)
  3. Your previews are now B/W – but the pictures are still in colour.
  4. Now use the B&W tab in the HSL section of the DEVELOP module to convert. That way you can tweak the relative strengths of all the colours. Like adding colour filters in the old film days.

    An added benefit: you can change your mind and so colour if you choose. This only works, of course, if you shoot RAW.

    Try to shoot some B/W. It’s cool.

    ___

    Admin news:

    • Courses still open: Flash (Oct 3, all evening) and the 5-evening fundamentals course (weekly, starting Oct 2). These are in Oakville, and small – max. 6 students, and I will run them with as few as two. So, book soon.
    • I have the 24mm T/S f/3.5 tilt-shift lens for a few days, from GTA Lens rentals. But better still: I have arranged a 10% discount for my readers, from the already low prices. Click on the logo on the right. Renting a lens is a great way to try out a lens you’ve always wanted.


    Why use Lightroom?

    Why do most photographers use Lightroom now, instead of, say, Photoshop?

    I think this is for several reasons. One: we are photographers. Photoshop is excellent for illustrators who spend all day on one image, we spend time shooting and getting it right in camera, broadly, and then having to deal with many images. This is one area in which Lightroom shines.

    Second: LR is easy to learn.

    Third: LR works the way you work. Not the other way around. Your files can be wherever you like. And so on.

    Fourth: did I mention its speed when you are dealing with many images?

    Look at this example of an image:

    Needs perspective correction. So.. a trip to DEVELOP module, and within that the LENS CORRECTION pane, and in that, click on AUTO:

    That instantly gets me this:

    Wow.

    Of course it does not always work this well, this quickly, but even when manual intervention is needed, it’s still very, very quick.


    Lightroom 5.2 is out

    And it’s worth it. Lightoom is worth it in general but version 5.2 is worth it specifically. Why? Because it fixes some important bugs, some small issues, as well as introducing some new functionality that you will like.

    The healing tool is better: it has optional feathering now and it samples from within the cropped area.

    Full details on the adobe blog. But if you have Lightroom 5, go do the free upgrade now. These issues, bugs, and features are things that have actually affected me.

    Pro Print Precision!

    In my continuing series of posts for everyone – today, a post for pros, or amateurs who take printing seriously. Which you should: a photo is not a photo until you have printed it. And hung it on your wall, preferably.

    My advice today is this: print straight from Adobe Lightroom. This has many benefits over “just make a file and print that”:

    1. No intermediate file; no need to go down to the restrictive AdobeRGB or even more restrictive sRGB colour space file formats.
    2. No intermediate file also saves time, confusion, and disk space.
    3. Lightroom contains a very good print engine, with great print setting options.
    4. Set it up once, and it’s good forever.
    5. And most significantly in recent versions of Lightroom: soft proofing.

    Everyone who has printed seriously knows that each paper type is good for certain prints only. After you figure that out, you will use one type of paper for prints with a lot of black. Another type for very colourful prints. Another type for prints with a lot of shiny areas. Or a lot of reds. And so on.

    Lightroom to the rescue. This is not a full Lightroom course (for that, come to me privately and I will teach you). This note is for those of you who already know Lightroom and computers well.

    And for those people, in a nutshell, here’s what you do:

    1. SET UP PRINTING:

    Select your photo, and go to the PRINT module. There, over time you will create a print preset of your own or each combination of printer and paper type (and other preferences, such as layout, margins, etc). Update that whenever you make a change to your preset. That way you invent the wheel once.

    In that profile, make sure under COLOR MANAGEMENT, you do NOT select “managed by printer”, but instead you select the printer paper profile for the printer/paper combination you are using (profiles which you have installed separately; from the printer or paper manufacturer).

    In my case, today, for a print that was Canon Pro Luster paper on my Canon 9500 Mark II pigment printer, so I selected that profile:

    Before you actually issue the print command, the computer’s PRINTER dialog will pop up. In that, be sure to select the same paper (under “Quality and Media”):

    OK, that is easy once you set it up, and prints will be reliable and predictable. And right.

    2. SOFT PROOFING:

    But here’s the fun part. In new Lightroom versions, there is an option called “soft proofing”. And that rocks.

    Look under your image. And activate the “soft proofing” option.

    You will be prompted to crate a soft proofing virtual copy; go ahead.

    And now you can see where the print does, or does not, reproduce well for your selected paper and printer type (or for your selected colour space, if creating a file)!

    See the top right, and select the correct profile for what you are printing to. In my case here, Pro Luster paper on the Canon 9500 MkII:

    Now, provided I have clicked the little paper mark top right of the graph ON, I see where this photo will not reproduce well on the paper selected.

    For instance, take the print I was just creating. A lake Ontario sunset:

    Now, if instead of the printer profile I select “AdobeRGB”, I see the following in my soft proofing view:

    Ouch! All those pure red areas are where the colour is outside of what the selected profile can handle. I.e. they will not look good. So I do not even attempt to print this print the way it is via an AdobeRGB file (yes, now you see how bad AdobeRGB is compared to using a good printer’s entire gamut).

    if I select my paper type instead, I see:

    There is still a little pure red stuff going on at the top, but much, much less. (If your print is red itself, like mine here, simply turn the “problem view” on and off repeatedly to see where the problems are.)

    So now I can tweak my image in the DEVELOP module until this last bit of warning goes away. I can use HSL to reduce saturation or hue or luminance of the colour in question, or I can change overall saturation, or I can decrease exposure: I have all the options open. And my print will be good. And I do not have to make four test prints to finally find the paper that works well!

    The Soft Proofing function is amazing. One more reason to live in Adobe Lightroom, if you are not yet!


    ____

    Want to learn? I have scheduled a special all-evening Flash course in Oakville, Ontario on 3 Oct; as well as a five-evening basic photography course, starting Oct 2, aimed at novice to intermediate users who want to learn to use their DSLR properly once and for all.

    These courses are very special in that they are like private coaching: I will only take up to 6 students for each course. The Flash course includes the Pro Flash Manual, and the five-evening course includes course materials and homework. Both are now available for signing up on www.cameratraining.ca/ – see the flash course details on this page.


    Spot Visualization

    You know those sensor dust spots?

    Yeah, I hate them too. When you shoot a sky at a small aperture like f/11, you will see them, sensor cleaning notwithstanding. They’re always there, like little poltergeists that are there to upset you and destroy your images. Modern sensor-cleaning cameras are a little better, but nevertheless, even when 99% of the dust is removed, that leaves the other 1%.

    And that is enough. If you look carefully at this, full-sized (keep clicking), you will see some, e.g. top right.

    But Lightroom comes to the rescue. In the DEVELOP module, at the top, select the clone/healing tool, set it to healing, and now at the bottom, activate “Visualize Spots”.

    You see no spots? Drag the slider at the bottom to the right so you see them all:

    Ouch!

    OK, now that you see them, zap them all:

    Now go back to normal view, and your image is cleaner than clean. Here;’s my final version (again, for best effect, as with all pictures here, click through to see large):

    No dust. Thank heavens.


    Make it all work for you!

    One piece of advice I give all photographers is: make it all work for you; in particular, spend a little time making things efficient. And spend up to a day doing it every month.

    That means things like:

    1. Packing your bags the best way (hint: I have no camera bag. Camera on one shoulder; bag with lenses etc on the other. Camera in bag = unready camera.
    2. Carry a little checklist or drawing that tells you what goes where in the bag(s). Enormous time-saver!
    3. Have at least one camera that is charged and set up, ready to go. Perhaps read settings from a memory card, if your camera allows that, or have a user preset ready to go. That way you can start shooting immediately.
    4. Finding a good camera strap: all my cameras have Domke straps, because they have a rotating joint at each end that avoid tangled straps.
    5. No lens caps on the camera you are using. Filters are your option, but I do not use them unless it’s snowing or I am at a beach or in a sandstorm.
    6. Always carry a flash and some modifiers (I really like the Honl photo range and always carry a reflector and a softbox and some gels.)
    7. Use Lightroom to asset-manage and edit your images. Only go into Photoshop when you need to (and do that from within Lightroom).
    8. Get a Mac – yes, I’ll say it. The productivity gain is so great, I am no longer OS-agnostic: I recommend the Mac with OS X. Yes, I know Windows and I love Linux, but the Mac just gets on with it, its interface is consistent, and especially when it gets to things like networking, it’s just so much more reliable than Windows. (*)
    9. Mark your equipment. Personalize all your gear. label things.


    And find the right apps for your devices. To get you started, I have some recommendations.

    This month’s app winner: One little gem I recently discovered is an app for Mac OS X (i.e. for the Macbook or iMac) called Keyclick from Sustworks (click here for the app’s page). It features selectable sounds and many more options:

    This app makes my Mac’s keyboard sound like an electric typewriter, and I totally love that adjustable sound: it even has a carriage return sound with a bell. At $9.99, it has made typing an activity that I once again enjoy. At the risk of annoying young people like my young engineer son: 1-0 for skeuomorphism. I find that the discrete and heavy click auditory feedback makes me a much faster and better typist. I have been using it for over a month now and it’s proven reliable and useful. And it’s fun to watch people turn their heads looking for the typewriter. Get the 30-day tryout version now, or just get it: it’s not exactly expensive.

    The iPad is a great business tool too. Honourable iPad app mentions go to:

    • OmniFocus for to-dos and project planning,
    • HP15C for a calculator with RPN notation,
    • Exifwizard to tell me the EXIF data embedded in photos I have on my iPad,
    • for credit card payments,
    • Portable Numbers for spreadsheets,
    • Easy Release for releases.

    On the iPad, set up your screens in a way that works for you!

    My rule of thumb: I find that if I spend roughly a day per month setting things up to be optimal for me, I gain at least several days per month forever.

    A Little More”Post”.

    Today, a few more words about “post-production”.

    I tend to pride myself on the fact that “I shoot in the camera”.But even then, there are things you can do “in post”, and that I feel fine in doing when I feel like it, because you cannot do them in the camera; or because in the past, you would choose a particular kind of film. And while you probably should not manipulate all your images, “pixels were born to be punished”, as Frederick Van Johnson says.

    Take this recent nude:

    That was lit simply and neutrally, with one or two flashes (one on the camera and one in an umbrella, if I recall correctly), so I can do all sorts of things with it. “Lighting it simply” is pretty much a requirement if I want the most options  open to me, so that is the way I shot it.

    Now let’s see. Here it is in Black and White, with skin brightened (using the Lightroom HSL slider) to give a high-key image:

    Or consider this, a gritty B/W look, with lots of film grain added as well – view it full size to see the effect:

    Or this, a cold look:

    Or this, an “oldfashioned” look:

    Or this, a split toned look, straight out of the 1960s:

    Those last four were built into Lightroom: a click is all you need. But you can do more yourself, and it is very simple. Like this desaturated look:

    Or this rather Polaroid-like look:

    I think I like the third image best – it suits the model’s look best in my opinion – but that is my opinion. I love the one before last, too. The point here is that all these are very different, and all good.

    So before we take my “shoot in the camera” as mantra: what I really mean is: shoot in the camera as much as you can; i.e. do not use post production as a substitute for proper exposure and lighting. But beyond that: as long as you are not shooting news, alter what you like to get the art look you desire!

    ___

    Need to learn Lightroom? Consider a few private coaching sessions, during which I will get you started very quickly. We will set up your file storage strategy, get Lightroom all set up properly, and I’ll teach you what you need to know to get started immediately.


    Gel trick

    One thing I sometimes use gels (like my favourite Honl Photo gels) for is to allow me to do background shifting – later.

    Let me explain.

    Say I take an image of myself like this, with a light blue gel on the flash that lights up the background:

    If I do not like that colour – provided it’s a different colour from whatever I am wearing and from my skin – then I can easily change it. In Lightroom, I find the image; then I go to the DEVELOP module; then I select the HSL pane; and in it, change the Hue of the colour (which I select with the pick tool, the little red circle on the left):

    And that turns the Aqua and Blue to Purple:

    Instead of the hue, I can also change the saturation:

    If I drag it down to zero, as in this example, then the colour disappears!

    Now, I can change the luminance (brightness) of the area that was originally coloured:

    And dragging it down makes the area darker:

    So just because I used a specific colour, I can do “studio work” after the fact! Of course I keep these adjustments to a minimum: major changes would not be a good idea (you can get funny edges and noise). But the fact that it is possible, and easy, is often very helpfu;l during real-life edits. Personally, I like my last picture best.

    ___

    LEARN WITH ME – NOW!

    • Who is coming to Oakville this Sunday, noon-4pm, for a Flash course?
    • Who is spending five days in my course at Brock University this August (the Niagara School of Imaging)? There’s still space: my “demystifying digital flash” course is indeed on, so book now! Here’s a video about this course: [click here]


    The Creative Cloud

    You may have read that Adobe products are now available as part of the “Creative Cloud”. That mainly means a rental price instead of a “buy once” (really, “license once”) model. Under this model, instead of paying $1,000 for Photoshop, you pay $50 per month. The software still resides on your computer, but it is updated regularly, and the computer checks regularly via the Internet to ensure you have been paying.

    What do I think?

    There are advantages to CC (namely the number of included apps; the constant updates; and the fact there is no capital outlay required), but on the whole, I am not a fan:

    1. Adobe is forcing this change on their clients. Photoshop is no longer available as a stand-alone app (mercifully, Lightroom still is – but for how long?). Adobe has a virtual monopoly, and monopolists should be held against a higher standard than smaller players. Adobe says “jump!”, we say “how high?”. We have no choice.
    2. For most, this will be a price hike. The $50 is an annual commitment (so the minimum is $600!) and it recurs month after month after month – forever. I still use Photoshop CS3 when I use photoshop, which is not often: I do 99% of my work in Lightroom. I do not need most apps.
    3. I have the feeling that when I buy an app, I buy that app, not the right to use it. I know, I know, it is licensing, but is sure feels like buying.
    4. Having to get permission to run my app. What if something goes wrong? or I am not online that once a month (e.g. I am traveling)? Software is mission critical to a photographer. Oh, nothing ever goes wrong? The other day, Facebook would not let me log in, giving me an “incorrect password” error. It was a facebook problem, and there is nothing I was able to do. The day after that, Netflix was down. Again, nothing I could do. Later that week, Tumblr was down for hours. And Adobe will somehow never malfunction? And I will always be online where Adobe can get through (e.g. in hotels, only browsing is allowed).

    Of course, CC has already been pirated, so it will make little difference in practice. I do wish that the customer’s interest was paramount, though, not the need for corporations like Adobe to squeeze every penny out of that customer. I am glad Lightroom is still a paid app, and I hope it stays that way for a while.