My Backup Strategy

As you make more and more photos, backups become more and more important. And of course you make them. Right?

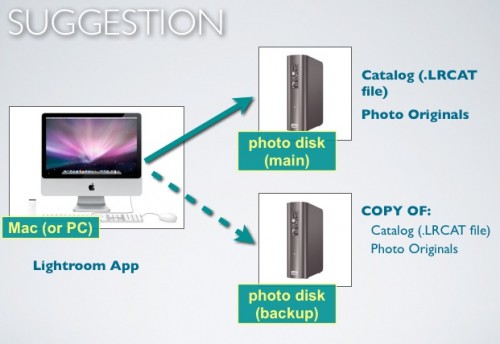
This is what I do:

Details:

  1. My photos live on a 3 TB external drive. When I add photos from a camera, they go there immediately, not to my Mac. Straight onto the external drive!
  2. My Lightroom catalog also lives on that external drive – that way, I can take that drive to anyone with Lightroom installed and I have all my work right there!
  3. When I am happy that the pictures and catalog are good, and ONLY then, I “intelligently” copy the new stuff to a second 3TB drive. I do that only once I am convinced it is good – no sense writing bad data. The script for that intelligent copy is here (link). Intelligent means the script checks all files on both disks, and copies over the differences (anything new gets added to the backup disk; anything deleted gets deleted from the backup disk also).
  4. I do not reformat the memory card until after this is done and verified!
  5. I also back up my regular Mac, using standard backup software – but since I keep little data on that mac, it’s not critical.

OK, so I am pretty well backed  up.

Except I am not. All my data lives on the two drives attached to my iMac. That is very dangerous – many things can go wrong. Things like:

  • Lightning
  • Flooding
  • Fires
  • Burglary (you think the burglar would take only external disk 1 and leave the backup drive behind?)
  • …and more, too much to imagine.

To solve this, there’s a few things not to do:

  • I could back up to DVD drives, but that is very expensive, very slow, and very unreliable. Ditto for CDs.
  • Cloud backup – too early to be practical (making a full backup at today’s Internet network speeds would take months – literally).
  • Keep memory cards – way too expensive.
  • Drobo – this is a possibility (RADI drive), but the Drobo uses its own proprietary encryption.

So here’s the solution:

  1. Instead of more local backup, I use a third 3TB drive, and once a week everything gets copied to that third drive (again, using an “intelligent” script).
  2. And the key: this third drive lives off-site, not at my home studio! So come earthquakes, lightning, or floods, I’m OK.
  3. Finally, I have one more set of off-site drives, per year, which I make a full copy to at the end of each year.

A lot of work. But worth it, because I can sleep. Are your memories (or your business) worth less? I didn’t think so – so come up with an off-site storage strategy today!

 

Snap to shot

Some more “post-production technique” for you here today, again using Lightroom – but if you are a Mac user, you can also use Aperture if you so prefer.

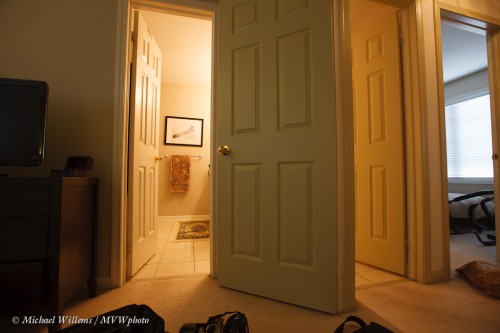
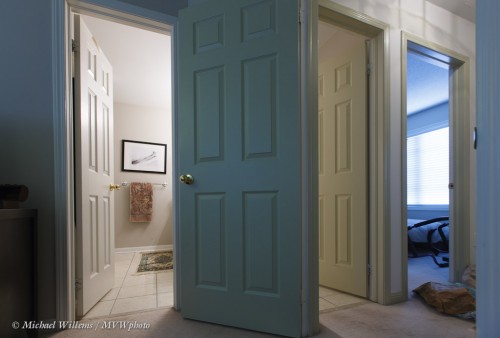
Let’s say that for some reason (you are testing a lens perhaps), you want a picture of your bathroom and hallway, using a very wide-angle lens. Like this:

But no – first, let’s retake that to get some of the foreground mess out of the picture. Remember: simple is good… simplify, simplify, simplify. Pretty much everything you can take out of a picture improves it.

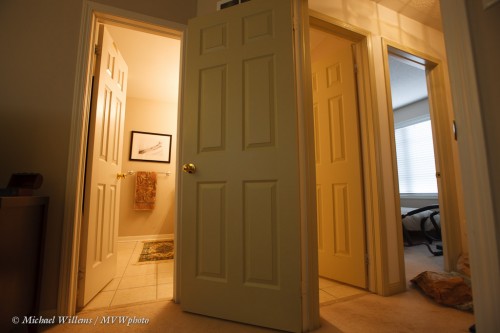
So take this shot again after you aim up a little:

Better. But it’s too dark, the colours are wrong, it’s all distorted.. waah.

Can we save this, and how long will it take?

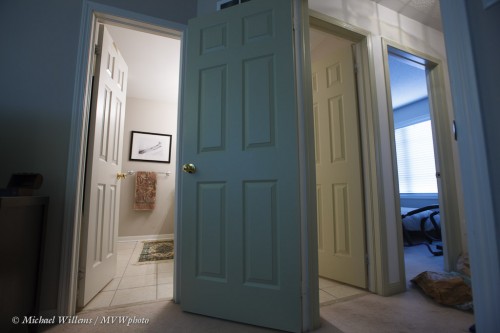
Let’s attend to the white balance first. Go to Lightroom’s DEVELOP module, enter the Basic pane, and use the dropper on a white area to set an OK white balance. You can adjust more later, but at least get it close. You shoot RAW, so white balance can be set after you take the picture (if you shoot JPG, you have to get it very close in camera).

OK, here we go.. click:

Better. Now go to Lens Corrections, and apply the Profile correction, if Lightroom knows your lens/camera combination. This fixes the dark edges and the curved lines (I was using a 16mm lens here on a full-frame camera):

The curved door is now straight!

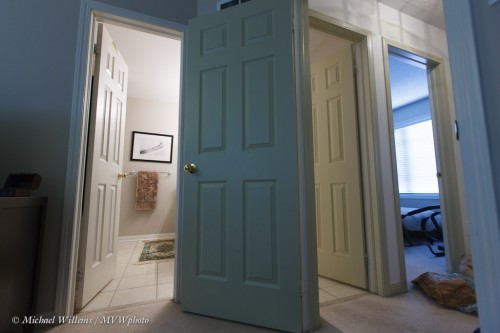
Now, still in Lens Correction, go to MANUAL, and fix the converging lines that you got because you aimed the camera up. Dragging “Vertical” to -27, and then cropping off the excess picture, gives me this:

Good!

Now, finally, let’s fix brightness and colour properly.

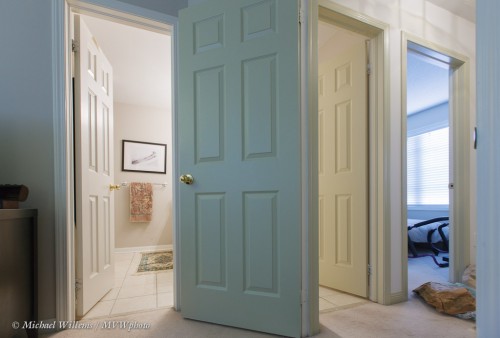
Brighter; adjust the colours again, highlights down to fix the window… a last White Balance fine tuning, and hey presto:

That entire fix took about 30 seconds. Doing this in Photoshop would take much longer. It’s still a silly “I’m just playing around” snapshot, but at least it is a technically proficient snapshot, in mere seconds.

You can see how Lightroom (or Aoerture) change your life as a photographer. Again, as in yesterday’s article, I am not advocating taking bad pictures and fixing them later, but you will sometimes want to adjust your images, and with modern software and RAW images, this is very simple.


Why you shoot RAW

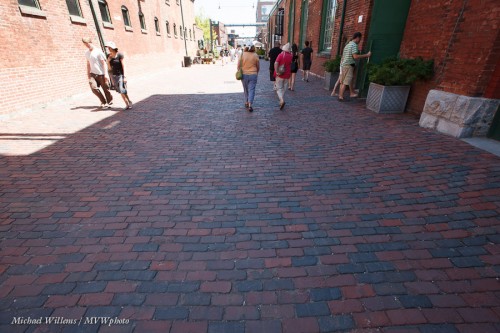
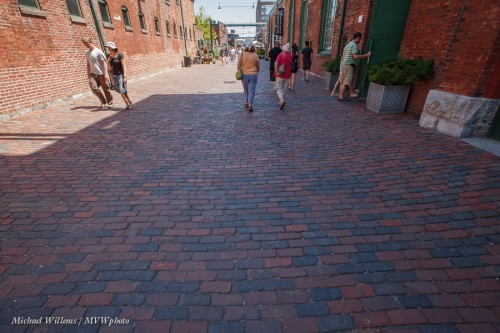
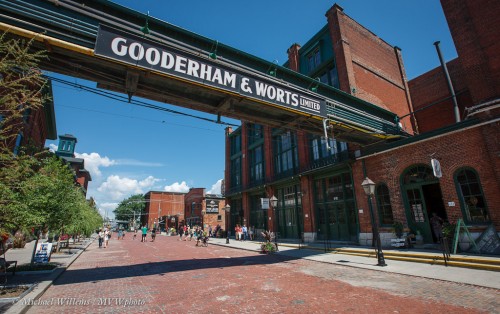
One reason to shoot RAW is that it enables you to handle difficult situations, like those with too much difference between bright and dark areas, like this one, today at The Distillery, where I was attending my exhibit:

The shadow area is dark, the sunny area is way too bright.

Normally, when shooting a close-by object, I would use a flash for this. But with a wide angle like this, you would need a lot of flashes to light up the dark area. So, RAW to the rescue!

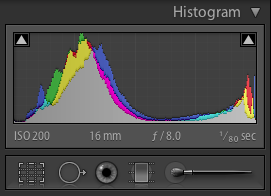
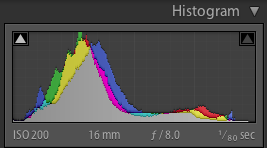
The original image look like this in Lightroom. The histogram shows that the bright areas are stuck right up against the edge:

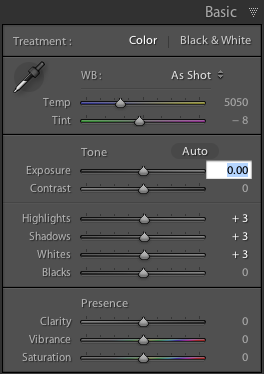
And the original settings in the BASIC pane:

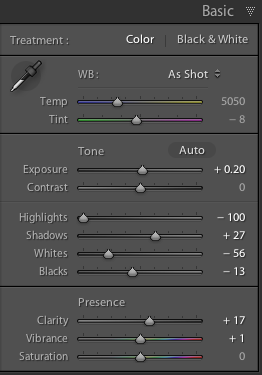
Fortunately, we have enough room in the RAW image to fix this: the bright areas have detail in them still. They may be overexposed, but they are still present in the data. So now we drag the bright areas down, thus changing the Basic settings to something more like this:

Which when you check gives you a histogram like this, much more like it – from dark to light without anything getting too close to the edge:

Which gives you a picture like this:

Simple, takes a second or two. This is a little like creating a HDR image from one file – which in fact is exactly what we have done here. The dynamic range in the original was too difficult for our camera to handle, but since it was only a few stops out of range, we were able to fix it in post-production.

I am not advocating doing this all the time – but sometimes, you have little choice. In those cases, expose to the right – overexpose the brights a little, because as long as it is just a little, you can fix the issue later.

How much is a little? I find that if I get some blinking (in the “blinkies”-view), I am good. Blinking is supposed to mean “no detail”, but on most cameras, blinking means something rather more like “watch out, you are getting close to losing detail here”. If the entire area is one solid black/white blink, then I have done too much to save. Stay clear of that and you can rescue the image. And Lightroom makes this very easy and quick.

One more image:

Incidentally, one reason to visit my exhibit (http://www.michaelsmuse.com), apart from the obvious one (to see my work and to buy an original framed print for your wall!), is that it is held in the Distillery District, one of Toronto’s most photogenic areas – it cries out to be photographed.

So bring your camera. I shall be there again tomorrow afternoon (Monday) – 1-5pm, come say hi. (Sssshhhh, don’t say anything: if I am at the gallery, and you mention reading this post to me, I’ll even give you a 10% discount on a print).


Of Pigments and Dyes

A quick word about inkjet printers today.

My Canon Pixma Pro 9500 13×19″ art printer broke recently as you will have read – so I bought a Pixma Pro 9500 Mark II printer. These are pigment printers, as opposed to the more usual dye printers.

What is the difference?

Dyes, which are absorbed by the paper they are printed on, are easier to keep predictable in terms of colour, and hence are cheaper; pigments, on the other hand, which sit “on top of the paper”, whilst more expensive ($200+ for all ten cartridges on my printer) are permanent. Pigment inks can last more than 200 years on some paper types under ideal (museum-quality lighting and framing) conditions; dye inks fade quickly (sometimes in as little as days; usually in 20-30 years). Which is why art prints are made on pigment printers: you presumably want a piece of art to last forever.

When you use a pigment printer, you need to make sure that you use paper suitable for pigment printers. Good papers (like the Inkpress pro Silky I like to use for photos, or the Hahnemülle Fine Art papers) will say on the box when they are suitable for both dye- and pigment-printers. Pigments combined with long-lasting natural-fibre Fine Art papers, once you get all the settings and drivers right, give you extremely consistent, predictable, and lasting museum-quality prints.

Also, my Pixma printer accommodates Fine Art papers by having a straight (flat) paper path – this requires a complicated feeding procedure that takes time, and only individual art sheets can be loaded, but it is worth is since it does not bend the paper.

So when anyone asks “why does a print cost like $80?”, the answer is above. The cost of supplies, paper and printer, combined with the time needed to make a pro print, combine to make the finished product not cheap. But it is “museum quality” and lasts forever.

So before you go to Wal-Mart for a quick print – do some research, and consider having it done by a pro using pro pigment inks and art papers – or buy your own, and do the work to set it all up. There’s nothing like a quality, lasting print to show off your work!


Handy tool

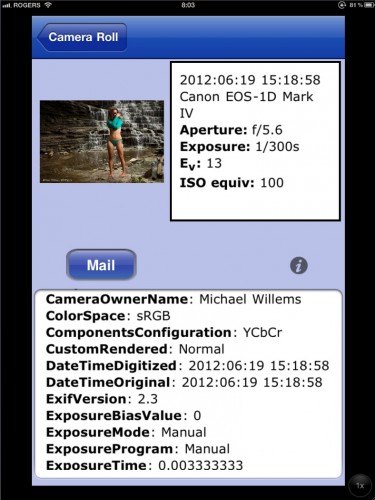
Recommended: Exif Wizard, an iPad app that tells you the EXIF data in the images on your ipad.

Like this:

..and there’s a whole lot more info. As long as you have not stripped out the EXIF data while saving (Lightroom, etc, offer this possibility), you will be able to go back to your saved images and answer the question “what settings, equipment, etc was I using for this?”. Which for pros as well as beginners is an important question.


Silhouette How-To

I have talked about silhouettes recently – let me share another one.

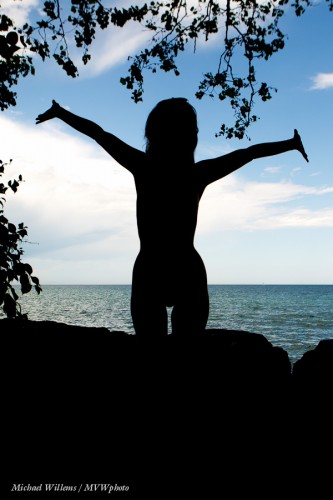
This was an accident: my flash had not charged yet so did not fire. It shows how to make an accident into a nice shot.

  1. Make sure your subject is in the shade, and the background is bright.
  2. Expose for the sky: aim your camera at the sky and set exposure to “0” for that on the meter if shooting in manual mode, or if in an automatic mode, press the Exposure Lock button (AE Lock, or on Canon, “*”).
  3. Recompose.
  4. Shoot.
  5. If you have to, in Lightroom drag “Blacks” to the left (if  you have LR4).

That is all – simple, and something you should sometimes do.

A reminder of why we shoot RAW

A reminder here of why we shoot RAW.

Remember, RAW files are not standard and they are three times larger than a JPG. So why bother?

  1. Camera settings such as colour, colour space, white balance, sharpening, saturation and contrast  are not “applied”, they are “attached as suggestions” SO you can alter them on your computer at will without any penalty.
  2. Because of the extra bits of date (12 or 14 bits per colour in a RAW; 8 bits in  a JOG file), over-or underexposure can often be fixed.

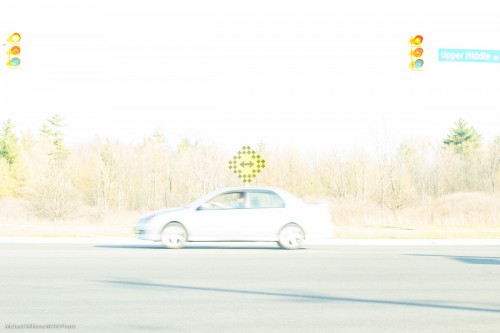
To illustrate the last point: here is a snap that was overexposed by three stops:

But since it is a RAW, I can fix it…

See here, turned down three stops in Lightroom (just drag the EXPOSURE slide to -3):

That should convince you: shoot RAW if your pictures are important to you!


How you shoot Black and White

Shoot Black and white often… but shoot it in RAW. Why? How?

  1. Shoot in RAW
  2. Set your image style to B&W so the preview you see approximates what you will get.
  3. Then in Lightroom, you can change the weighing of the colours.

What do I mean by point three?

Made into B/W, that gets you:

But now you can play with “filters”. Like by turning down red:

Or by turning UP red and turning down the background slightly:

…and so on.

That is why you must shoot RAW: if you shoot JPG, the conversion is done in camera and you cannot change it.

B&W is a very powerful way to shoot. With RAW conversion, it becomes an amazing tool. Go try!


Software merits

Chris, a student at Sheridan College, asked me to

“discuss/blog or whatever re: the relative merits/disadvantages of Lightroom, FastStone, GIMP, and Digital Photo Professional”.

Great question. Software is a huge part of the equation, and there is so much to choose from!

First of all, there is the distinction between image manipulation software and asset management software.  Photoshop, its free clone GIMP, and others are examples of the former. Great at moving a head from one person to another if you have the time. But not at organizing/ranking/rating/keywording, or at being fast. That’s what Lightroom and Aperture are for.

Then there is pro software versus basic software. Again, Aperture and Lightroom are examples of the former;  DPP and other free products like Google’s free Picasa or, I suppose, Apple’s iPhoto, are example of the latter.

So. If you want free software:

  • Canon DPP is great for basic RAW editing.
  • GIMP is great as a free Photoshop clone.
  • Picasa is free and does basic everything.

When you need real pro software:

  • If you need deep image manipulation, get Photoshop (and learn for a year), or GIMP.
  • If you need organizing as well as spee, Lightroom (for Apple or PC) or Aperture (for Apple only) are your great choices.

Today, if you ask me… Lightroom at $150 is a must have. Three days of learning (not three years), and all the editing a photographer usually needs. And if you are an image editor, get Photoshop or GIMP as well.


A simple chiaroscuro portrait or two

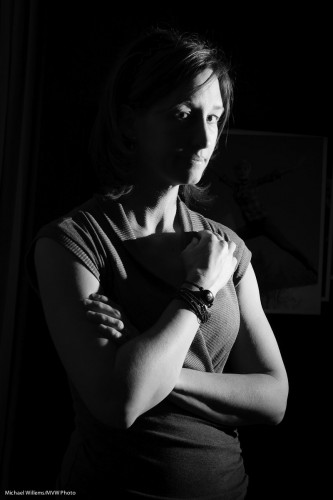
In the last few days I took two people’s portraits using just one off camera flash. Here’s Michelle and Adnan, respectively:

How did I take those?

First, I set the camera so that the ambient light looks dark. The room was not dark – it just looked dark to the camera, because I had set the camera up specifically to achieve that. 100 ISO, f/5.6, 1/200th second. You could use any combination of ISO-Apertyure-Shutter that gives the same brightness, but keep in mind:

  • High aperture or low ISOs mean the flash has to work harder, and it may not have enough light
  • The shutter speed cannot achieve 1/200th second; your camera’s fl;ash sync speed.

Then I added the flash. I used an off-camera speedlight on our right. I could have used TTL remote control or pocketwizards: I used TTL in Michelle’s portrait and Pocketwizards in Adnan’s. Light is light! Note that I put a Honlphoto Grid on the fl;ash, else the light would have lit up the background too. The flash (fitted with the grid) was aimed directly at the subject. To get the right exposure, I metered the Pocketwizard-driven flash, and I “flash exposure compensated” the TTL-driven flash.

Then I positioned the subject properly. I wanted the light to hit them just about from their front, with their face turned to get short lighting. I also wanted to see both eyes, even if one is only just visible.

And that was all. A one minute portrait, and a pretty cool one, no?