The Histogram

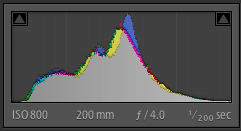
You may have been told that a “good” histogram looks like this – all the way from black blacks (left) to white whites (right):

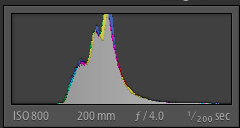
So this one is bad: no blacks, no whites:

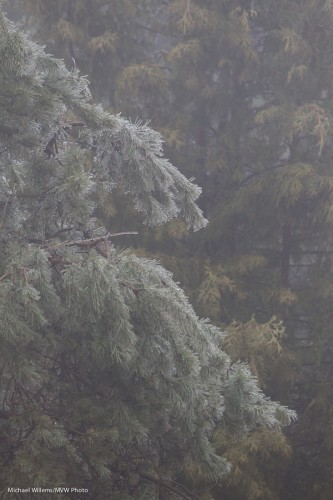
As they say: it ain’t necessarily so. Not at all, in fact. The second histogram belongs to this foggy image:

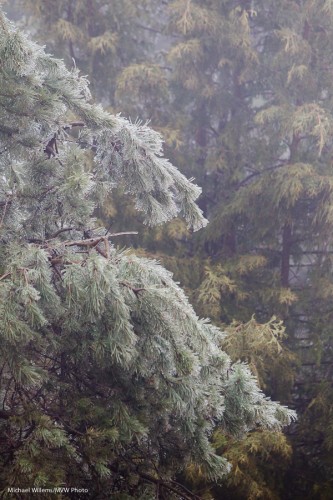
While if we changed the histogram to what you thought was a “good” one, we get this:

Which is all very well if you intended that – and you might well, but it is not how that morning looked. It looked like the first image.

So here’s the skinny:

The histogram should go all the way to the left (pure black) if there are (or if you want there to be) blacks in the scene, and it should go all the way to the right (pure white) if there is (or if you want there to be) pure white in the scene.


Lightroom 4 PV2010/PV2012

When you import images in (or handle images in) Lightroom4, you can choose the “Process version”: 2010 or 2012 (or even older). The new default is 2012, which gives you all sorts of new tools and a new interface.

In the Develop module, the first choice under “Camera Calibration” looks like this (2012 being the default):

The old edit basic pane with LR 3 was like this:
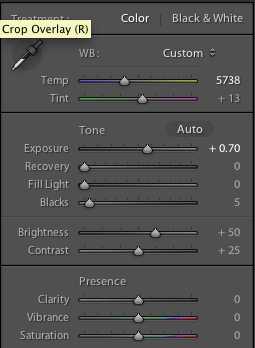
The new one is very different and looks like this:
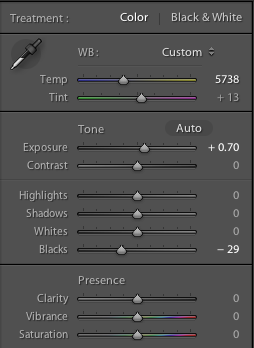
The problem is that the new process version (“PV”) has “auto highlight recovery”.

So when I shoot an image with a blown out background, as I do in many shots like this, I used to see:
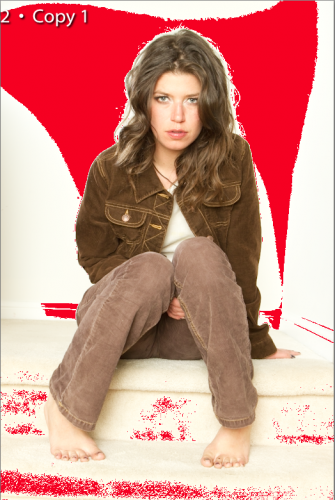
The red areas are Lightroom’s way of indicating a blown-out area where all detail has been lost.

Just as I like it.

But in PV2012, Lightroom assumes that blown-out highlights are a mistake, and automatically, without giving me the option to disable this, brings them back! Which is quite easy from a RAW image, so now I see detail where I do not want any:
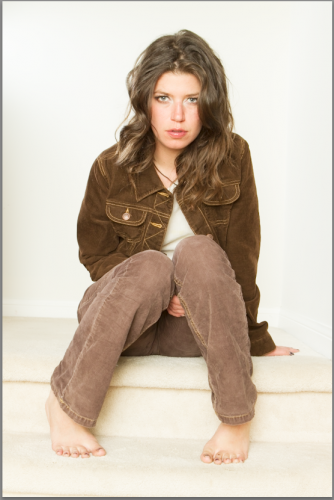
So now the only way is to set “Whites” up (by perhaps +50 to +80 on the slider), or do a curve adjustment. The Whites adjustment gives me this:
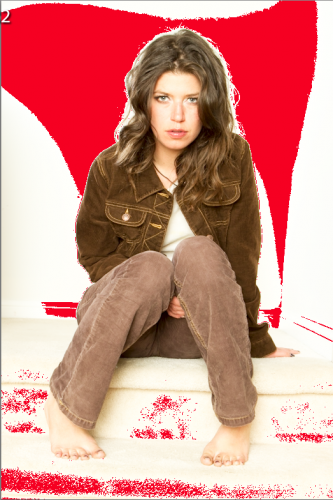
The drawback is that now I need to do this manually, and that it does affect the rest of the image.

So here’s my tip: one way around this is to go back to PV2010, which you can do with individual images or with entire shoots. That way you get the old controls – and the old behaviour – back for the images you choose to handle this way.

When converting, you may want to convert to the new PV only on an image by image, or at least a shoot by shoot, behaviour.

Another way to “disable” the automatic conversion that has been suggested to me (but that I have not tried – it may take a little work to get to the same appearance as in PV2010):

  1. Create a curve that is linear 1:1 from lower-left to somewhere close to upper right, and then curves straight up to the top.  You may need a few points to get this to stay straight below the curve.
  2. Save the curve.
  3. Import a fresh image or reset one that’s already in, and apply that tone curve.
  4. Now create a preset that just has that tone curve.
  5. Now, anytime you want to “disable” the automatic highlight recovery, just apply that preset.  You can do it to any number of images at once, even applying it on import.

And you should probably convert at some stage – Lightroom 4, although it has a few minor issues and is slower than LR3, is very good and has some compelling new features.

 

Backup tip

An advanced computing tip today on speedlighter…:

Have a Mac or UNIX-like computer? Then you can use a simple little command to synchronise disks. Let me explain.

I have two hard disks next to the Mac. Two 3TB disks (I just upgraded them).  I work on one: all my images and Lightroom files and office admin files live there. Then I have the other.

Whenever I work, as soon as I am done on one and am sure it’s all good, I run the following command on my mac:

I.e. the following is the actual commands; the lines preceded by # are just comments:

rsync -a –verbose –progress –stats –delete /Volumes/MVW-3TB-1/Lightroom/ /Volumes/MVW-3TB-2/Lightroom/

rsync -a –verbose –progress –stats –delete /Volumes/MVW-3TB-1/MVW-Docs/ /Volumes/MVW-3TB-2/MVW-Docs/

rsync -a –verbose –progress –stats –delete /Volumes/MVW-3TB-1/Photos/ /Volumes/MVW-3TB-2/Photos/

The rsync command intelligently compares the two disks and adds anything to disk 2 that was added to, or changed on, disk 1, while deleting anything from disk 2 that was deleted on disk 1. A perfect backup in seconds (the first time can take a day of course, depending on how full your first disk is).

Using the nano text editor, I put these commands in a little text file called “syncdisks”, and I make that file executable using the chmod command (chmod 755 ./syncdisks). I then call that file by typing .syncdisks every time I want to run it.

I could automate further but this is good for me – and it shows the power of the command line, doesn’t it? Of course you would modify this to reflect the names of your disks and your folders to be copied.

(If this was all a bit techie for you, ignore this post and move on to tomorrow!)


Lightroom tip!

In Lightroom, the catalog (the .LRCAT file) contains all your edits. But what if it gets corrupted?

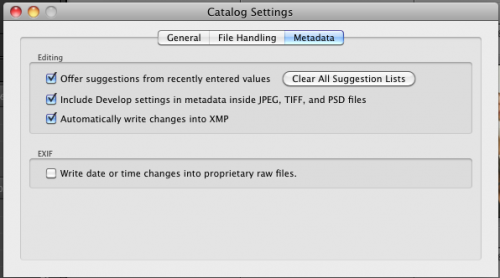
In that case you can retrieve edits – eg edit the file in another app,like Photoshop – from small XMP “sidecar” files – IF you make these! This is off by default – turn it on in LIGHTROOM – CATALOG SETTINGS:

If that third tick mark is OFF in your Lightroom, then I advise you turn it ON right now!


Quick fixes are sometimes good

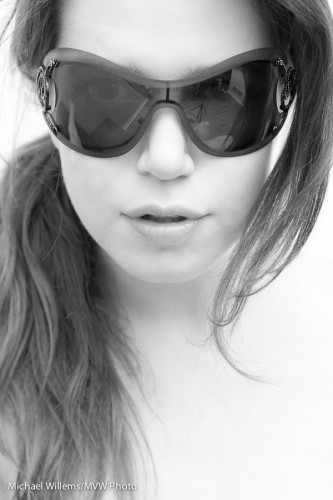
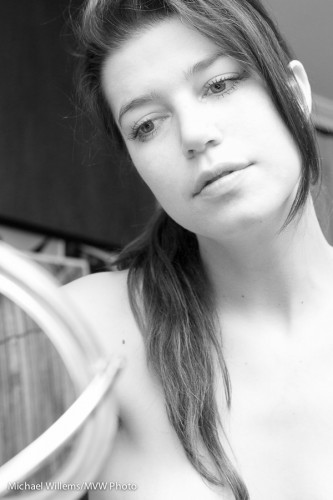
As I mentioned the other day, converting a portrait to black and white can be good if it is not optional in the first place. It is an “easy fix”. Not that my friend, model Kim, pictured below in a shoot Thursday night, needs these fixes much…  but of course she, like everyone, has normal human skin.

As I said the other day, I am not a fan of altering people. But removing temporary blemishes, and de-emphasizing permanent ones, is not different from applying make-up and is better for the skin.

Kim Gorenko (Photo: Michael Willems)

But it is more than that. As I have mentioned here before,

  • Colour can distract in portraits, while black and white removes those distractions.
  • Mixed light (eg tungsten and unmodified flash) is problematic, but in black and white, light is just light.
  • You can emphasize or de-emphasize various colours when converting colour to black and white. To make that yellow shirt darker, or to make that green wall lighter.
  • And yes, you can fix sin, or make it smoother, by converting to black and white and then increasing the brightness of red in the mix (equivalent to using a red filter on a film camera). A blue filter would do the opposite – make skin look really, really bad.

How to do black and white?

  • Shoot in colour, in RAW format.
  • Then convert later – in Lightroom using the B&W option, where you can vary all colours individually, thus creating any filter effect you want. Experiment by dragging the various channels up and down.
  • If (and only if) you are shooting in RAW, you can set your camera’s “picture style” to Black and White. That way by looking at the on-camera preview you get an idea of what the converted image may look like – but since RAW saves all the colours, you are still going to do the conversion later, on your computer.

For better skin, as said, drag the RED channel UP (+).  This makes blemishes brighter (i.e. they disappear). Dragging Orange up makes all of the skin brighter, which also of course makes it look better by reducing both blemishes and shadows.

OK, one more image.. here, the colours of the walls etc would definitely distract from the message of the photo:

Kim Gorenko (Photo: Michael Willems)


Web sites in Lightroom

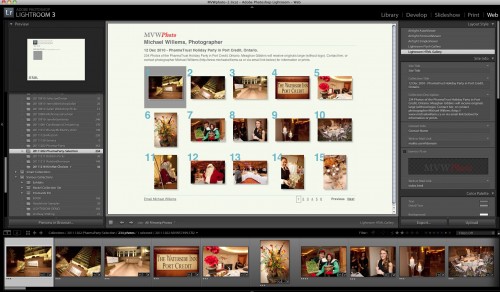
All you need to create web site galleries of your images in Adobe Lightroom is Adobe Lightroom and a web server/FTP server.

In the WEB module, you can lay out your gallery of selected images any way you like.. many templates are available and many settings are available in these templates. For instance, like this:

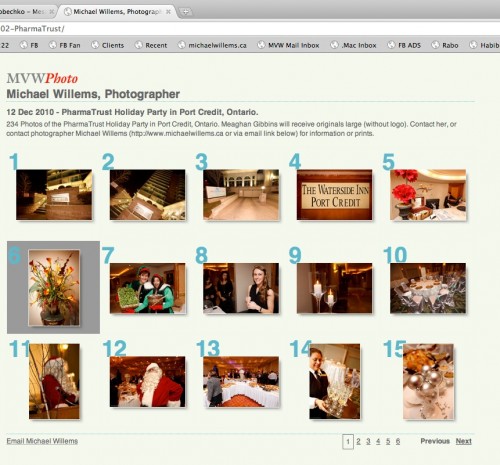
Which, once you upload it to a web server, leads to a web site like this:

I hope this spurs you on to doing something with your pictures: get a web host, learn how to FTP files to it, and share your pictures with friends and family – or with clients – with minimal effort.


Rescue Ops

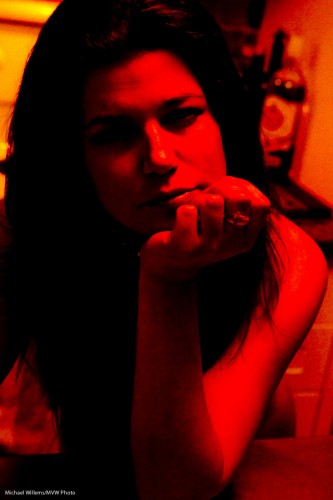
Sometimes an image is spoiled – like when the flash fails to fire.  This happened to me during a very recent shoot – no flash, and to the naked eye the image looked black.

But these images, especially when shot RAW, can sometimes still be used. In the case of the aforementioned image, I did the following in Lightroom’s DEVELOP module:

  1. In the BASIC pane, I increased both exposure and fill light to the maximum setting.
  2. I then would have normall converted to B&W, but in this case I did not, since the tungsten ambient light exposed the image basically in red only.
  3. What I did do, of course, is reduce noise.
  4. Then I added grain – film grain looks impressive.

The result:

Kim in Red - Photo: Michael Willems

Not bad for a spoiled image!

So the two lessons: (a) always shoot RAW, and (b) Do not throw out bad images just yet – they may be useable.


Marking images in Lightroom

In Lightroom, there are many way to mark images. These include:

  • Rating (1-5 stars)
  • Keywording
  • Colour labels
  • Picking

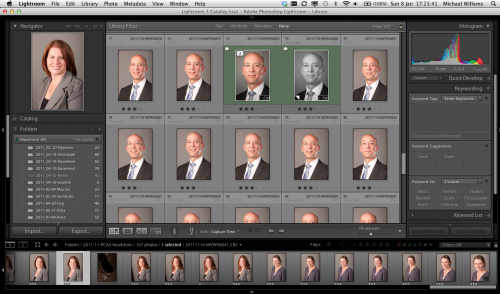
You see some of these in use here:

These give you a great ability to use images the way it suits you.

I use start to rate the pics –  this is independent of use. One start is technically unusable; two starts is technically just about OK but not good – a snapshot; three stars is usable and can be shown to client; four stars is great in this shoot; five stars is portfolio shot. Stars are carried across collections too, since they are a property of the pic, not of its use.

The same is true of keywords, which I assign upon, or just after, import.

On the other hand, I use colour labels to indicate something temporary – like “use this for the article”.

I use pick to indicate a very temporary pick – as in “these are the ones I am going to print now”.

This way I can work with all my images in a multi-dimensional way. Lightroom really really rocks!