Lighting Ratios

When you use more than one flash, you can adjust each light individually. If you use speedlights and your camera maker’s wireless TTL functionality, you can do that in two ways:

  • Canon: relative, using ratios. As in “A:B = 4:1” meaning A is 4x (two stops) lighter than B
  • Nikon: absolute, by adjusting individually. E.g. “A = No adjustment; B = -2 stops adjustment”.

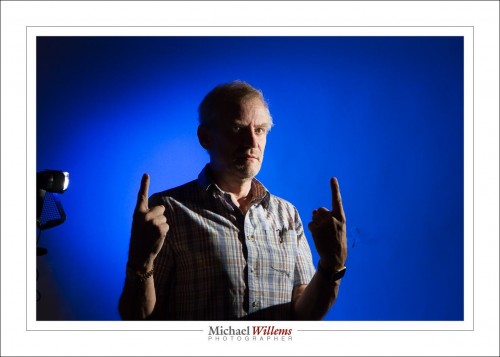
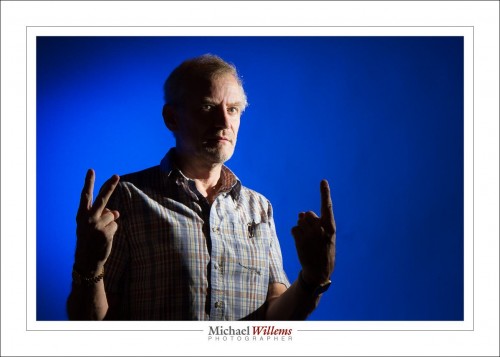
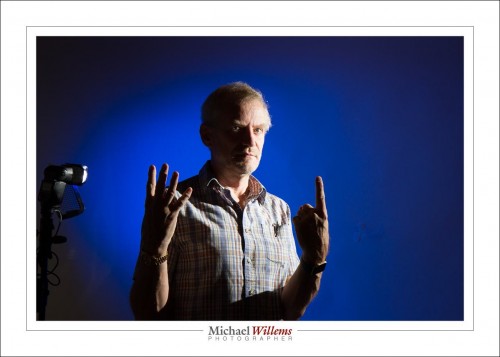
An example of this using two Canon flashes.

Ratio between key light (face) and background light: 1:2

1:1:

2:1 (you are getting the hand signals by now I presume):

4:1:

The preference is yours: mine is 2:1. But that is largely a matter of taste.

If you use manual flash and radio triggers, it is conceptually easier, since you set up each flash by itself, independent of other flashes. Ratios are a little bit trickier to get your head around, because it is not immediately clear which flash will get darker and which flash lighter, and to what extent. So trial and error will be required. Either way, key point is that you should think carefully about how bright each flash is, in a multi-flash setup.


Kill Ambient, Kill, Kill, Kill.

In studio photography, you want to kill ambient light completely. The light bulbs in your studio, or the light falling in through the window, should not affect the picture at all.

This is easy when using flash. 100 ISO, 1/125 second, f/8 and you’re all good. Ambient light: gone.

But when you are using hotlights, it’s not so simple—especially if you are using small, light, and affordable compact fluorescent lights. These are (by definition!) exactly as bright as a lightbulb. So now you need higher ISO, longer shutter, lower f-number… and now your lightbulbs do suddenly show up in the photos.

And that’s why most photographers use flashes.


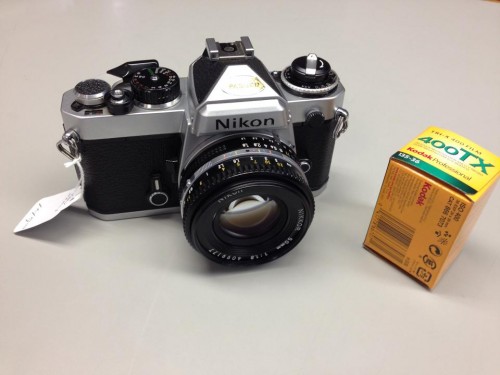
Remember these?

That’s my Nikon FE. A film camera.

I shoot film every now and then.

Why?

Because it disciplines me and keep my skills sharp. When you shoot a roll of film you get no instant replay of the photo you’re taking. You also know you are spending a dollar every time you click. This means both that you have to get the pictures right and that you have to pay attention.

You end up taking 36 photos, not 360. And you will have carefully considered each one. You will spend perhaps a minute focusing carefully, composing carefully, and exposing carefully. No room for mistakes. You are, in other words, being a real photographer.

If the shoot is really important, I carry a little digital camera to try out my exposure settings every now and then. Just like in the past I would have used a Polaroid camera to try out the settings. There is no shame in that.

This is why I recommend everything should shoot fill up every now and then. Go buy a used, good condition film camera. This will cost you perhaps $150. Use C – 41 color film. This is the easiest to get developed. And then, scanned so you get digital files to edit, too.

Try it and feel the satisfaction that comes from having done a good job. Go on, give it a try. If you can shoot a roll of film flawlessly, you are a real photographer.

If you cannot do this, then at least turn off the review function on your digital camera. Pretend you’re digital SLR is in fact a film SLR, and do not look at the pictures until after the shoot. That way you will still grow the same set of skills.

Repeat – focusing a tilt-shift

Once again, military technology is at the basis of what we do with technology. It is incredible what humans will do in order to more efficiently fight other humans.

In the early 20th century an Austrian army captain named Scheimpflug worked out how to handle perspective in aerial photographs (this would come in handy in WWI, no doubt). Hauptmann Scheimpflug is famous for explaining what we know as the Scheimpflug principle. If you like math, look it up on Wikipedia. I warn you, it took me a while to get my head around all those formulas.

What do they do for us? They tell us how to use tilt-shift lenses (or view cameras) to change the plane of focus.

And I will give you a simplified version of its implications here today (yes, it’s simplified: no need to start pointing that out). I am talking about tilting here today, not about shifting. But even simplified, this is an advanced article that assumes you already know at least the basics of what tilt-shift lenses do.

I wrote this because I usually see people with tilt-shift lenses just wildly change every adjustment randomly: and that is not at all a way to guarantee results. Knowing stuff is always better.

WHAT TILT-SHIFT LENSES CAN DO

A tilt-shift lens (its tilting, specifically) allows you to shift the plane of focus so that you can make sharp not “stuff parallel to the sensor” (like the wall in front of you), but “stuff at an angle to the sensor” (like the floor below you).

Consider this, the normal situation. With my 45mm lens set to f/2.8, I focus on the door, so it is in focus (but the stuff close to me is not):
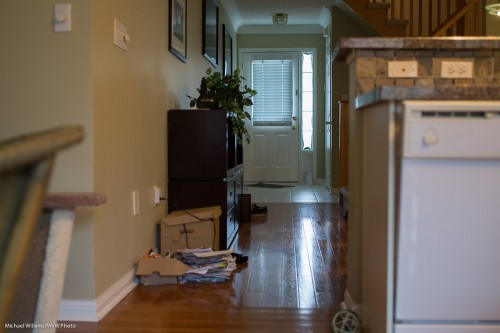
Or I focus on the stuff closest to me, so it is sharp (but the door is not):
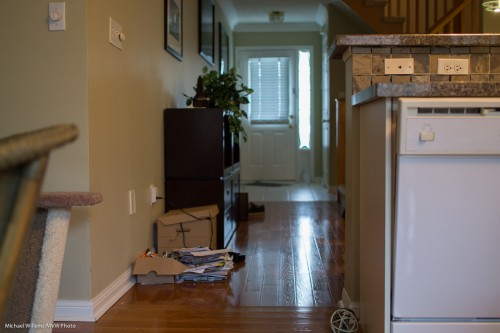
And if I want both in focus, well, I would have to go to a very small aperture (maybe f/16 or even smaller) to get them both sharp. Or to a wider angle lens, or I would have to move way back. None of which may be practical, or even possible.

Enter the tilt-shift lens. If I…

  • tilt the lens down by the the right angle; and
  • hold my camera at the right angle; and
  • am at the right distance from the floor; and
  • focus at the right distance…

(I told you this was complex), then I can do anything I like. Like this:
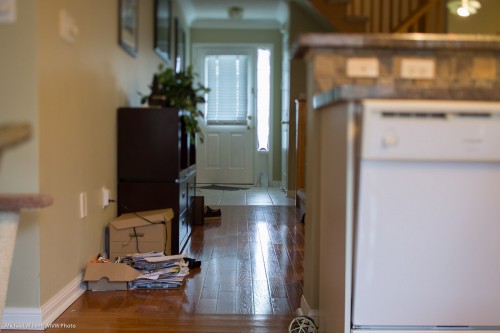
The floor is in focus, from close to far. And yet I am still just at f/2.8!

So far, so good. The question is: once you have a tilt-shift lens, how do you focus it where you want? With the number of variables I just mentioned, there’s just about infinite possibilities, and very few of those actually work for you.

LET’S SIMPLIFY!

I like simplifying. So let’s start with taking variables out. Let’s hold the camera parallel to the floor (i.e. aiming straight ahead, not up or down) and set the focus to infinity. Then the focal plane (“where it’s sharp”) will be perpendicular to the sensor, and since we are holding the camera straight, that means it will be the floor – provided we get the height of the camera above the floor and the angle of tilt down right. Just two things!

And the relationship between them is given by a simple relationship:

J = f/sin θ

Where:

  • J is the distance to the focal plane (“the floor”)
  • f is the focal length of the lens (45mm in my case)
  • θ (theta) is the angle at which you tilt the lens down (down, because the floor is below you).

My 45mm lens can shift down up to 8 degrees.  So the relationship between angle and “how high you have to be above the floor if you want the floor to be in focus” is:

45mm T/S LENS

TILT ANGLE (deg) – DISTANCE (mm)

  • 1°   2,578   (=2.57m)
  • 2°   1,289   (=1.29m)
  • 3°   860   (=86cm)
  • 4°   645   (=65cm)
  • 5°   516   (=52cm)
  • 6°   431   (=43cm)
  • 7°   369   (=37cm)
  • 8°   323  (=32cm)

Remember, this is with the camera pointed straight ahead, and the focus set to infinity. (Why this is so is easily derived from the formulas in the Wikipedia articles and basic knowledge, but I will spare you the math, except to mention that that the tangent of 90 degrees is infinity).

So in my last image, I was about 85cm above the floor, with the lens angled down by 3 degrees. Bingo.

(A tilt-shift pens is hard to adjust very finely: the adjustments are very precise. Patience is needed.)

An alternate way to use this simple rule is to start with what you want. I.e. “if I am x distance away from the floor (and pointing straight ahead with my focus set to infinity), what should my angle be?)

The formula is simply the same as above, so it becomes:

θ = sin-1 (f/J)

So if I want my camera to be, say, 1.7m above the ground, I would have to angle down by sin-1 (a.k.a. arcsin) (45/1700), which my calculator says is 1.52 degrees. Yes, a scientific calculator is handy. Or you could work these out once and carry a little table with you, like this:

45mm T/S lens

DISTANCE (m) – TILT ANGLE (deg)

  • 5m   0.5°
  • 4m   0.7°
  • 3m   0.9°
  • 2m   1.3°
  • 1.5m   1.7°
  • 1m   2.6°
  • 0.5m   5.2°

NOW WE GET A LITTLE MORE COMPLEX

Now let’s let go of the assumptions, namely that you focus on infinity and point straight ahead.

When you alter the focus setting of your lens (i.e. you do not focus on infinity), the focal plane swings up and down. It still starts below your camera at a distance given by the formula at the top, but now it is not parallel to the horizon. As you focus closer, it swings up (or you swing the camera down, whichever you prefer):

Scheimpflug Intersection (Source: Wikimedia)

By how much? I.e. what focus setting will give you what angle?

Aha, glad you asked. Another formula!

From Wikipedia:

ψ = tan-1 ( (u’/f) sin θ)

Where:

  • ψ (psi) = the angle that the focal plane angles up by;
  • u’ = the distance along the line of sight from the centre of the lens to the PoF (i.e. the distance to the focal plane; i.e. the focus setting, since you will be focusing on your plane of focus);
  • f = your lens’s focal length;
  • θ = the angle you have tilted the lens down by.

So that means that while at infinity focus the plane is perpendicular to the sensor, as you focus closer, the plane tilts up.

IN PRACTICE

So now.. knowing all this, in practice, this is what you would do if you want a particular focal plane to be sharp:

  1. Determine how far away from the intended focal plane you will be. E.g. if the intended focal plane is the ground, say in a landscape shot, then you may say “the sensor will be 1 metre above the ground”.
  2. Put the camera on a tripod at that distance from the ground.
  3. Aim it straight ahead (the sensor is vertical).
  4. Set the focus to infinity.
  5. Now, using the tilt-shift mechanism, tilt the lens toward the intended focal plane (e.g. down, in this example) by the angle given by θ = sin-1 (f/J) above, so in our example, with a 45mm lens and 1m distance above the floor, that means angle down by 2.6 degrees.

Alternately:

  1. Aim the camera straight ahead (the sensor is vertical).
  2. Set the focus to infinity.
  3. Now, using the tilt-shift mechanism, tilt the lens toward the intended focal plane until you see it sharp.

Both these ways to get to the same result give you a sharp ground (if that is what you are intending). The first method is less error-prone, of course; calculating angles rather than trial and error is always recommended if you can.

Not perpendicular?

And if the focal plane should not be perpendicular to your sensor, e.g. because the landscape slopes up, or because you wish to aim down at an angle, then start as in the first method above; then (after aiming down if need be*) and simply adjust focus closer than infinity until the plane tilts up to where you want it.

(*) If you aim the camera down, of course the actual distance between it and the intended focal plane increases, so you will have to lessen the tilt angle.

Did I mention this was a little complicated?


Disclaimers: Any errors here are mine. And as said, of course I am simplifying a little here. If we were to be totally accurate, we would take into account the different distances between lens and focal plane on the one hand (hinge rule) and sensor and focal plane on the other hand (Scheimpflug rule); and the fact that a T/S lens on an SLR does not rotate around its axis, but instead, rotates up or down in its entirety; and the fact that a lens is not a simple single-element idealized lens (lens plane versus lens front focal plane). But what I discuss in this article will do entirely well enough in practice.

___

American friends: why am I using metric instead of feet etc, you may ask? Read what The Oatmeal says, and no more words necessary.

 

Mirrorless Tip

When you use a mirrorless camera, like this one, held by a student at this past Saturday’s Meetup Seminar…:

…then you need to be careful with your camera’s settings.

Often, mirrorless cameras have a way to make the picture that you see through the viewfinder look exactly like the picture you will be taking. So it looks like the “finished product”.

That sounds like a plan, eh?

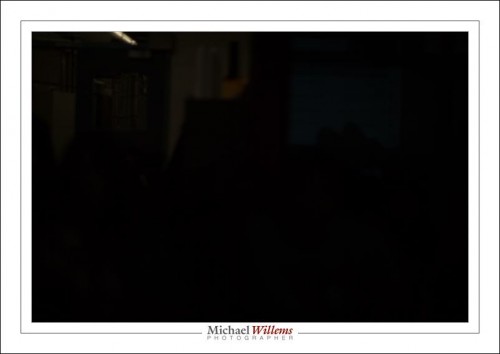
But it isn’t. Not always, in any case. In particular, when you take flash photos. Because when you take a flash photo, the camera has no way of knowing this, and of knowing what the photo will look like. All it will show you is what the ambient part of the picture will look like.

And in a studio picture, that is usually something like this:

Why?

Well, when taking a studio shot, the ambient light should not show at all in your photo. Only your flashes should. Therefore, you would usually use a standard studio setting like 1/125 sec, f/8, at 200 ISO.

So if you tell your camera “show me the ‘finished product’ through my viewfinder”, you will see nothing.  So you cannot even focus, or compose the photo.

Therefore, I strongly recommend that you turn that feature off. So that you see the same thing you would see through an SLR’s viewfinder: a bright picture, or at least a picture that looks similar to what you are seeing without a camera. In flash photos, I would say that is a very good thing.


Digital Camera Straps?

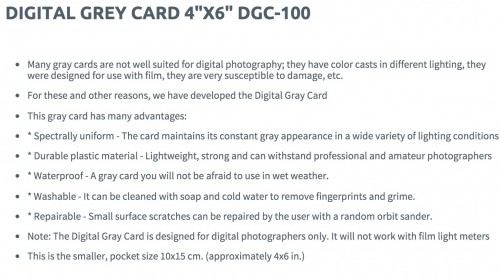
I am struck today by yet another ad for a “digital” device, This time, a grey card.

Here’s the online product description:

Let’s parse that, shall we? Read all the bullets and you see that they are either circular (it is for digital because it was “designed for digital”), or irrelevant. Or dumb (“susceptible to damage”: what, digital photographer damages cardboard more than film photography did?)

The only “advantage” that has anything to do with anything is “spectrally uniform”. Well, so are the old pieces of cardboard. There is really nothing in there that has anything to do with “digital”, so why they say “these will not work for film cameras” is beyond me.

Or rather, it is not beyond me.

It’s called “marketing”.

Companies want you to buy things, and re-labelling everything “digital” takes advantage of gullible innocents, who think they must buy new UV filters, grey cards; anything they can stick the word “Digital” in front of. Soon we will have digital camera straps!

So, my advice: when something you already own is re-marketed with the word “digital”, be very suspicious. It’s quite probably just a money grab.

___

Those of you who live in, or near, Brantford: I am holding a meetup Saturday, 10AM… read all about it here. There is still space.

What a mess!

Let’s talk for a moment about your studio.

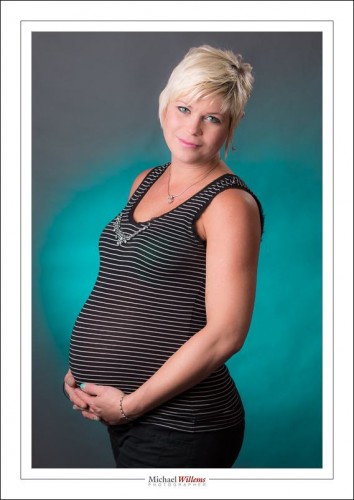
A studio is a space where you make photos like this typical studio shot of Evangeline just days before she gave birth to her son:

That’s straight out of the camera, unfinished.

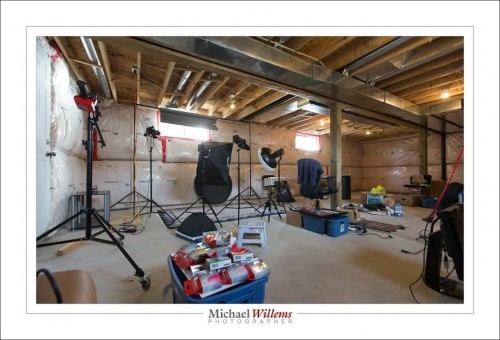
And where was that made? Right here:

Messy eh! But that does not show up in the photo!

Studio requirements:

  • Large enough
  • High enough (hence my unfinished ceilings)
  • Power everywhere
  • Ability to hang backdrops
  • Ability to have things easily at hand. Things like light stands, flashes, modifiers.

My studio meets all those requirements, and then some. It is one large space, which is what I like most about it.

Sunday, I am doing a Meetup here: a free workshop for would-be pro photographers who live in or around Brantford. Check it out if you like here and want to learn about photography!


Deal

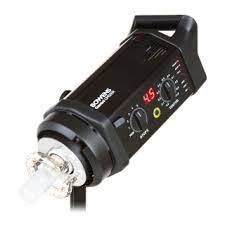
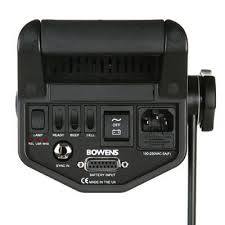
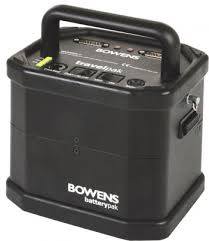
DEALS – DEALS – DEALS! A good friend is selling photo equipment. Here’s the next lot. If you are interested, let me know and I will forward your email/message to the seller immediately! (I love the Bowens lights, I use them too; and just for the record, I am not profiting from this sale in any way)

FOR SALE: Bowens Gemini 500/R TX UM/SB Kit with Battery – Lighting Kit

In mint condition. Used about 6 times. Bowens Gemini 500/R TX UM/SB Kit with large Bowens travel kit battery, 2 strobes and stands, softbox, bag, spare 3 meter cable, 3 year warranty and quick ring for softbox and upgraded to Westcott 45″ white satin w/black removable cover umbrella. Great for on location shoots – powerful. Paid $2600 in Sept/14. Asking $1900.

___

Email me at michael@michaelwillems.ca


Where.

Travel photography is a popular reason for people to buy a camera, and to actually use it. Before you go, buy my book on travel photography and have me put on my Impactful Travel Photography seminar for you and a few friends (see http://learning.photography).  And let me give you just a couple of starting notes in this post.

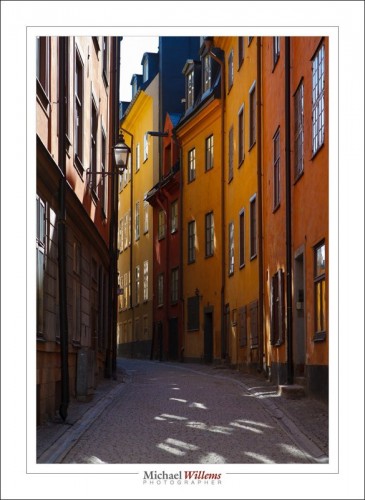
Gamla Stan, Stockholm, Sweden

First: research where exactly you are going to go. I use Flickr and to a lesser extent Google image search to look for great images in the location I am going to. Then I look up where exactly they were taken, and at what time of day (Flickr usually retains the EXIF data). I look for best viewpoints and then research where they are: “where was that great photo taken from, and at what time”. I even look at what lenses were used. Not that you should copy, but you can draw conclusions from that kind of data.

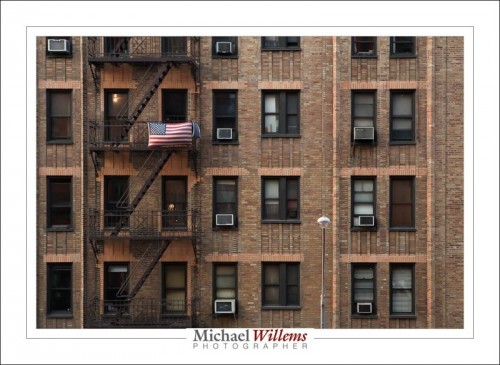
View from the Hotel Chelsea, NY, NY

I also look up attractions’ GPS coordinates, since attractions do not always have a street address. You can google that: Searching for “latitude and longitude of Zabriskie Point” gives you “36.4200° N, 116.8111° W”.

I also look for shooting locations of Hollywood movies: why not let Hollywood do the heavy lifting of finding great locations?

On location, I always ask the hotel reception, the concierge; I buy postcards of locations, and I look for events, since people often do not mind being photographed at them; they expect, rather than resist, cameras.

Bring an app like Daylight to check exact sunrise and sunset times; an hour each way around sunrise and sunset , you get wonderful light.

Then check you have what you need. Camera(s); batteries; chargers; memory cards; lenses; flash(es); perhaps an ND and Polarizing filter or two; some cloths for cleaning (anything that is small, light and cheap is good!); whatever you need, think about it now, not just before traveling.

In other words: preparation does wonders when traveling.

Make it better.

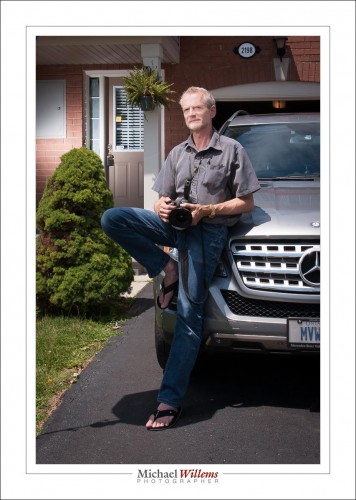
Here’s a typical outside flash shot. (Taken by the über-talented photographer Lisa Mininni while I was teaching her flash tricks yesterday):

What did we do to make this?

[A] Take the shot:

This was a flash shot, of course. So outside in bright sunlight the settings are very, very simple.

  1. Pocketwizard on camera.
  2. Second Pocketwizard connected to the flash by means of a “Pocketwizard to hotshoe”–cable from www.flashzebra.com. Modify with a softbox or umbrella (the latter is smaller but will blow over more easily in the slightest breeze).
  3. Flash set to manual, half power. (Be ready to increase to full if you need to—but the flash may overheat, and recharge time between shots will be long).
  4. White balance to “Flash”.
  5. Camera manual, 100 ISO, 1/250 sec.
  6. Then, determine the aperture you need for a good background. Start at f/8—and then vary from there. On a day like yesterday, I needed f/11 to f/16.
  7. Once your background is right, look at the flash part. If the flash is too bright, reduce its power level or move it farther away from what it is lighting. If the flash is too dark, increase its power level or move it closer to what it is lighting. Or add a second flash, Worst case, use direct, unmodified flash.

[B] Finish the shot:

That finishing (not “editing”!) is just as important as taking the photo, and it consists of:

  1. Verify exposure and tweak if necessary. (If you have taken the shot properly, this should not be needed.) Pay attention also to “highlights” and “blacks”.
  2. Set white balance to “Flash”, if it wasn’t already. (Ditto).
  3. Correct lens and “architecture”–distortion.
  4. Crop and rotate if/as needed.
  5. Sharpen if/as needed.
  6. Perhaps add a very slight post-crop vignette.

Those steps are pretty much standard, and a typical picture takes me less than 30 seconds to finish.

[C] Options

I could of course add another flash, for the background. Set that to quarter power.

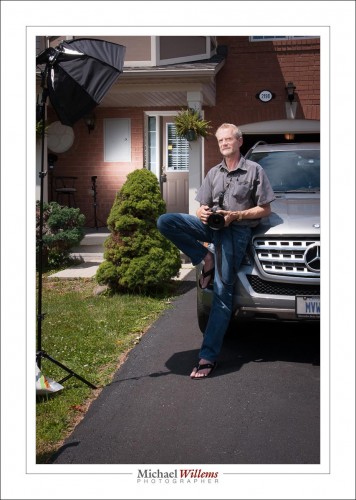
OK. How was this shot lit, then? Here’s how:

That’s right—always make a pullback shot, where you can see the lighting setup. You’ll forget. I used a third pocketwizard connected to the second flash via a second hotshoe cable.

Is this rocket science? No. But it is fun and it does open up untold creative possibilities.

___

Come to me for a private lesson and I will teach you how to do this, how to use modifiers, how to balance light sources, how to use gels, and much, much more,. You don’t need much, other than an SLR, a flash, and knowledge of the basics (“what is aperture and shutter speed and how do they work”)—but I can even teach you those if you like. See http://learning.photography or give me a call on +1 416-875-8770 and never look back. I can teach you remotely, too, using Google hangouts, too, even if you are in, say, Australia.