Anatomy of a portrait

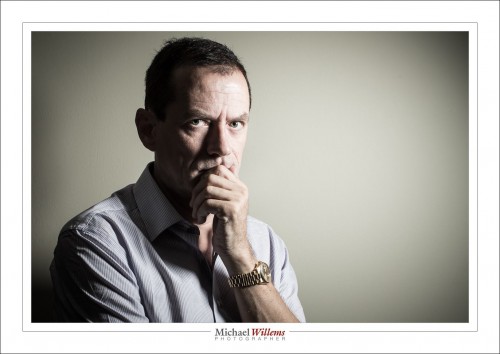
My younger son, who is a rapper, told me tonight, on his birthday, that he needed  a new portrait for publicity for his new album. So I obliged, before cooking dinner and while simultaneously doing laundry. Here he is:

That image took maybe twenty minutes, half an hour tops – but a lot of experience and thinking and equipment goes into a portrait like that.

First, what is required? We discussed, and he clearly wanted a serious, dramatic, look. In a grungy setting. The T-shirt text and the bling should be clearly legible and visible, respectively.  So OK – the briefing being clear, I used the basement studio, and freed just enough space to do a half body portrait.

Then the light. Speed was of the essence: I was about to make dinner. So I used speedlights. First, I set up a light stand with a 430EX flash set to manual, 1/4 power, and driven by a pocketwizard. I equipped it with a Honl photo 8″ softbox. I feathered the softbox to get the right amount of drama in the light, and to get Loop Lighting, almost Rembrandt Lighting, on his face.

The camera was a 1Dx with a 50mm f/1.2 lens, set to 1/125th sec, f/11, 100 ISO. I knew the 50 was perfect for a half body portrait in a small space.

I tried, and the photos were OK:

Not too bad, but we wanted a little more emphasis on the writing. And more texture of the shirt. And clearly visible bling. So I added a second speedlight, this time with a 1/8″ grid, for a tight line of light, and aimed that at the shirt. Also equipped with a pocketwizard, and set to lower power (1/16th). Not having had time to prepare, I took my time finding things like cables and a bracket that fit the flash – all part of the fun.

I set the lights to the camera’s desired settings of, if you recall, 1/125th sec, 100 ISO, f/11. I used a light meter to verify that.

And there you have it. A few pictures – I took a total of 30, and we chose his preferred one, the one at the top. I could have done the light thing, the vignetting, in post, but call me crazy: I call that cheating if I could have done it in camera.

As a result, almost nothing needed to be done in post, but that still takes time: selecting, removing the odd bit of dust, any perspective correction, and so on.

Total time taken, as said, less than half an hour including getting things ready, setting up lights, moving stuff, and the entire discussion and post work. But that’s only because I have done this before. Experience is important. The good news: you can gain experience too and it costs very little.


___

If you want to learn, and you live near Oakville, Ontario: evening Flash course on 3 Oct, and 5-evening course with a weekly evening lesson starting  2 Oct. – both these small courses have open places still.


Pro Print Precision!

In my continuing series of posts for everyone – today, a post for pros, or amateurs who take printing seriously. Which you should: a photo is not a photo until you have printed it. And hung it on your wall, preferably.

My advice today is this: print straight from Adobe Lightroom. This has many benefits over “just make a file and print that”:

  1. No intermediate file; no need to go down to the restrictive AdobeRGB or even more restrictive sRGB colour space file formats.
  2. No intermediate file also saves time, confusion, and disk space.
  3. Lightroom contains a very good print engine, with great print setting options.
  4. Set it up once, and it’s good forever.
  5. And most significantly in recent versions of Lightroom: soft proofing.

Everyone who has printed seriously knows that each paper type is good for certain prints only. After you figure that out, you will use one type of paper for prints with a lot of black. Another type for very colourful prints. Another type for prints with a lot of shiny areas. Or a lot of reds. And so on.

Lightroom to the rescue. This is not a full Lightroom course (for that, come to me privately and I will teach you). This note is for those of you who already know Lightroom and computers well.

And for those people, in a nutshell, here’s what you do:

1. SET UP PRINTING:

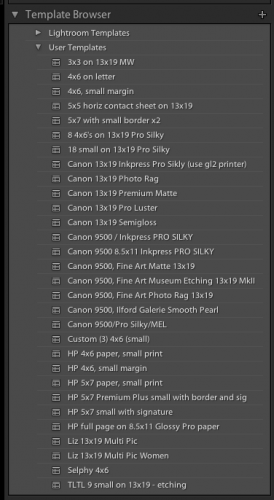
Select your photo, and go to the PRINT module. There, over time you will create a print preset of your own or each combination of printer and paper type (and other preferences, such as layout, margins, etc). Update that whenever you make a change to your preset. That way you invent the wheel once.

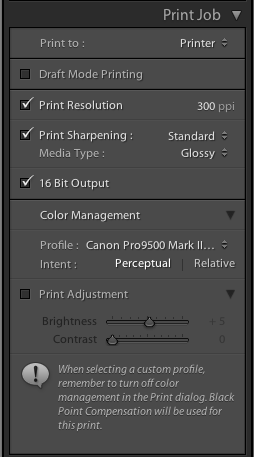
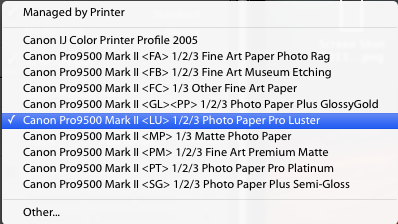
In that profile, make sure under COLOR MANAGEMENT, you do NOT select “managed by printer”, but instead you select the printer paper profile for the printer/paper combination you are using (profiles which you have installed separately; from the printer or paper manufacturer).

In my case, today, for a print that was Canon Pro Luster paper on my Canon 9500 Mark II pigment printer, so I selected that profile:

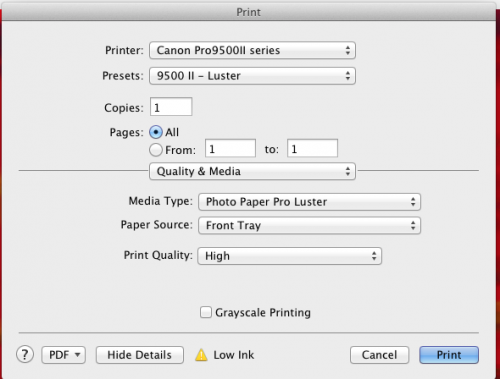
Before you actually issue the print command, the computer’s PRINTER dialog will pop up. In that, be sure to select the same paper (under “Quality and Media”):

OK, that is easy once you set it up, and prints will be reliable and predictable. And right.

2. SOFT PROOFING:

But here’s the fun part. In new Lightroom versions, there is an option called “soft proofing”. And that rocks.

Look under your image. And activate the “soft proofing” option.

You will be prompted to crate a soft proofing virtual copy; go ahead.

And now you can see where the print does, or does not, reproduce well for your selected paper and printer type (or for your selected colour space, if creating a file)!

See the top right, and select the correct profile for what you are printing to. In my case here, Pro Luster paper on the Canon 9500 MkII:

Now, provided I have clicked the little paper mark top right of the graph ON, I see where this photo will not reproduce well on the paper selected.

For instance, take the print I was just creating. A lake Ontario sunset:

Now, if instead of the printer profile I select “AdobeRGB”, I see the following in my soft proofing view:

Ouch! All those pure red areas are where the colour is outside of what the selected profile can handle. I.e. they will not look good. So I do not even attempt to print this print the way it is via an AdobeRGB file (yes, now you see how bad AdobeRGB is compared to using a good printer’s entire gamut).

if I select my paper type instead, I see:

There is still a little pure red stuff going on at the top, but much, much less. (If your print is red itself, like mine here, simply turn the “problem view” on and off repeatedly to see where the problems are.)

So now I can tweak my image in the DEVELOP module until this last bit of warning goes away. I can use HSL to reduce saturation or hue or luminance of the colour in question, or I can change overall saturation, or I can decrease exposure: I have all the options open. And my print will be good. And I do not have to make four test prints to finally find the paper that works well!

The Soft Proofing function is amazing. One more reason to live in Adobe Lightroom, if you are not yet!


____

Want to learn? I have scheduled a special all-evening Flash course in Oakville, Ontario on 3 Oct; as well as a five-evening basic photography course, starting Oct 2, aimed at novice to intermediate users who want to learn to use their DSLR properly once and for all.

These courses are very special in that they are like private coaching: I will only take up to 6 students for each course. The Flash course includes the Pro Flash Manual, and the five-evening course includes course materials and homework. Both are now available for signing up on www.cameratraining.ca/ – see the flash course details on this page.


Another basics tip

As you know, this blog is for photography pros, but also for beginners. There’s something for everyone, and in that context, today another fundamentals tip. Namely: focus accurately, using only one focus area/focus spot.

I can’t tell you how important it is to focus accurately. The camera has no brain. It cannot decide at what distance to make the image sharpest. Only you can.

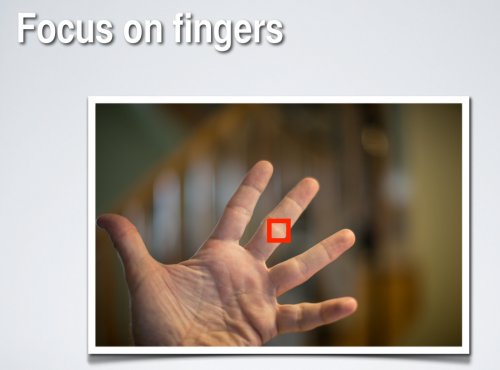
Go to Program Mode (“P”), or Aperture Mode (“A”), Shutter Mode (“S”/”Tv”), or Manual Mode (“M”). Now set your camera to one focus point.

Aim that at what should be sharp, and take the picture.

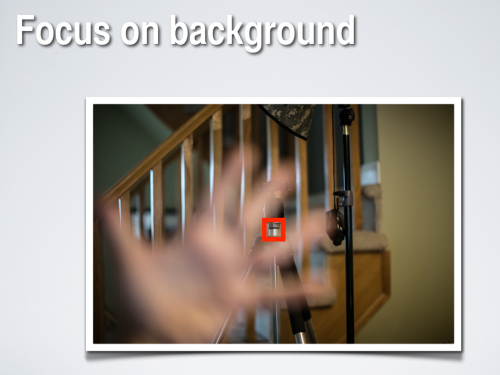
So you can now aim that single focus point at anything, including background items. Then, they will be sharp:

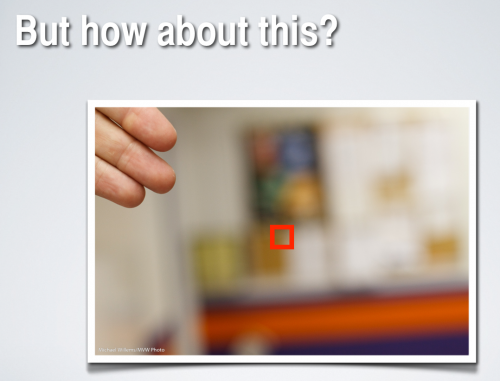
But what if the subject is not in the centre, or where there is a focus point?

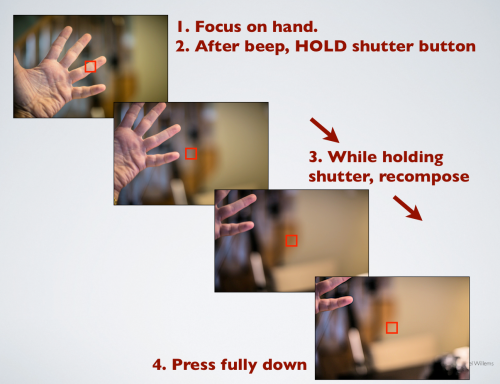
Then you do this: “focus – recompose – shoot”:

So the secret is to hold the focus while you recompose. Holding the focus means holding your finger on the shutter half way, without either letting go or pressing fully down.

While recomposing, you can swing your camera left, right, up, or down, but obviously not forward or backward, because the “beep” after you focus means you have set a specific focus distance.

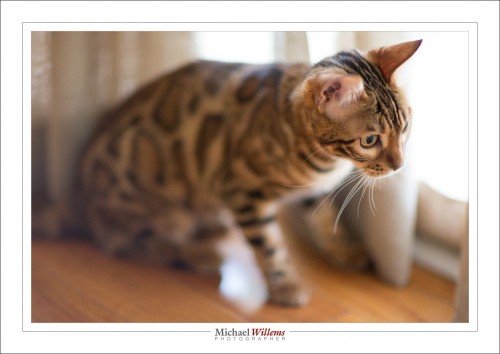
And that is especially important when shooting with a prime lens “wide open”, i.e. at a large aperture (a low “f-number”). Like here, in this picture of Mau the Bengal cat:

More pictures are lost due to inaccurate focus than to anything else. And it is surprisingly easy to do it right. So… do it right!


A Reminder to Newcomers

A lot of new readers here on Speedlighter.ca, so I thought time for a few reminders.

My name is Willems. Michael Willems.

That didn’t sound quite as cool as when James Bond says it. But anyway, I am a photographer, and I teach photography – at Ontario’s Sheridan college, in schools, to groups large and small; in my own school; privately; at Vistek; at shows, and internationally. See www.michaelwillems.ca. This blog supports that teaching. It is my gift to you all. I want the world to know photography, so I share here.

I aim at everyone, from beginners to pros. Every day, I write what I feel like writing about. By reading all articles, you will get the idea and learn. You can also search. Or read categories (scroll to the bottom for this).

I have been doing this daily for four years. Yes, four years of daily posts. I occasionally miss a day, but then I do two posts the next day.

This blog may not always stay daily, but it will always stay free. All I ask in return is for you to:

  • Tell all your friends about it, if you like what you read!
  • “Like” the posts on Facebook and other social media (use the little icons at the top and bottom of each article).
  • Add your voice to the discussions (comment by using the link at the bottom of each article).
  • Consider buying my photography e-books. See the link above. I promise you will like them and learn  – a lot. They cost $19.95 each and are in PDF format, at least 100 pages each, and not addled with DRM protection. I trust you.
  • Consider additional training.

So… for newcomers, a quick tip: learn to focus your camera.

Quick advice of the day:

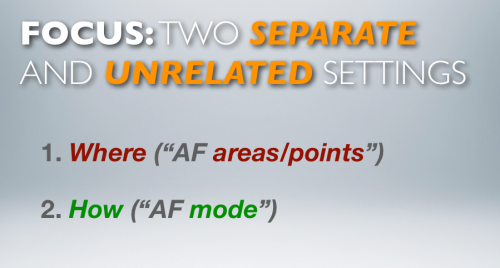
  • Where: select one focus point. Aim that at what should be in the centre of the sharp range. Focus by pressing half way down. Hold. Recompose if necessary. Press all the way down.
  • How: normally use lock focus (“One Shot”/AF-S). When shooting moving objects, consider continuous focus (“AI Servo”/AF-C).

Now go practice that. We’ll talk again tomorrow!


Another Selfies

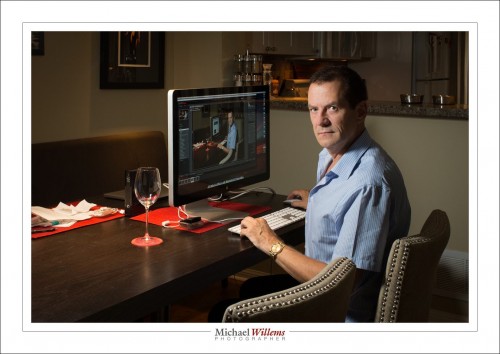
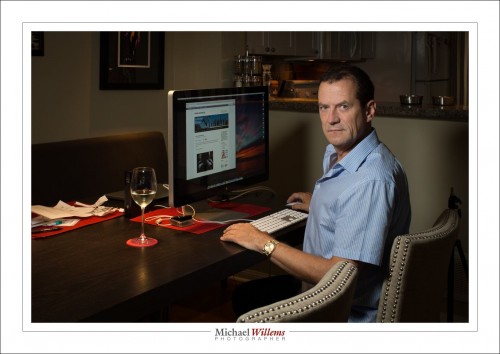
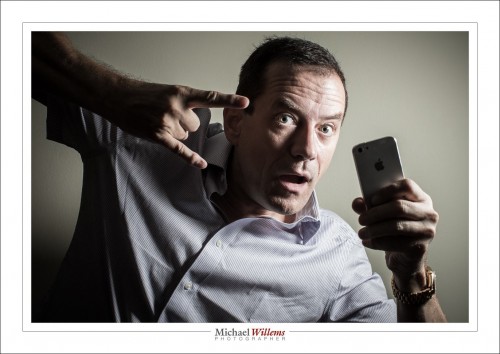
Nope – that is not a grammatical error. It is simply taking liberties with grammar. It’s a selfies in the sense that, if you look carefully, it combines two into one:

Me looking at me!

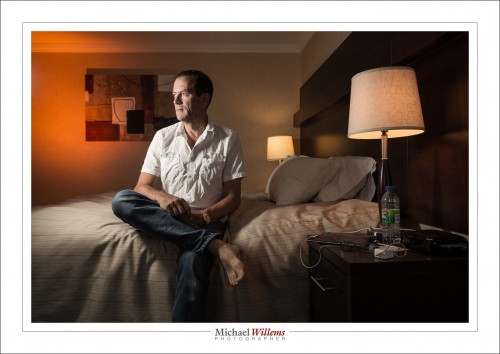
And I thought that today I would explain the thinking behind this portrait and its execution.

First, my choice of model. I used “me”, because I am extremely patient with me; I do not get drunk; I do not stand me up; I do not fall asleep; I do not say “are you done yet”; I do not mind retrying a shot many times if need be. Not that all models are difficult: a true pro model would never make any of these mistakes – but not everyone is a true pro.

So, seeing as it’s me, I wanted an environmental (a.k.a. “situational”) portrait. And what better than my work environment? So that is settled.

Next, then, the choice of lens. I chose a 50mm lens (full-frame: if you had a crop camera you would use a 35mm lens). A little longer than usual: for an environmental portrait I would normally use a 35mm lens, but I wanted to go a little tight to get rid of other “stuff”, like the flash on our left and the printer on our right: both now out of the picture.

Then the light. I wanted to light me with a flash, with a small softbox; but in this case, the ambient light is very important. I wanted the screen to be visible, and I wanted the tungsten and LED lightbulbs to be visible.

But I needed a small aperture. Why? Focus had to be set manually, and I would probably not be entirely accurate in positioning myself. That meant I needed f/11 for depth of field. So given that f/11 and the need to see ambient light, this meant I needed 400 ISO and 1/20th second.

And at the distance I needed, with the Honl Traveller 8 softbox, that “f/11 at 400 ISO” setting needed full power from a 430EX flash, in order for that flash to be the right power. The flash is just upside the picture on our left, on a light stand.

So the first shot:

And finally, the final flash direction. I tried it fairly straight on for the test shot, but for the final shot, wanted more short lighting (making my face thinner). See top.

Then all I needed to do is load that into Lightroom, and take the second shot; and apply the same lens corrections/cropping to both shots. Done!

____

Want to learn? I have just scheduled a special all-evening Flash course on 3 Oct; as well as a five-evening basic photography course, starting Oct 2, aimed at novice to intermediate users who want to learn to use their DSLR properly once and for all.

These courses are very special in that they are like private coaching: I will only take up to 5 students for each course. The Flash course includes the Pro Flash Manual, and the five-evening course includes course materials and homework. Both are now available for signing up on www.cameratraining.ca/ – see the flash course details on this page.

Do you have the flash manual e-book yet? Click on “Pro Flash Manual” above and learn how to do this!


Selfie…

Self portraits are tough. Because you do not know what you are doing. And you cannot focus. And the camera doesn’t hold itself. Above all, it’s a drag, because you want to see to compose, but you cannot. Not until afterward, anyway, and that tends to be a pain too.

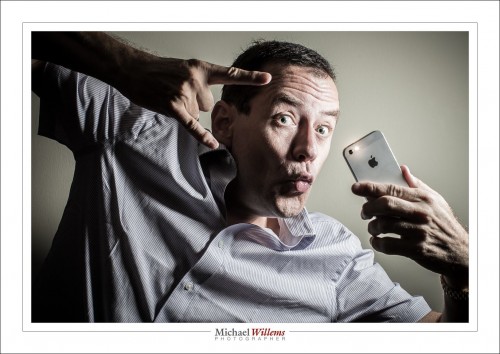
And yet, I do them all the time. Including this, the never do this at home, folks shot:

Yeah. The duck face. With gang symbols, and an iPhone. Ouch. These are usually shot in a washroom, and then you post it on Facebook, if you are a teenage/20s girl, and immediately all your fine feathered friends say “AWESOME PHOTO!!!”, while in fact it’s usually an awful photo.

But as you see, my selfie is technically good. So here’s how I do it:

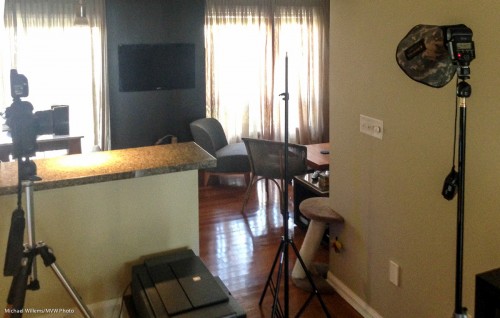
So here’s the TEN WAYS TO A SELFIE:

  1. The camera is mounted on a tripod.
  2. It is set to manual mode, 200 ISO, f/8, 1/125th second (with these settings, only the flash will do any work, and ambient light will not interfere).
  3. It is set to the 10-second self timer mode.
  4. It is equipped with a Pocketwizard (set to send, or “remote” mode).
  5. The flash is mounted via a ball head onto a light stand. The ball head allows me to point the flash conveniently. I have it positioned 45 degrees up, as seen from where my face will be.
  6. The flash, too, has a Pocketwizard (in receive, or “local” mode), and it fires the flash via a flashzebra.com hotshoe-cable.
  7. It is equipped with a Honl Photo Traveller 8 portable softbox.
  8. The flash is set to manual, quarter power. That gave me f/8, at that distance and at 200 ISO.
  9. See that additional light stand? A-ha! I put it where the subject (i.e. I) was going to be. Then I focused accurately on it. Then, with that focus distance set, I set the camera to manual focus. Then, when taking the shot, I moved the light stand away, and positioned myself exactly where it had just been.
  10. I aimed my face toward the softbox, in order to get the lighting pattern you see here.

That’s how I did this shot.

Oh yeah.. you see the iPhone pretending to be flashing? That’s an app, FlashLight, that allows me to turn the light on permanently.

And finally, you see that I also went close, and that I composed using the rule of thirds. Mission accomplished. Including Dreaded Duck face!

Here. One more. In case the duck face was too much to take:

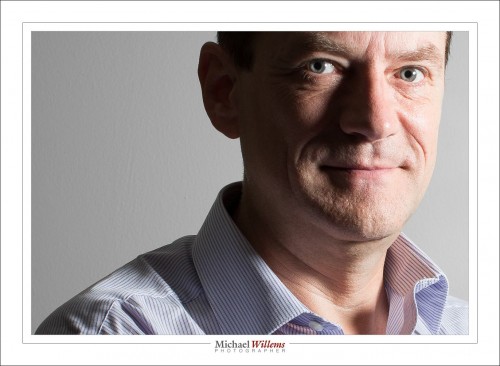
Oh, OK, OK, here’s a more serious one, where I went closer:

And one last one from the same setup:

Now you go try!

____

Want to learn? I have just scheduled a special all-evening Flash course on 3 Oct; as well as a five-evening basic photography course, starting Oct 2, aimed at novice to intermediate users who want to learn to use their DSLR properly once and for all.

These courses are very special in that they are like private coaching: I will only take up to 5 students for each course. The Flash course includes the Pro Flash Manual, and the five-evening course includes course materials and homework. Both are now available for signing up on www.cameratraining.ca/ – see the flash course details on this page.


More Chances To Learn!

Great news for “area residents” (as The Onion would put it): more chances to learn from me in person!

I have just scheduled:

  1. A special all-evening Flash course on 3 Oct;
  2. A five-evening basic photography course, starting Oct 2, aimed at novice to intermediate users who want to learn to use their DSLR properly once and for all.

These courses are very special in that they are like private coaching: I will only take up to 5 students for each course. The Flash course includes the Pro Flash Manual, and the five-evening course includes course materials and homework.

Both are now available for signing up on www.cameratraining.ca/ – see the flash course details on this page.

Also, more Oakville courses as well as all-new Hamilton Studio dates will be announced soon. Let me know if you have particular wishes, so that I can keep these in mind when designing the schedule.


I’ll Just Do It Myself!

I tend not to worry about, or comment on, the photography market, but sometimes I shake my head and say “what?”.

One of those times is today. A friend asked me to help her shoot small high-end product for a retailer who sells… small, high-end products. Think thousands, and very small. So we quoted for this – the images to be used for a full-page advertisement.

Example of small product, shot with tilt-shift lens


This kind of shooting is not simple. It involves such things as:

  • Camera – a good one.
  • Macro lens
  • Tilt-shift lens
  • Tripod
  • Lights – at least three or four available flashes, preferably
  • Modifiers: Reflectors, softboxes, umbrellas, lightboxes
  • A light table
  • Time

Oh, and knowledge.

And post-processing software, expertise, and time.

So what did the retailer do? He posted this:

So I’ve decided to just buy a camera, seeing what the costs of a shoot are. Any cameras or lenses that are best for close up macro?”

He later asked:

What is a good DSLR to buy?

And when asked whether he knows how to shoot in manual mode, he replied:

No. How hard can it be?

So there is the market problem in a nutshell. Everyone thinks they can do it. I am not sure how to break it to this retailer, but in fact it is not simple, and it involves a lot more than just buying a camera.  “Every professional skill takes 10,000 hours to master”, it is often said. By whom, you ask? By me, and by many others. Because it is true.

I think this retailer may be better off just having us shoot his products, and making it a lesson at the same time. And I do hope he decides to do that, rather than trying it himself.


Post hoc

..ergo proper hoc? No – forget that: I am not talking about logical fallacies.

I am talking about what happens to photos after you take them.

Here’s what happens after a shoot, quite often:

  1. You shoot.
  2. You get home and look.
  3. You think “Oh, I am not very good”
  4. You think “Oh – I am amazing, actually”
  5. Repeat 3 and 4 a few times
  6. After oscillating a while, you settle down and pick some images to use
  7. You share those, and you are done.

But what you should do is also: look again later. You increasingly see your images as what they are, not as “what you were doing when you shot them”. This is why you use Lightroom, and this is why it is useful to go back and review your work – even years later.

For example, three years ago, I shot an event with showman/radio person JT Foxx (brother of a then friend of mine) on a visit to Toronto. At the time, the event pics were good, but he did not like the portraits – and indeed, he had not had the best night before, and the light wasn’t great, and I had no off-camera flashes, and so on. So – I got some snaps, but I was not terribly happy with them either.

Until I just changed upon them again – three years later. I think, now, that this is actually a very good portrait, showing his personality:

(95mm, 1/125th sec at f/2.8, 800 ISO, bounced flash).

So I got a portrait out of this shoot, three and a half years after the shoot. And that is my point – look again at your images. Try a different crop (or, as in this case. sepia instead of colour). Have a new eye – and even years after a shoot you will discover gems that you did not know where there. Your image library is a mine – and sometimes a gold mine.


You have nothing to fear…

…but fear itself. And a little grain. When it comes to high ISO values, that is.

But the benefits of those high ISO values a modern camera gives you can be great, too.

I often see new photographers hesitate to go above 400 ISO, say. Well, it all depends on the camera of course, but generally, you shoot to get pictures, and a picture with grain at 1600 ISO is better than a blurry mess without grain at 400 ISO.

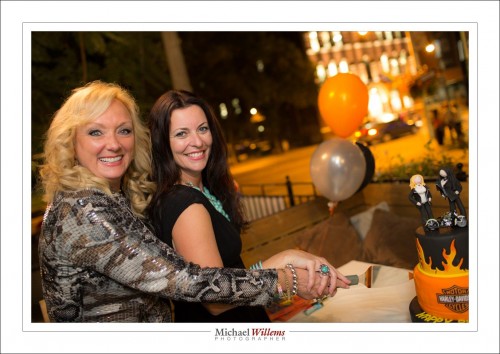
Look at this example from Wednesday night. Jane Dayus-Hinch, wedding organizer/guru/TV personality, with Eddie Suliman, cutting their joint birthday cake.

Outdoors, on Toronto’s Church Street.

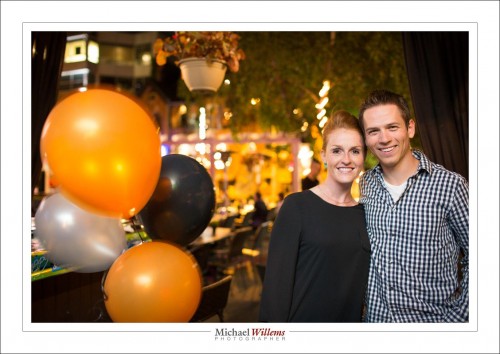
Shot at 1/30th second at f/2.0, at 3200 ISO, using my 1Dx and the 35mm f/1.4 prime lens.

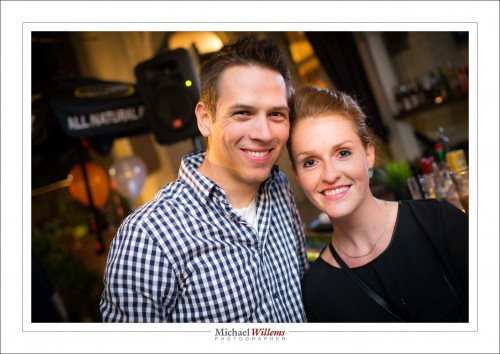
Another few examples, all shot at roughly the same values (the last one at 1/20th second):

So yes, you can shoot at high ISO values. And yes, you can shoot slow, if you use the flash to light your subject (bounced, of course). Your camera will not be as good as mine, but a little grain is OK – better than a picture with those horrid black backgrounds.

___

Want to learn this stuff? Want me to teach you how to make pictures just as good? Sure thing. Contact me. I teach at schools, clubs, colleges, high-end stores, and privately, in person or via the Internet. And it is remarkably easy. Once you know.