Back Yard

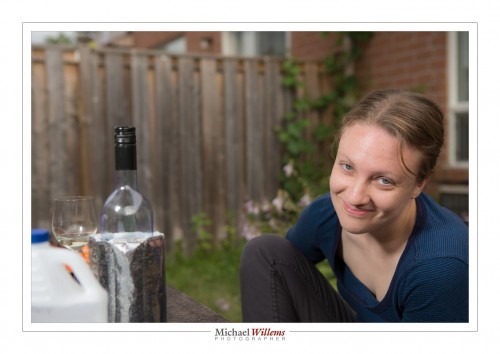
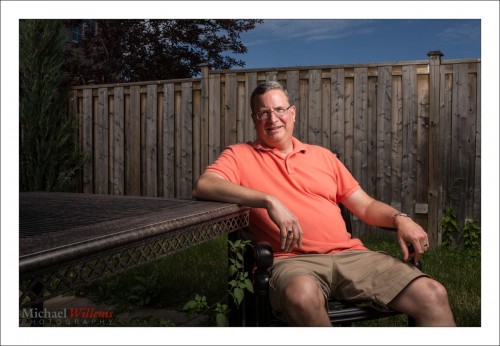
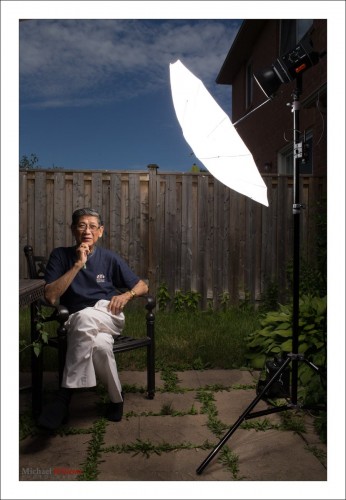
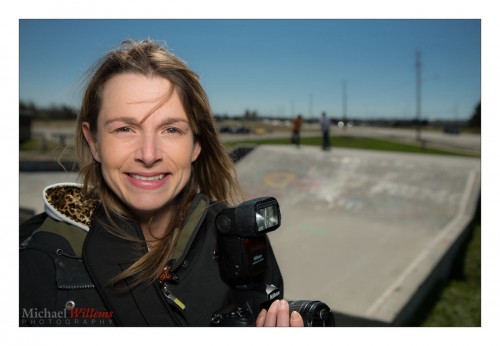
You can take nice pictures in the back yard. Like this one of yesterday:

To do this, you need:

  • An SLR camera with manual mode.
  • Off-camera flash: e.g. a remote flash in TTL mode fired by your camera’s pop-up, for many cameras, or by a 580EX/600EX/SB-900/etc on the camera; or a remote flash in manual mode fired with Pocketwizards.
  • Perhaps a modifier, like an umbrella or a small softbox.
  • A light stand and bracket to mount all the above.

So the equipment is relatively simple. And the use? Not so difficult either. Let me repeat how you do this.

First we set the exposure of ambient part of the image (the “background”):

  1. Camera on MANUAL mode
  2. ISO: Set to 100 ISO
  3. Shutter: Set to 1/250th sec
  4. Aperture: Start at f/5.6 if it is overcast. Or if it is brighter, go up to f/8, f/11, even f/16. Trial and error can work: you simply go as high as you need to get a darker background (for instance, on a sunny day, f/5.6 or f./8 will give you a way too bright background). For me, a “darker” background is -2 stops. If you like less drama, -1 stop is OK.

That’s the background done.

What about the foreground?

If the aperture you need to get to a darker background is f/8 or a smaller number, and your flash is close to the subject, you can probably use an umbrella or softbox. If it is f/11 or higher number, you will possibly need to use direct flash, unmodified, since a modifier loses power.

All I did was add a little vignetting and some minor tweaking.

Easy once you get the hang of this. And I can help in many ways. One of those ways: Aug 18-22 you get the chance to learn from me in a very intensive 5-day workshop at the annual Niagara School of Imaging, held at Brock University. There are still a few spots open: book now if you dig flash as much as I do.

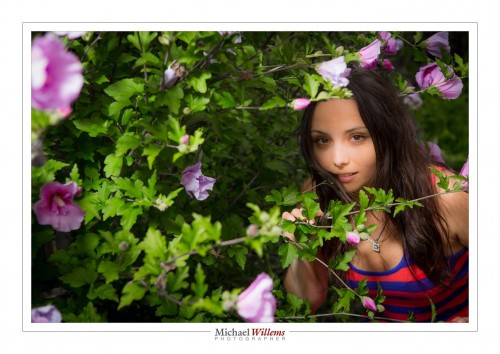
 

Photo-graphy

Photography has at its root the word Photo, “light”. It’s so often all about the light.

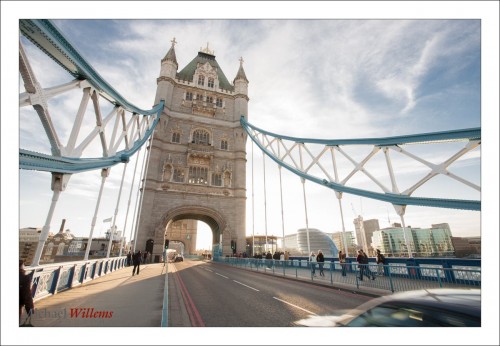
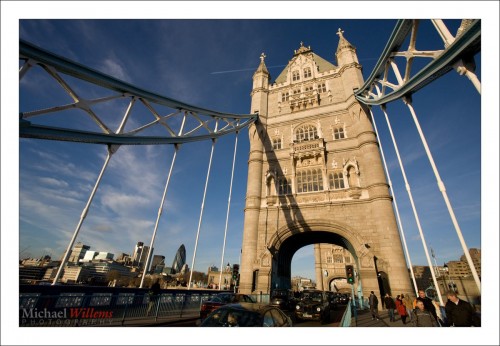
Here is London’s Tower Bridge, a few years back, from the north side:

And here it is again, exactly five minutes later, under identical conditions, but seen from the other (south) side:

Those look like they were taken on different planets, or were seriously enhanced in software. But no, they were not: they were both simple images shot “as they were”.. the difference is the direction of the light. Need I say more?

So when you make (not take – make!) a picture, one of the first things you should do is look at the light. Where is it coming from? Where would you like it to be coming from? Is there any way you can change it, perhaps by moving yourself, or moving or reflecting the lights, or using additional light?

Try it, and see how much difference it makes.


Recipe, another

Yesterday’s recipe was the “Willems 400-40-4 rule” for indoors flash shots.

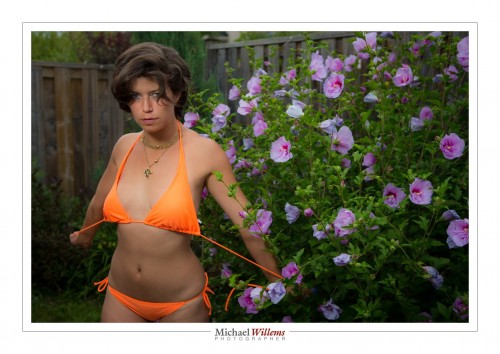
Today, another one. Say that you want to go outside for a saturated colour flash shot like this, on a fully sunny day at noon.

So for that you need a flash with a modifier. I used a strobe, but you can use speedlights if you are willing to fire them at high power and have them close to your subject.

Here’s my strobe:

Now follow my logic.

Step One: ISO and Shutter. The sun is bright and I am competing with it. So to cut the sun, I will be at low ISO (meaning at 100 ISO, the minimum) and high shutter speed (1/200th sec, the fastest sync speed for many cameras). This is a given, an “always” starting point: by default. sunny day means 100 ISO and 1/200th sec).

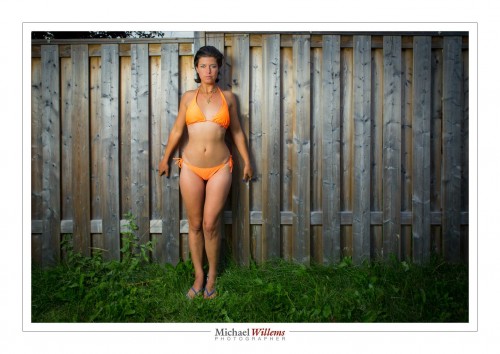
Step Two: Aperture. At that speed, a “normal” exposure would be f/11 (this is the Sunny Sixteen Rule in practice – look this up on this blog – yes, there is a reason I teach you all this stuff. At 200 ISO it would be f/16 “sunny sixteen”, so at 100 ISO, we’d need f/11.). So we arrive at 1/200th sec, 100 ISO, and f/11… this looks like this:

But wait – I want that background darker, to get saturated colour as in the first shot, not light as in the second shot. So we go to at least f/16, one stop darker than “sunny sixteen”. Now, indeed the background is darker.

Step three: Flash power. Now we adjust the flash to give us enough power to get to f/16. If we are using a small flash, that means no modifier (loses too much light); if using a strobe, we adjust it until the brightness matches f/16. Use a meter, or use trial and error.

So the method was:

  1. Set low ISO and fast shutter;
  2. Decide on aperture you want;
  3. Set flash to match that aperture.

And to this, we add:

  1. Use a modified flash if you can – like shooting through an umbrella, as I am doing here. But modifying loses power, so you may need a direct flash, or have the flash very close to the subject.
  2. Use off-centre composition (avoid the centre – use the Rule of Thirds).
  3. See if you can get diagonals included to lead into the image and give it depth.
  4. Avoid direct sunlight on the subject’s face: it shows wrinkles and it causes squinting. Sun from behind gives you “shampooey goodness” instead: much better.
  5. See if you can angle the flash w.r.t. the subject, off to the side, and turn the subject into that flash. Also raise the flash 45 degrees (looks natural and you see no glasses reflections).
  6. See if you can get lucky and include all three primaries, red (-ish); green and blue, in the image. If so, you have a good image!

Let’s see that image again. Click on it and click through to see the original image at full size:

That looks like a photoshopped image, and yet it is not – it is the way I shot it in the camera. yes… and I can teach you the same – it really is simple, once you get the idea.

___

The Pro Flash Manual e-book is designed to teach all this and much, much more, and it dovetails into this site and into my classes. Learn about both these e-books here on my web site. Want to learn? Check out www.cameratraining.ca as well.


Simple Setting Tip

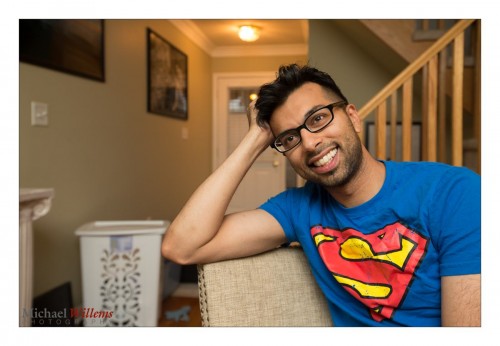
You have all heard this before, but one more time: here is a simple setting for “indoors flash in a typical living room”. For photos like this, in other words, of my friend and colleague photographer Taha Ghaznavi:

Not bad, eh? Would you like to learn to make photos like this, with those nice warm background colours, and natural looking shadows? Well – you can, if you have an SLR and a flash. Here’s how:

  1. Camera on MANUAL (“M”)
    1. ISO: 400
    2. Shutter: 1/40th second
    3. Aperture: f/4
  2. Set the White Balance to FLASH
  3. Ensure that the Flash is set to TTL (that is its normal auto mode: it says something like “TTL” or “ETTL” on the display on the back).
  4. Aim the flash 45 degrees up – BEHIND you (ensure there is a ceiling or wall).

Magic! Your background is dark, but not too dark. There’s no reflection off the glasses. The face looks not flat, but three-dimensional.

Simple starting settings like the Willems 400-40-4 rule above are important. Recipes. Of course they are just that – simple start settings. If your subject is too dark, for instance, it may be that the ceiling is too high for good bounce. In that case increase your ISO to 800 or even to 1600. Or if your subject is wearing white, you may need “+” flash exposure compensation. And so on.

So you may need to vary, but by starting with good rules of thumb like the Willems 400-40-4 rule you will not be too far off for a start!

___

These recipes are the basis for my Photography Cookbook – a recipe book that will get you started with many good situations. But a thorough knowledge of the fundamentals is also needed if you want to be a good photographer. The Pro Flash Manual is designed to teach that. Learn about both these e-books here on my web site.


Softly, softly

“What is a softbox used for?”, I often hear. “To soften light”, I respond. But it occurs to me that showing you is probably worth a lot more than telling you.

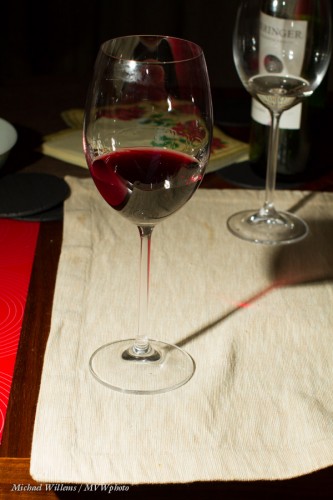
Here’s a picture of a wine glass, taken last night to demonstrate exactly this point:

As you see, I used off-camera flash, so it’s not too bad – but look at the shadows from the glasses’ stems. They are well delineated and sharp and clear. We call that “hard” shadow, caused by “hard” light.

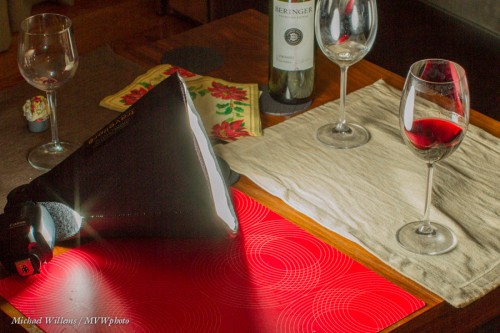
Now let me put a little softbox on the flash:

I used a Honl photo Traveller 8 softbox – one that folds up to basically a flash nothing, and is light and sturdy. A very useful tool, and I always carry one or two.

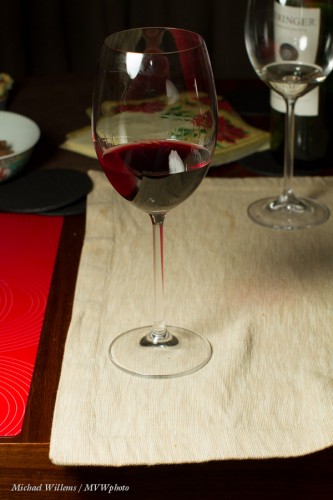
What does it do? It modifies the light (a “modifier” is anything that changes the direction, size, or colour of the light) by making it bigger. A large light with respect to the subject avoids sharp shadows: the larger the light, the fuzzier (“softer”) the shadows become. Now look at the shadows coming from the glass:

What shadows? They are almost gone now! And that is what a softbox does. Even a small softbox, if close to the subject.

Why “close to the subject”? because what matters is how large the light source is with respoect to the subject, or, if you prefer, “as seen by the subject”. Small gives hard light; large gives soft light. Take the sun: it may be large, but as seen by us, because of its distance from us, it looks small, so it gives hard light. This 8″ softbox, on the other hand, may be only 8 inches across, but because it was close to the subject it looks large. Hence, soft light.

The softbox is better than an umbrella in the sense that it does not throw light all across the room. That is why the softbox is my favourite light softener, and that is why I usually carry a number of them, large and small, when I shoot.

___

My new e-book “Pro Flash Manual” discusses this and all sorts of other modifiers in detail, of course, as well as teaching you the rest of flash, all in once go. It’s a PDF; just $19.95, contains 123 unprotected (i.e. easy to read and copy) pages, and you can get it here now.


It’s 2AM, or “a day in the life”…

…and I am back from an impromptu shoot. A friend and student needed some help with a commercial shoot for a high-end hair salon. 11AM-7PM they did the hair; 8-11pm my friend was shooting. Except it didn’t go too well. So I drove up to lend a hand.

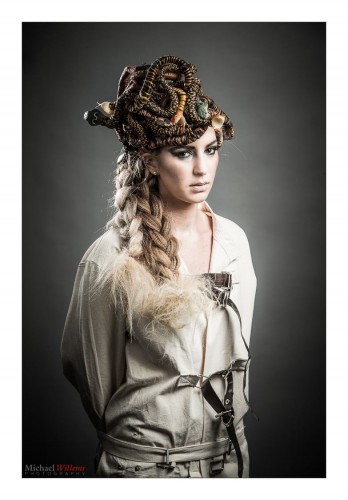
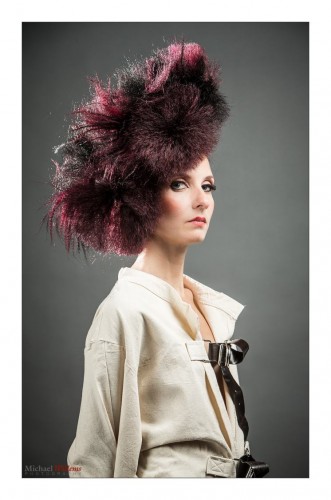
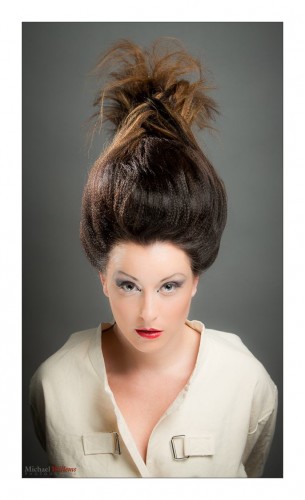
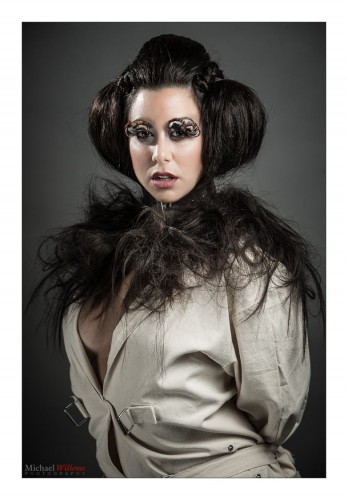
The salon owners are extremely creative. And Italian. That made this a very pleasant shoot. Here you go; Medusa in a straightjacket:

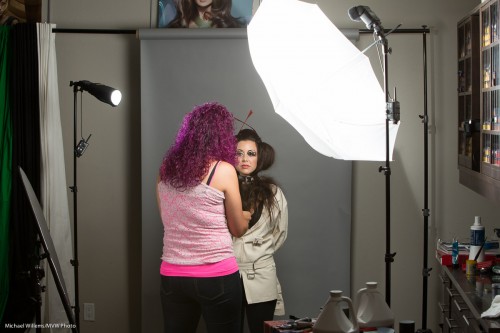
I had to first pack my portable studio into the car. Then drive 60km. Then quickly unpack, and quickly ask my colleague to set up a backdrop: I had brought the grey paper backdrop, because grey can be made anything from white to colours to black. Time was short by now.

Then the lights. I brought the strobes, but decided to use the speedlights. Lighter, smaller, quicker. A hair shoot means a main (or “key”) light shot through an umbrella, and a reflector for fill.  And, very important, a hair light through a snoot or grid for “shampooey goodness”.

For consistency, I used Pocketwizards and manual settings on the flashes. If this had been an event, I would have used TTL.

Here you see the setup:

Then, metering – flash set to half power gave f/7.1. At 200 ISO and 1/125th second. Done. Now I can concentrate on shooting the fabulous creations!

Part of the skill that goes into a shoot is in areas like problem solving and technical knowledge. But a larger part goes into deciding on the positioning. The people skills, in other words. My colleague is very good at those, so I am looking forward to seeing her work.

In any case: including the drive, five pictures took me about seven hours altogether to make; and that is not counting the post work – the pictures above have had minimal editing done. So now you know why pro photography costs money.

I would add more here, but it’s 2:15Am and I need some sleep!


Group Shot Basics

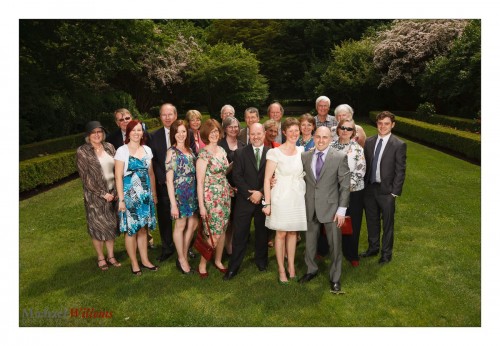
Another post on group shots. Here’s another take on a good group shot I made at a wedding:

I shot that as follows:

  • At 1/250th second, 100 ISO, f/8.
  • Using a 35mm lens.
  • Using two strobes (battery-powered) fired into umbrellas.
  • Using Pocketwizards to fire them.
  • Me standing on a chair.
  • Shooting into the sun’s direction (i.e. the group is turned away from the sun).
  • White balance set to “flash”.

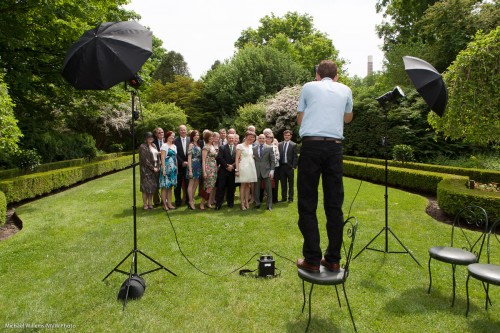
That looked like this:

Shooting properly gave me a much better shot, wouldn’t you agree? I have saturated colours. The audience are the “bright pixels”. My perspective show everyone, not just tops of heads, and the backdrop is vegetation. Turning the crowd away from the sun prevented squinting.

And that’s how its done!


Blink. No, don’t!

Today a reminder, prompted by my recent Montréal visit.

If your subjects do this:

…that is because:

  1. The flash is aimed straight at the subject (remember, outside, since you are majorly mixing flash with available light, you can get away with this if you need to); and
  2. TTL flash uses a pre-flash for metering. Then, a few ms later, when the shutter opens and the “real” flash goes off, your subject is already in mid-blink from the preflash.

Yes, you will recall there is a solution. Flash Exposure Lock (FEL, Canon) / Flash Value Lock (FVL, Nikon). This allows you to first press a button for the preflash, and then press the shutter for the picture and the “real” flash.

  • Canon: use the “*” button, unless your camera has a little “FEL” or “M.Fn” button; then use that.
  • Nikon: assign the FVL function to the Fn button (do this via the pencil menu). Note, D3100/D5100 cameras lack this function. Then use that button.

After pressing the button as per the above, you have a few seconds to fire the “proper” flash and take the image. Remember to warn your subjects there will be two flashes and the second one is the “real” one.

That little tip makes you a better photographer than uncle Fred. There. You’r welcome.


Lighting In Timmins

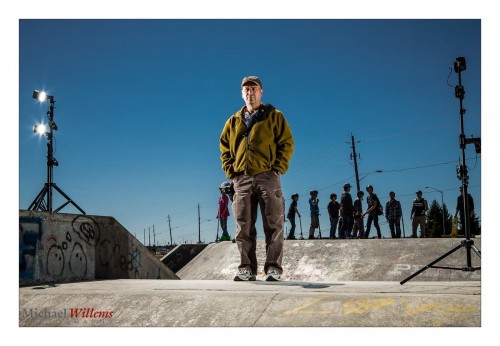
I am in Montreal, but take a look at this shot from the Timmins workshop on Saturday:

I use flashes – two on each stand:

  • Flash makes the subject stand out (I like a “darkground” -a darker background).
  • Side flash makes the subject three-dimensional.
  • More light is good. One stop more by doubling the light on each side.
  • Two, also to cover a vertical subject more evenly.

I used 1/250th and 100 ISO, obviously (why “obviously”?) – and that got me f/13.

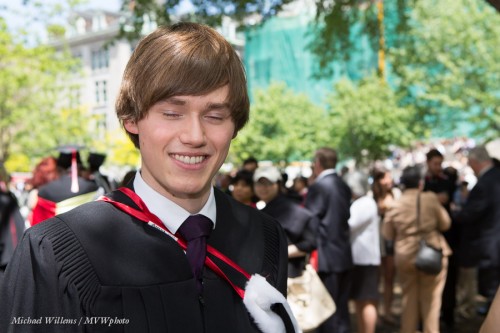
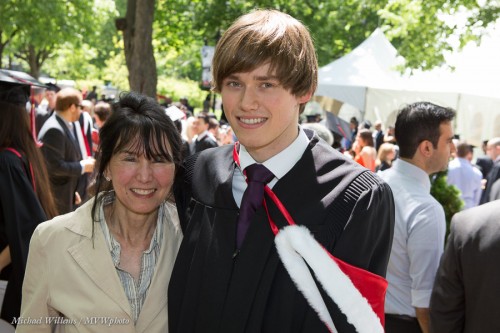
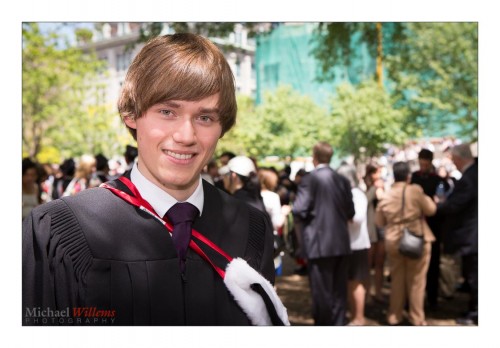
Now off to shoot my son’s graduation ceremony at McGill – yes, I am in Montréal.


Bubutbut

I often, of course, say this – “Limit: when using flash, you cannot exceed your camera’s fastest sync speed (usually 1/250th second)”.

And then almost as often, I hear the following objection:

“But Michael: you can use High Speed/Auto FP flash!”

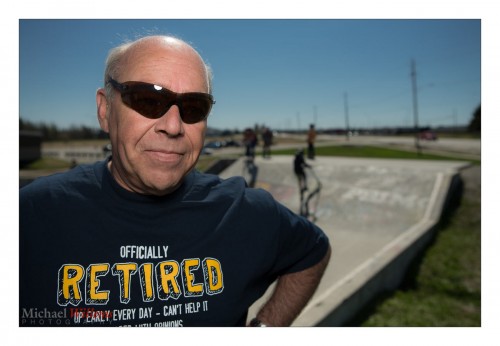
And that way, you can exceed the sync speed. Sure – like in this photo of Aurèle Monfils of the Porcupine Photo Club, which I made yesterday with the standard sunny day blurred background setting (write it down!) of:

  • 100 ISO
  • f/4
  • 1/2000th sec

…using an on-camera flash fitted with a Honl 8″ Traveller 8 softbox:

Yes. You can, as you see!

But now I have a “but”.

The high-speed mode works by effectively making your flash into a continuous light, at least for the duration of the shutter speed; it flashes pulses at 40 kHz. Fine, but most of those pulses reach the closed part of the shutter, so most energy is wasted; hence, your effective range is reduced dramatically. Maybe just over a metre at 1/2000th second when using the flash without modifier; with a softbox as I was using here, maybe 30cm, no more.

Hence the slight “wide angle” look in my image above due to me having to be close, with a wide lens. As in this one of Aurèle’s daughter Lisa:

So while it is true that high speed/FP flash solves the sync speed problem, it’s  not a panacea, and in practice, it is only occasionally usable.

Footnote: Lisa is turned away from the sun: It is behind her, meaning she is not squinting, and the sun becomes the shampooey goodness™ light on her hair!

___

Want to learn to use modern Flash technique? I travel worldwide for hands-on seminars. Vegas, London, the Netherlands, Phoenix, Niagara, Toronto, or Timmins: wherever you want me, I’ll be there for you.