El Carro

Car pictures. Always fun. Including snaps:

20170328-MW5D3454-1200

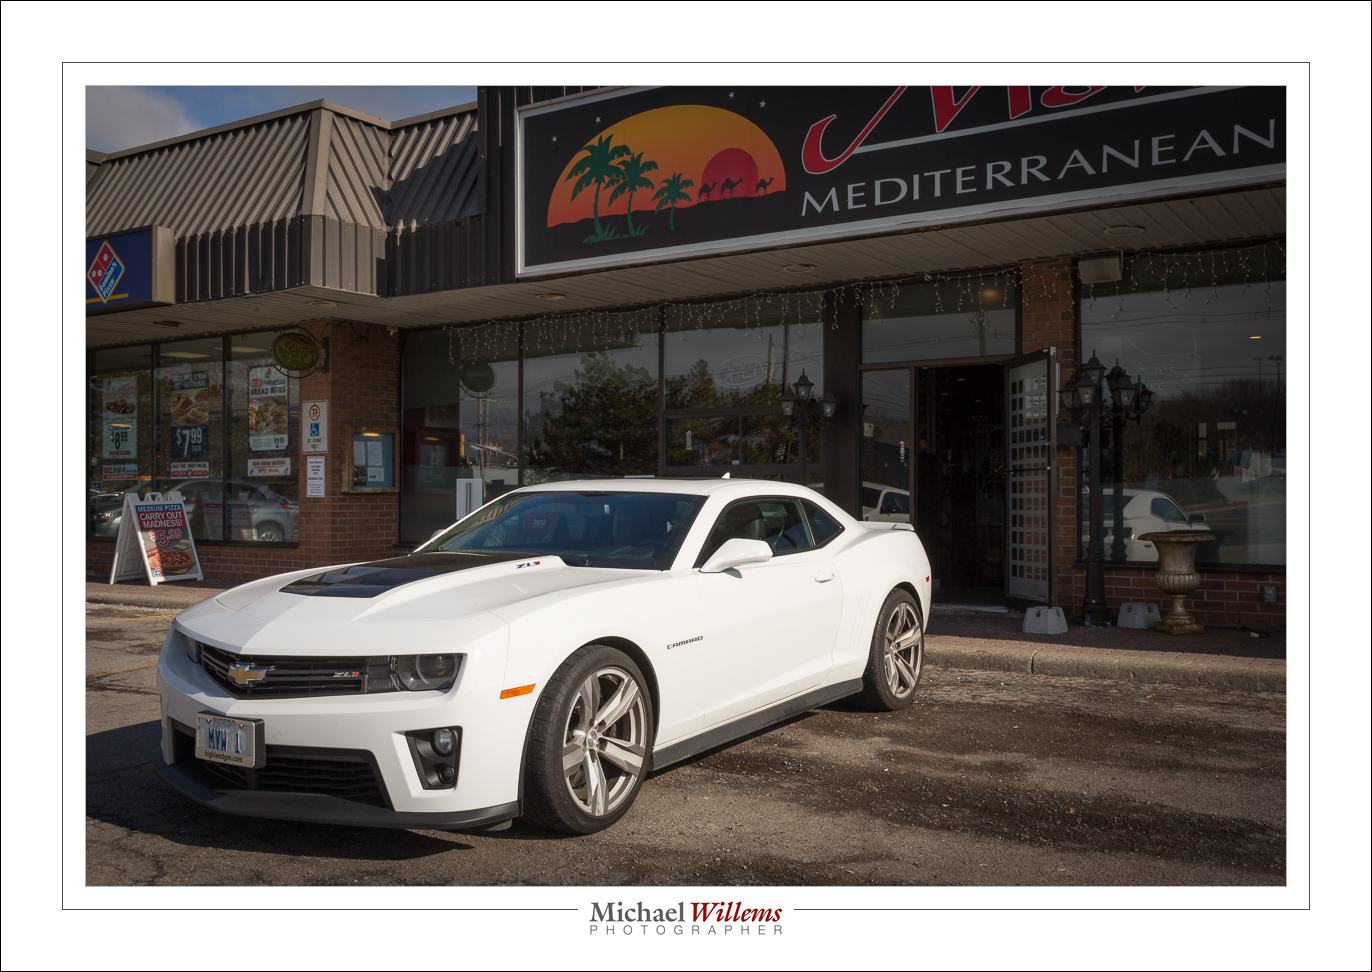
That’s my Camaro ZL1, at 400 ISO, 1/400 sec, f/16.

Does anything occur to you when you see those numbers?

Yes, it’s the Sunny Sixteen rule.

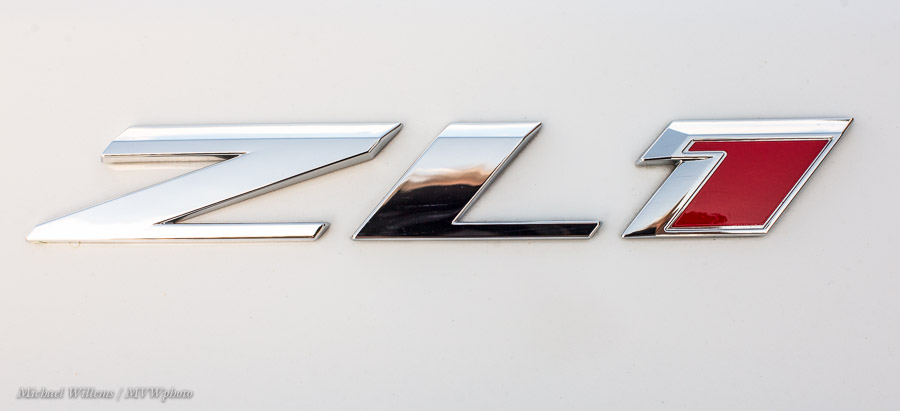
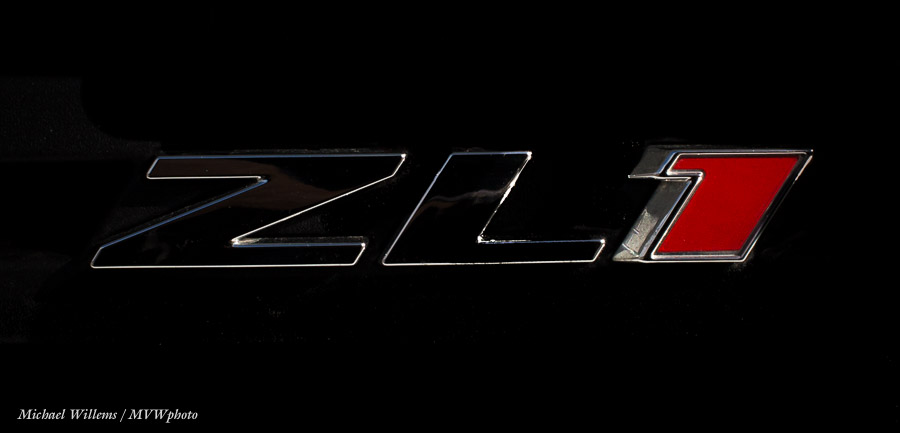
Anyway, the car has a lot of detail, like the badges:

20170328-MW5D3456-900 20170328-MW5D3455-900

So here is my all-new Camaro. Flash TTL, flash bounced behind me,

20170331-MW5D3475-1200

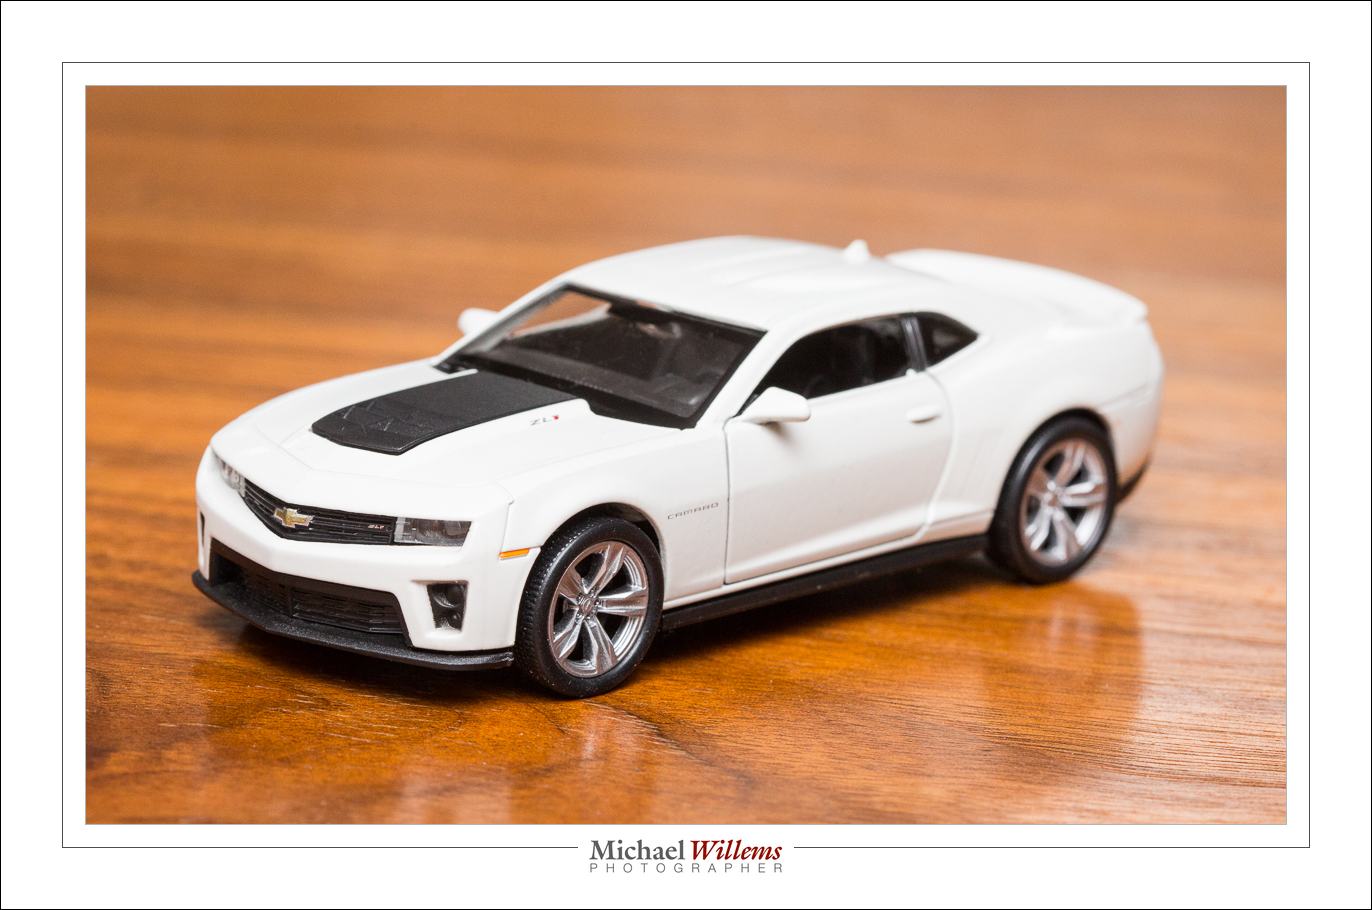
That is right, a little toy. And it’s my car’s exact colours, too. And that toy has surprising detail. The same badges, for a start.

20170331-MW5D3475-900-4

Note: Over the next while, long term that is, I plan to use this toy as a prop in pictures all over the place, so stand by!

Always carry a camera dept: drinks in the above restaurant, and they looked pretty enough to take a snap:

20170328-MW5D3464-1200

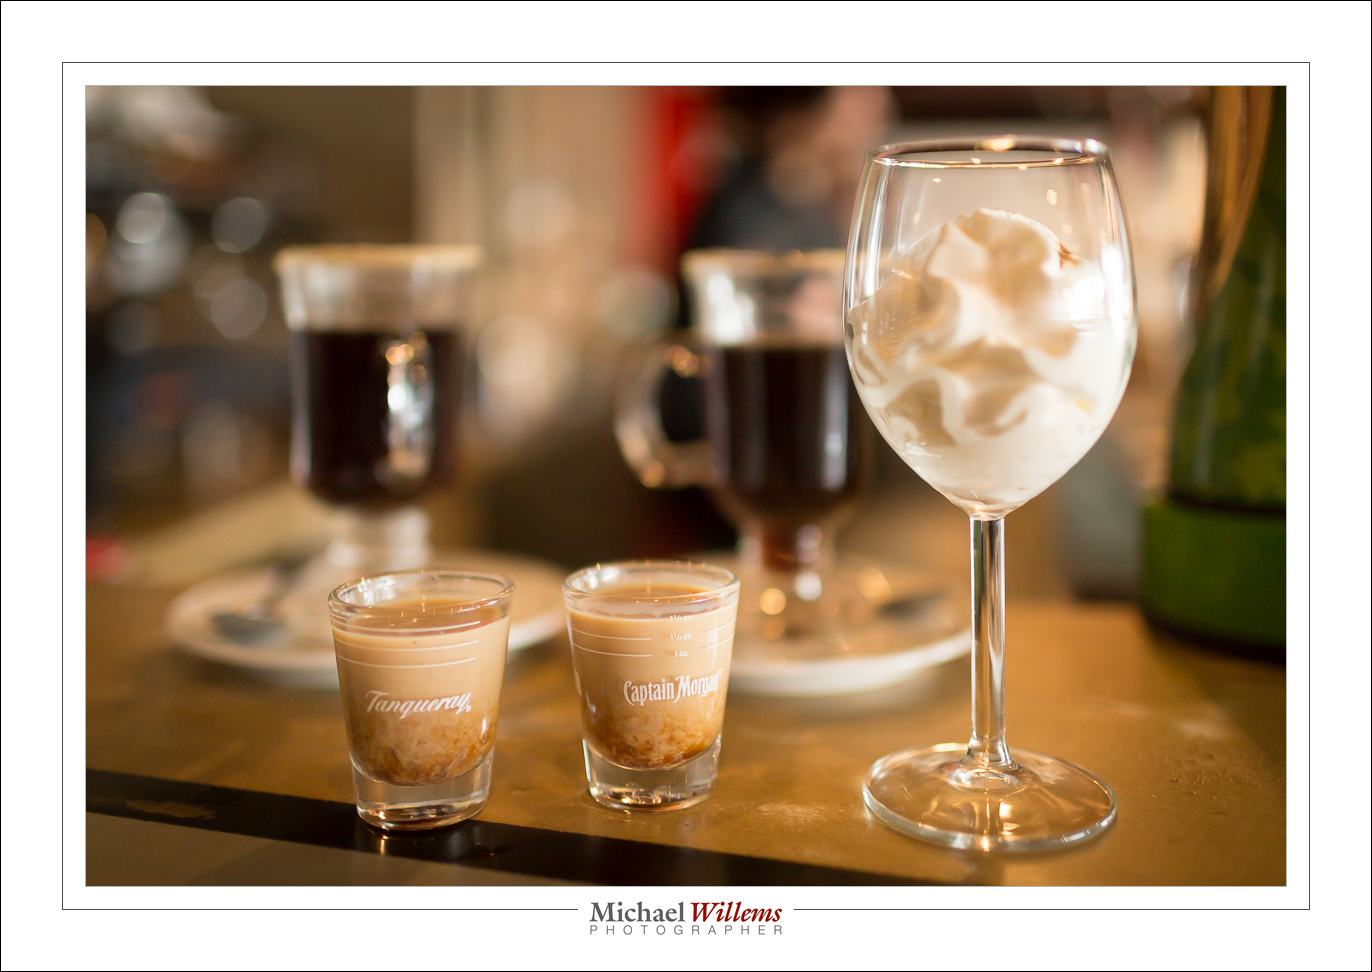
(35mm lens, manual mode, 1/320 sec, 1000 ISO, f/2.2.)

Congrats to students!

Congratulations to my students who won in the recent Capture Oakville photo competition!

  • Overall First place went to my student Kevin Workman
  • Hillary Currer won first prize in the “Unaltered/Out of Camera” category
  • Roger Passmore won first prize in the “Capture the Human Spirit” category… see his entry below.
  • David Hook won first prize in the “Capture Oakville” category.

Ha! That means that two thirds of the winners in this prestigious contest have been my students. Well, I am certainly proud to have contributed to their success, and this makes me extra happy to be a teacher of photography.

Congratulations: excellent work.

As for contributions: I think perhaps I contributed a little more than average to Roger Passmore’s winning entry “Michael”. Here it is:

Michael Roger Passmore

See what I mean? He captured my spirit wonderfully: serious, perhaps even grumpy, and depressed at many of the things I see in the world. Yup, that’s me!    🙂


Happy New Year!

Happy New Year from The Speedlighter! 

As for your 2017 resolutions, how about this one: Make this the time you finally perfect those skills you always wanted to hone! Skills that allow you to quickly and easily do pictures like the ones I took over the last couple of weeks. These include a few animal (and animal-plus-owner) pictures:

20161110-mw5d1613-1024

20161110-1dx_1783-1024

20161219-1dx_2654-1024

20161113-1dx_1819-1024

All those were made with the 85mm f/1.2 lens, and used a single speedlight in an umbrella.

But I also did an executive portrait, just yesterday:

20170101-mw5d2658-1024

20170101-mw5d2676-1024

Do you see the difference between the two above? For the first one, I did not want to show the outside (boring, homes). Easy, so the picture,like almost all my pictufes, was stright out of the camera.

For the second one, however, I did want to show the blue sky. So I exposed that one less (using the magic Outdoors Recipe–one of the things you will learn if you turn up). Both used flash, of course; fired by Pocketwizards and with their power set manually. The second one used much more flash power because I was using low ISO and small aperture to kill the outside light. I also had to, therefore, brighten the Apple logo in post-production.

20170101-mw5d2655-1024

I would almost call that last one an environmental portrait.

The next ones are certainly environmental portraits:

20170101-1dx_3062-1024

The one above used a 24-70mm lens and a speedlight with a Honl Photo 1/8″ grid. The one below, a 16-35mm wide angle lens and a speedlight with an umbrella:

20170101-1dx_3048-1024

What do they all have in common? Simplicity, good exposure, and a thorough knowledge of the technical necessities.

You can learn this too. Why not do it? I have several great opportunities coming up!

All of these are excellent learning opportunities, and will broaden and deepen your knowledge significantly. Hope to see you there and then. 


Fill, but not too much.

When doing a portrait, you use a main (“key”) light, a fill light, and optionally, a background light and a hair/edge light.

The purpose of that fill light, oddly, is to be darker than the main light. This introduces depth into your picture, and it narrows the subject’s face.

OK, so fill is darker than key, But perhaps not completely dark, like here:

20161023-1dx_1386-900

Nice and atmospheric, but perhaps a little too much drama.

So we add that fill light, but set it, say, two stops below the main light (so if your meter reads an aperture of f/8 for the main light, it should read f/4 for the fill light). Now we get what we wanted:

20161023-1dx_1387-900-2

If you make it too bright, i.e. you do not set it two stops below the key light but you set it at the same brightness, you might get something like this:

20161023-1dx_1387-900-4

As you see, the face looks wider now, and it loses that “real”, three-dimensional look.

So you should probably start at –2 stops for the fill light, and then adjust to taste: you are the artist, after all!

–––

Learn to do it yourself! Michael teaches portrait lighting and many, many other photography subjects at Sheridan College in Oakville, and to small groups or individual students all over the world, in person or via Google Hangouts. See http://learning.photography for details. 


Available light

Yes, available light rocks! Beautiful, colourful, soft, and so on. But when a photographer says “I am an available light photographer” or “I am a natural light photographer”, that usually means “I don’t know flash”.

Because it is often in the mixing of available light and flash light that things get interesting. Certainly in daylight.

Also–hiring a pro pays. Yes, you can get it done cheaper by Uncle Fred, but would you get pictures like these, from yesterday’s family shoot? (Hint: “no”.) A few hundred dollars and you have memories for life:

20161113-1dx_1945

20161113-1dx_1853

20161113-1dx_1819

20161113-1dx_1891

20161113-1dx_1935

If you can see these pictures, there’s plenty of available light. But had I not had my assistant hold the flash off the side near the subjects, they would have been silhouettes! Or I could have exposed for the subjects – in that case, a very bright, blown out background–with very little colour.

So you hire a pro for this. Right equipment (that super sharp lens); Right technique:

You have heard this from me before:

  1. Use the magic outdoors formula, and only vary f-number.
  2. Use long(-ish) lens (85mm prime in this case).
  3. Subjects away from the sun: means no squinting and the sun becomes hair-light.
  4. Fill with flash, off to the side for modelling.avoiding “flat” look.
  5. Flash fired in this case with radio triggers (Pocketwizards), and on manual, 1/8 power, with Honlphoto 12″ softbox (click on the small ad on the right to order, and use code word “willems” to get an additional 10% off).

BUT THERE IS MORE. If I print, I ensure that the print is perfect. Permanent photo paper. Pigment printing (not dye, which can fade). If a face is too pale, I selectively increase colour saturation in the face. And so on. That takes time, and it is exactly what Walmart et al do not do.

All this is what I teach in my live or online workshops: contact me to learn more, or see http://learning.photography .

And take some fall pictures, or have me do it!


Today’s pics

I was hired to take some fall pictures of a woman and her dog today.

Like these:

20161110-1dx_1771-1024

20161110-1dx_1783-1024

20161110-1dx_1758-1024

20161110-mw5d1613-1024

In pictures like this one challenge is that the dog is the same colours as the background. That’s where (off-camera) flash comes to the rescue. That allows me to make the subjects brighter, and the background dark. And the sun is the hair-light. (all that is what I teach in my courses and books).

Lenses: 85mm f/1.2 and 70-200 f/2.8. Camera Settings: 100 ISO, f/3.2, and 1/250 to 1/400 sec.

1/400 sec? Impossible. That’s beyond the camera’s “sync speed”. But actually: very possible; you just don’t get the entire picture being lit. Which is sometimes fine.

And finally: a no flash/flash comparison:

screen-shot-2016-11-10-at-15-23-44

Remember Willems’s Dictum: Bright Pixels are Sharp Pixels.


Photographer, or…?

…or illustrator?

I am a big fan of being a photographer–meaning you do the work in the camera. But sometimes even I do some post-production work. Like here in this edited flash picture:

20140420-mvwx1740-1024

That makes an OK picture a good picture, mainly because it dramatically simplifies it. See an earlier post for the “recipe” for this Andy Warhol-like effect – but I suggest you make your own. Much more fun. Simple (I used Lightroom) and quick.


Intermezzo, and, join me Sunday?

A bit slow this week as I have been in bed with flu-like symptoms. Meanwhile, here’s some depth – remember, to make your images “real looking”, use a close by subject against a farther background (“close-far”):

20161029-mw5d1523-1024-2

Now – flash. A long workshop, all hands-on, this Sunday. The last two sold out. But PLENTY of space for this one. Think about it: you’d find this VERY useful. Hands on, so you do your own pictures, build the sets, connect the Pocketwizards, etc – and it’s a LONG one.

Another view of Toronto

As seen from the Don Valley Parkway on Saturday around noon:

20161022-mw5d1466-1200

Made at 1/500 sec, f/11, 400 ISO, with a 16mm lens.

Why and how those decisions?

  • 16mm to get it in and to make it easy for me in terms of shutter speed and depth of field.
  • 1/500 sec because I am doing this handheld in one hand.
  • f/11 to ensure focus and DOF: I am focusing without truly looking.
  • 400 ISO to enable the above.

…in a hurry! You may notice the similarity to the “sunny 16 rule”: my settings are just 2/3 stop lighter than sunny sixteen. When you are experienced in these things, settings become simple. Just try.