Shoots, and why you go back

After a shoot, wait. Go back to the shoot after a while, and you will see entirely new images.

Here’s a few images from two years ago, when I was in Las Vegas:

20140107-MVWX4407-1024

20140104-MVWX4098-1024

20140107-MVWX4390-1024

20140110-MVWX4560-1024

..and Death valley, California:

20140105-P1100926-1024

All these are images I did not use. Did not really consider, the first time I looked at this shoot. Every time I go back to a shoot after a few years, I see new things. Do the same: you will be surprised.


The light, the whole light, and nothing but the light.

Often, the key to creative photography is to add light where you want it. And nowhere else. And ma ny people forget that added qualifier.

Take this, student Alonzo lit with a single flash through an umbrella. And umbrella spreads light widely, which is in fact one of its benefits:

20160229-MW5D6826-1024

Now let’s use a single flash, unmodified, aimed at him from the right:

20160229-MW5D6822-1024

But now let’s put a grid on that flash:

20160229-MW5D6824-1024

It is the difference between the second and third photo in particular that I would like you to look at.

In the second photo, ambient light is still at zero (use the studio setting, see my books). But the flash itself creates light everywhere. In photo three, that is restricted: the flash only sends light where I want it to. Not everywhere else.

I use the Honl Photo modifiers. If you like them, follow this link and use code word “Willems” upon checkout to get an additional 10% off. I used a 1/4″ grid for that last photo. My favourite flash modifier, that grid!


Express.

Portraiture is one of the most rewarding types of photography, why? For a few reasons. One, people mean more to us than things. Two, its ability for a picture to tell a thousand words, to be subtle, to infer. It does that more, in my opinion, than macro, landscapes, or most other types of photography. Stones and trees are stones and trees. Nothing against them. But people are more expressive. The human face has more muscles, more ways of expression mood, than anything else in the known universe. That’s why.

Like here:

20160213-MW5D6506-1024

Or like this:

20160213-MW5D6599-1024

Or this:

20160213-MW5D6614-1024

Or these:

20160214-MW5D6692-1024

20160214-MW5D6694-1024

20160214-MW5D6693-1024

Can you name all the moods in those pictures?

And in a technical sense, can you see how I used monochrome to reduce the images to the essence? And how, in the last three, I use selective depth of field to emphasize my subject? Those were all made at around f/1.4 using an 85mm prime lens. If you want to be a portrait photographer, I recommend you get a fast (low f-number) prime (fixed) lens. Nothing like it!

  • Shoot: Feb 13/14, 2016
  • Model: Kim Gorenko
  • Make-Up: Janice West
  • Photo: Michael Willems

Portrait of the artist as a… ehm… a young man.

That’s me, by a Sheridan College student last week. Standard four lights: key, fill, hair/edge, and background. All using speedlights with modifiers, namely umbrellas, snoot (for the hair light) and a grid (for the background light). Easy to set up, and easy to shoot.

Tomorrow, I will shoot a self portrait, and I recommend that you do, too, Self portraits are very good practice. They need you to have technical skills, as well as a feeling for personality and composition. Go wild!


Just a moment.

When I shoot events, of course I do many “smile at the camera” photos. People like those, and with good reason. They show you were there, having a good time. Photos like these:

It is easy to do them: use the right lens, make the background bright enough, use a high enough ISO, bounce the flash upward behind you, and ensure that both people are the same distance away from you. (move yourself, or move them, to achieve that). Most of my images that evening were made at 6400 or 3200 ISO, 1/30 sec, f/2, using a 35mm f/1.4 lens.

But I also like to shoot moments. People doing things. As my fellow photographer Story Wilkins put it to me a few years ago: “if it smiles, shoot it”.

Here are a few examples from my recent Halloween shoot:

Those give you a good idea of the event, n’est-ce-pas?

If you like those, try to do the same, next time you shoot a family get-together—or a commercial event.Reflect the fun. And have some fun yourself, too. Best way to get the mood down in photos.


Smile?

Ever wonder why models never smile in advertising photography? Why they always look so serious… aggressive even, sometimes?

Because they want to look perfect, that’s why.

Smiles create smile lines… but unlike you and I, photo editors, Cosmo readers, and models who want perfection call these lines “wrinkles”. And they dislike them, and the shadows they create. Like so:

The aforementioned (and, truth be told, most women) usually prefer this, a very “no-shadow” neutral look where skin is perfect:

If you are shooting traditional model shots, like for a portfolio, that’s what you do.

  1. Puff out some air, like when you voice the letter “P”.
  2. Let face come to a rest; this takes 1-2 seconds.
  3. Leave mouth ever so slightly open.
  4. Ensure that all facial muscles are 100% relaxed.

Result: skin is flawless. No shadows, no unevenness, no wrinkles. No personality is shown. Just beauty.

But wait. The look you want depends on what you are shooting. When you want to depict personality, you can have a person looking angry, surprised, sad… even happy. Like this:

So relax and shoot what you want. Do not shout “smile!” for every shot; but do not avoid all smiles either. If only because your model will feel better. But also because you may indeed want to show different sides of a person’s personality.


A difficult shoot

A shoot Saturday. A club, with no good ceiling or wall to bounce from. And no light to focus. And an audience that did not stand still for a moment, meaning focus was even more difficult. Those were the three main problems.

And yet:

Wow, eh. 325 photos like that.

So what’s the secret?

Boiled down to a few bullets, it is:

  • Expose for a “–2 stops” background, as you know from my Flash courses.
  • Feel free to use high, or very high, ISO values. Use noise reduction in post-processing (e.g. in Lightroom).
  • Use prime lenses, or at least have them available.
  • Shoot a lot: as much as twice as much as you need.
  • Be within about two stops of perfect, and shoot RAW.
  • Take any portraits at least twice, in case focus is off, etc.
  • Look for “moments“, not just steady “grip and grin” images.
  • (Hence): do not be afraid to throw out half your pictures.
  • Be willing to do post work on many pictures.

In Saturday’s shoot I had over 700 pictures, and that boiled down to about 600 usable ones, of which I used 325 (Why? Well, if you have five pictures of a specific moment, you may want to use just one).

I shot the majority of my images at 6400 ISO, 1/25 sec, f/2, using a 35mm f/1,4 lens). And even then I had to push many of the images. 

But with a modern camera, it is doable, and even an impossible venue like Saturday’s can lead to a great shoot.


Pose.

I never say “posing”—instead, I say “positioning”. Instead of :”I am going to pose you differently”, it’s “I am going to position you differently”.

But we do pose. Models pose for a living, and they are good at it. My main model manages to position herself differently for every shot, even after we have done eight years of shooting together, and made tens of thousands of images.

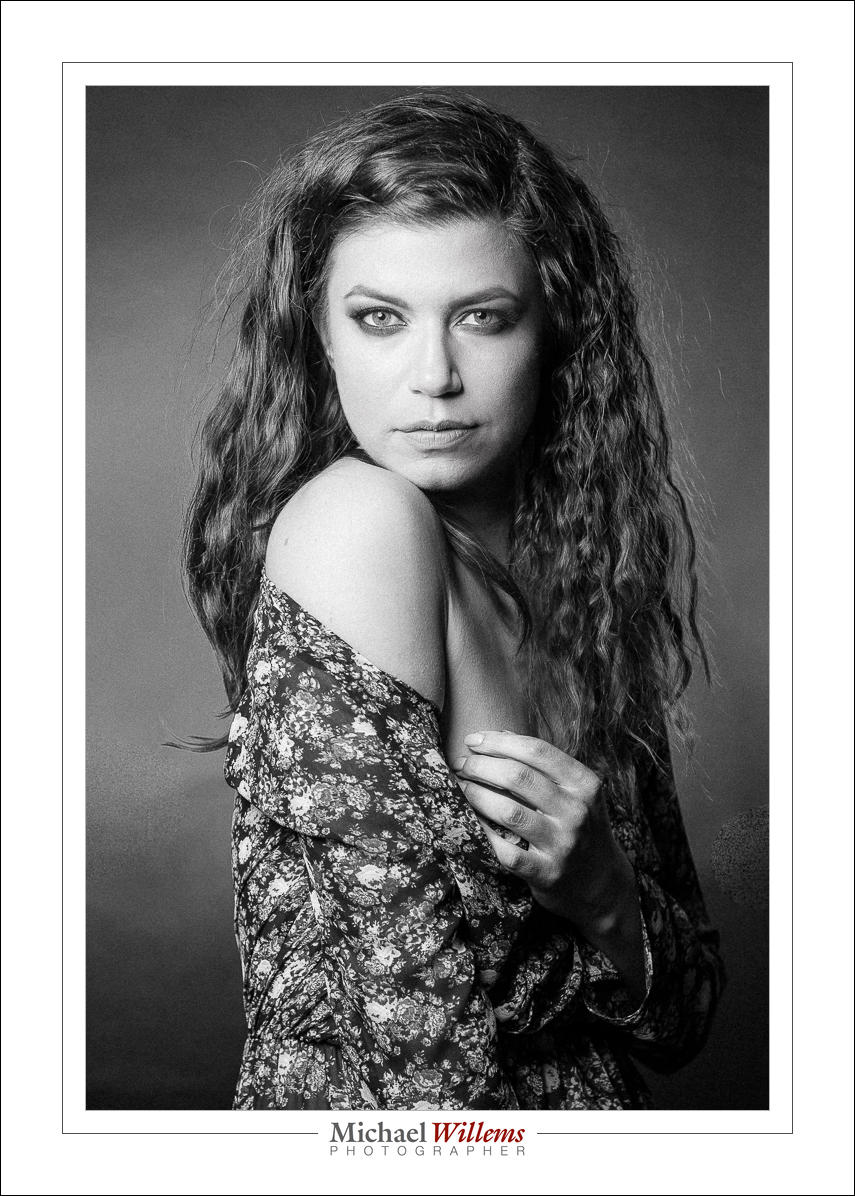
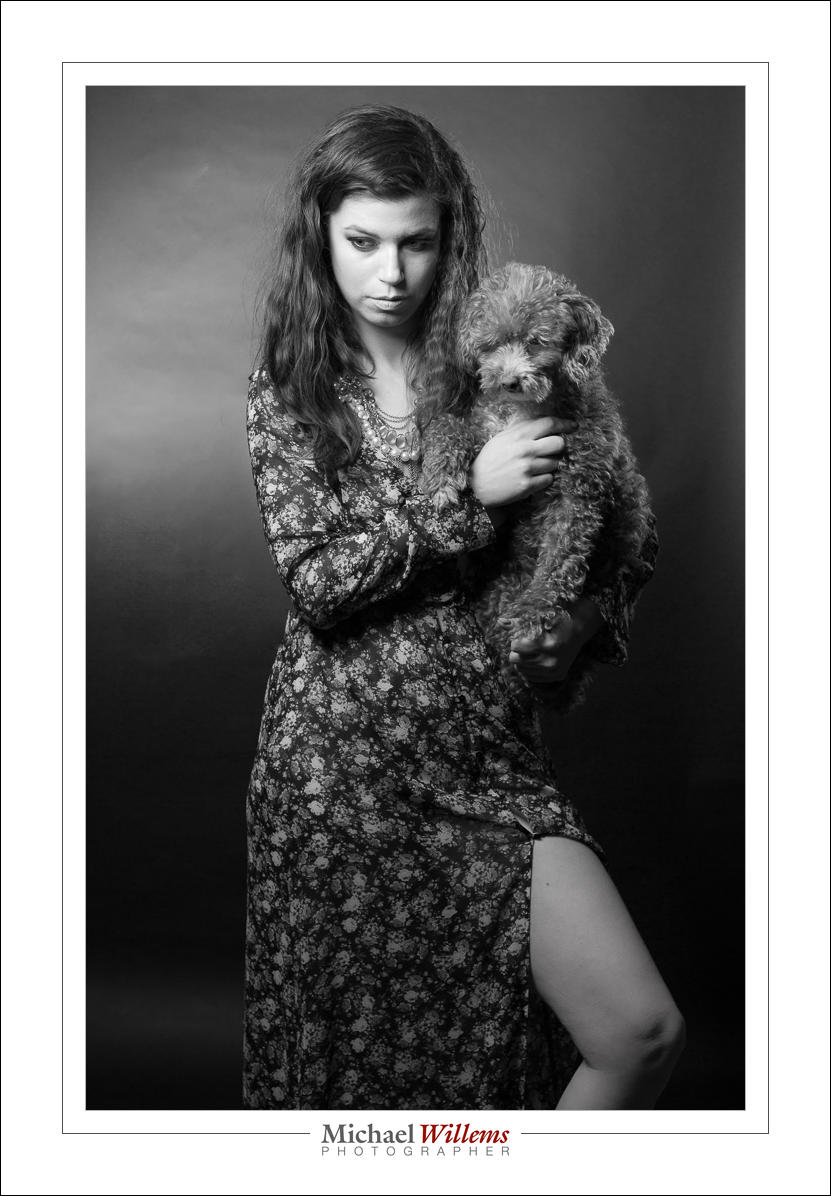
Images like this, yesterday in an abandoned parking lot in Brantford:

(125 ISO, 1/250 sec, f/5.6; 24-70 lens; full-frame Canon 1Dx)

A good model turns toward the light (unless otherwise instructed by the photographer), and changes pose after every click. He or she seldom smiles (smiling causes laugh lines, a.k.a. “wrinkles”.

See the Rembrandt Lighting in the image above? One off-camera umbrella on our right, 45 degrees to the side of her face and 45 degrees up from her face.

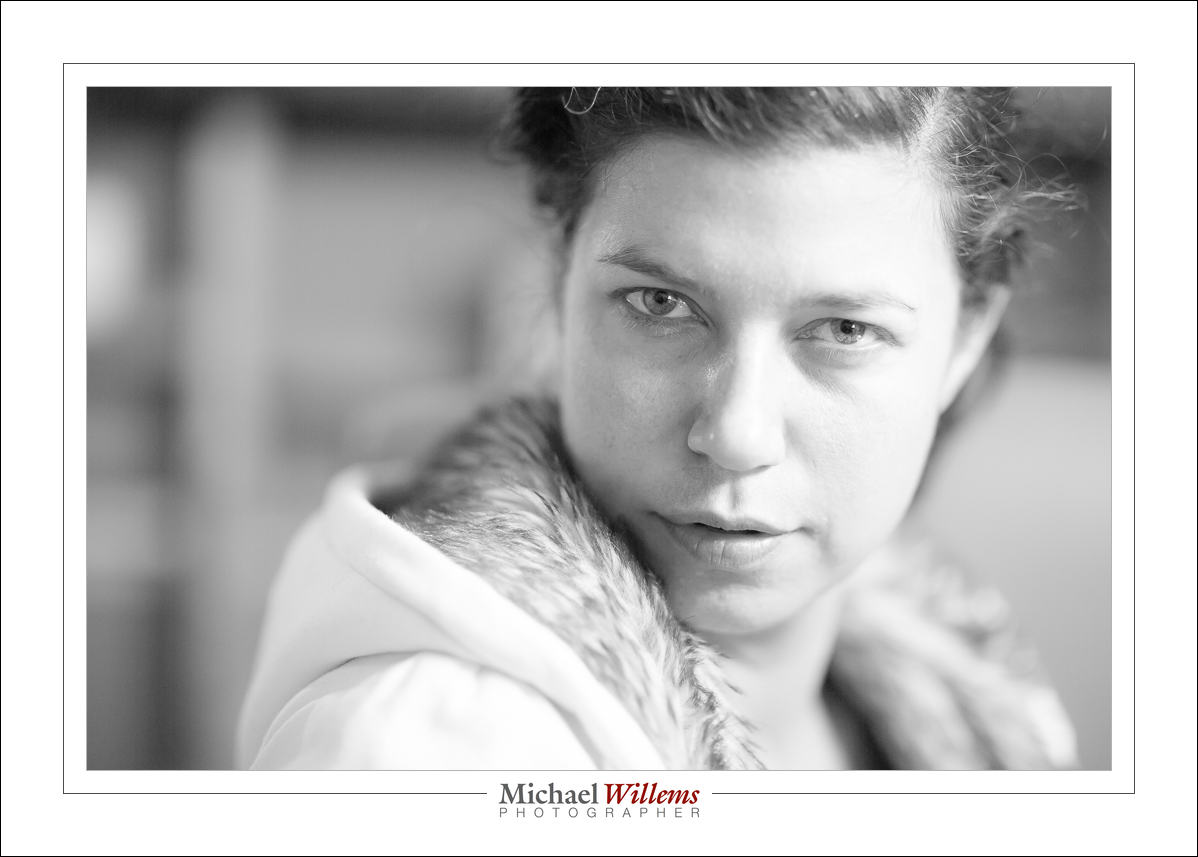
Another note: as you see I am using deliberate flare in the image above. By shooting into the sun, basically. When you do this, you should probably remove any filters that you have on your lenses. If you can use a small aperture (e.g. f/16) you will get a starburst effect.

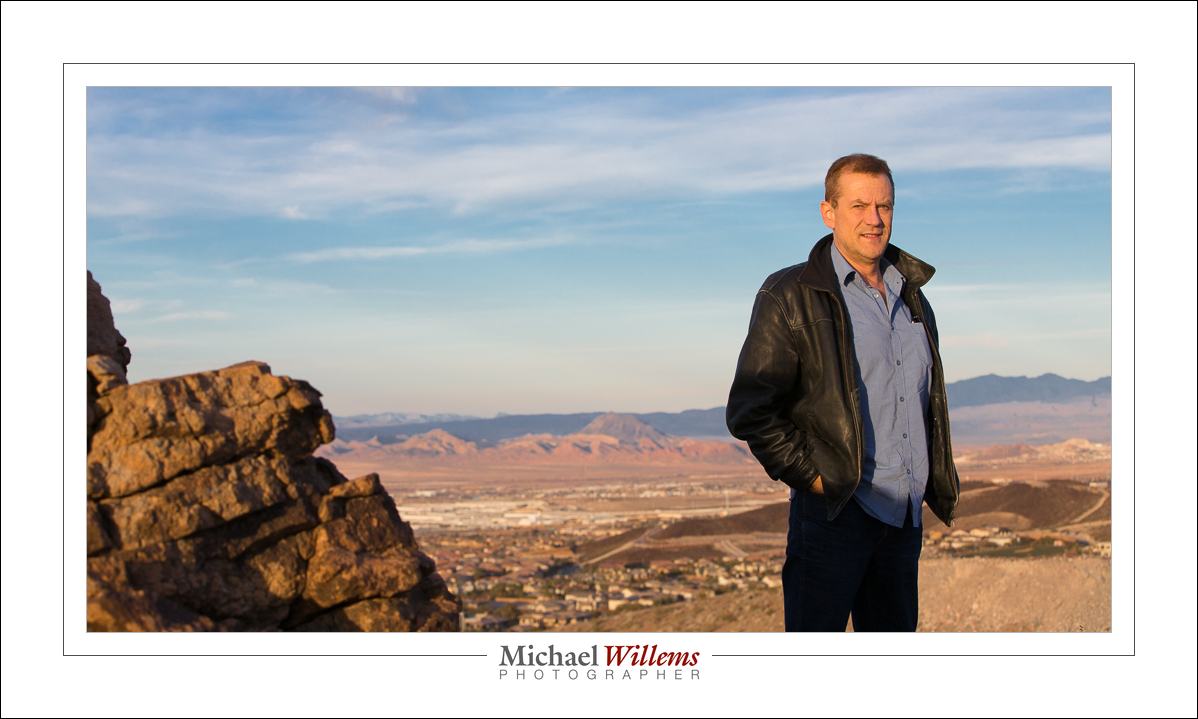
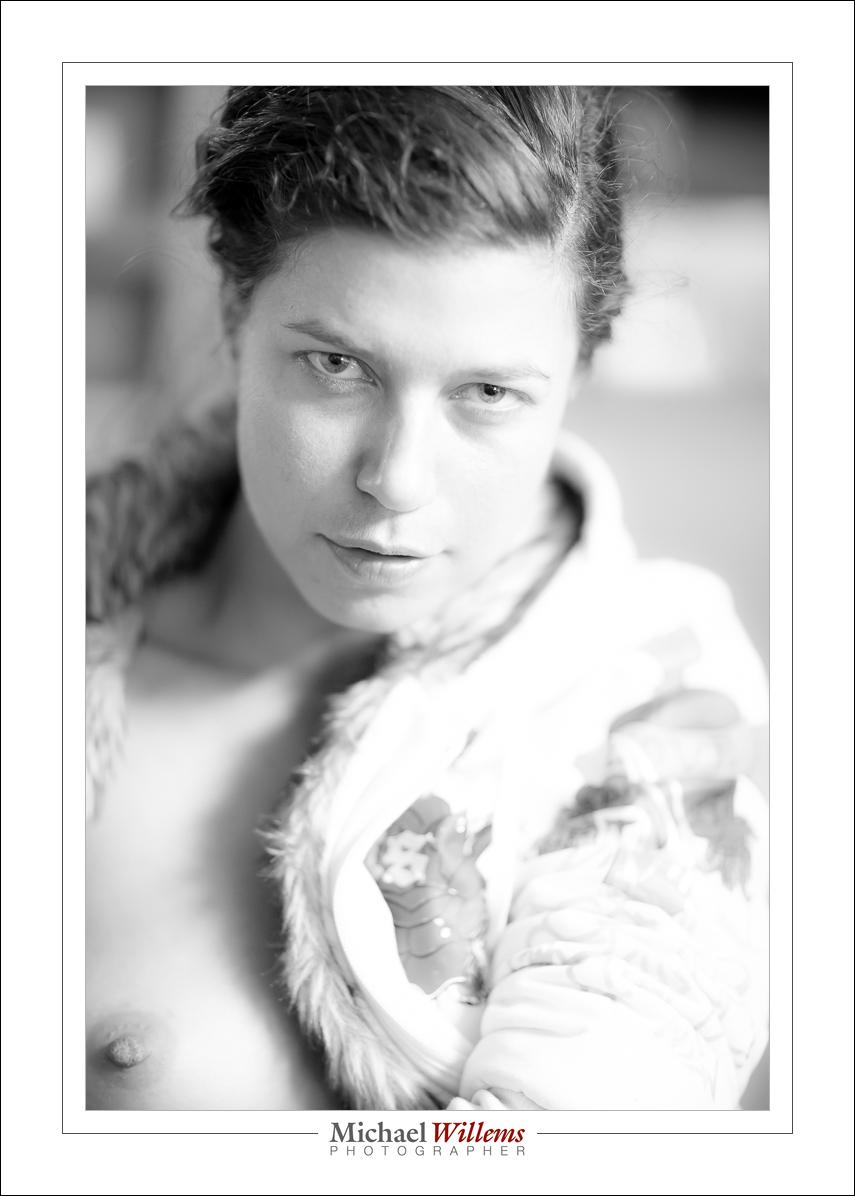
One of my favourites:

That soft shadow: beautiful. And the dark exposure beautifully shows the blue sky. And all I used is:

  • Camera,
  • A 24-70 f/2.8 lens,
  • Two Pocketwizard radio triggers,
  • A light stand,
  • A bracket on the light stand for the umbrella,
  • An umbrella,
  • A cable “from Pocketwizard to hotshoe”.

Easy to handhold and walk miles with. But I drove (remember: car parking lot?).

Flash outdoors rock, in case you have not picked that up yet from my writings.


The studio

A studio is all about convenience, I find. I can work without one, but in a studio I have everything set up and ready to go. This is my Brantford studio a day ago, before I had finished tidying:

Notice that a studio need not be tidy. It needs to be well organized, large, and it needs all the equipment ready to use. All the equipment being

  • Cameras and lenses
  • Backdrops,
  • Many small flashes, many strobes
  • One or two hotlights (for video)
  • A host of modifiers
  • Light stands
  • Reflectors
  • Gadgets, like brackets
  • …and so on.

In my studio, I have two stations set up permanently. One for traditional portraits like this:

(Standard Studio Setting: 100 ISO, 1/125 sec, f/8)

And one for edgy portraits like this, of my friend Adam pretending to be a pregnant woman:

(Standard Studio Setting: 100 ISO, 1/125 sec, f/8)

So do you need a permanent studio? Of course not. But it sure makes life easier and shoots faster to carry out. And it takes the guesswork out of photography.

My Brantford studio is now open for individual and class training, and portraiture. Just 20 minutes west of Hamilton, Brantford is centrally located, between the GTA, London, and Kitchener/Waterloo/Cambridge/Guelph. Come see me if you need a portrait for LinkedIn, a family portrait, or any form of photography training.


Photosensitive

Tonight, I attended the 25th anniversary of Photosensitive, a collective of Canadian photojournalists.

I am honoured to be a member of Photosensitive, and I have contributed to the last two Photosensitive projects, “Picture Change” and “Aging”.

A few pics from tonight:

One lesson: don’t be dogmatic. No flash here; I merely used 1600 ISO, f/2.8 at 1/100 sec. When you work it out (which I will leave to you), that’s basically two stops brighter than 400-40-4, which makes sense, Normally, if I used a flash ambient would be –2 stops; this time, ambient has to carry the photo, so it’s two stops brighter.

Photosensitive does everything in black and white.

I used only available light and my 24-70 f/2.8 lens. Why? To shake it all up a little, that’s why!

Me in the mirror…:

Black and white rocks for this sort of work. Look at the photos at full size.